Last Updated on May 15, 2024 by teamobn
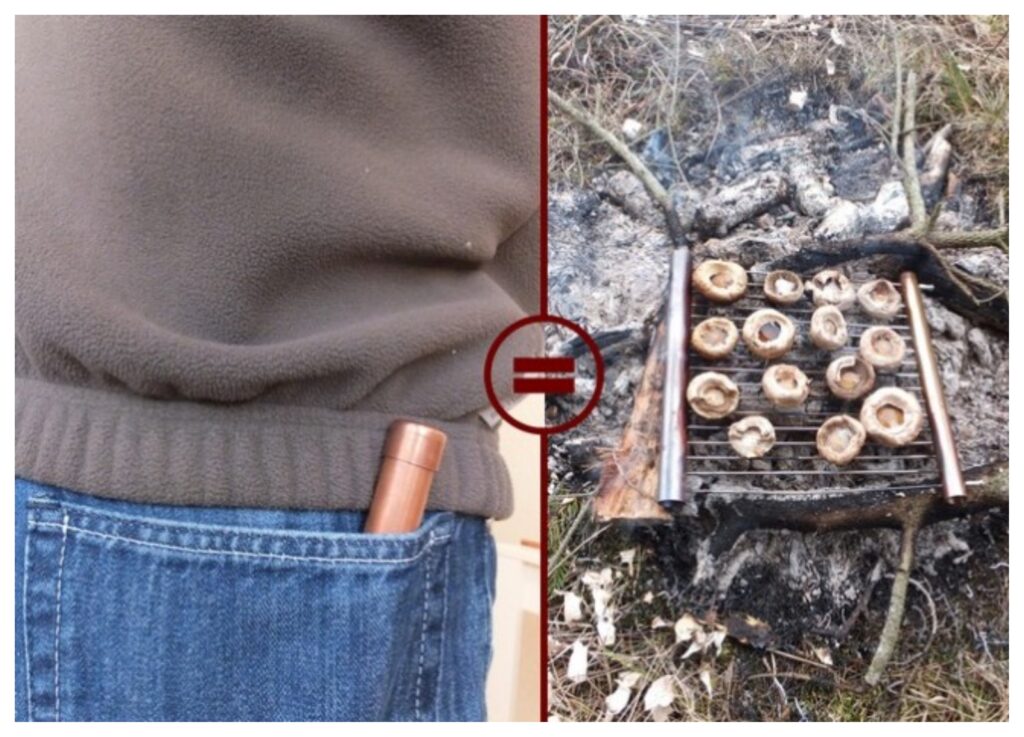
A Pocket Grill? Well, nothing beats cooking over an open flame. The intense heat sears in the natural flavors of the food, while the smoky aroma tantalizes the senses. Whether it’s for the salty sweetness on that lightly charred, freshly grilled corn or the rich, succulent tenderness of smoked meat, the outdoors begs us into the fresh open air to light a fire and start cooking.
Over an open flame, foods take on a whole new flavor. The high heat of the fire caramelizes the natural sugars in fruits and vegetables, giving them a deep, rich flavor. meats become tender and juicy, with a smoky flavor that is simply irresistible.
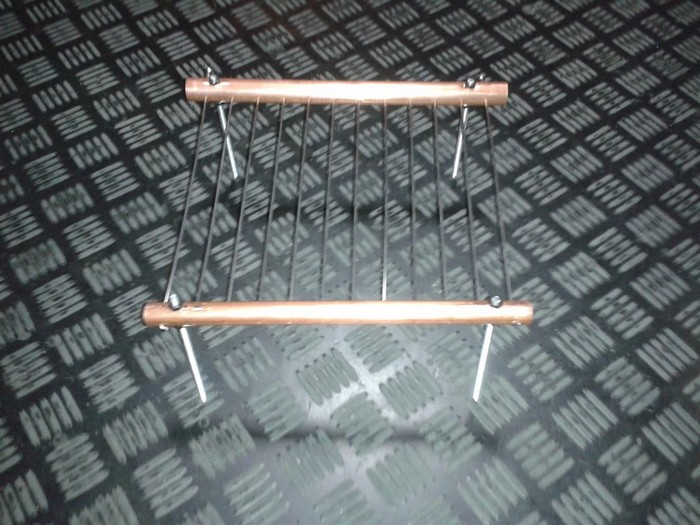
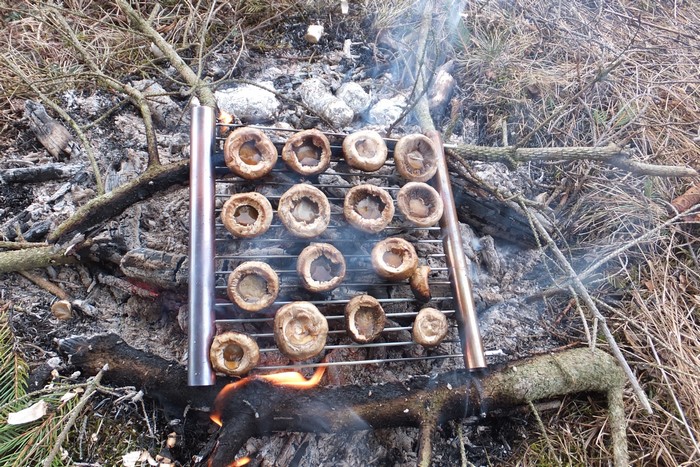
There are lots of portable grills out there for camping and other outdoor adventures, but we’ve discovered that ‘portable’ usually means ‘luggable’. But wait ‘coz the one featured here is pocket size and yes… this pocket grill is an easy DIY project.
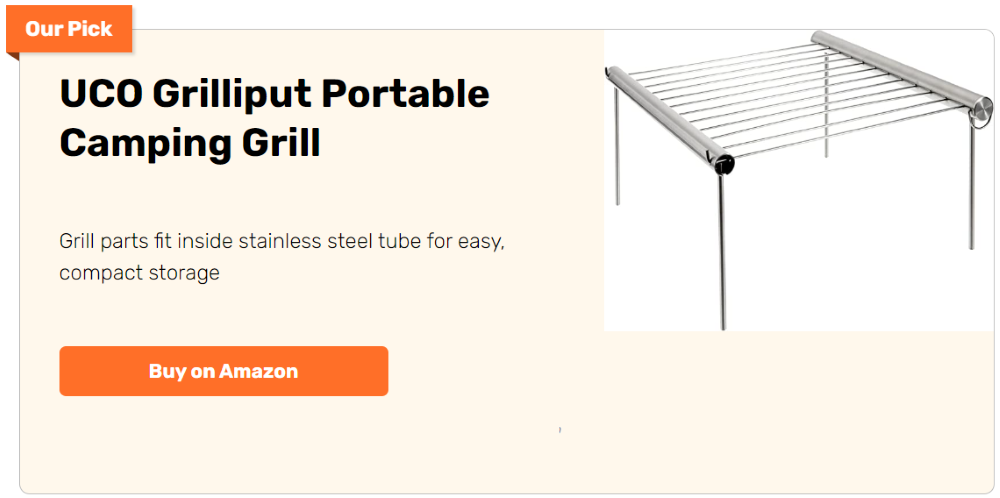
And what makes the pocket grill really perfect for outdoor activities is that the pocket grill is easier to clean compared to regular portable grills. Just disassemble it (which only takes about ten seconds) and clean the parts with ease!
Worried about the materials used in making this pocket grill? Aside from aircon tubes and gas lines copper is also used to make pots and other cookware, with many people regularly using them to make jams and other delicacies. The ‘grill grate’ on the other hand is made with stainless steel rods… So this pocket grill is totally safe for cooking. 
Want to know how to make a pocket grill? Keep reading for the full tutorial! Be sure to pay attention to the tips and notes to remember. 
Contents [show]
Making a Pocket Grill
Click on any image to start the lightbox display. Use your Esc key to close the lightbox.![]()
Materials
- 3/4″ diameter Copper Tube
- 5/8″ diameter Copper Tube
- 2 Copper Tube Caps (size that will fit the larger diameter pipe)
- 1/16″ diameter Stainless Steel Bicycle Spokes
Tools
- Hacksaw
- Cutting Pliers
- Drill
- Utility Knife
- File (or Sandpaper)
- Ruler
Instructions
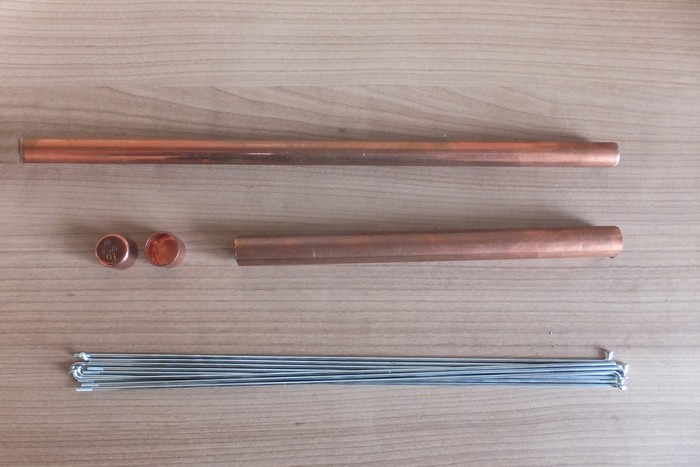
The materials: Of course, these are not mandatory, you are welcome to improvise, but please wear safety gear and respect work security guidelines (or suffer the consequences of your foolish actions).
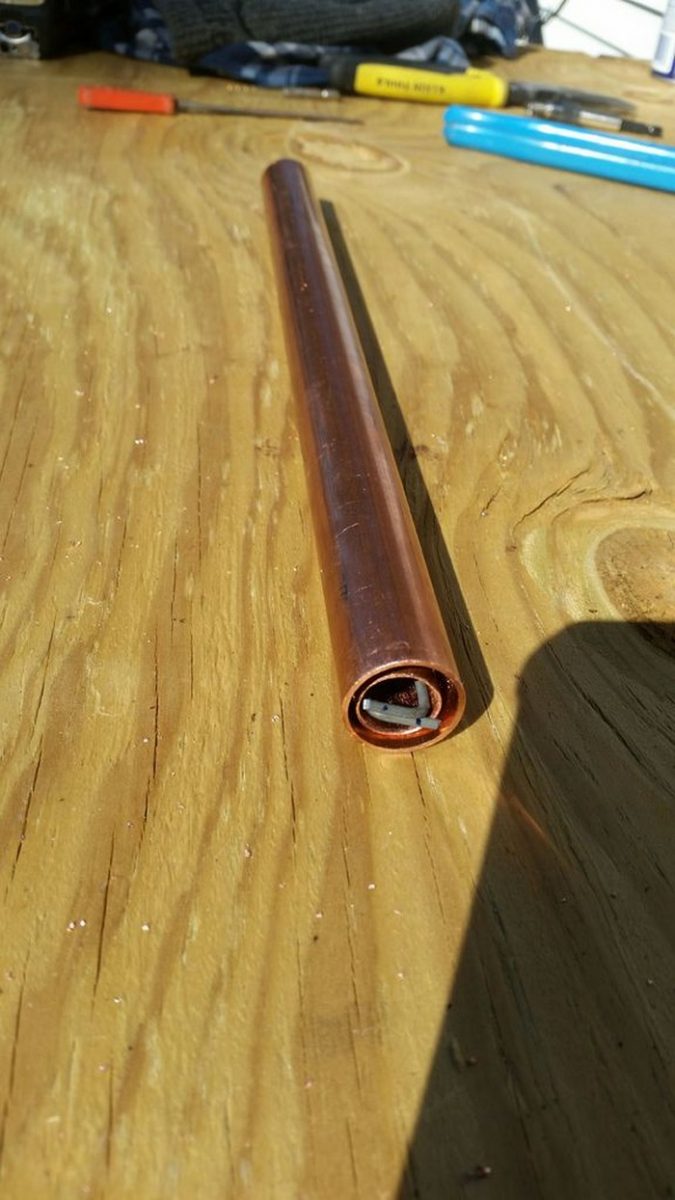
Basically, you need two pieces of pipe, one must fit in the other, I used 18mm (3/4 inch) and 15mm (5/8 inch) copper tube; any metal should do, but I used copper because it is relatively lightweight, doesn’t bend much when exposed to fire, it has thin walls and most importantly I had them lying around the house (leftovers from the heating system) so they were free.
Two copper tube caps that fit the larger diameter pipe (also lying around and also free).
A handful of approx. 2mm diameter bicycle spokes (1/16 inch). I can’t give you an exact number, you’ll see why in a bit. Make sure that you use stainless steel spokes, you’re going to eat off of them.
Pro Tip: If you have a bicycle repair shop nearby, you should ask them for broken spokes, you may get them for free (I hacked my old bike tire to death for this).
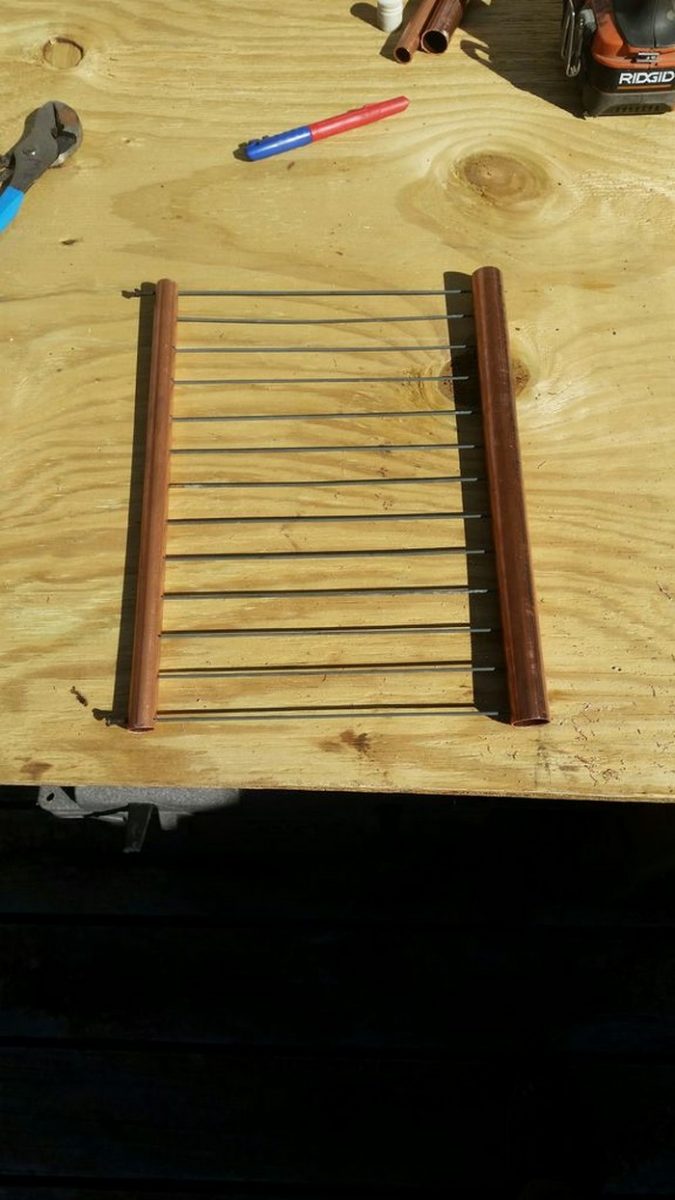
The measurements are pretty simple since you’ll need to cut everything to the same size (you will get a rectangular grill).
Pro Tip: The bigger you make your grill the more spokes you’ll need, make sure that the number of spokes you intend to use all fit inside the smaller diameter tube.
I made mine 20 cm wide (7.87401575 inches, just make it 8) since I found that about 25 2.2mm spokes fit inside the 15mm diameter tube.

Cut tubes to length: Cut the two tubes to equal length and file the rough edges, as I previously mentioned I made them 20cm (approx. 8 inches).
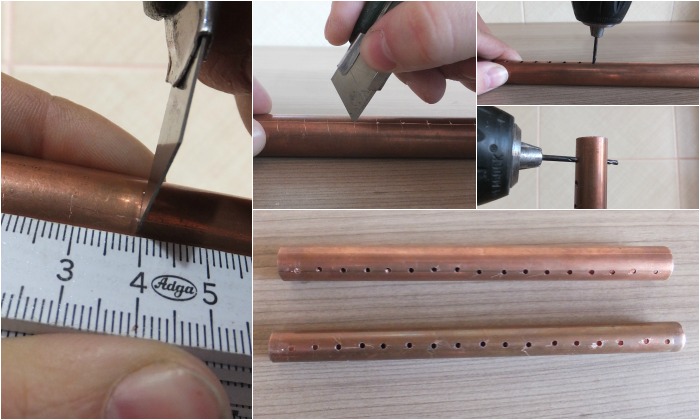
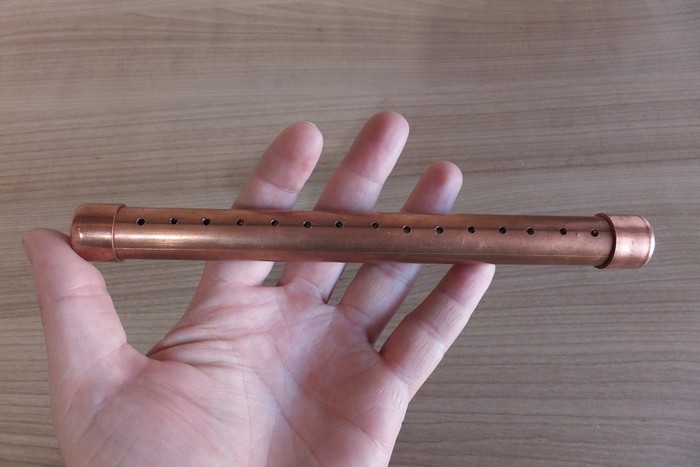
Measure, mark, and drill holes: Now that you’ve got your tubes cut to length, you need to mark and drill the holes for the spokes. (The only holes drilled through both sides of the tube are the ones where the nipples attach.)
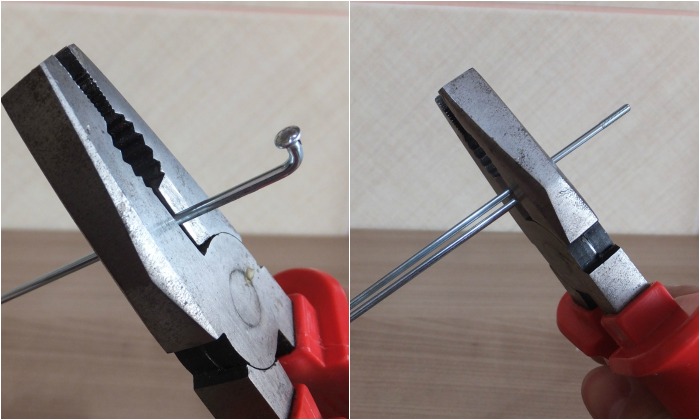
Cut spokes to a length: By now you have the exact number of spokes you’ll need, just count the holes. The spokes need to be the same length (or smaller) as the tubes since they need to fit inside.

Pro Tip: You will need 2 spokes with intact threads on one end and a 90° bend on the other so cut them about 5 – 10mm (1/16 – 3/8 inch) longer than the rest, please keep this in mind.


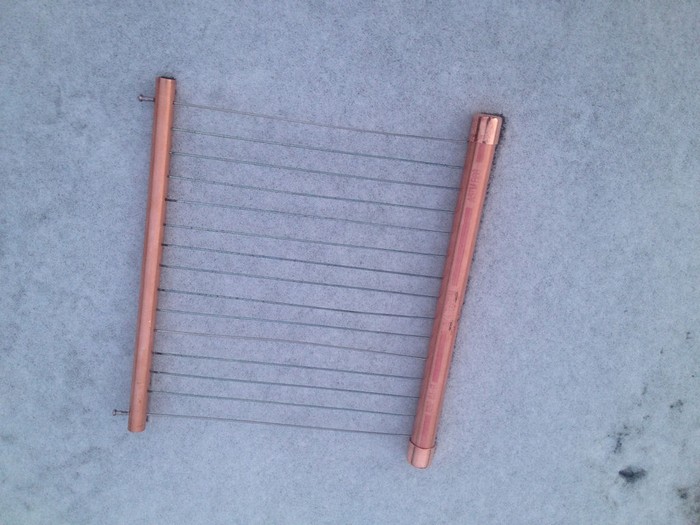
Assemble the grill: I’m not going to lie to you, this is painstaking to do until you do it a few times and get used to it.

Disassemble and pack the grill: This is a “piece of cake”. Just unscrew the nipples and this pocket grill falls apart. Packing it up is also pretty easy.

Final Thoughts: Some of you expressed concern that copper emits harmful gasses when heated, I can’t scientifically refute this, but I couldn’t find any source on the internet proving it…
The “Centers for Disease Control and Prevention” website, in the NIOSH Pocket Guide to Chemical Hazards section, states about copper fumes: “Exposure may occur in copper & brass plants and during the welding of copper alloys.” Meaning that you’d have to melt copper or copper alloys to release the toxic fumes, we won’t be doing that over the campfire, not even close.
Thanks to stvnishere for this great project!
Here’s a quick video…
Portable Grilling Recipes for Your Pocket Grill
A pocket grill can take ordinary outdoor dinners to exceptional when adventure calls. A pocket grill provides a novel approach to savor freshly prepared meals and is portable, simple to put up, and ideal for outdoor enthusiasts. These recipes are made to maximize your pocket grill for hiking, camping, or just spending a day at the park, guaranteeing wonderful results every time.
Grilled Vegetable Medley
What You Need
- Slicing of one zucchini
- One bell pepper, sliced
- one quartered little red onion
- Two tbsp olive oil
- Taste-test salt and pepper.
How to Cook
- Turn your pocket grill up to medium heat.
- Toss all vegetables with pepper, salt, and olive oil
- Place vegetables directly on the grill grate or use a grilling basket.
- Grill for 4-6 minutes on each side or until tender and charred.
- Serve hot as a side dish or over rice for a light meal.
Smoky BBQ Chicken Skewers
What You Need
- Cubed two big chicken breasts
- 2 tbsp BBQ sauce
- tsp honey
- 1 tsp paprika, smoked
- Taste-test salt and pepper
- Skewers, either metal or wood
How to Cook
- Preheat your pocket grill.
- Whisk together the honey, smoked paprika, salt, and pepper in a bowl.
- Thread the chicken cubes onto skewers.
- Brush the BBQ mixture over the chicken skewers.
- For ten to fifteen minutes, on the pocket grill, cook the chicken through, flipping now and again.Enjoy a delicious, smoky treat right from your pocket grill.
Sweet Grilled Pineapple
What You Need
- 1 pineapple, peeled, cored, and cut into rings
- 1 tablespoon cinnamon sugar
How to Cook
- Preheat your pocket grill to medium-high heat.
- Sprinkle cinnamon sugar over both sides of the pineapple rings.
- Place the pineapple rings directly on the grill.
- Grill for 2-3 minutes per side or until grill marks appear and the pineapple is heated through.
- Serve as a sweet dessert or a tangy side dish.
These recipes are just a start to the wide range of dishes you can prepare with a pocket grill. They’re not only quick and easy but also bring a touch of gourmet to your outdoor dining experiences. Enjoy the convenience and flavor that only a pocket grill can provide, and make your next outdoor adventure deliciously memorable.
Advanced DIY Modifications for Your Pocket Grill
Adjustable Grill Height Enhancing your pocket grill with adjustable height features allows you to control cooking temperatures more effectively, which is ideal for different types of food that require varying heat levels. This modification involves replacing the standard legs with threaded rods. By adding nuts and washers, you can easily adjust the height of the grill above the flame, giving you more precision and flexibility during cooking.
Adding a Grill Cover Incorporating a cover for your pocket grill not only allows for smoking capabilities but also provides protection against unpredictable weather. A simple aluminum sheet can be shaped and fitted with hinges to serve as a lid. This cover transforms the grill into a smoker and shields your cooking area, making your grilling experience more versatile and enjoyable, regardless of the elements.
Double-Layer Grill For those who need more cooking space, adding a second layer to your pocket grill can double the surface area without compromising portability. This involves constructing an additional grate with copper tubes and stainless steel spokes, similar to the original design. The second grate can be mounted above the first, using clips or a slot mechanism for easy assembly and disassembly.
Portable Wind Guard A portable wind guard can be a game-changer for outdoor grilling, especially in windy conditions. Using lightweight metal sheets or even heavy-duty aluminum foil, you can create foldable panels that attach to the sides of the grill. These panels help maintain a steady temperature by protecting the flames from the wind, ensuring that your food cooks evenly and predictably.
By implementing these advanced modifications, your pocket grill becomes more adaptable and efficient, enhancing your outdoor culinary adventures. Each modification is designed to add functionality and convenience, making your DIY pocket grill a truly indispensable tool for any outdoor enthusiast.
Conclusion
Building your own pocket grill is a rewarding DIY project that enhances your outdoor cooking experiences. With simple materials and a bit of creativity, you can assemble a portable, efficient grill perfect for any adventure. Once complete, your pocket grill will be ready to deliver delicious, smoky flavors wherever you go.
We have more interesting grill projects. Check out our rocket grill guide!

