Last Updated on May 22, 2024 by teamobn
Step 19: Framing

The frame goes up:
I actually ended up running out of 4-foot pallet 2×4’s and purchased approx. (20) bargain 2×4’s for a dollar each. They weren’t exactly straight, but for $20, it wasn’t bad. Notice the 2×6 and 2×8 headers. This was more free wood I got off of Craigslist.
There are two doors, one in the front and one in the back. In this photo, you can see the rough opening of the diamond-shaped window and the front door. The 2×4 at the bottom of the doorway was cut out later.
The 2×4’s, spliced together and ugly, are 15″ inches apart. This is because the siding will be 30″ pieces of 1×4, with a staggering vertical seam. If you need some help with basic framing, check out google– there are some great sites out there. Basically, though, you should worry about optimizing the material you have without sacrificing safety. The tarp was to keep everything dry until the roof went up.
Step 20: Framing, continued
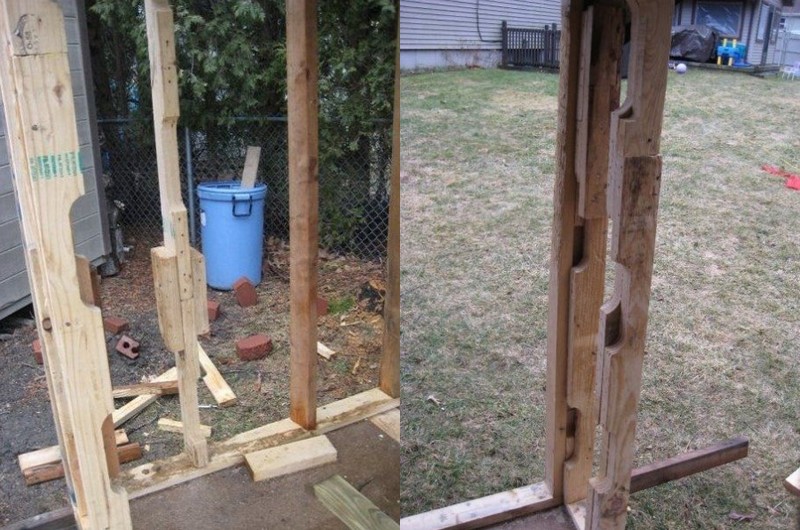
I never imagined just what a pain in the butt it would be to splice (scab) the 4-foot 2×4’s together. The wood was really hard and overall it just was not fun. I gave up on anything being square almost immediately. Because I planned on siding the pallet playhouse with the 30″ pallet 1×4’s and 1×6’s, each stud was placed 15″ in the centre, rather than 16″. This allowed me to stagger the vertical joints.
Step 21: Ice cream window framing

This header is most likely overkill, but I wanted a very large opening. Some day, when the kids outgrow this, it’ll be converted into a garage for a riding mower. This will give me a very large door! It is dimensional lumber (ie, it really is 2″ thick and 6″ wide, not 1.5″ and 5.5″). There are two pieces sandwiched together.
Step 22: The roof of the pallet playhouse

I built this little stand to hold the ridge beam. In most houses, the ridge board is just a place to nail the rafters to. They don’t hold weight. This was set up as a true beam to help bear some of the roof’s weight. I got the beam from a guy on – wait for it – Craigslist. He gave me a bunch of old dimensional boards he tore out of his attic.
Step 23: The Roof of the pallet playhouse


There are a number of websites with rafter calculators out there, so I won’t go into measurements. I spaced the rafters evenly, at 16″, because I planned on using regular old OSB plywood. You’ll notice that there is a two-foot overhang attached to the main roof. I also put joists in the deck. The fascia is a ten-foot board that helps to hold the overhang. As you can see, the windows are in. I made sure they were square.
Image Notes
1. 10-foot 2×4, set up as fascia.
2. two-foot overhang
3. deck joists– some of these are oak. Make sure you drill pilot holes for any nails when you use this stuff.
Continued Page 5…