Last Updated on May 22, 2024 by teamobn
Step 5: The pay-off

I got about (6) good 1×4’s and (3) good 1×6’s per pallet. I also got three 4′ lengths of 2×4. Notice the ends are ragged– I paid for that later when I made the siding. I had to re-square every board.
Step 6: Salvaging the 4′ 2×4’s

The 2×4’s were painful. I put each in a vise grip and beat it into submission. I smashed off the wood with the hammer, then yanked the nails. Every 2×4 had at least one nail with a stripped-off head. I cut them off with an old pair of linesman’s pliers.
People have suggested to me that using a Sawzall to simply cut the nails was a better way. I did try it, but I decided on this method as being the best. Your mileage may vary, depending on exactly what kind of pallets you want to use.
Step 7: The long winter
I spent most of a New England winter collecting and breaking down pallets. I also trucked around two states picking up lumber, doors, nails, heck anything people would give me for free. As I mentioned, I met a lot of nice people and saw a lot of towns I otherwise wouldn’t have ever known about.
I work pretty far from home, so I got to concentrate on two different areas as well as map out my “no-fly” zone based on my long commute. Most of the time, I stayed very close to my normal work/home route. This is important if, like me, you’re looking to build an environmentally friendly structure. Doesn’t make much sense to burn thousands of gallons of gas building a recycled playhouse!
Step 8: Making the windows of the pallet playhouse
Between collecting and breaking down pallets, I spent a lot of time building the double window and the diamond-shaped porthole for the pallet playhouse. I have a garage, but it’s not heated. Sometimes it got pretty cold!
A few words about tools:
At a minimum, you’ll need a circular saw, hammer, crowbar or catspaw, and heavy cutting pliers. A handsaw will come in handy, too. A sturdy ladder is a must. By far the most useful tool I had was my table saw. It’s not necessary for the pallet playhouse itself, but without it, I wouldn’t have been able to make the siding. It also helped a lot on the windows of the pallet playhouse and as an all-around tool.
But….you could get away with the circular saw, mitre box, and a handsaw. Or replace the methods I used with ideas of your own.
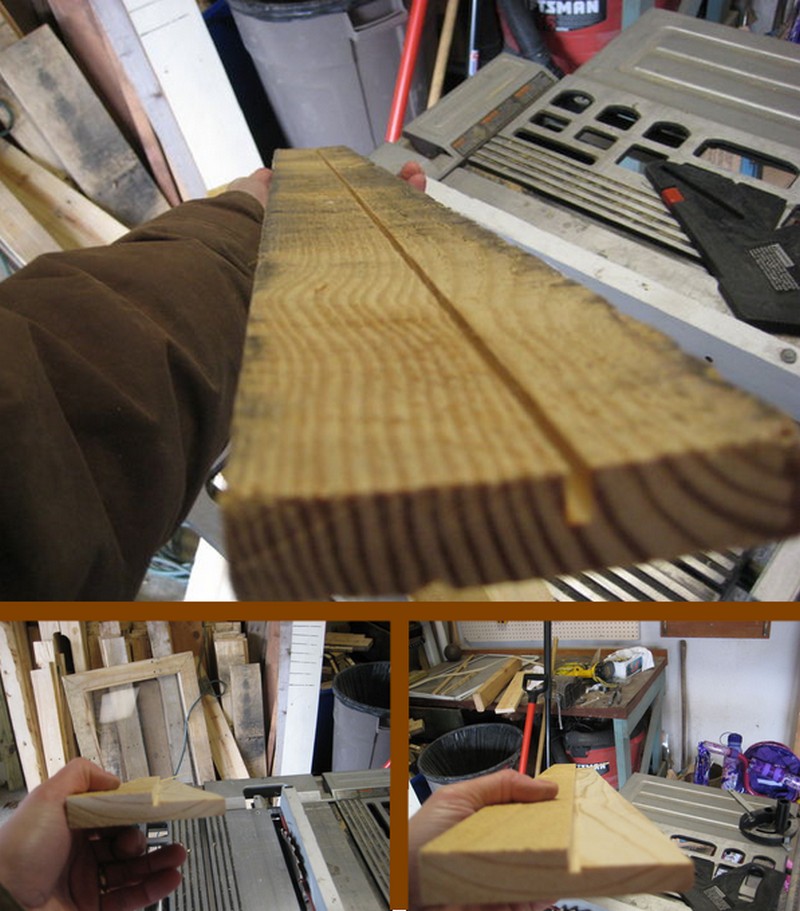
The first step for the windows of the pallet playhouse (two for the “ice cream window” and one for the porthole) was the basic frame. My idea was to take some old storm windows I had from my house and frame them in 1×4 pallet wood.
You could use plexiglass or old glass from sashes, or even simple screening material. I started with a long rabbet on the side of a 1×4. It took two cuts on my table saw, one for the depth, and the rest for the horizontal area. If you have a dado or a router, you could dig the rabbet out with that.
Step 9: Making the windows of the pallet playhouse – Pt 2

I had these old storm windows left over from when we replaced some double-hung windows on the house.
Step 10: Making the frame for the windows of the pallet playhouse

After the sides were rabbeted, I cut 45-degree angles on each side, exactly like you would when building a picture frame. I made the mitre sled years ago. Makes it much easier, but you could use your circular saw, a mitre box or even the handsaw.
Step 11: Making the frame for the windows of the pallet playhouse- Pt 2

Ta-da. The basic building block for the windows of the pallet playhouse. I’d say you don’t want the rabbeted-out groove to be too tight– I get a feeling that the wood expanding and contracting would crack the pane pretty easily.
Step 12: Making the frame for the windows of the pallet playhouse- Pt 3
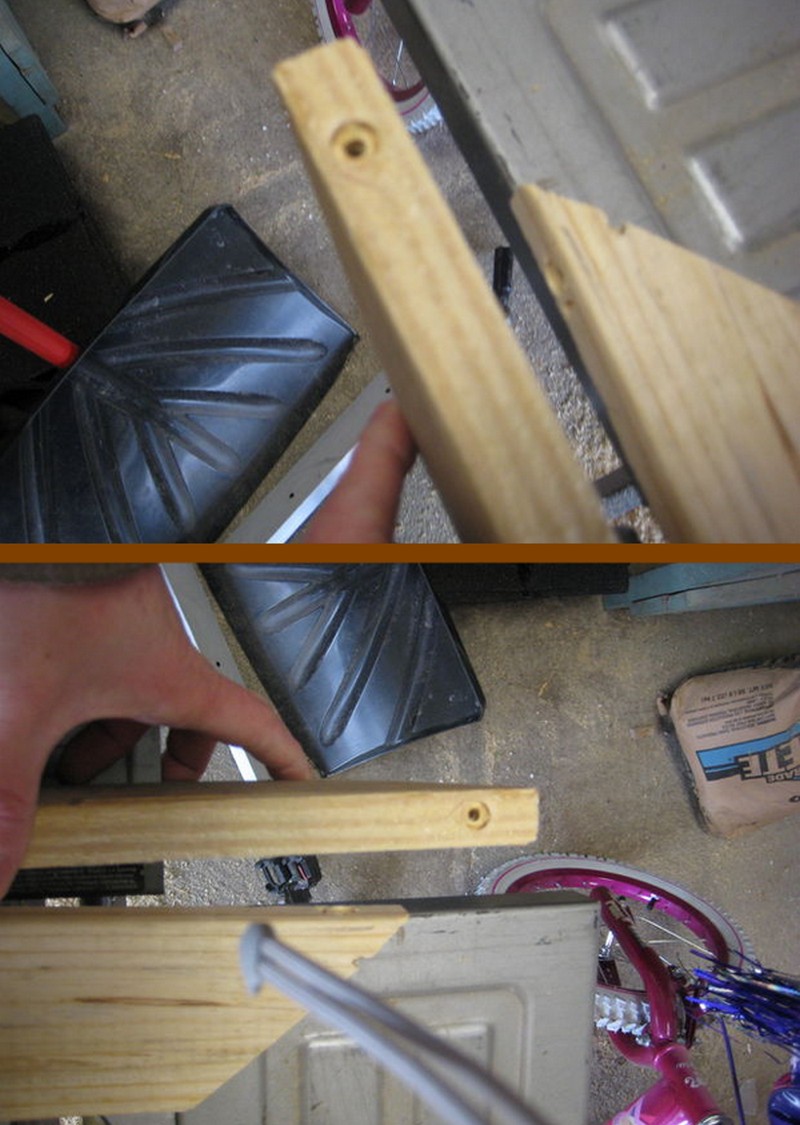
I countersank a hole at four corners for a 2″ deck screw. I had them left over from an earlier project, so while they weren’t free, they were in inventory.
Step 13: Frame for the Windows, cont.

I finished the double windows by backing the frame with more 1×4’s. I just butted them together. The first picture shows the first two boards (horizontal, in the background and foreground. The board perpendicular is shown in the proper position in picture number (2). I put two 1″ wood screws in each corner, driven straight through into the undelying frame. You’ll want to countersink them.
Continued Page 3…