Last Updated on May 22, 2024 by teamobn

Have you got kids and some time on your hands? Do you want a fun project that won’t cost a lot to do? Then why not use unloved pallets and reclaimed wood to build your kids this great cubby? What’s that… you don’t need a cubby? Then why not build it as a shed or workshop?
This pallet playhouse was great fun. As a bonus, I got to travel a lot meeting many very nice people who were giving away perfectly good materials for cents in the dollar and often, free.
I spent around $200 dollars on this project back in 2008-2009. Of that, more than a hundred dollars paid for paint while the rest went to those building materials I couldn’t get for free.
Take a look at the pictures of the pallet playhouse. Spend a lot of time on your ideas and planning and then start collecting those pallets!
Building Your Pallet Playhouse
Step 1: Break down the pallets
I got about 80 pallets, five at a time, from my work. I got a chance to know the facilities people and they were very happy to let me take them. It saved them a trip to the dumpster and saved them from having to pay to have the dumpster emptied.
That’s right. Almost all of these pallets go directly to a landfill. The rest are picked up by pallet salvage guys (they get $1 or so a pallet) or people like me. Many people burn pallets for heat. I got a lot of exercise carrying the pallets out to my Jeep which could fit about eight pallets at a time, but I rarely found more than five good ones on any given trip.
A few words about pallets:
There are all sorts. Some are oak, some are pine or spruce. Some of them are even mahogany or cherry or cedar. Stay away from the hardwood pallets. They’re almost impossible to deal with in large numbers. They’re just too darn tough. Unless you’re doing something small or you want them for firewood – for which they are great, stick with the pine or other softwood pallets.
About one in ten of the pallets I found were high enough quality. Most were rubbish. I tried to find ones that were single-use, roughly 48″ x 34″, and were built using three notched 2’x4’s connected by 3/4″ inch nominal boards (commonly called “one by” lumber.) All of them were heat treated (marked “HT”) and held together by nearly indestructible spiral nails.
Many people assume that pallets are pressure-treated. In my experience, very few, if any, have had any sort of treatment besides kiln-drying. I’m told that years ago they were also treated with pesticides, but this is no longer the case.
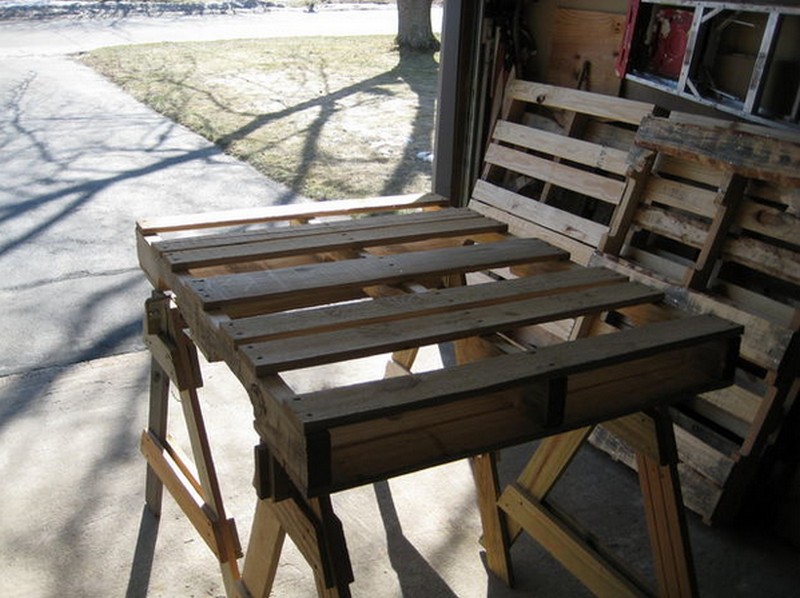
Step 2: Cut off the stringers
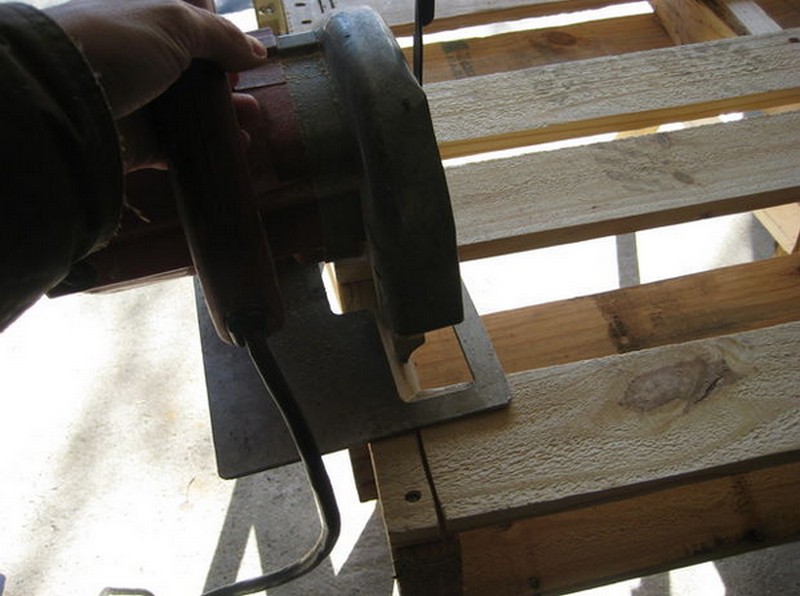
I started my pallet playhouse project by cutting off the outside stringers (the 2×4’s) with a skill saw. Trying to remove the spiral nails without damaging the wood was impossible. You’ll want to set your depth at a fraction more than the 3/4 inch board.
Image Notes
1. I lost a lot of time later because my cuts weren’t square. Take extra time and make sure they are close to the square. It’ll help later, trust me!
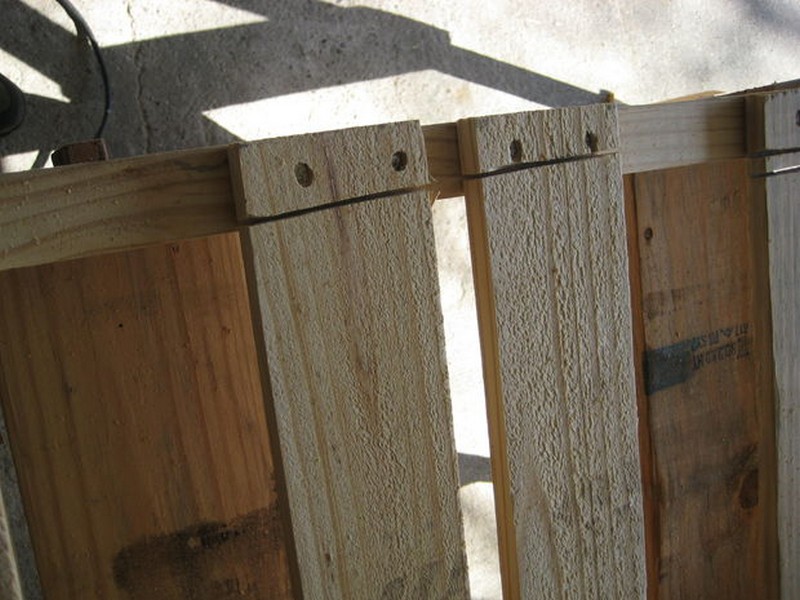
Step 3: Knocking out the pallet stingers
After you cut along each outside stringer (not the middle!), flip the pallet over and do the same on the other side.
WARNING: Pallets are usually made of timber that got rejected for other uses. It’s hard, often warped, has old broken nails embedded in it, and generally is just a pain to work with. Be careful. Wear goggles. Repetitive work breeds carelessness. Trust me, I know. Use a hammer to knock the stinger off if it’s stubborn.
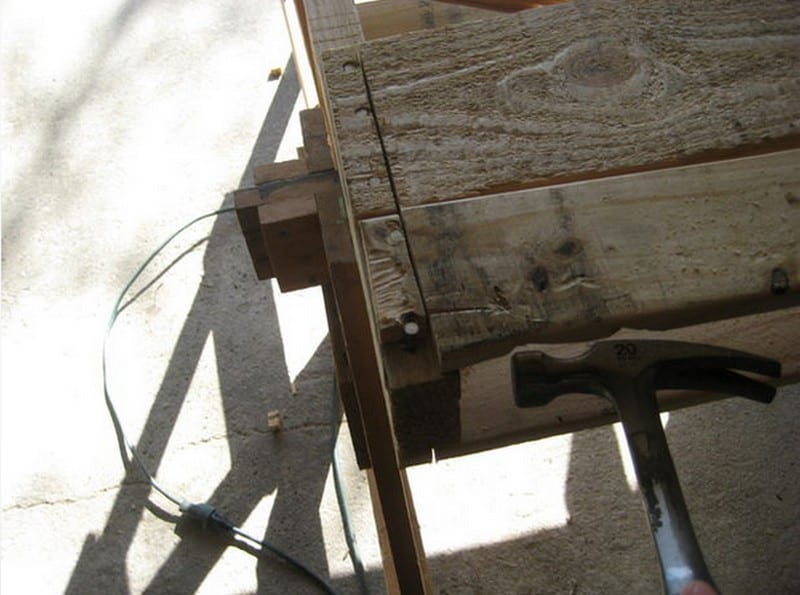
Step 4: Detach the board from the middle stringer.
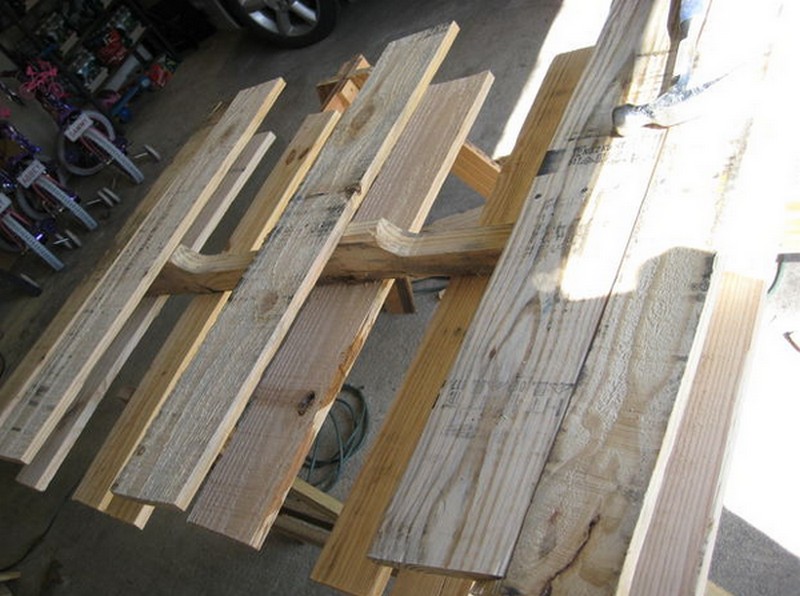
You’ll be left with a bunch of 1X4’s and 1X6’s attached to the 2×4 in the centre. By rocking the 1×4’s and the 1×6’s back and forth, you can get the board off without totally destroying it. There will still be quite a few ruined boards. Good for the wood stove.
Pull or remove any nails left in the board and stack them to the side. I ended up having to rearrange and move my stacks of boards quite a few times as the pile grew. Think ahead. There’s going to be a lot of stuff in your garage/shed/backyard. You may also want to grade your boards, based on knots, warping, bark, etc. This will help later when you try to decide what to use for what job.
Save the nails, too, if they’re straight. The blunt spiral nails are really the best type of fastener to use when you’re attaching the 3/4″ lumber to your pallet playhouse. They minimize splitting. You’ll be amazed at how many you end up keeping.
Continued Page 2…