Last Updated on June 4, 2024 by teamobn
Should you just throw away old furniture? To answer simply: No. Throwing away old furniture should never be an option unless they’re destroyed beyond repair or is infested with some termite species that can’t be exterminated.
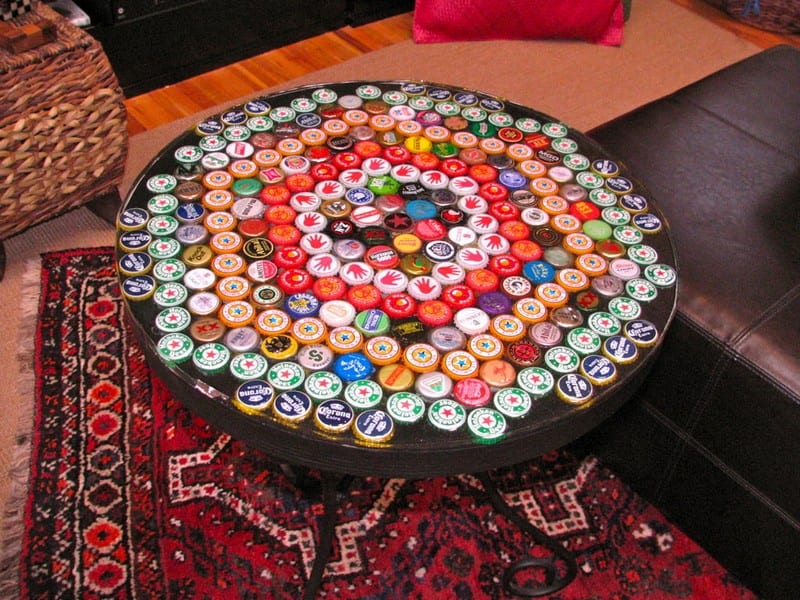
You’d be amazed at the things you can achieve with old furniture if you are willing to invest a little effort. Thinking of what to do with an old table that’s seen better days? Why not give it a makeover? And it doesn’t have to be expensive – use recycled bottle caps!
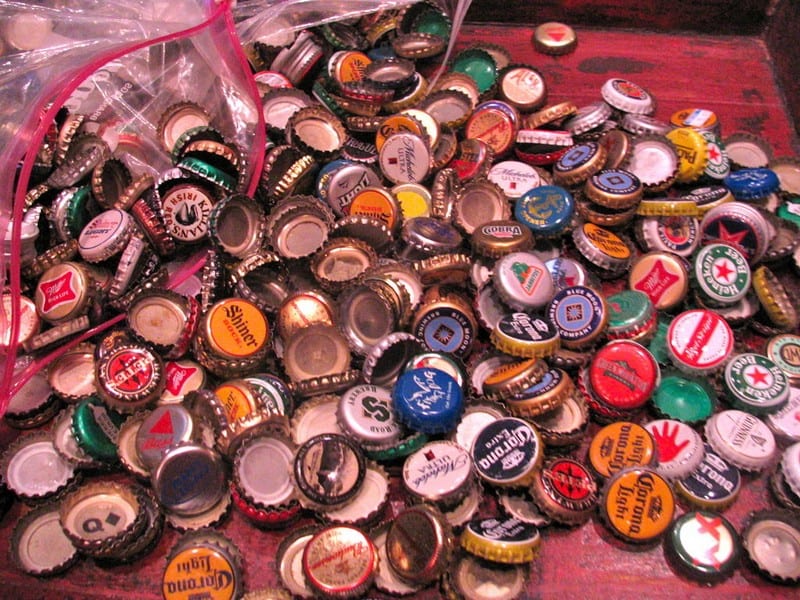
To make your own bottle cap table, start by collecting a variety of bottle caps in different colours and sizes.
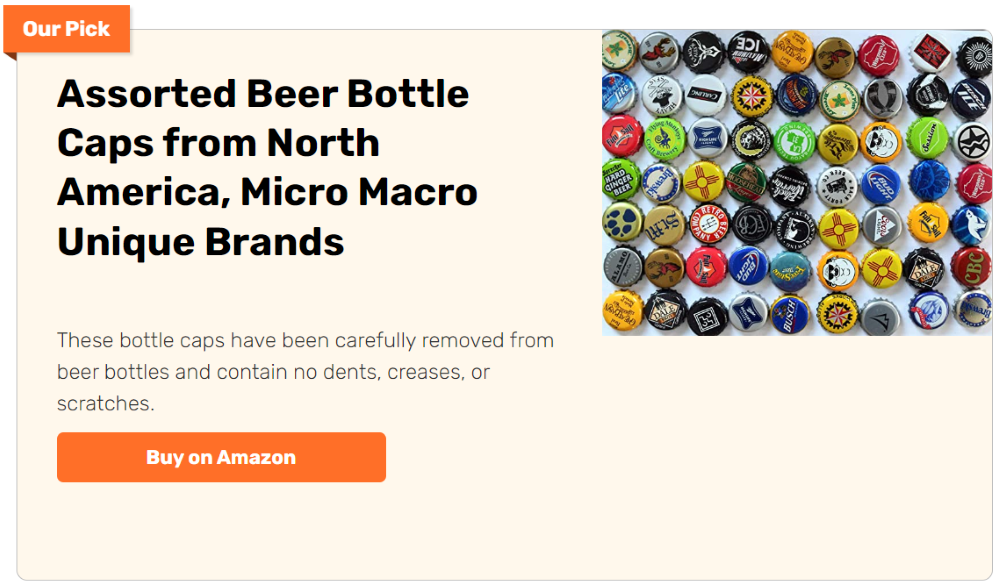
Depending on the size of your table, you might need some time to collect enough bottle caps. You can ask for help from local bartenders. Get your friends to help you collect too.
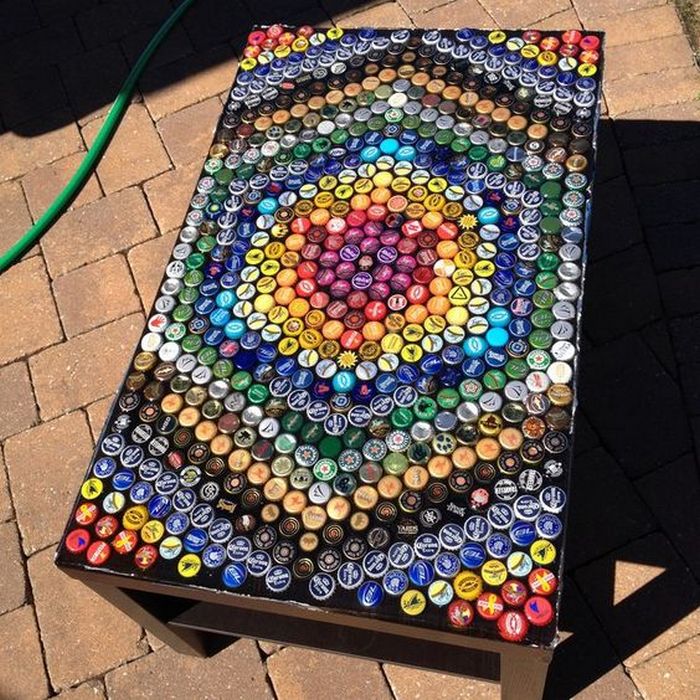
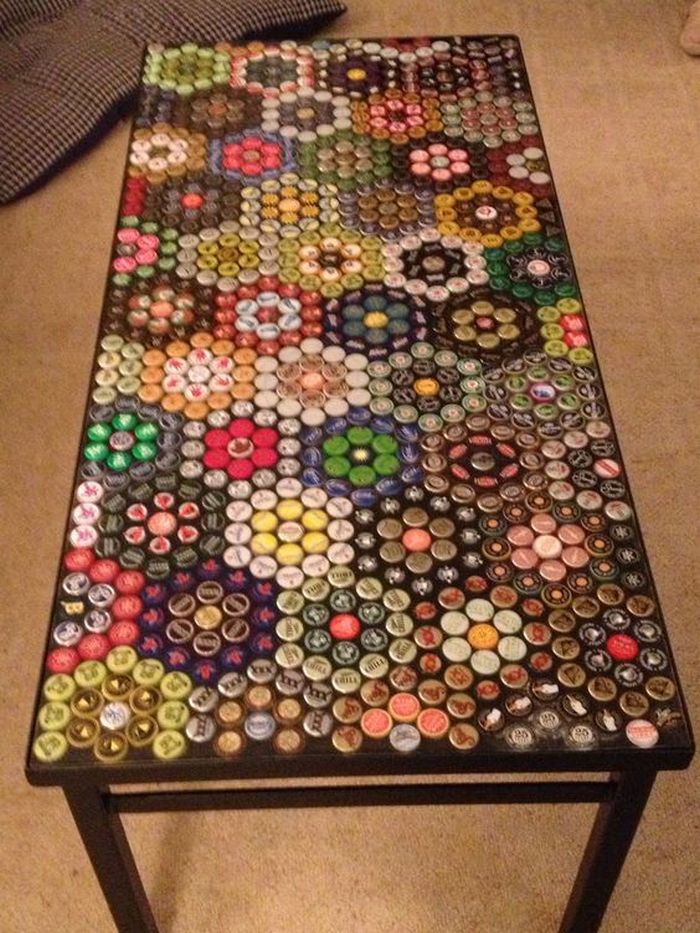
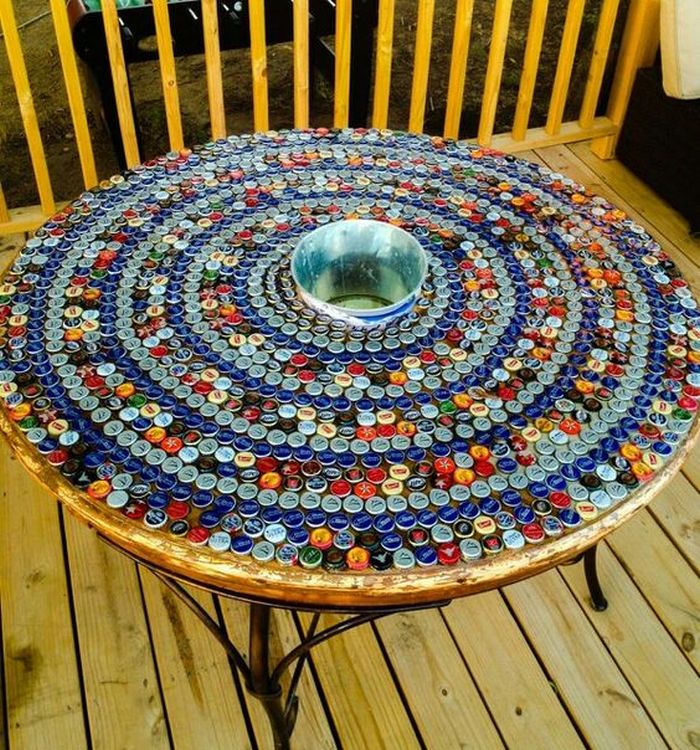
After you’ve collected the bottle caps decide on your bottle cap table pattern. You can arrange the caps according to colour or design, your imagination is the limit.
Click on any image to start the lightbox display. Use your Esc key to close the lightbox. You can also view the images as a slideshow if you prefer.


A bottle cap table like this would make a great table for your patio, it’s easily a talking piece especially if you frequently entertain outdoors.
Contents
Crafting a Bottle Cap Table
Materials
- Table
- Bottle Caps
- Super Glue
- Aluminum Foil
- Duct Tape
- Painter’s Tape
- High Gloss Finish Resin
Tools
- Old Plastic Card (old insurance or ID)
- Cutter
Instructions
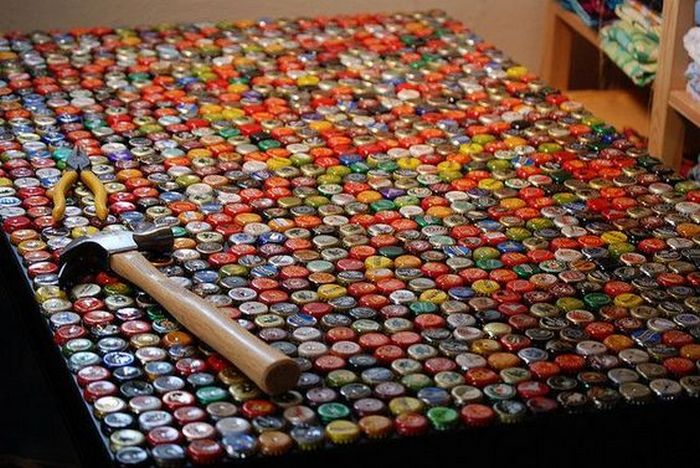
Collect lots of bottle caps. It would be better if you could collect many for each kind/brand.
Lay out the bottle caps. Arrange them until you have covered the table with as many caps as you can.
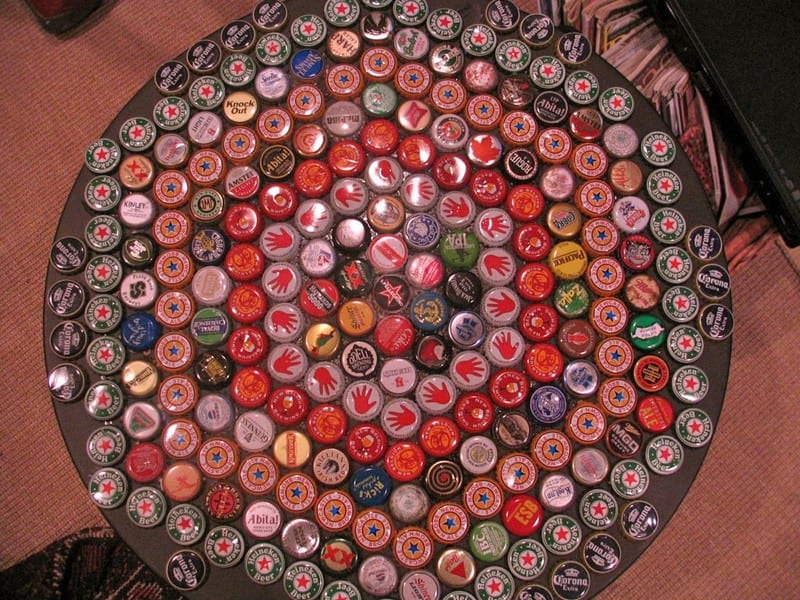
Once you are happy with how your bottle cap table looks, the next important step is to glue them. The best adhesive to use for this is super glue – dries quickly, leaves the least marks, and is enough to keep the caps in place.
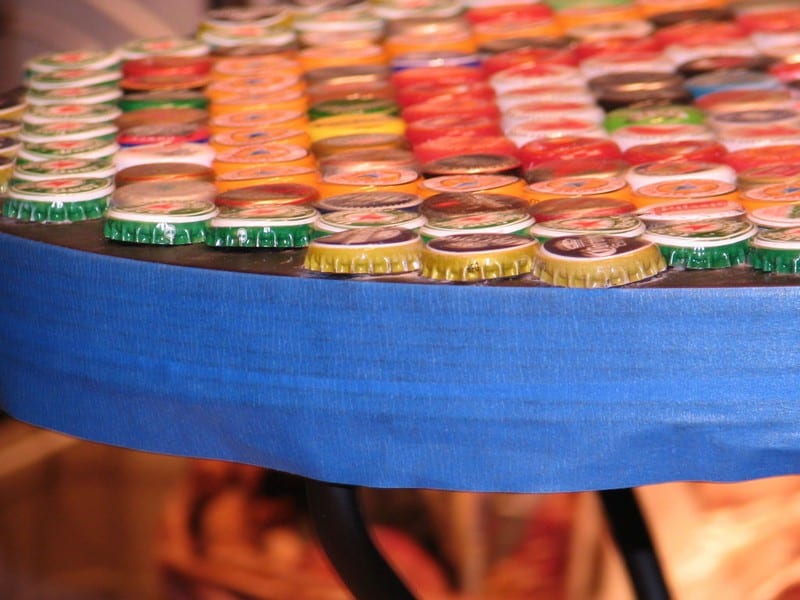
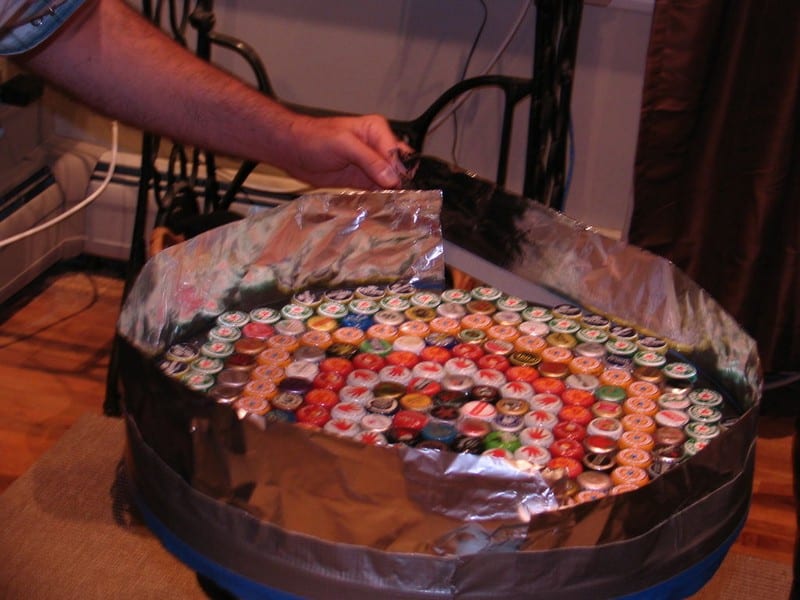
After gluing all pieces the next step is to pour in the resin, but you have to make sure your table is all set. One of the things to look out for is holes in the surface of your table. Here, the holes are covered from underneath so that the blue tape won’t show in the final design.
If your table has plenty of holes in it, like a mesh, you might want to cut an MDF as a cover for the entire table. Don’t forget to tape the sides of your table, too, as shown in the previous picture. This will protect your bottle cap table from getting sticky with duct tape which you will be using in the next step.
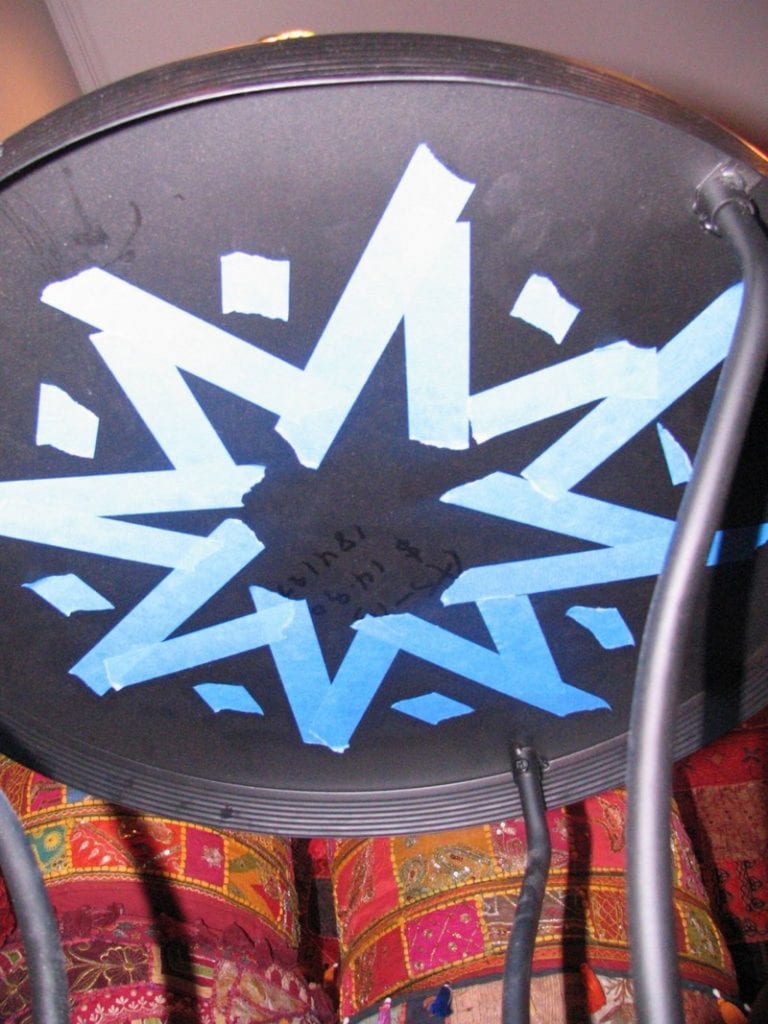
Resin obviously needs some molding from which to shape itself. If your table already has a rim around it, you probably won’t need to do this step. Get a foil 6 inches thick, and fold it lengthwise so that it is 3 inches. Stick half of the duct tape on one bottom side of the foil, as shown in the picture.
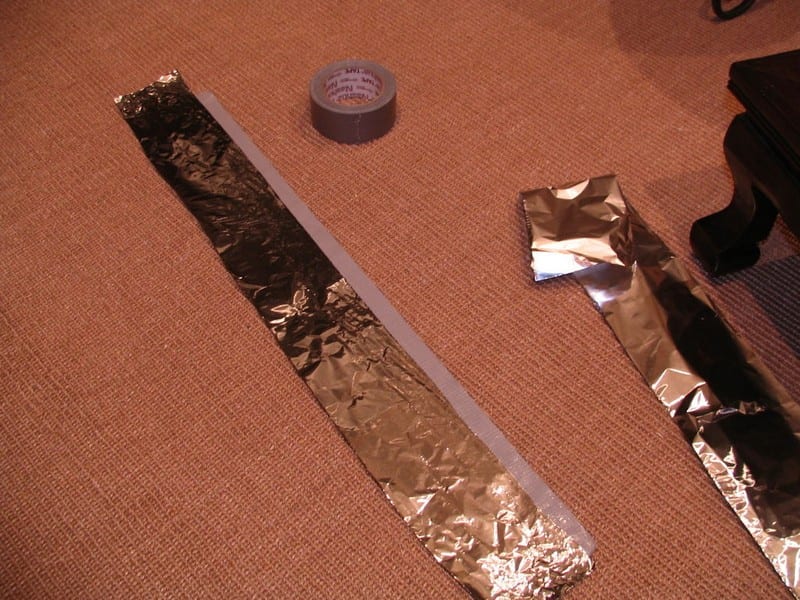
Carefully tape the foil/tape strips around your table. Make sure that the bottom edge of the foil falls just below the edge of the tabletop itself. The reasons: If the exposed sticky side of duct tape is above the table top, resin will stick to it and thus destroy the resin later when you remove the barrier. If you place the foil far below (overlapping with the blue tape), the resin may seep in and will later trap the blue tape on the sides of your table.
Follow the instructions found in the box of your resin to mix. Carefully pour it on your table, using a plastic card to make sure gaps and edges are properly filled.

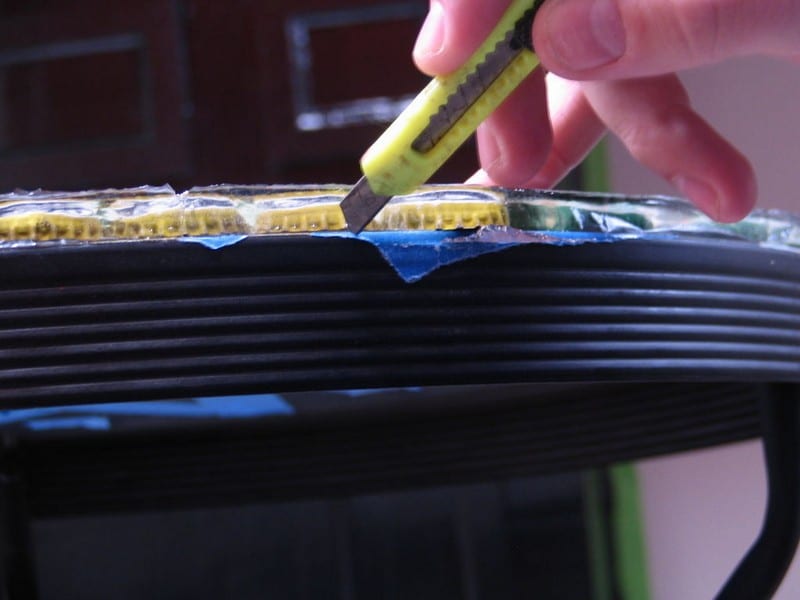
Once the resin has set and dried, you can now remove the foil barrier. Check for some tapes or foil that might have been stuck. Carefully get them out with the help of a cutter.
You are now done with your DIY bottle cap table!
This would be a great conversation starter at home, don’t you think?
Thanks to americangypsy for this wonderful tutorial.
Sourcing Bottle Caps Sustainably
Making a bottle cap table is a creative endeavor as much as a chance to use sustainable techniques. By sourcing bottle caps in an environmentally friendly manner, you help to recycle and cut waste. Here’s a sustainable way to gather bottle caps for your project.
Partner with Local Businesses
Talk to the neighborhood eateries, brewers, and bars; they usually have a surplus of bottle caps. Many times, these companies throw away a lot of caps that you may use again for your bottle cap table. Working together, you guarantee a consistent supply of resources and support neighborhood companies in lowering their waste output.
Community Drives
Arrange for bottle cap collections in your neighborhood. In community centers, schools, or neighborhood stores, set up collection boxes and invite people to donate their used bottle caps. This not only facilitates your gathering of the necessary supplies but also increases community awareness of recycling and reuse.
Use Recycling Centers
Look for discarded bottle tops at neighborhood recycling facilities. These facilities can supply big amounts of caps and frequently sort their collections, which facilitates the faster gathering of supplies for your bottle cap table. Resources that might otherwise wind up in landfills can be directly reused in this way.
When you source bottle caps sustainably, you create a distinctive piece of furniture and express the value of recycling and sustainable living.
Sealing and Protecting Your Bottle Cap Table
After you’ve put together your bottle cap table, the next big step is making sure it stands the test of time. Sealing it properly is crucial. A good seal doesn’t just preserve the vibrant look of your creation but also makes sure it’s sturdy enough for daily use. Here’s how to lock in the beauty of your bottle cap design and keep it looking great.
Pick the Right Resin
For a project like a bottle cap table, epoxy resin is usually your best bet. It’s tough, it’s clear, and it provides a shield against water and scratches, which is exactly what you want for a table surface that you’ll actually use. Make sure the resin is clear to keep those bottle cap colors shining through without getting foggy or dim.
How to Apply It
First things first: make sure your table is spotless and dry. When you mix the resin, follow the instructions on the package to the letter—getting this wrong can leave you with a sticky mess. Pour the resin slowly, starting from the center of the table and working your way out to the edges. Use something like an old credit card to smooth it over the bottle caps, making sure it seeps into every nook and cranny.
Letting It Set
Once you’ve covered your bottle cap table in resin, it needs to set. Depending on what resin you use and your room conditions, this could take from several hours to a couple of days. Keep the table somewhere dust-free while it sets; any dust or dirt can stick to the wet resin and ruin the smooth surface.
Keep It Looking New
To keep your bottle cap table looking its best, wipe it down regularly with a soft cloth and a bit of water. Steer clear of harsh cleaners and anything abrasive – they can scratch or cloud the resin. If your table is going to be in a sunny spot, think about using a UV-resistant resin to keep the colors from fading.
Use Polyurethane Coating
Polyurethane is another excellent choice for sealing your bottle cap table. It comes in both water-based and oil-based varieties, each with its own set of benefits. Water-based polyurethane dries quickly and doesn’t emit strong fumes, making it a great option for indoor projects. Oil-based polyurethane is more durable and provides a rich, glossy finish that can enhance the depth and hue of your bottle caps. Apply it with a fine-bristle brush to achieve a smooth surface.
Apply a Polycrylic Sealant
Polycrylic is a water-based sealant that offers a clear finish and is less susceptible to yellowing over time compared to polyurethane. It’s also great for projects that might be exposed to light moisture but not heavy wear. Polycrylic is easier to clean up and emits fewer odors, which makes it ideal for use in well-ventilated or enclosed spaces. Apply multiple thin coats, allowing each coat to dry thoroughly before applying the next, for best results.
Consider a Varnish
For those looking for an even more traditional approach, varnish can be used to seal and protect a bottle cap table. Varnish typically provides a durable, hard finish that is excellent for tables that will see a lot of wear. It enhances the visual depth of the bottle caps and can be found in different sheens from matte to high gloss. Application requires careful technique to avoid drips and brush marks.
Wax for a Natural Finish
If you prefer a more natural look, consider using a specialty furniture wax to seal your bottle cap table. Waxes provide a softer finish and enrich the natural colors of your project. They’re also great for adding an additional layer of protection over another sealant like resin or polyurethane. Apply with a soft cloth and buff to a soft sheen, reapplying as needed to maintain protection.
Seal your bottle cap table properly, and it will be more than just a stunning piece of furniture; it will be a durable part of your daily life.
Conclusion
Bottle cap tables are a nice do-it-yourself project and a fantastic way to recycle and show off your ingenuity. With the right materials and techniques, one may create a robust and beautiful piece of furniture that sparks discussion. Understanding that your table will be a unique focal point in your home, relish the construction and personalization process.
We have more fun table projects for your home. Read our octagon picnic table guide next!