Last Updated on January 24, 2024 by teamobn
Trash bins are an important part of maintaining a clean and tidy kitchen. They help to keep food scraps and other waste items out of sight and make it easier to keep the kitchen clean. There are a few things to keep in mind when choosing a trash bin for your kitchen.
Trash bins play an important role in keeping our communities clean. However, they can often be seen as an eyesore, as they can be unsightly and unkempt. Can’t stand the unpleasant sight of your trash and recycle bins? Here’s an easy project you might want to tackle to fix it!
To keep our trash bins from becoming an eyesore, we need to make sure that they are regularly emptied and cleaned. We also need to make sure that we are using them properly, by not overfilling them or putting the wrong types of trash in them.
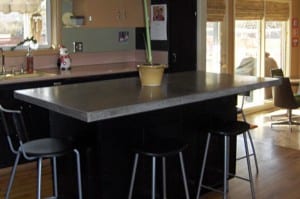
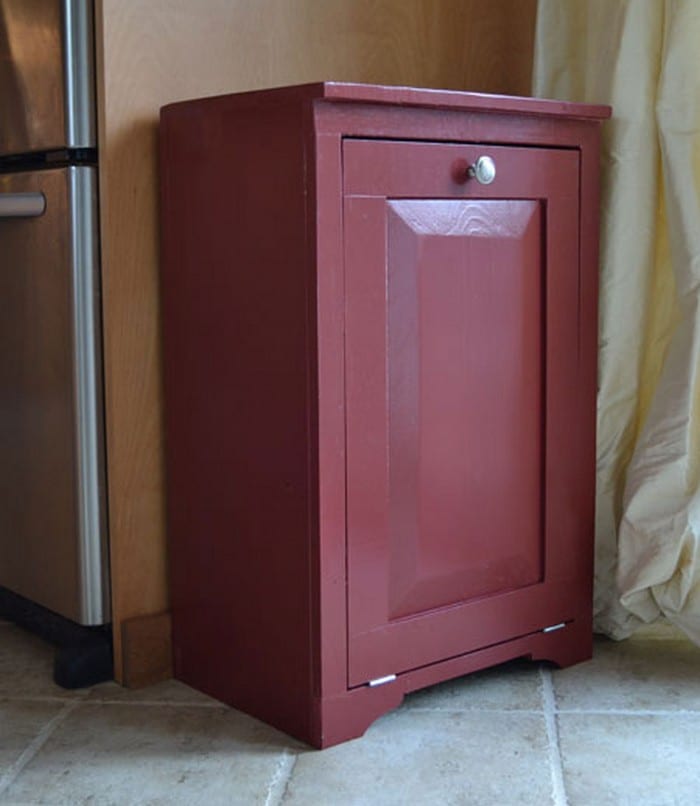
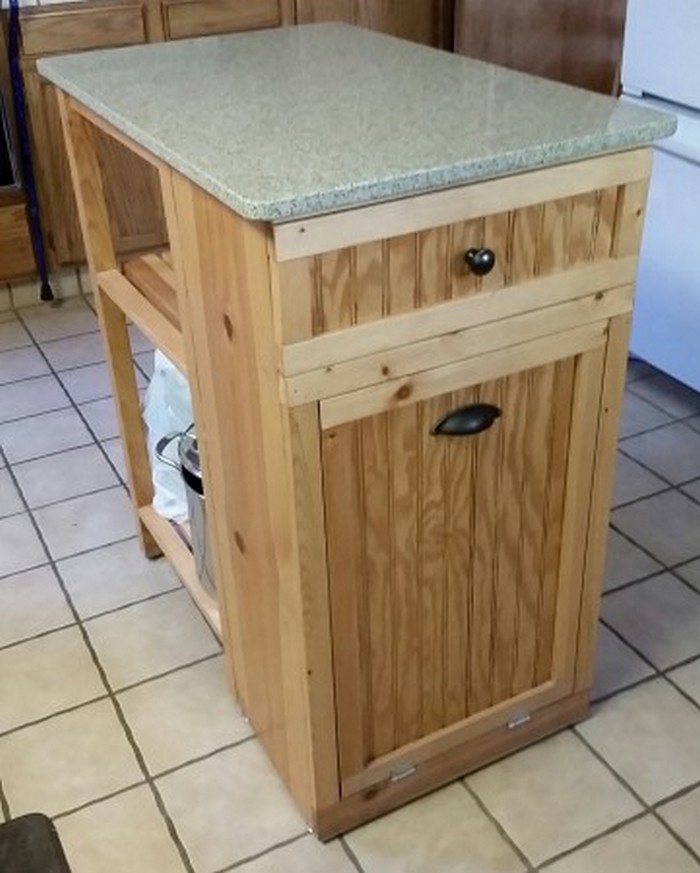
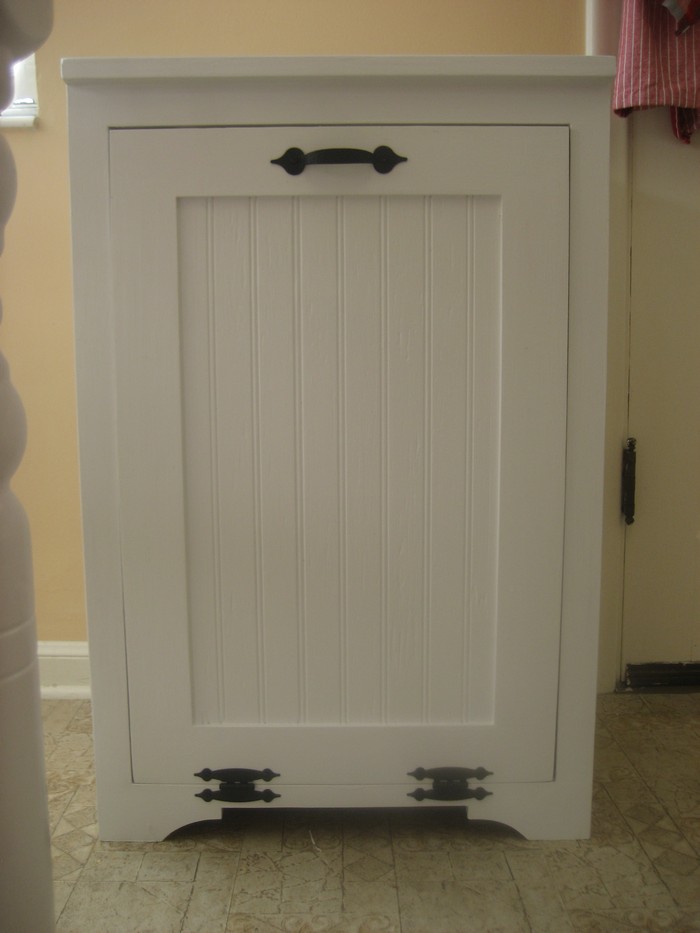
One easy way to make your kitchen more organized and tidy is to build a tilt-out trash cabinet. This simple woodworking project can be completed by even novice DIY-ers and it makes hiding your trash bin a breeze. Plus, it adds an extra element of functionality to your kitchen by giving you a place to store your trash can out of sight.
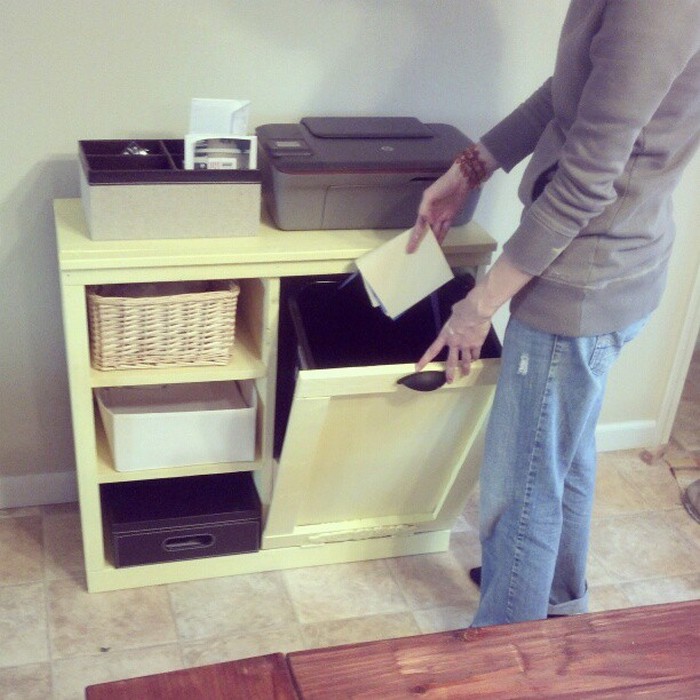
This tilt-out trash cabinet is a great project for the kitchen or any room in your house. You can even incorporate it with a shelving unit in your home office or bedroom. This project is a great way to declutter your home and make it more organized. You can use this cabinet to store your trash can, recycling bin, or even cleaning supplies.
This tilt-out trash cabinet is easy to build and only requires a few materials. Building a tilt-out trash cabinet can help make your home neat and clean-looking. Plus, it’s a relatively simple project that won’t take up too much time and effort.
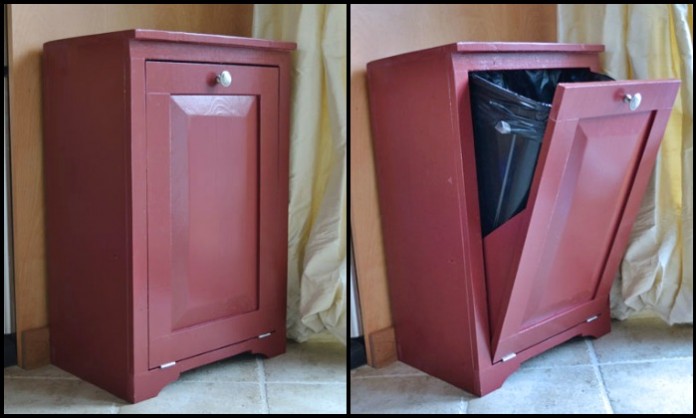
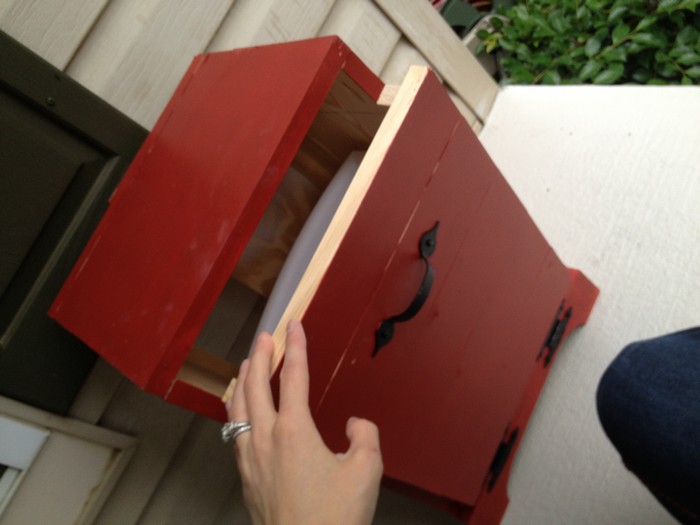
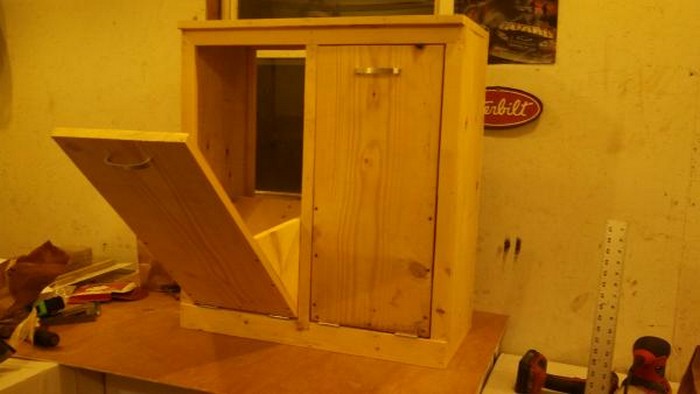
Upcycling is a great way to breathe new life into old items. If you have an old cabinet that you no longer use, you can upcycle it into a tilt-out trash cabinet. To do this, remove the door and transfer the hinges to the bottom of the door instead of the sides.
This will allow you to easily access your trash can while keeping it out of sight. After reattaching the door, you can sand it and stain or paint it. By upcycling old items, you not only save money but also help the environment by reducing waste.
But, if you don’t have an old cabinet that you can upcycle, then you can also start this project from scratch. You can customise it based on your preference, making it a truly unique piece for your home.
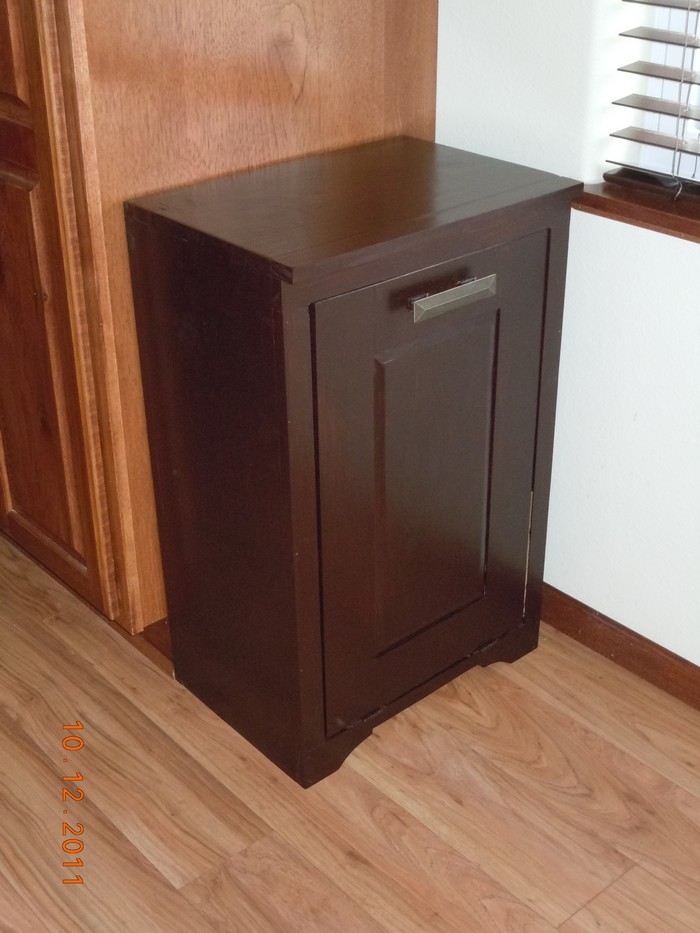
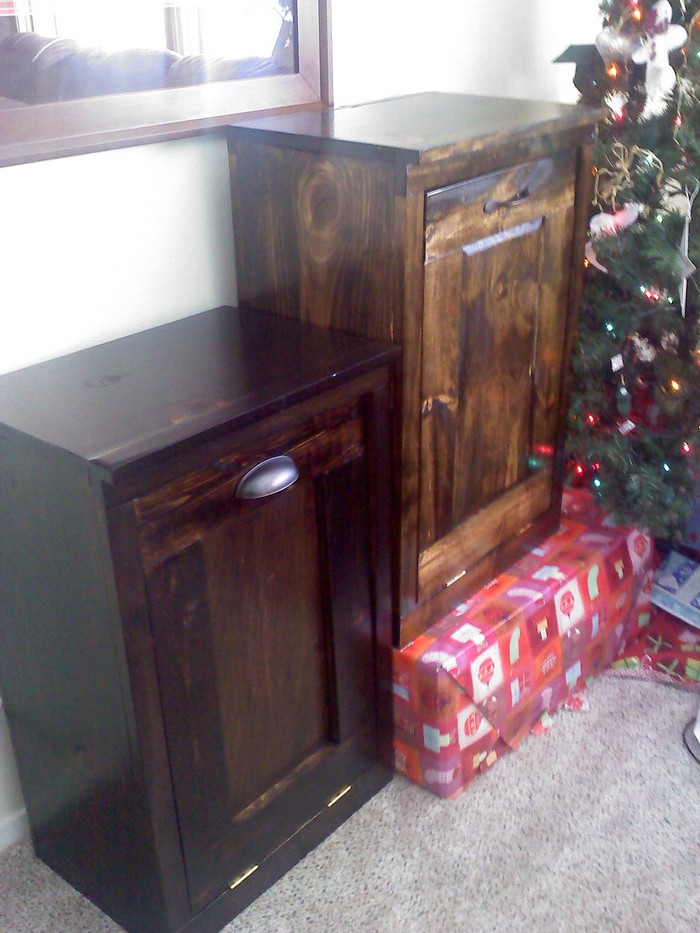
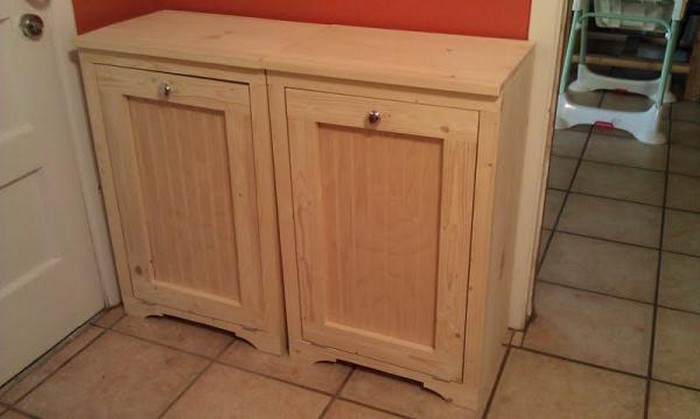
Planning on building one or two of these tilt-out trash cabinets? You can get more inspiration from our album below. 🙂
Crafting Tilt-Out Trash Cabinets in 7 Simple Steps
Get ready for a game-changer because we’re about to embark on a journey to banish those eyesores and welcome the era of tilt-out trash cabinets! In just 7 straightforward steps, we’ll transform your kitchen into a realm of organization and chic concealment. Buckle up for a DIY adventure that’s not just practical but oh-so-glamorous!
You’ll need these materials:
- 2 – 6 ft long 1×12 Timber
- 1 – 8 ft long 1×3 Timber
- 2 – 8 ft long 1×2 Timber
- Narrow Hinges
- Knob or Pull
- 2″ Screws
- 1 1/4″ Finish Nails
- 2″ Finish Nails
- 1-1/4″ Pocket Hole Screws
- Wood Glue
- Wood Filler
- 120 grit Sandpaper
- Primer
- Wood Conditioner
- Paint
Also, these tools:
- Measuring Tape
- Speed Square
- Pencil
- Kreg Jig
- Cordless Drill
- Jigsaw
- Sander
- Brad Nailer
- Circular Saw
Click on any image to start the lightbox display. Use your Esc key to close the lightbox.![]()

Thanks to Ana White for sharing invaluable tips on how to build tilt-out trash cabinets!
Step-by-step instructions:
Get ready to embark on a timber-powered journey as we guide you through the epic quest of building a show-stopping tilt-out trash cabinet! Armed with a stash of 2 to 6 ft 1×12 Timber, 1×3 and 1×2 Timber, and a toolkit that’s nothing short of a DIY superhero’s arsenal, you’re about to turn your kitchen into the talk of the town.
Grab your tools, flex those creative muscles, and let the tilt and thrive adventure begin with these tilt-out trash cabinets!
Step 1: Assemble Your Lumber League
Gather your lumber squad – the 2 to 6 ft long 1×12 Timber, the 8 ft long 1×3 Timber, and the 2x 8 ft long 1×2 Timber. This is your timber treasure chest, so embrace the potential in those wooden warriors. It’s about to get lubricious up in here!
Step 2: Measure and Marvel
Unleash your measuring tape and channel your inner architect. Map out your cabinet dimensions on the 1×12 Timber using your trusty pencil and speed square. This is where precision meets creativity – so measure twice, cut once, and marvel at your soon-to-be masterpiece!
Step 3: Join Forces With Pocket Holes
Enter the Kreg Jig, your pocket hole sidekick. Drill pocket holes along the edges of your 1×12 Timber to ensure a sturdy cabinet frame. This step is like creating the secret sauce of woodworking – strong, invisible joints that scream craftsmanship!
Step 4: Cutting and Crafting Your Cabinet Core
Armed with your circular saw, bring your tilt-out trash cabinet vision to life by cutting the 1×12 Timber according to your measurements. This is the moment when your timber transforms into the heart of your tilt-out masterpiece. Precision cuts, and you’re on your way to DIY glory!
Step 5: Assemble Your Cabinet Crew
Lay out your cut pieces and start assembling your cabinet frame. Use wood glue to reinforce the joints, then secure them in place with 2″ screws through those strategically placed pocket holes. This is the bonding ceremony where your cabinet takes shape – sturdy and ready for action!
Step 6: Attaching the Tilt-Out Mechanism
Introduce your narrow hinges to the party – the unsung heroes of your tilt-out adventure. Position them strategically on the sides of your cabinet frame, ensuring a smooth tilt motion. Attach them securely with screws, and voila – your tilt-out trash cabinet is ready to bust a move!
Step 7: Adding the Finishing Touch
Cue the 1×3 and 1×2 Timber – your trim superheroes! Cut these pieces to size and attach them around the edges of your cabinet to give it a polished finish. Secure them in place with 1-1/4″ finish nails, and watch as your cabinet transforms from functional to fabulous!
Step 8: Choosing Your Cabinet Bling
Time to give your cabinet some personality! Select a knob and pull that resonates with your kitchen’s vibe. Want a sleek design? How about the colourful theme? Be sure to elevate your cabinet from basic to brilliant.
Step 9: Sand and Smooth
Grab your trusty sander and smooth out any rough edges. Sand the entire cabinet with 120-grit sandpaper, creating a canvas that’s ready to soak in the paint. This step is all about prepping for the paint party – the smoother, the better!
Step 10: Prime and Paint Extravaganza
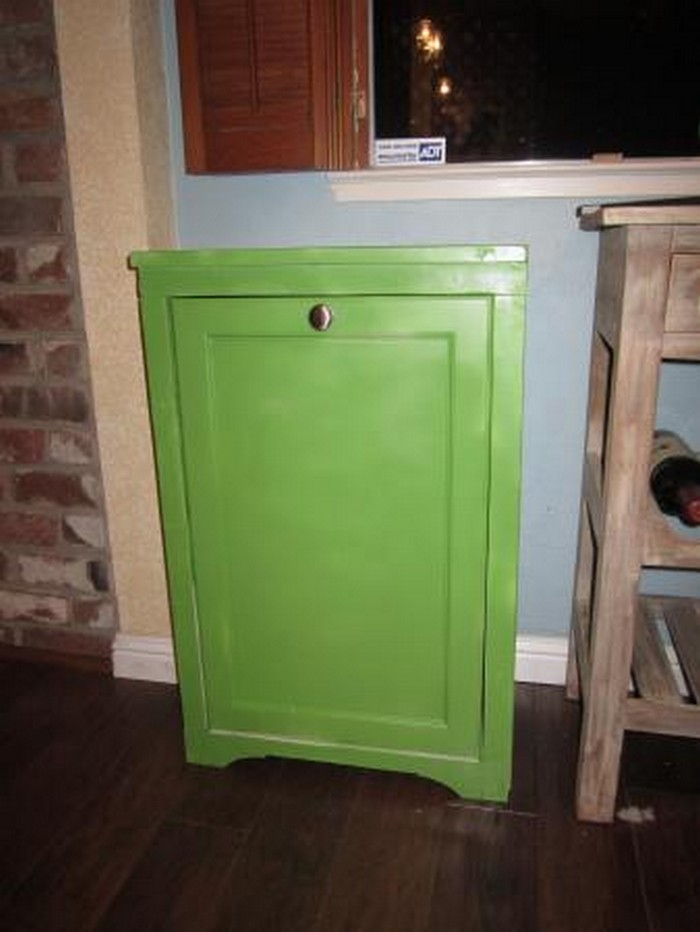
Apply a coat of wood conditioner to your cabinet to ensure an even paint absorption. Once conditioned, let the paint party begin! Prime your cabinet and unleash your favourite paint colour. Of course, you can go bold, classic, and trendy, this is where your creativity takes the spotlight.
Armed with timber, tools, and a sprinkle of DIY magic, you have crafted a tilt-out trash cabinet that is as functional as it is fabulous. So, tilt on, DIY maestro – your kitchen is the stage for a timber-powered masterpiece!
10 Bonus Tips for Maximum Wow
Ready to amplify your DIY prowess? We’re back with another round of catchy tips to supercharge your Tilt-Out Trash Cabinet game! From clever storage solutions to design delights, these 10 extra ideas will take your trash cabinet from good to downright sensational. So, grab your tools, put on your creative cap, and let’s dive into the world of Tilt-Out 2.0!
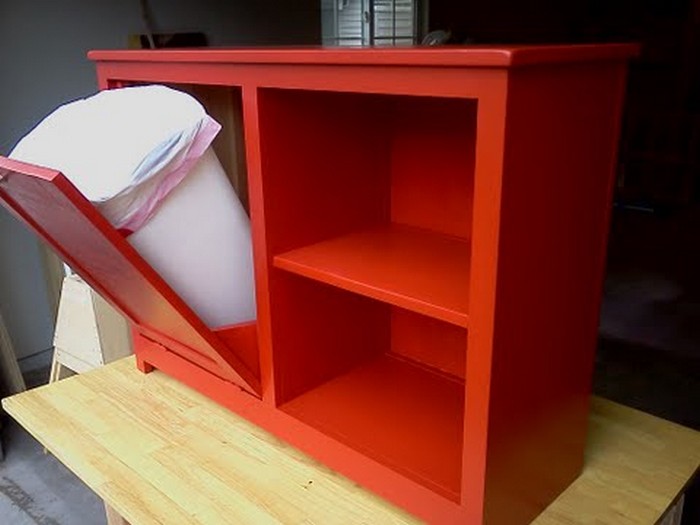
Tip 1: Shelf Shuffle – Incorporate Adjustable Shelves
Kick off your tilt-out adventure by installing adjustable shelves inside your cabinet. It’s like giving your cabinet a customizable wardrobe, adapting to the ever-changing needs of your kitchen. Play the shelf shuffle game and conquer clutter like a pro!
Tip 2: Hinge Huddle – Conceal With Hidden Hinges
You don’t want to settle for the ordinary, do you? You can embrace the extraordinary! Swap standard hinges for hidden ones, adding a touch of mystery to your tilt-out cabinet. It’s the Hinge Huddle that takes your trash cabinet from functional to fabulous.
Tip 3: Bin Bliss Upgrade – Invest in a Pull-Out Bin
Elevate your trash game with a pull-out bin mechanism. Say goodbye to wrestling with bags – simply pull out the bin for easy access and hassle-free disposal. Bin Bliss Upgrade: Because your trash deserves a smooth exit!
Tip 4: Paint Pop – Two-Tone Your Cabinet for Drama
Ditch the monochrome monotony and embrace the paint pop phenomenon. Two-tone your cabinet by painting the exterior and interior in contrasting colours. It’s a visual feast that adds drama and personality to your tilt-out masterpiece.
Tip 5: Sliding Splendor – Introduce Sliding Barn Doors
Step into the realm of rustic charm by swapping traditional doors for sliding barn doors. It’s not just about tilting; it’s about sliding into a whole new level of design splendour. Your trash cabinet just upgraded to farmhouse fabulous!
Tip 6: Trim Transformation – Frame It Like a Pro
Rev up your cabinet’s aesthetics with a trim transformation. Choose a bold and contrasting trim colour to frame the edges, turning your tilt-out cabinet into a work of art. It’s the trim transformation that commands attention!
Tip 7: Lid Luxury – Craft a Stylish Flip-Down Lid
Give your tilt-out cabinet a touch of luxury by adding a stylish flip-down lid. Not only does it conceal the bin seamlessly, but it also doubles as a surface for quick kitchen tasks. It’s lid luxury – because every trash cabinet deserves to multitask in style!
Tip 8: Label Love – Add Charming Labels for Organization
Bring order to the chaos by incorporating charming labels. Add “Recycle,” “Trash,” and quirky names for different waste categories, and labels to add a dash of organization and a whole lot of personality to your tilt-out creation.
Tip 9: Wheel Wonders – Install Hidden Casters for Mobility
Unlock the power of mobility with hidden casters. Install these wheel wonders on the bottom of your tilt-out cabinet for easy maneuverability. It’s the wheel wonders upgrade that turns your trash cabinet into a flexible and functional piece of kitchen art.
Tip 10: Dazzling Decals – Personalize With Vinyl Decals and Quotes
Transform your tilt-out cabinet into a canvas of creativity with dazzling decals. Personalize it with vinyl decals, quotes, and your favourite kitchen sayings. It’s the dazzling decals touch that adds a personal and lively vibe to your trash cabinet.
Picture this: from the backstage of practicality, your tilt-out trash cabinet is about to take centre stage and take the spotlight! Each tip, from sliding barn doors to lid luxury, is an all-access pass to elevate your DIY project into a kitchen sensation.
Let’s talk sliding barn doors – the rockstars of rustic chic. Imagine your kitchen transforming into a country retreat with a simple slide. It’s not just concealing trash; it’s about making an entrance, turning your cabinet into a visual symphony that dances to the rhythm of your kitchen’s unique vibe.
Cue the lid luxury – a touch of sophistication that whispers elegance. Your Tilt-Out Trash Cabinet is not just managing waste; it’s flaunting a sleek flip-down lid, making every closure a statement. It’s not just a lid; it’s a performance, closing with the finesse of a high-end sedan door.
As you incorporate these tips, your tilt-out trash cabinet is no longer a backstage crew member; it’s the star of your kitchen stage. It’s a performance art piece, ready to receive applause for turning an everyday chore into a captivating kitchen show.
So, tilt on, Design Dynamo! Your kitchen is now the arena for a daily design extravaganza, and your Tilt-Out Trash Cabinet is the undisputed headliner. With sliding barn doors and lid luxury leading the way, your trash cabinet is ready to take its place in the spotlight as the dazzling star of your kitchen stage!
The Wrap Up
There you have it, you’ve just aced the ultimate crash course in turning your kitchen into a charismatic masterpiece! It’s been a journey filled with timber tango, hinge heroics, and a dash of paint extravaganza, transforming your trash corner into a captivating spectacle.
From precision moves in measure and marvel to the structural dance of the Kreg jig jamboree, your tilt-out trash cabinet has gone from a simple idea to a show-stopping performance. The sawdust symphony turned timber into a design melody, and timber bonding made sure your creation stands tall with the strength of DIY success.
Hinge heroics brought drama and flair, turning your cabinet into a dynamic performer that tilts with the grace of a seasoned dancer. Trim triumph added the finishing touches, making your creation pop with style. Knob and pull allowed you to sprinkle a dash of your personality onto the stage.
In the paint extravaganza, you unleashed a burst of colour, turning your cabinet into a vibrant masterpiece. Your kitchen is no longer just a cooking space; it’s a gallery where your tilt-out trash cabinet steals the limelight.
Imagine it as the lead guitarist in a kitchen band, strumming chords of innovation and turning the routine act of tossing trash into a daily chart-topping hit.
So, tilt on, Design Dynamo! Your kitchen is not just a place to cook; it’s a performance stage where every tilt and swing is a note in the melody of your culinary genius. Your tilt-out trash cabinet isn’t just a piece of furniture; it’s the headline act, turning trash management into a daily dose of catchy, captivating awesomeness!
Tilt-out trash cabinets are the Houdinis of waste management, effortlessly concealing your kitchen’s secret trash stash. It’s like playing hide-and-seek with your garbage, and the cabinet is the ultimate champion.
Tight on kitchen real estate? Fear not! Tilt-out trash cabinets are the space-saving wizards, tucking neatly into corners and saving you from the clutter conundrum. Say farewell to the eyesore of traditional trash bins! Tilt-out cabinets are style magicians, transforming an everyday necessity into a sleek, design-savvy feature that elevates your kitchen’s aesthetic.
They’re not just saving space; they’re orchestrating a symphony of organization, turning your kitchen into a harmonious haven where clutter has no place and space-saving magic is the headline act.
So, cheers to more DIY adventures, more tilting success, and the undeniable charm you’ve infused into your culinary kingdom! May your culinary kingdom continue to be sprinkled with success and seasoned with that secret sauce of yours. Are you ready for the upcoming DIY adventures, the inevitable cascade of tilting success, and the inescapable charm that makes your kitchen reign supreme? You got this!