Affordable DIY Cat Tree From Upcycled Drawers

Last Updated on March 17, 2025 by teamobn

DIY Cat Tree
Build your pampered feline a cat tree with old drawers!

Cats are natural climbers and they love heights. They are able to climb cat trees and other structures with ease, and often enjoy spending time up high. This behaviour is instinctive for cats and helps them to escape predators or find a good vantage point.

Cats are agile creatures that are equipped with sharp claws and flexible bodies that make climbing easy for them. When cats are up high, they can survey their surroundings and spot potential threats or prey from a distance. This behaviour is instinctive and helps keep cats safe from harm.

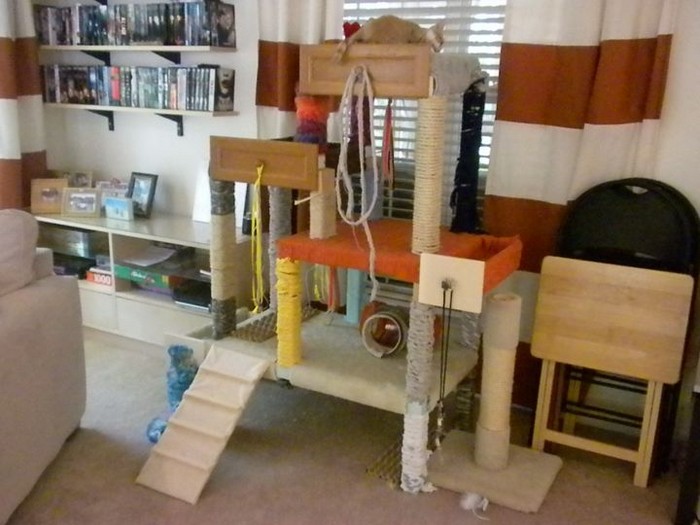
If you have cats at home, you might need to have a DIY cat tree! Cat trees provide cats with a place to scratch, climb, and sleep, which can help keep your furniture and carpets safe from damage. Plus, they’re simply fun for cats to play on!

But why buy an expensive cat tree from the store when you can easily build one for a song? Building a cat tree is a relatively simple process that anyone can do with a little time and effort. Plus, it’s a great way to save money!

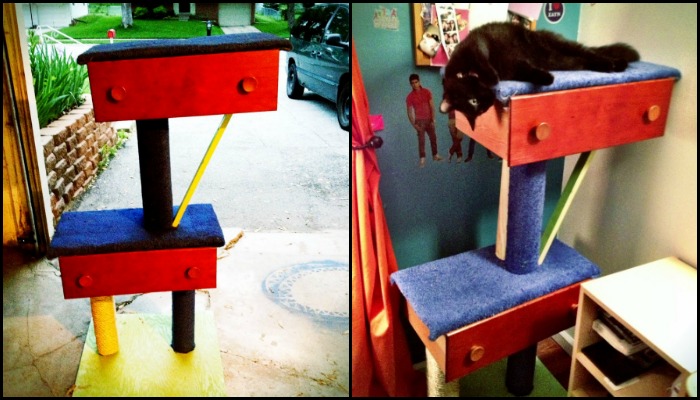
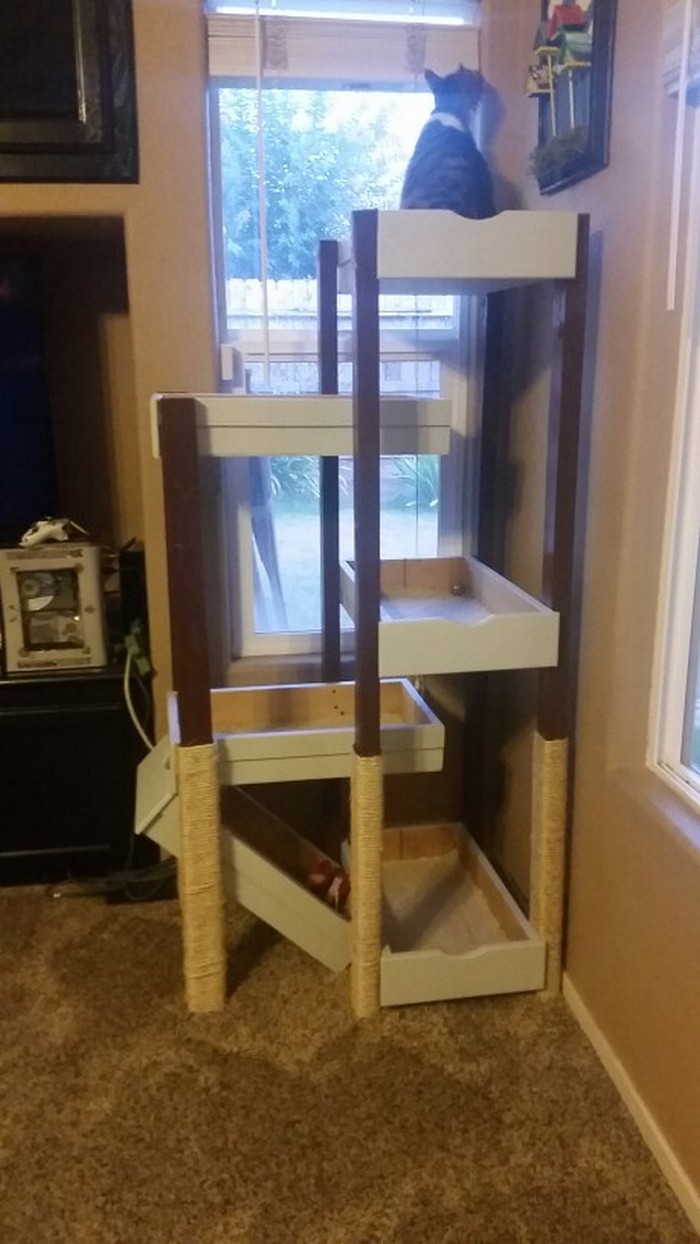
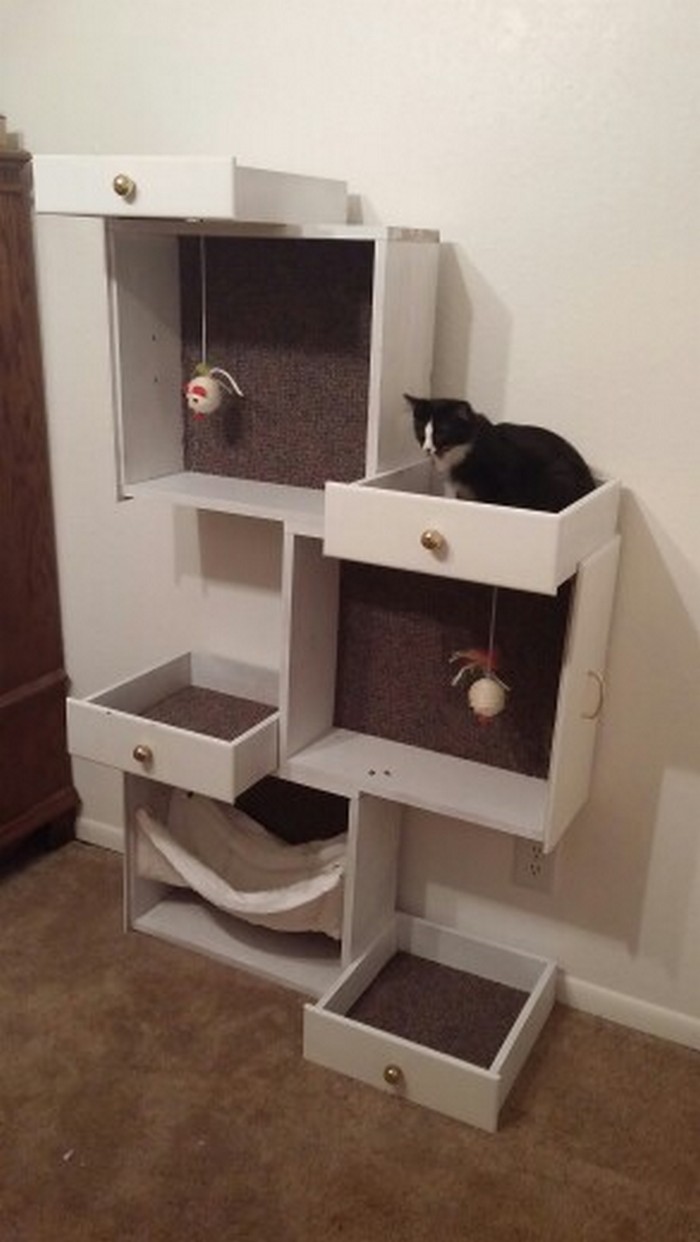
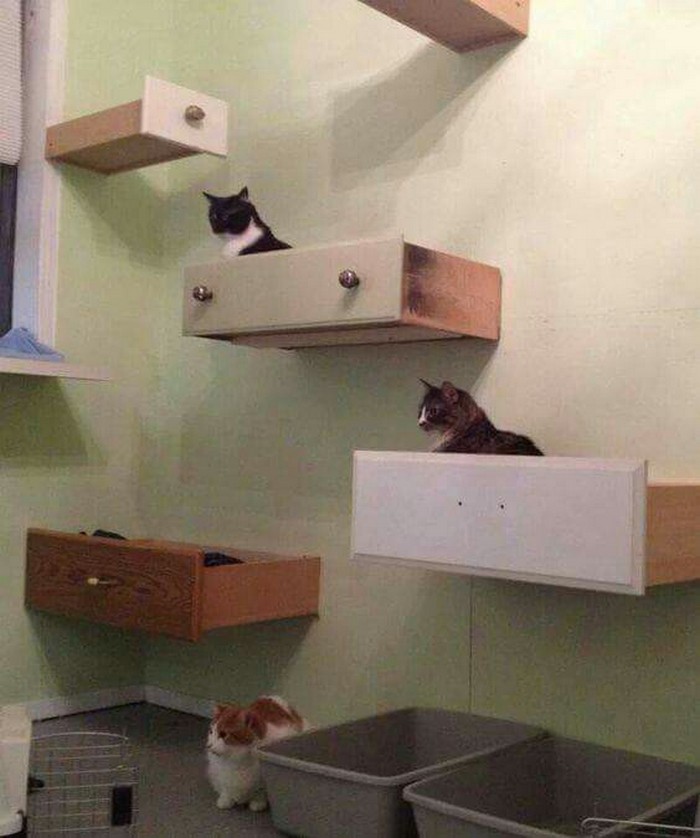
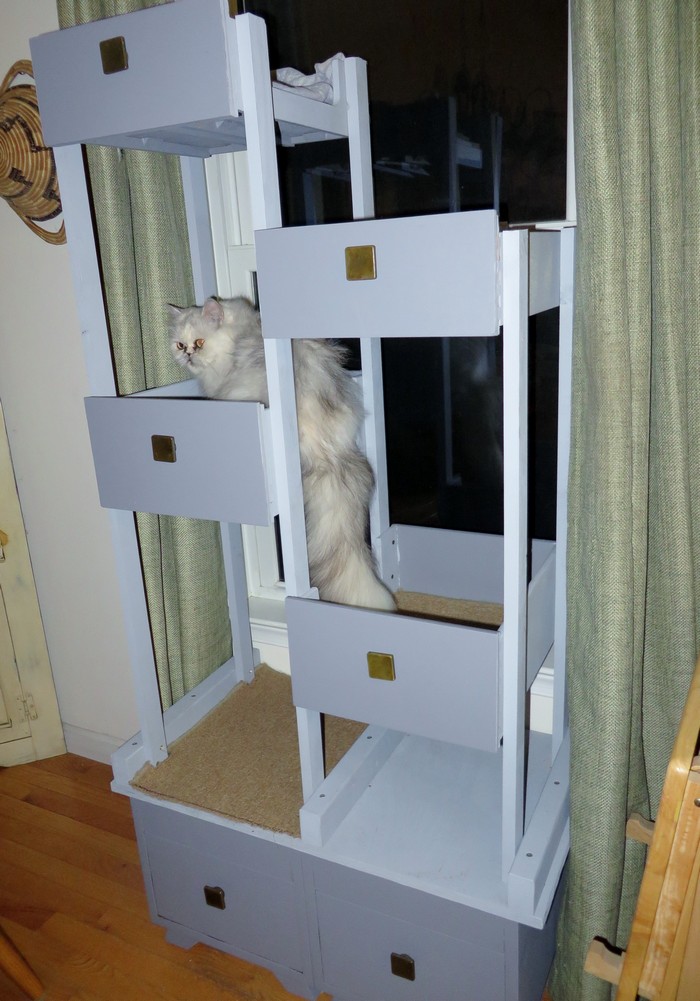
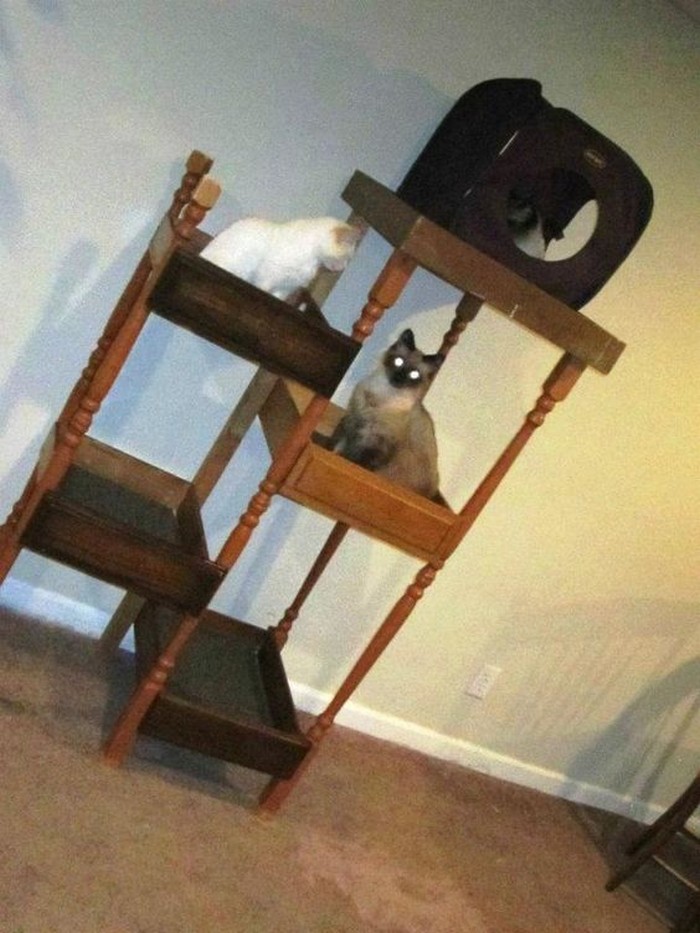
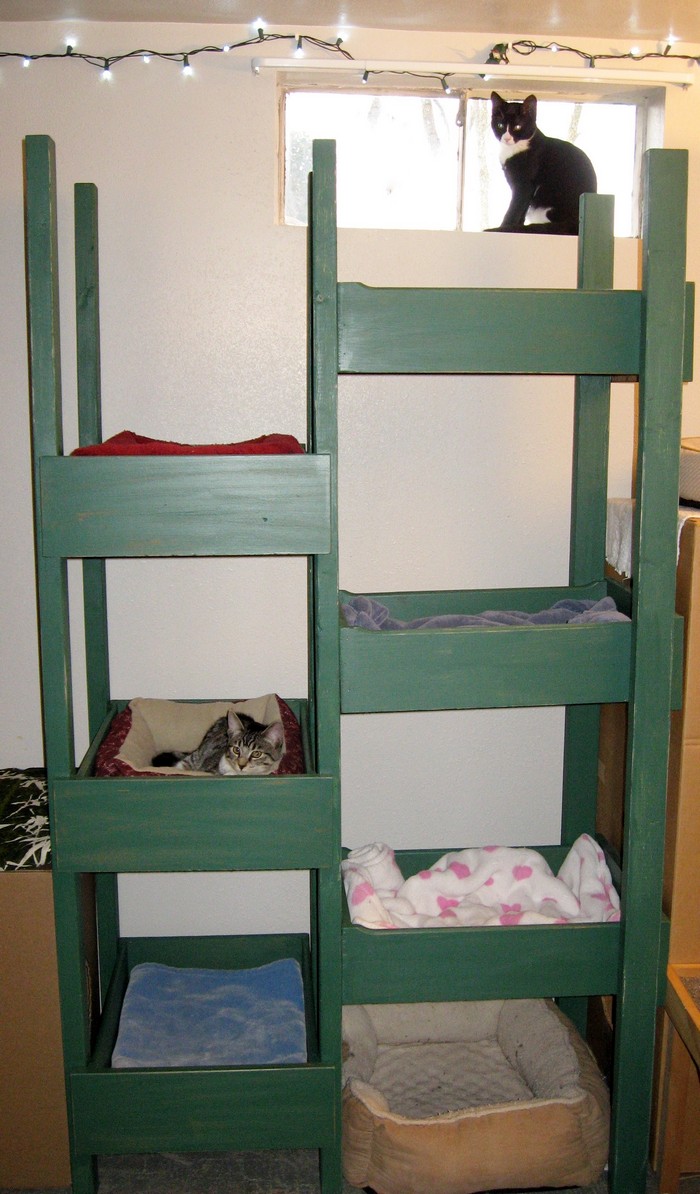
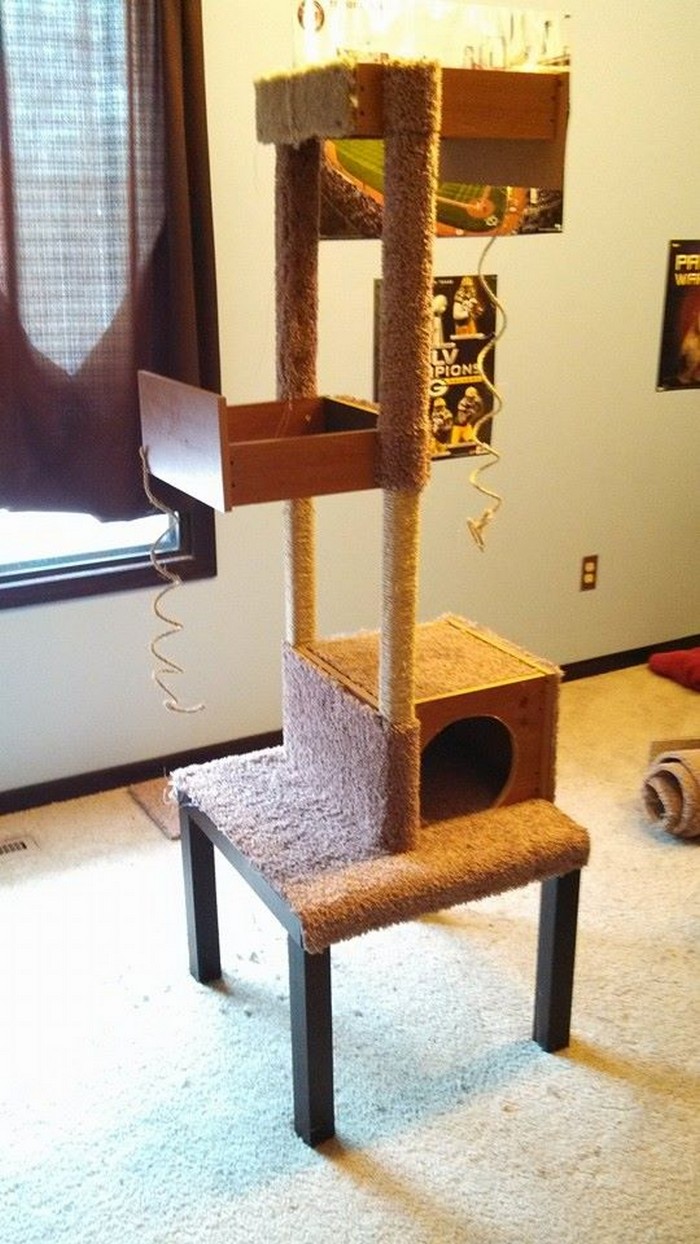
All you need is some basic carpentry skills and some sturdy materials, and you’ll be well on your way to creating a cat tree that your feline friend will love. You can even use old drawers to make your DIY cat tree! It’s simple, fast, easy and clever!

DIY Cat Tree

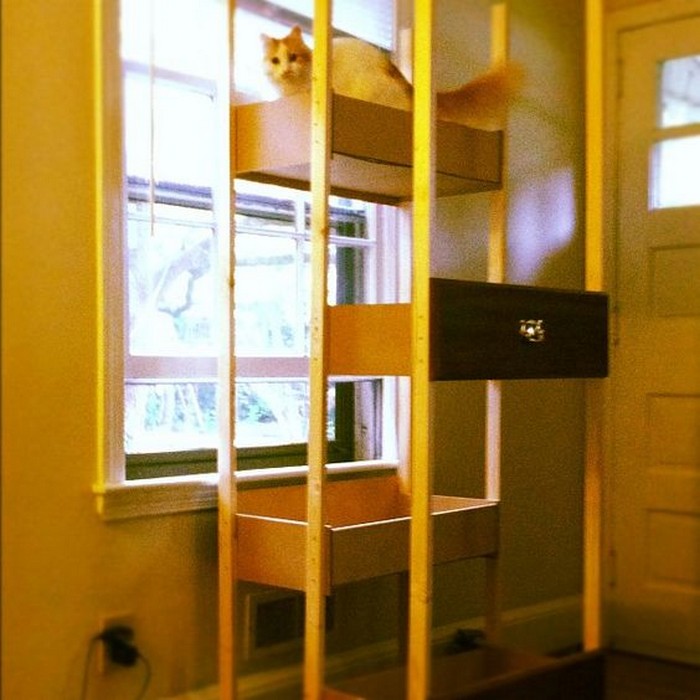
There are plenty of old drawers out there – from your local thrift stores, garage sales, or even just from the streets! You can get as many as you want to make your cat tower as tall as you want, without having to spend a lot. You can also use other reclaimed materials such as table legs to save even more money. With a little bit of creativity, you can easily turn these old drawers into a fun and functional cat tower that your feline friend will love!

When it comes to finding an inexpensive cat tower solution, we love that this idea is also very unique. There is no specific step-by-step process, no single set of measurements, and no particular finished product. When it comes to building a cat tower, the sky is the limit!

You can attach the drawers directly to your walls for a sleek and modern look, or create a platform using the drawers and some upcycled timber as legs for a more rustic aesthetic. No matter what style you choose, your kitty is sure to love its new perch.

This allows everyone to customize their own cat tower to fit their home and their cat’s specific needs. Plus, it’s a fun project to take on and it’s always satisfying to see your cat enjoy the fruits of your labour!

If you’re on the hunt for some cat tree inspiration, look no further than our handy album below. Whether your cat needs a place to perch, scratch or simply lounge, a cat tree is a great addition to any home. So, what are you waiting for? Start browsing and find the perfect cat tree for your feline friend!

Crafting Your DIY Cat Tree

You’ll need these materials:

  • Old Drawers
  • Plywood
  • Timber Posts
  • Manilla Rope
  • Carpet
  • Wood Glue
  • Paint (optional)

And these tools:

  • Measuring Tape
  • Nail Gun
  • Drill
  • Saw

Steps:

Step 1: Plan Your Cat Tree Design

Before you start cutting or assembling anything, sketch out your design. Decide how tall you want the tree, how many levels it will have, and where you’ll position the drawers and platforms. Take your cat’s size and habits into account. Do they love high perches? Hideouts? Scratching posts? Tailor the design to them.

Step 2: Gather and Prepare Your Drawers

Collect old drawers from thrift shops, garage sales, or leftovers from an old dresser. Inspect them for stability. Remove any hardware like handles or knobs. If the drawers are rough or chipped, sand them lightly to smooth the edges. You can also paint them at this point if you prefer a cleaner look.

Step 3: Cut the Timber Posts and Plywood

Using your saw, cut the timber posts to the height you want for the vertical supports. These will connect the different levels of your cat tree.

Cut the plywood into base and platform shapes. The base should be wide and sturdy enough to support the entire structure without tipping over. A good rule is to make it twice as wide as the tallest point of the tree.

Step 4: Wrap Timber Posts with Manilla Rope

Take the manilla rope and wrap it tightly around the timber posts. This will turn them into scratching posts. Apply wood glue to the post as you wrap to keep the rope secure. Make sure the rope is tight with no gaps. Once fully wrapped, secure the end with more glue and press it firmly.

Step 5: Assemble the Base

Attach the plywood base to the bottom of your first timber post using a drill and screws. This will act as the foundation of your cat tree. Make sure it’s stable and level before moving on.

Step 6: Build the Levels

Drill holes through the bottom of each drawer to attach them to the timber posts. Start with the bottom drawer and work your way up, stacking and securing them as you go.

If you prefer platforms between drawers, screw plywood platforms directly to the posts at your desired heights. You can also add extra stability by using a nail gun to fasten the sides.

Step 7: Add Carpet for Comfort

Cut pieces of carpet to fit inside each drawer and on the platforms. You can also wrap some of the outer surfaces in carpet if your cat likes to scratch horizontal areas. Use wood glue to secure the carpet in place and allow it to dry completely.

Step 8: Paint and Finishing Touches (Optional)

If you want to paint the exterior of the drawers or the plywood base, now’s the time. Use non-toxic, pet-safe paint. Let it dry thoroughly before letting your cat explore.

You can also attach toys, add a hammock, or hang a rope from the top level for extra fun.

Step 9: Check Stability and Safety

Once everything is assembled, give the cat tree a gentle shake to make sure it’s stable. Tighten any screws or nails as needed. Check for sharp edges or loose parts and fix them before introducing your cat to their new playground.

Step 10: Let Your Cat Explore!

Place the cat tree in a spot your cat likes to hang out. Add some treats or catnip to encourage them to climb and explore. Sit back and enjoy watching them enjoy their new DIY cat tree.

Why DIY Cat Trees Are Better Than Store-Bought

Cat trees are more than just pet furniture. They give your cat a place to climb, scratch, and relax. While there are plenty of store-bought options available, building your own DIY cat tree offers several advantages that are hard to beat. Here’s why making one yourself is often the better choice.

Customized for Your Cat’s Needs

Every cat is different. Some love to climb as high as possible, while others prefer cozy hideouts. Store-bought cat trees follow a one-size-fits-all approach, which may not suit your cat’s personality. A DIY cat tree lets you customize every feature. You can build platforms at the heights your cat prefers or add special features like hammocks, tunnels, or ramps. You’re in control of the design, ensuring it fits your cat’s habits perfectly.

Saves You Money

Cat trees at pet stores can be expensive, especially for larger or more complex designs. Making your own costs much less. You can reuse old drawers, scrap wood, or leftover carpet. Thrift shops and garage sales are great places to find cheap materials. With a little creativity and effort, you can build a sturdy, attractive cat tree without breaking the bank.

Better Quality and Durability

Many store-bought cat trees are made with low-cost materials like particle board or cardboard. Over time, they can become unstable, especially if your cat is active or larger in size. DIY cat trees give you the opportunity to use solid wood and high-quality materials. This makes the structure stronger and more durable, ensuring it lasts for years.

Fits Your Home Decor

Let’s face it—some commercial cat trees aren’t exactly stylish. They can be bulky, mismatched, or clash with your home’s decor. When you build your own, you can choose colors, finishes, and designs that blend seamlessly into your living space. Whether you prefer modern minimalism or a rustic look, your DIY cat tree can complement your home.

Eco-Friendly and Sustainable

Repurposing old furniture like drawers or shelves keeps them out of landfills. You can also use sustainable materials and avoid the plastics and synthetic fabrics commonly found in commercial cat trees. Building your own cat tree is a great way to reduce waste and make an eco-conscious choice.

A Fun and Rewarding Project

There’s something satisfying about building something with your own hands. DIY cat trees are simple projects that don’t require advanced carpentry skills. It’s a fun activity that you can do over a weekend, and you’ll get a sense of accomplishment when you see your cat enjoying it. Plus, if you enjoy DIY projects, this is another chance to get creative and try new techniques.

A DIY cat tree isn’t just a fun project. It’s an opportunity to create something special for your pet—something they’ll enjoy and use every day.

Upcycled DIY Cat Tree Gallery

Click on any image to start the lightbox display. Use your Esc key to close the lightbox. 8-)

Choosing the Best Materials for DIY Cat Trees

Building a DIY cat tree starts with picking the right materials. Good choices ensure your cat’s safety, comfort, and enjoyment. They also make your project sturdier and longer-lasting. Here’s what you need to consider when selecting materials for your homemade cat tree.

Solid Wood for Strength and Stability

The frame of your cat tree should be built with solid wood. Avoid particle board or MDF, as these materials can weaken over time, especially under your cat’s weight. Plywood is a good choice for platforms because it’s strong and doesn’t warp easily. For vertical supports, use timber posts or thick wooden dowels. Solid wood provides a stable structure that won’t tip or wobble, even with active climbers.

Plywood for Platforms and Shelves

Plywood is versatile and affordable. It works well for shelves, steps, or platforms where your cat will sit or lie down. Look for at least ½-inch thick plywood to ensure strength. If you plan to paint or cover the plywood with carpet, sand the edges first to prevent splinters.

Manila Rope for Scratching Posts

Cats love to scratch, so wrapping your vertical posts in rope adds an important feature. Natural manila rope is the best choice. It’s sturdy, safe, and has the rough texture cats enjoy. Avoid synthetic ropes or dyed materials, which can contain harmful chemicals. Secure the rope tightly with wood glue as you wrap it around the post to keep it in place.

Carpet for Comfort and Traction

Adding carpet makes the tree more comfortable for your cat to climb and rest on. Use low-pile carpet instead of thick or shaggy styles, which are harder for cats to grip. Stick with natural fiber carpets if possible and avoid anything with rubber backing. You can glue or staple the carpet to platforms, inside cubbies, or on ramps.

Wood Glue and Fasteners for Secure Assembly

Use high-quality wood glue to secure pieces together before adding nails or screws. This gives your structure extra strength. Make sure all nails and screws are driven in deep, with no sharp ends exposed. A nail gun is handy for quick assembly, but a drill and screws will work just as well.

Non-Toxic Paints and Finishes (Optional)

If you want to paint your cat tree or give it a finish, choose non-toxic, pet-safe products. Water-based paints or sealers are safer than oil-based versions. Allow everything to dry completely before letting your cat explore.

Recycled and Upcycled Materials

Don’t overlook salvaged or second-hand materials. Old drawers, ladders, wooden crates, and pallets can all be turned into platforms, cubbies, or supports. As long as they’re sturdy and in good condition, these materials are a great way to save money and reduce waste.

By choosing the right materials, you’ll create a cat tree that’s safe, durable, and fun. Your cat will appreciate the sturdy platforms, scratching areas, and cozy spaces, and you’ll enjoy knowing it’s built to last.

Designing a DIY Cat Tree for Small Spaces

Living in a small home or apartment doesn’t mean your cat has to miss out on a fun and functional cat tree. With thoughtful design and smart use of space, you can create a DIY cat tree that fits your home and keeps your feline happy. Here’s how to design a cat tree that works in tight spaces.

Go Vertical Instead of Horizontal

When floor space is limited, focus on height. Cats naturally love climbing, so a tall, narrow cat tree can satisfy their instincts without taking up much room. Stack old drawers or plywood platforms vertically, using timber posts to connect them. Make sure the base is wide enough to keep the tree stable, even if it’s tall.

Use Wall-Mounted Perches and Steps

Wall-mounted cat trees are perfect for small spaces. You can attach old drawers or plywood shelves directly to the wall, creating a climbing route that doesn’t use any floor space. Install shelves at varying heights to give your cat options for jumping, climbing, and lounging. Just be sure to secure each platform with strong brackets and anchors.

Choose Multi-Functional Designs

Combine your cat tree with other pieces of furniture. For example, build a cat tree that doubles as a bookshelf, end table, or storage unit. Old drawers can become both storage bins and cozy cat cubbies. This saves space while giving your cat new places to explore.

Opt for Sleek, Minimalist Styles

A streamlined design makes the cat tree less bulky and easier to fit into a small room. Use clean lines, simple shapes, and neutral colors to create a cat tree that blends in with your home décor. Open-sided platforms and minimal framing also reduce the visual footprint, making the space feel less cluttered.

Add Hammocks and Hanging Beds

Hammocks are a great space-saving feature. You can stretch them between posts on your cat tree or hang them under shelves. They give your cat a comfy place to nap without adding bulk. Fabric hammocks are easy to make and can be customized to fit any design.

Use Corner Spaces Wisely

Corners are often underused areas in a room. Build your cat tree to fit snugly in a corner, using triangular platforms or arranging drawers to create a climbing path up the wall. A corner tree can go higher without taking up valuable living space.

Foldable or Modular Cat Trees

If you need flexibility, design a foldable or modular cat tree. Use lightweight materials and hinges to make platforms that fold flat when not in use. Or create modular pieces that can be stacked, rearranged, or stored away depending on your needs.

Prioritize Safety in Small Spaces

In tight spaces, stability is key. Make sure your cat tree has a wide, sturdy base or is securely anchored to the wall. Use non-slip materials on platforms and check for sharp edges. The tree should be strong enough to handle climbing and jumping without tipping or wobbling.

A well-designed DIY cat tree for small spaces doesn’t have to compromise on fun or functionality. With a little planning, you can create an enriching space for your cat that fits perfectly in your home.

Conclusion

A unique and reasonably priced approach to provide your cat with a fun, useful environment is building a DIY cat tree out of used furniture. It lets you repurpose items, personalize the style, and create something strong and distinctive for your house. Best of all, your cat has somewhere safe and cozy to climb, scratch, and lounge.

We have more fun projects for your feline friend. Check out our cat rope bridge guide next!

YOU MIGHT ALSO LIKE

|

Search All Projects:

Your details will never be shared with any third party. Unsubscribe at any time with a single click.

The posts on this site sometimes contain an affiliate link or links to Amazon or other marketplaces. An affiliate link means that this business may earn advertising or referral fees if you make a purchase through those links.