Last Updated on July 22, 2024 by teamobn
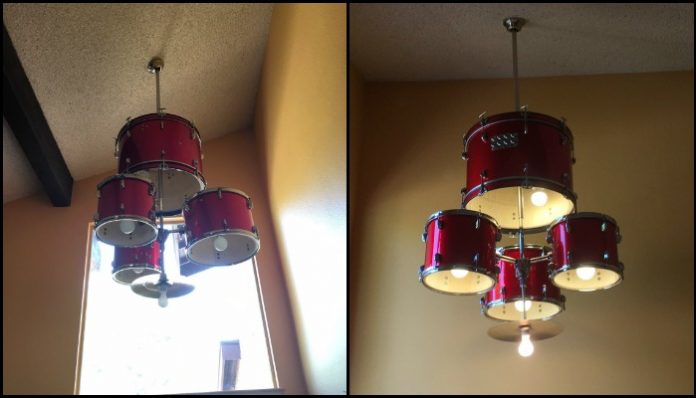
Chandeliers are more than just a source of light or a decorative element in a room. They can also be a symbol of luxury, status, and wealth. In the past, chandeliers were often only found in the homes of the wealthy and powerful. Today, chandeliers are available in a wide range of styles and price points, making them accessible to a wider range of people.
Chandeliers can add a touch of elegance and sophistication to any room. They are also a great way to make a statement and add visual interest. When selecting a chandelier, it is essential to consider the size, shape, and style that will best suit the space.
Got an old drum set that’s only collecting dust at home? Then why not give it a new purpose by turning it into a terrific drum set chandelier? This project is relatively simple and only requires a few tools and materials that can be easily sourced. Plus, it’s a great way to upcycle an old piece of furniture and add some unique flair to your home. So why not give it a try?
This drum set chandelier project is perfect for musicians or music lovers who want to add a touch of music to their home décor. These old instruments or musical equipment create one-of-a-kind light fixtures that will add personality to any room.
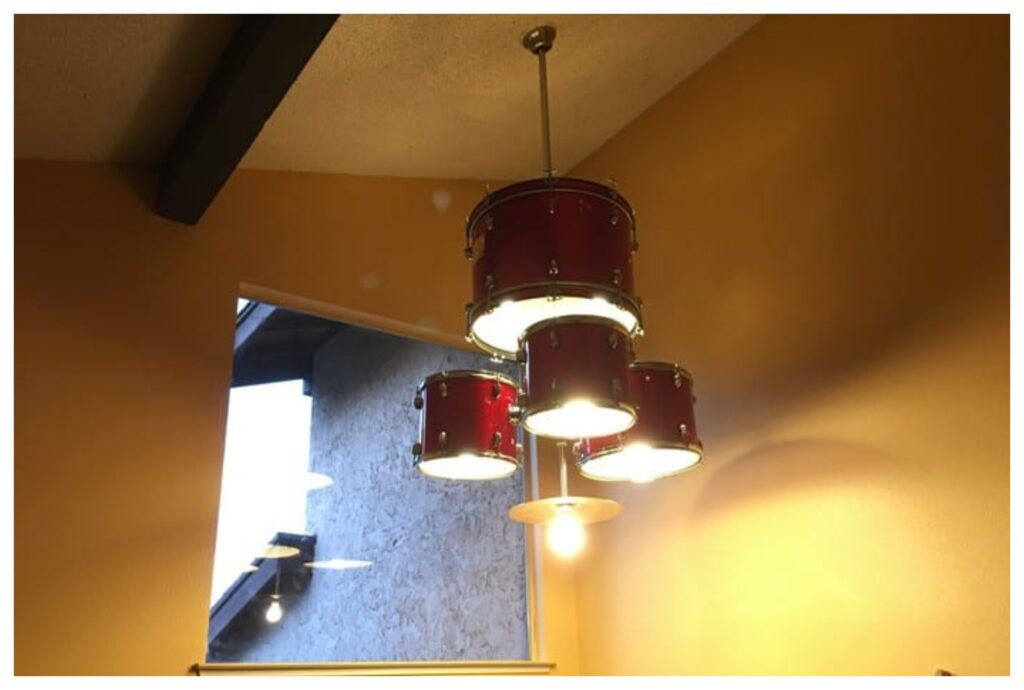
Not only is this project a great way to repurpose old items, but it’s also a fun way to personalize your space. You can get as creative as you want with your design, and you’ll end up with a light fixture that truly reflects your taste.
So if you’re ready to get started, gather up your old drum set!
This drum set chandelier is made using a full-size drum kit. But it’s one of the cheaper brands, so weight was not an issue. It’s as heavy as the ceiling fan it replaced, hence the owner-builder was able to use the existing mount for installing his new DIY chandelier! Here’s a tip: check Craiglist or GumTree for junior drum kits if you are concerned about the weight of full-sized equipment.
There are many ways to turn an old drum kit into a chandelier. It would depend on the materials that are available to you and how creative you want to be. You could use the cymbals as the base for the chandelier, or you could use the drums themselves.
You could even use the drumsticks as part of the design. It’s really up to you and how you want to repurpose the old drum kit. With a little bit of creativity, you can turn an old drum kit into a beautiful and unique chandelier.
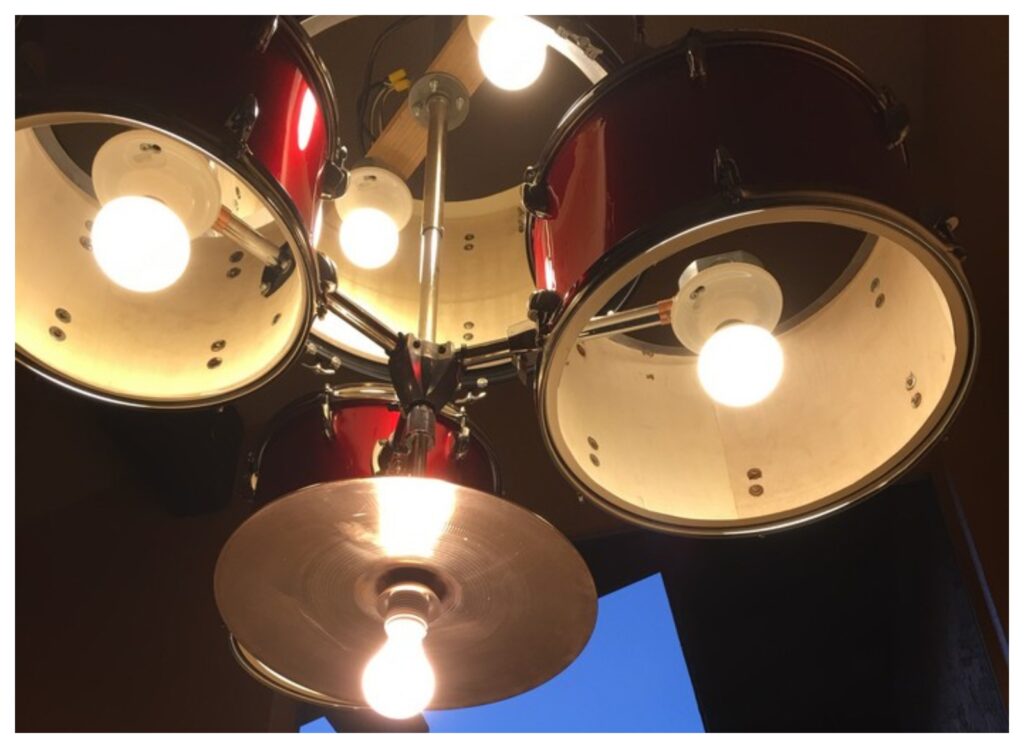
When planning a DIY drum set chandelier, you’ll need to take the final weight into account. Depending on the materials you use, your chandelier could end up being quite heavy. Make sure you have a sturdy ceiling mount that can support the weight of your chandelier.
If you want to know further details of this project, you can learn how from the DIY-er who built this drum set chandelier by heading over to the link provided below.
Well, what do you think of this creative idea?
Contents
Building a Drum Set Chandelier
Materials
- Old Drum Set
- LEB Bulbs
- Metal Microphone Stand Base
- 1×3 Timber
- Ceiling Fan Mount
- Pipe Flanges
- L-Brackets
- Electrical Boxes
- Plumbing Fittings
- Screws
Tools
- Measuring Tape
- Cordless Drill
- Saw
Instructions
Step 1: Design Your Chandelier
- Start by visualizing and sketching your chandelier design. Decide how many drums and other parts of the set you want to include. This will help determine the structure and size of the chandelier.
Step 2: Prepare the Ceiling Mount
- Use the ceiling fan mount as your base. Ensure it is securely attached to a ceiling beam for support. This mount will need to hold the weight of the drum set, so reinforcement may be necessary.
Step 3: Assemble the Frame
- Cut the 1×3 timber to create a frame that fits the contour of your design. This frame will serve as the primary support, holding the drums in place.
- Attach pipe flanges to the timber at positions corresponding to each drum’s placement.
Step 4: Install the Drums
- Attach each drum to a flange using screws. If necessary, modify the drums by drilling holes to fit the flanges.
- Position the drums according to your initial design, using L-brackets for additional support if needed.
Step 5: Prepare Electrical Components
- Fit each drum with an electrical box. These will house the wiring for the LED bulbs.
- If your design includes the use of cymbals or other parts of the drum set, consider how they might integrate into the lighting structure, possibly as shades or reflectors for the lights.
Step 6: Install Lighting
- Install LED bulbs in appropriate fittings within each drum. Ensure that the bulbs are securely fixed and that the wiring is safely connected.
- Run wiring through the plumbing fittings to keep it neat and organized, ensuring all connections are secure and meet local electrical codes.
Step 7: Incorporate the Microphone Stand Base
- Use the metal microphone stand base as either the central support column or as a unique decorative element within the chandelier. Its placement will depend on your specific design.
Step 8: Final Assembly
- Once all elements are securely attached and the electrical components are properly installed, raise the chandelier frame to the ceiling mount.
- Secure the entire assembly to the ceiling mount, ensuring all connections are tight and safe.
Step 9: Testing
- Once the chandelier is fully assembled and mounted, connect it to the power source and test all the lights to ensure they work correctly.
Step 10: Finishing Touches
- Make any necessary adjustments to the alignment or distribution of the lights.
- You can also paint or decorate the chandelier frame and drums to match your room’s decor.
Click on any image to start the lightbox display. Use your Esc key to close the lightbox. ![]()
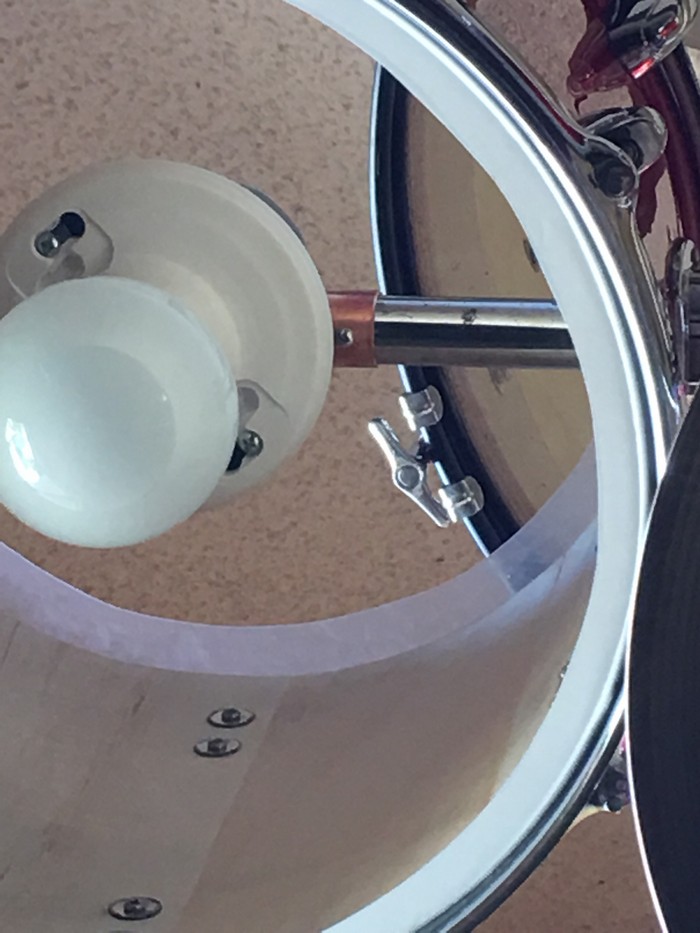
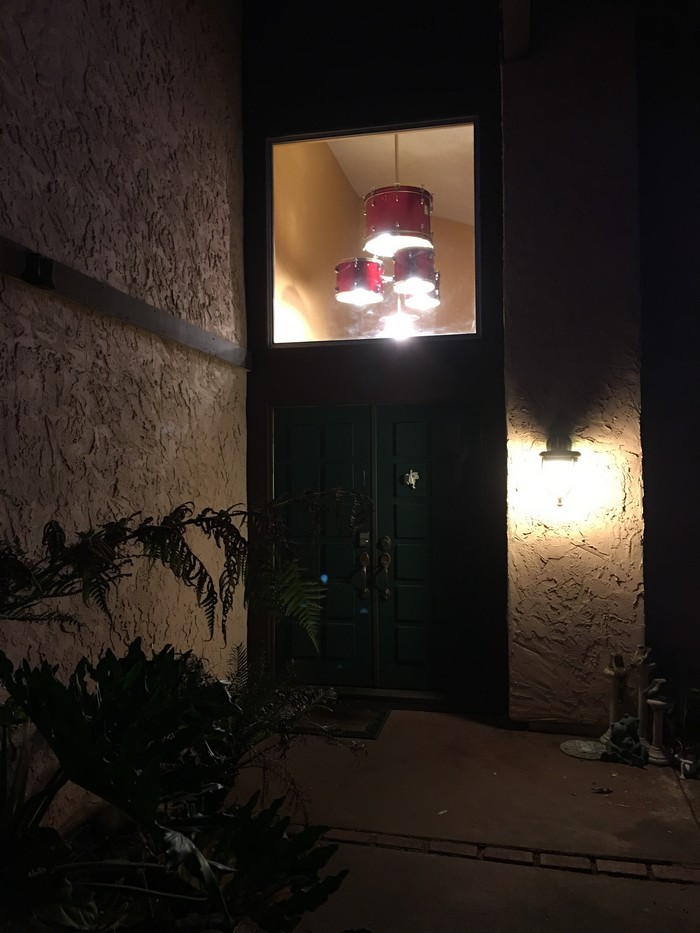
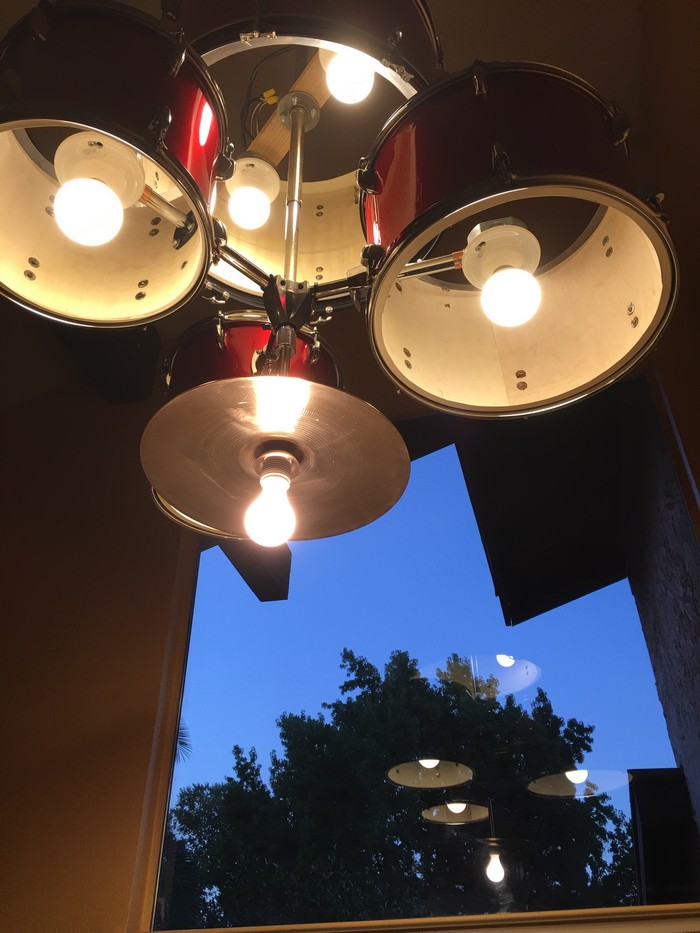
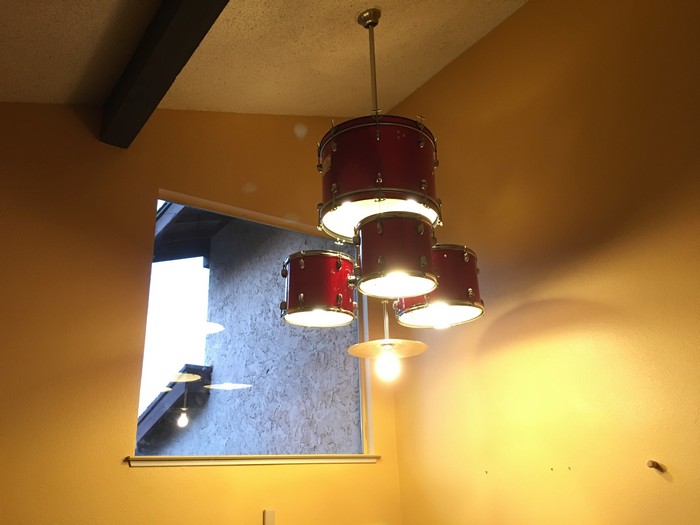
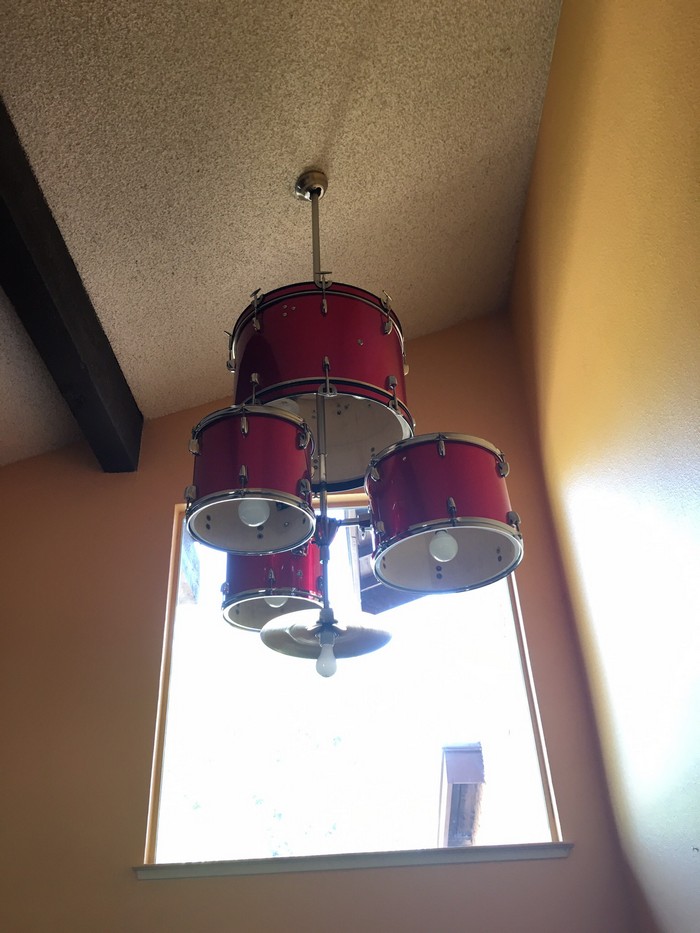
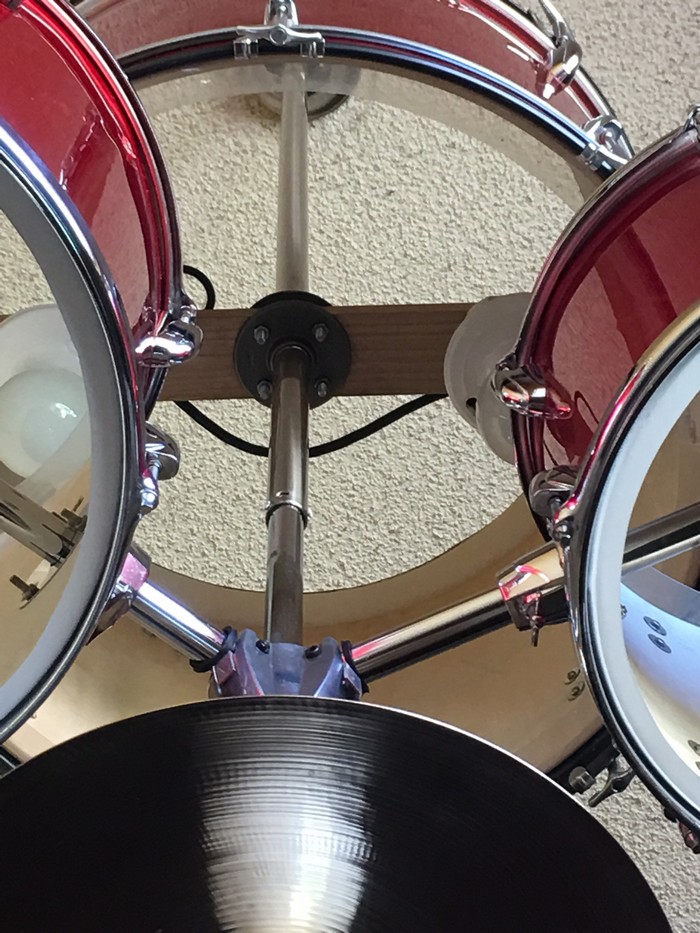
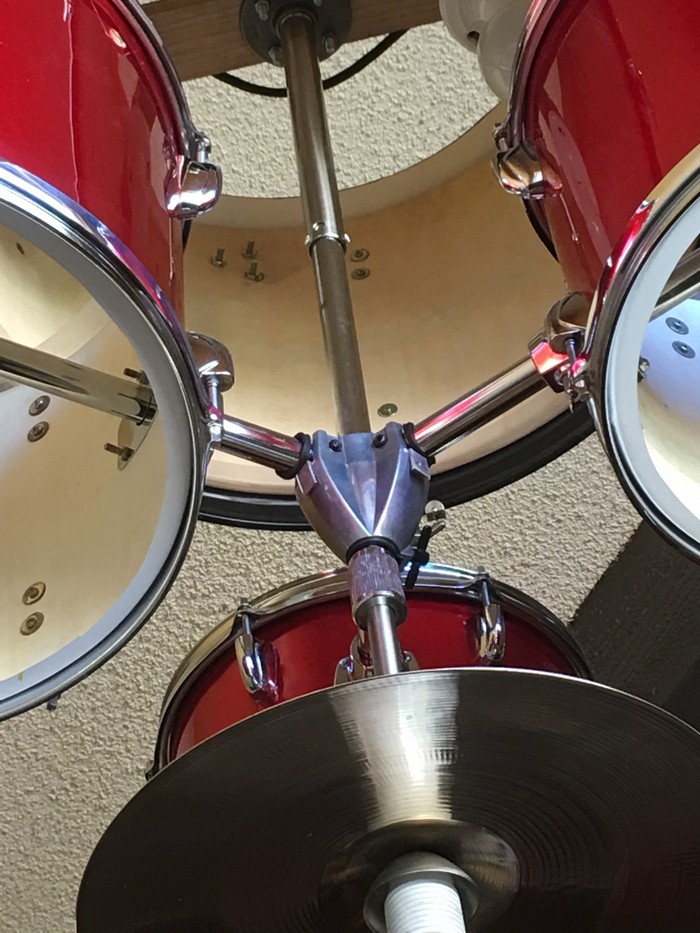
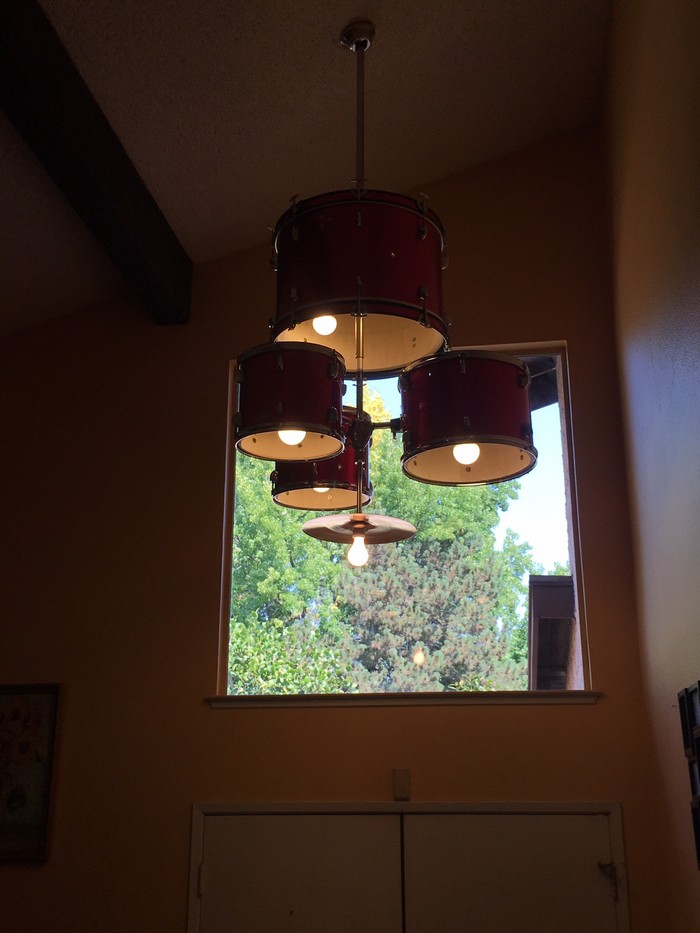
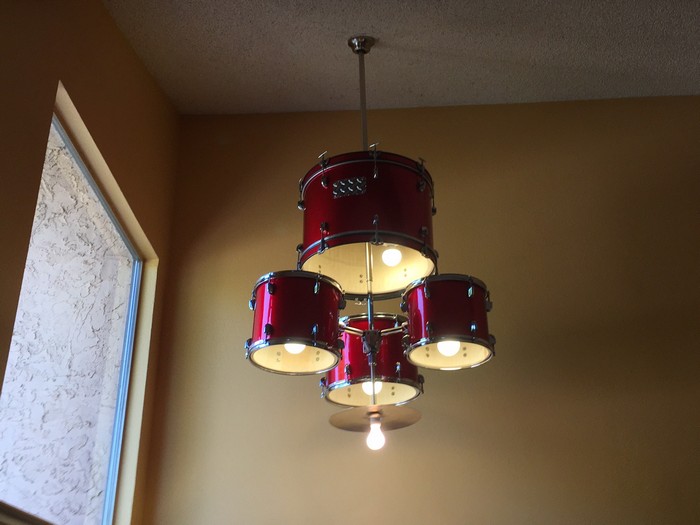
You can get more step-by-step instructions from icabod over at Instructables!
Lighting Options and Effects
Creating a drum set chandelier is a unique way to incorporate your love of music into your home décor. The lighting options and effects you choose can dramatically alter the ambiance of a room, making your chandelier not just a decorative piece but a functional element of your living space. Here’s how you can explore various lighting possibilities to enhance your drum set chandelier.
Choose the Right Bulbs
For your drum set chandelier, the type of bulbs you select will influence both the intensity and the color of the light. LED bulbs are ideal due to their long lifespan and energy efficiency. You can opt for dimmable LEDs if you want the ability to adjust the brightness according to the time of day or the mood you wish to create.
Color Temperature and Effects
The color temperature of the bulbs can affect the atmosphere of the room. Warm white bulbs typically create a cozy and inviting environment, ideal for living rooms or dining areas. For a drum set chandelier in a more creative space, such as a music room or studio, cooler white bulbs may enhance the room’s modern feel. Color-changing LEDs can also be used to add a playful and dynamic element to the chandelier.
Strategic Bulb Placement
In a drum set chandelier, the placement of bulbs within each drum can create different lighting effects. Placing bulbs in the center of drums will illuminate the drum skins, highlighting their textures and colors. Alternatively, positioning lights around the perimeter of each drum can cast interesting shadows and create a halo effect, which can be particularly dramatic.
Use of Reflective Materials
Consider using reflective materials inside the drums to enhance the lighting effect of your drum set chandelier. Metallic paints or mirrored surfaces can reflect light and brighten the room more effectively. This technique not only increases the light output but also adds an element of visual interest to the chandelier.
Incorporating Additional Light Features
Adding auxiliary light features can elevate your drum set chandelier’s functionality and aesthetic appeal. For example, installing small spotlights on the chandelier frame can direct light to specific areas of the room, perfect for highlighting artwork or architectural features. Additionally, using fiber optic lights within the drumsticks or cymbals can introduce an element of surprise and creativity to the design.
Each of these lighting options and effects can be tailored to complement the overall design of your drum set chandelier, ensuring it not only serves as a focal point but also enhances the ambiance of your space. Experimenting with different configurations will help you create a truly unique and personal lighting installation.
Conclusion
Creating a drum set chandelier is a rewarding project that merges creativity with functionality, transforming unused musical instruments into a stunning centerpiece. This DIY endeavor allows you to customize lighting effects and incorporate personal touches, making the chandelier a true reflection of your style. As you undertake this project, consider the space and design carefully to ensure the chandelier enhances the ambiance of your room. Ultimately, a drum set chandelier serves not just as a source of light but as a statement piece that celebrates your love for music in a unique and visible way.

