Last Updated on January 31, 2025 by teamobn
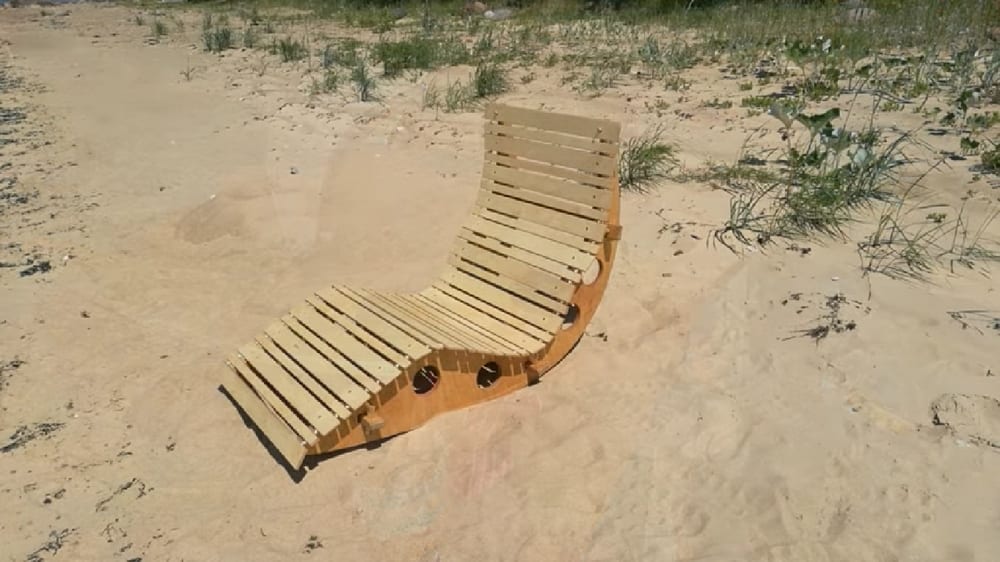
This DIY garden rocking chair would make a great, relaxing addition to any garden.
The rocking chair is a classic piece of furniture that has been around for centuries. It is a popular choice for gardens due to its ability to provide a comfortable seating option while also adding a touch of style to the space. Rocking chairs are typically made from wood, which makes them durable and easy to care for.
When choosing a rocking chair for your garden, it is important to consider the overall style of your space. If you have a more traditional garden, then a classic wooden rocking chair would be a good choice. For a more modern garden, there are many options available in terms of materials and styles. You can even find rocking chairs that come equipped with built-in speakers, which are perfect for enjoying a relaxing garden party.
When my mother-in-law came to stay with us for two months, we wanted to give her something special. She’s in her early seventies and is such a voracious reader. She loves staying outdoors, surrounded by greenery. So we thought, why not combine the two – a DIY garden rocking chair?
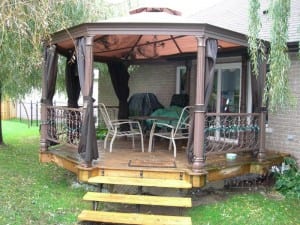
My husband decided to give her her own spot in the garden. She deserves a place where she can relax and immerse herself in one of her many books. It’s a tranquil spot, away from the hustle and bustle of everyday life. It’s a place where she can go to escape and read.
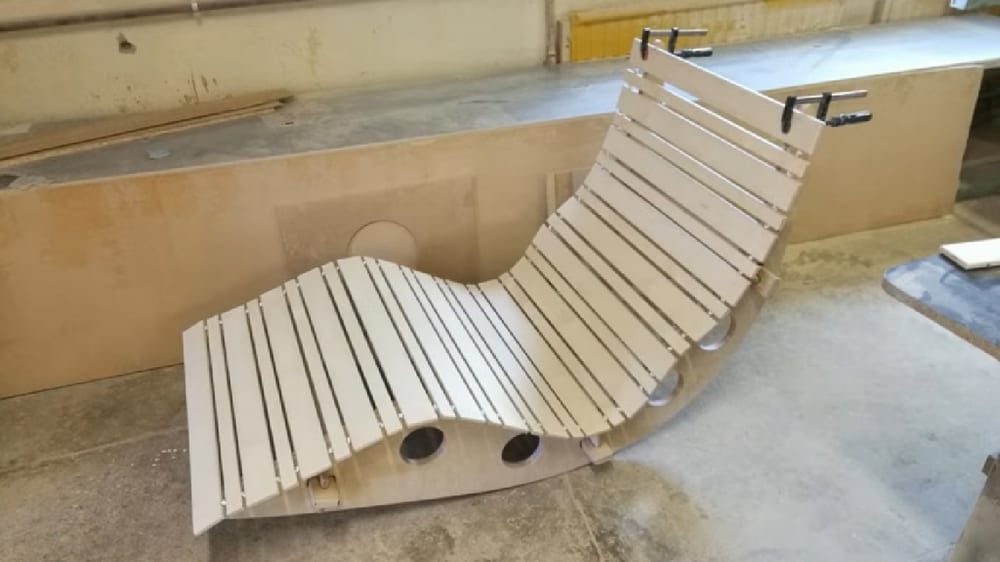
My husband and I were looking for a project that would be not-so-complicated yet still worthwhile to build. We found a garden rocking chair project that fit our needs perfectly. The project was simple enough that we were able to complete it within a few hours. The end result was a beautiful, sturdy garden rocking chair that we can give to my mother-in-law to enjoy for years to come.
We are so pleased with how this project turned out, t met all of our expectations and would recommend it to anyone looking for a fun, easy build. The instructions were easy to follow and the overall look and feel of the product exceeded our expectations.
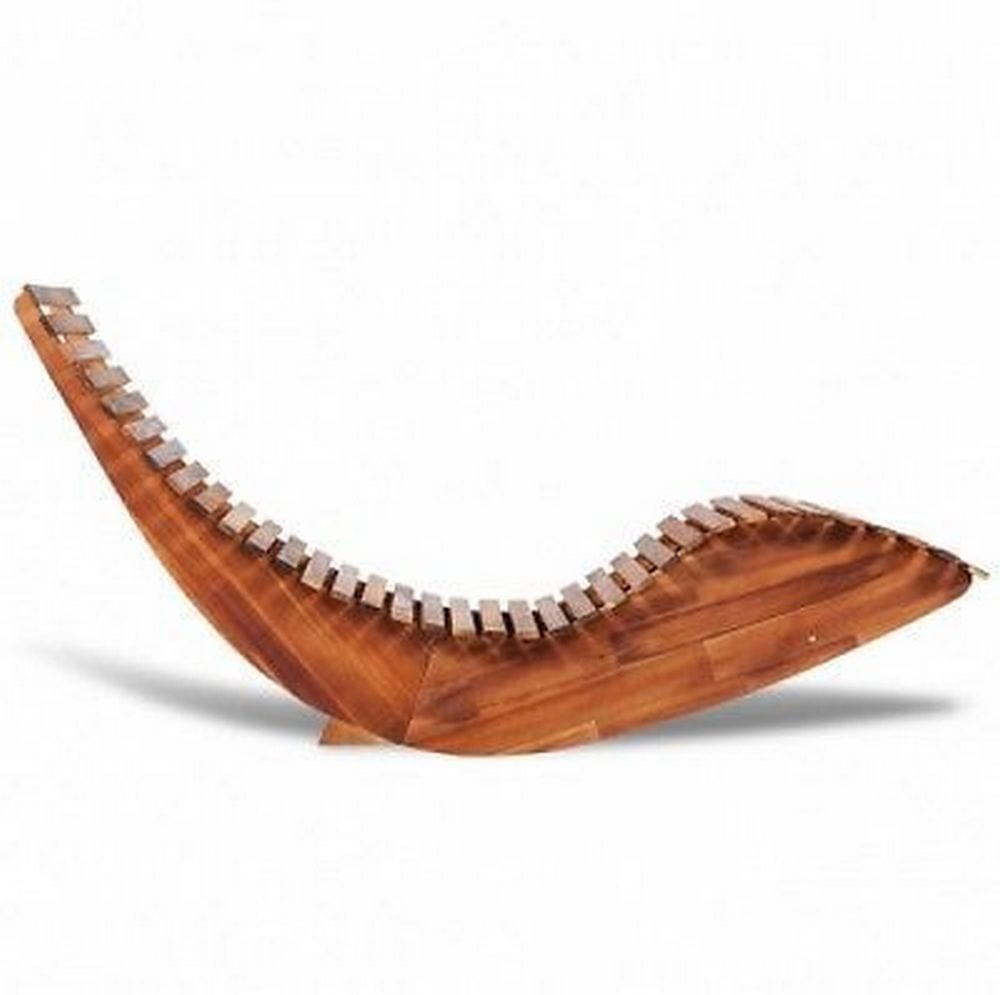
If you’re looking for a great project that’s totally worth your while, this garden rocking chair is highly recommended. My mother-in-law absolutely loved it. It’s comfortable to sit on she’d be in it for the most part of the day. She spent many hours in it reading, enjoying the outdoors, and spending time with family. This chair was a great addition to the garden and provided her with years of enjoyment.
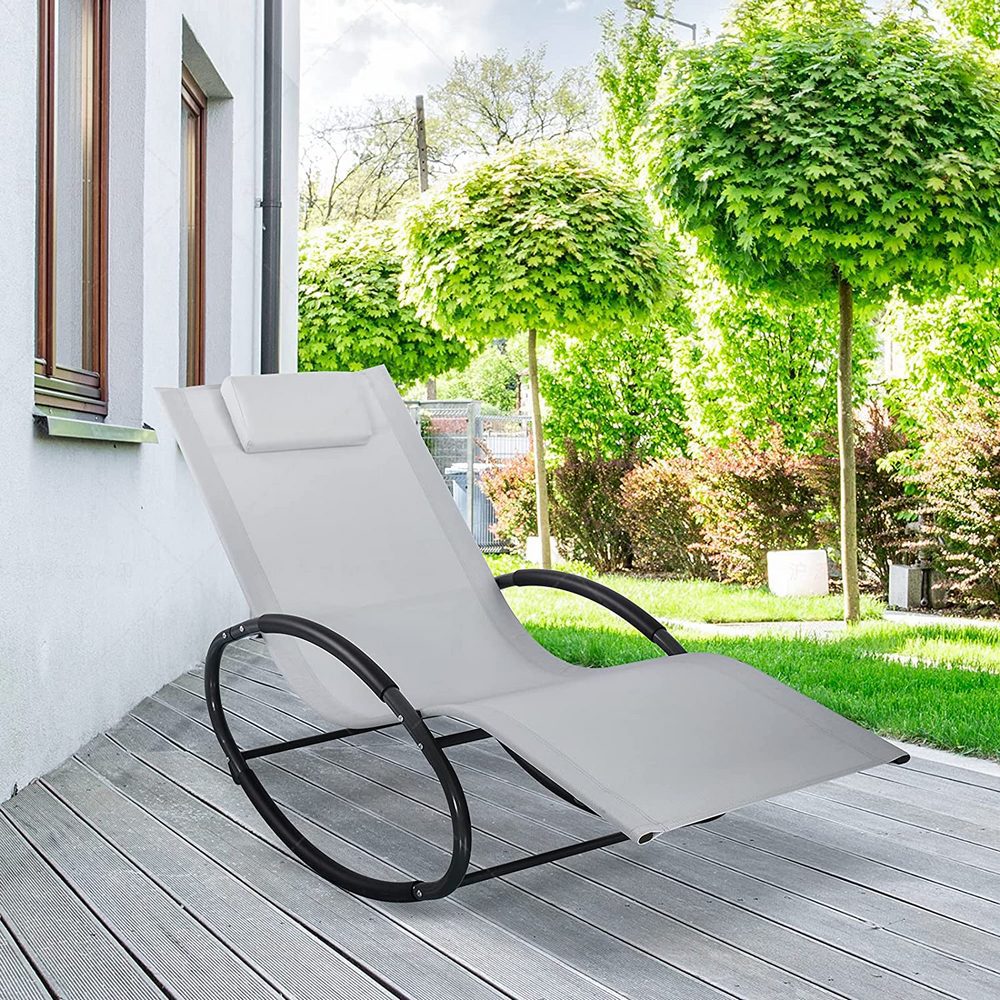
If you need inspiration for other versions of this garden rocking chair project, you can check our gallery. We have prepared some designs that will sure to fits your style.
Contents
Building a Garden Rocking Chair
Materials:
- Plywood
- Planks
- Aluminium lath
- Linseed oil
Tools:
- Jigsaw
- Marker
- Cutter
- Belt sander
- Plunge router
- Clamps
- Electric drill with a drill bit
- Paintbrush
Steps:
Step 1: Gather Materials and Tools
Before starting, ensure you have all the necessary materials and tools. Choose weather-resistant wood like cedar or treated pine for durability.
Step 2: Plan and Mark the Design
- Sketch the chair design on paper with precise dimensions. A standard rocking chair seat is about 18 inches high and 20 inches deep.
- Mark the outline of the seat, backrest, and rockers on the plywood and planks using a marker.
Step 3: Cut the Chair Parts
- Use a jigsaw to cut out the rockers from the plywood. The curve should be smooth to allow steady rocking.
- Cut planks for the seat, backrest, and armrests.
- Use a cutter to trim any excess or rough edges.
Step 4: Shape and Smooth the Wood
- Use a belt sander to smooth out all the wooden pieces. This prevents splinters and improves the finish.
- Use a plunge router to round the edges for a more polished look.
Step 5: Assemble the Rocking Base
- Attach the rockers (curved plywood pieces) to the legs using an electric drill. Ensure they are level and balanced.
- Secure with screws and clamps while drilling to maintain stability.
Step 6: Attach the Seat and Backrest
- Fix the seat planks onto the rocking base, ensuring a slight backward tilt for comfort.
- Attach the backrest planks at a comfortable recline angle.
- Secure all joints with screws, using clamps to hold pieces together while drilling.
Step 7: Add Armrests and Reinforcements
- Install armrests by attaching planks to the seat frame.
- Reinforce the structure with aluminium lath under the seat to improve durability.
Step 8: Sand and Finish
- Smooth out the entire chair using a belt sander.
- Apply linseed oil using a paintbrush to protect the wood and enhance its natural grain.
- Let it dry for 24 hours before using the chair.
Step 9: Test and Enjoy
- Once dry, gently test the rocking motion on a flat surface.
- If everything is stable, place the chair in your garden and enjoy a relaxing time outdoors!
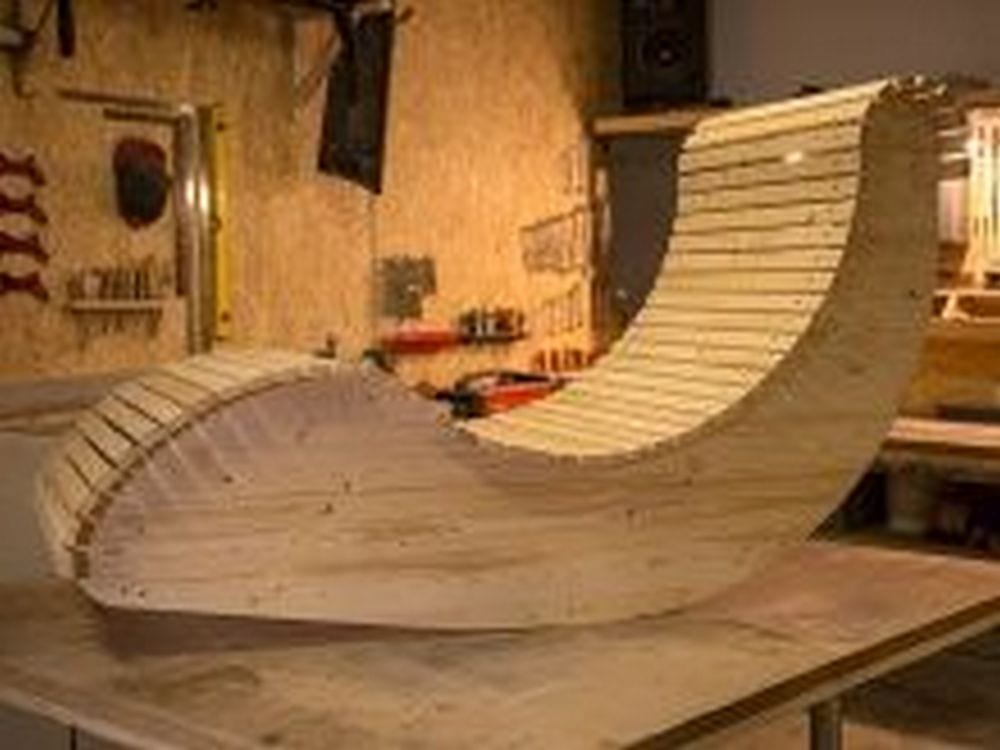
If you’re looking for a fun and unique project to add to your backyard this summer, look no further than this garden rocking chair tutorial! In just a few hours, you can build a comfortable and stylish chair that will provide hours of enjoyment for you and your family.
This project is perfect for beginner woodworkers, as it requires only basic tools and materials. But even if you’re a seasoned pro, we think you’ll find this project to be a fun and challenging change of pace. For a visual guide, check out the video below.
How to Choose the Best Wood for a DIY Garden Rocking Chair
A garden rocking chair needs to be both sturdy and weather-resistant. The right wood choice determines its durability, comfort, and overall look. Not all woods can withstand outdoor conditions, so selecting the right type ensures that your chair lasts for years. Whether you’re aiming for a rustic feel or a sleek modern design, understanding the qualities of different wood options will help you make the best decision.
Hardwoods vs. Softwoods
The first choice you need to make is between hardwood and softwood. Hardwoods like teak, oak, and mahogany are dense and durable, making them excellent for outdoor furniture. They resist moisture, insects, and decay better than most softwoods. Softwoods like pine and cedar are more affordable and easier to work with, but they require proper treatment to resist weathering. If longevity is your priority, hardwood is the best option. Softwood is a practical choice if you prefer a budget-friendly and lightweight material.
Teak: The Premium Choice
Teak is often regarded as the best wood for outdoor furniture. It naturally contains oils that repel water and prevent rot, making it ideal for a garden rocking chair. This wood is highly resistant to insects and does not warp or crack easily. Although teak is more expensive, it requires little maintenance and develops a beautiful silver-gray patina if left untreated. If you prefer to maintain its golden-brown color, applying teak oil periodically will keep it looking fresh.
Cedar: Lightweight and Naturally Resistant
Cedar is a great choice for those who want a lightweight but durable wood. It naturally resists moisture, decay, and insect damage, making it a solid option for outdoor use. Cedar is also easy to work with, which is ideal if you’re a beginner in woodworking. While it’s less dense than teak, regular sealing or staining helps maintain longevity. Its natural scent also acts as a bug repellent, an added benefit for outdoor furniture.
Oak: Strong and Classic
Oak is prized for both strength and exquisite grain pattern. Mainly, white oak is a great choice for outside furniture as it is rot- and moisture-resistant. Though it is heavier, it is more durable as is denser than cedar. Should you go with oak? Using a protective sealer will aid in increasing its lifetime? Conversely, red oak is better-suited for interior furniture and less resistant to outside conditions.
Pine: Affordable but Needs Protection
One of the most reasonably priced wood choices, pine appeals for do-it-yourself projects. It is a softwood, nevertheless, hence it does not naturally fight dampness or insects. Should you choose pine, you must either apply a weatherproof sealant or use pressure-treated wood to shield it from the outdoors. Pine lets you personalize the appearance of your rocking chair by being easy to paint or stain.
Mahogany: Durable and Elegant
Mahogany presents a mix of looks and strength. Its deep, reddish-brown hue lends outdoor furniture a refined appearance. This hardwood benefits from occasional sealing to preserve its polish even though it resists pests and decay. Although it is much less durable than teak, it is reasonably priced and works well outdoors.
Consider elements including climate, care, and your degree of ability when selecting wood for your garden rocking chair. Choose extremely water-resistant wood such as teak or cedar if you live in humid surroundings.
Pine or cedar can help simplify the construction procedure if you want an easy-to-work-with material. Whether you decide on a kind, keeping the integrity of the wood depends on sealing and staining. Depending on the correct wood, your homemade garden rocking chair will be a long-lasting and comfy addition to your outside area.
Garden Rocking Chair Gallery
Click on any image to start the lightbox display. Use your Esc key to close the lightbox.
Weatherproofing Your Garden Rocking Chair
A garden rocking chair is exposed to the elements, making weatherproofing essential for longevity. Rain, sun, and humidity can cause wood to warp, crack, or rot over time. Proper treatment will preserve the chair’s structural integrity and keep it looking good for years. Whether you’re using hardwood or softwood, adding layers of protection will ensure that your DIY rocking chair withstands outdoor conditions without constant maintenance.
Choosing the Right Wood Treatment
The first step in weatherproofing is selecting the right wood treatment. Sealants, oils, and stains provide a protective layer against moisture and UV damage. A clear sealant works well if you want to maintain the natural look of the wood while providing a waterproof barrier. Stains add color and protection, preventing water absorption while enhancing the wood grain. Wood oils, such as linseed or teak oil, penetrate deep into the wood fibers, keeping them hydrated and resistant to cracking.
Applying a Waterproof Sealant
A high-quality outdoor wood sealant protects against rain and humidity. For best results, choose a marine-grade sealant designed for extreme weather conditions. Before applying, sand the wood to create a smooth surface, then wipe away any dust. Use a brush or sprayer to coat all surfaces, including joints and underside areas evenly. Allow the first coat to dry completely before applying a second layer for maximum protection. Reapply sealant every one to two years to maintain effectiveness.
Using Outdoor-Grade Paint
If you prefer a colorful finish, outdoor-grade exterior paint is another weatherproofing option. Paint forms a solid barrier against moisture and UV rays, preventing fading and decay. Choose a high-quality acrylic or latex-based paint designed for exterior use. For added durability, apply a primer before painting and finish with a clear polyurethane topcoat to prevent chipping and peeling.
Protecting with Wood Oils
For a more natural approach, wood oils enhance the wood’s resistance to water while maintaining its natural grain. Teak oil is ideal for hardwoods, while linseed oil works well on both hardwood and softwood. Apply the oil with a brush or cloth, ensuring it penetrates the wood thoroughly. Let it soak in for several hours before wiping off any excess. Reapply every few months, especially if the chair is exposed to direct sunlight.
Elevating and Covering the Chair
Keeping the chair slightly elevated prevents water from pooling around its legs. Use small rubber or metal feet to lift the chair off the ground. This simple trick reduces moisture absorption and prevents rot. Additionally, using a breathable furniture cover when the chair is not in use offers extra protection against rain and UV exposure. Choose a cover made from waterproof and UV-resistant material to ensure maximum durability.
Regular Maintenance for Longevity
Even with weatherproofing, regular maintenance helps extend the chair’s lifespan. Inspect for cracks, peeling paint, or water damage every few months. Lightly sand and reapply treatments as needed. If you notice mold or mildew, clean it with a mild soap and water solution before it spreads. During winter or long periods of rain, consider storing the chair in a covered area to prolong its life further.
A well-weatherproofed garden rocking chair can remain in excellent condition for years with minimal upkeep. Choosing the right protective finish, keeping it elevated, and performing regular maintenance will ensure your DIY project meets the elements. With these steps, you’ll have a durable and comfortable chair to enjoy throughout every season.
Conclusion
Building a garden rocking chair is a rewarding DIY project that combines functionality with craftsmanship, giving you a comfortable and stylish addition to your outdoor space. Choosing the right wood, weatherproofing properly, and following careful assembly steps will ensure durability and long-term enjoyment. With a little effort and the right materials, you can create a rocking chair that provides relaxation for years to come.
We have more amazing chair decorations for your outdoor space. Check out our wooden swing chair project next!