Last Updated on March 27, 2025 by teamobn
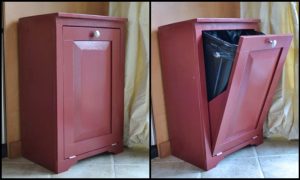
My parents had their house renovated a month ago and we went there last week to see the finished product. Although it looked way better than how it was before, I can’t help but focus on the mess on the lawn. They have tons of excess materials piling up, most of which are large chunks of wood and logs. It’s such an eyesore and it makes the whole house look unkempt.
I understand that they can’t just leave the materials lying around and that they need to be disposed of, but there has to be a better way to do it. Maybe they could hire a company to come and take care of it for them. Or, maybe they could find a use for some of the materials.
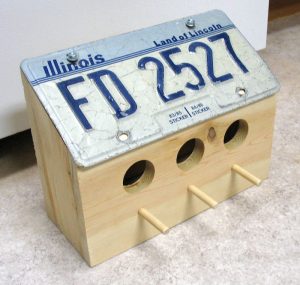
My husband suggested that we build something to make use of the excess stuff. My daughter suggested a swing and, since my parents can hardly say no to her, they agreed. We’re glad we could put the extra stuff to good use and make our daughter happy.
If you’re looking to add a touch of whimsy and style to your outdoor spaces, a well-styled swing chair is a perfect way to do it. These unique pieces can add a touch of fun and elegance to any yard or patio, and they’re sure to be a hit with family and guests alike.
Whether you opt for a traditional wooden swing or a more modern hanging chair, there’s no doubt that a swing chair is a great way to add a little something extra to your outdoor spaces. Build one in your backyard and swing to the summer breeze, or prop one up under a tree for a statement-making focal point. Aesthetics aside, there’s nothing more comforting than a gentle rocking motion in an outdoor environment.

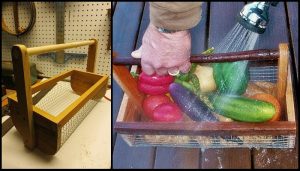
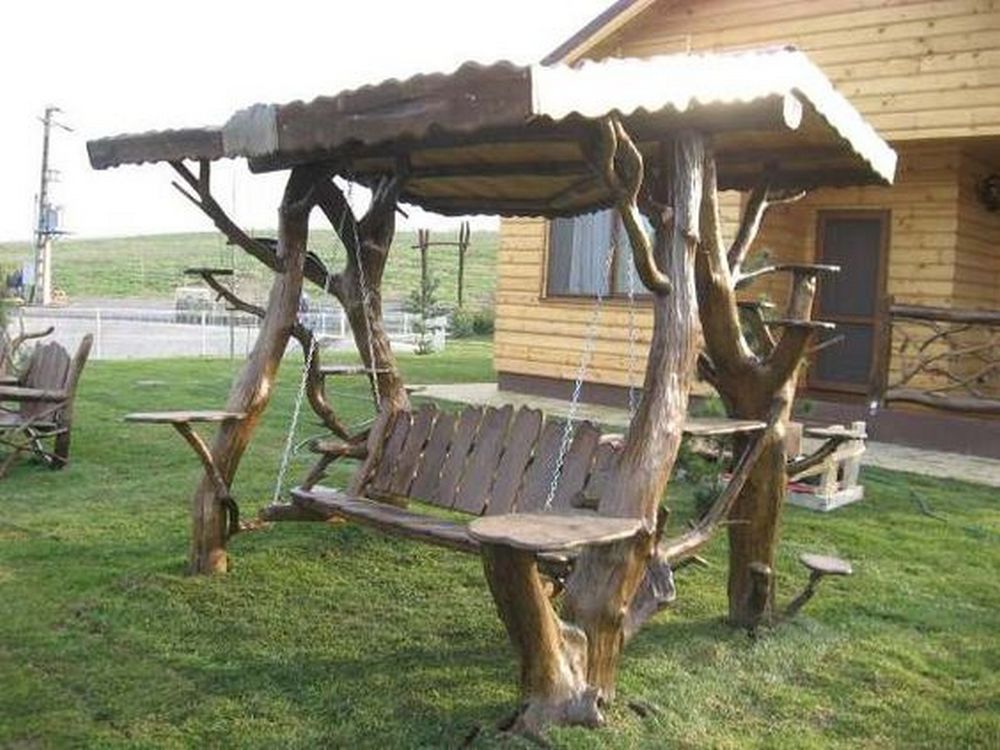
We were thrilled to come across a DIY project for a rustic wooden swing chair. The project was easy to follow and resulted in a beautiful piece that we can enjoy for years to come. This wooden swing chair is the perfect addition to any porch, and it was so easy to make! We would highly recommend this project to anyone looking for a fun and easy way to spruce up their outdoor space.
This wooden swing was perfect for my parents’ lawn. It was the perfect size for them and it was very sturdy. The swing was also very comfortable and they loved it.
Contents [show]
Building a DIY Wooden Swing
Materials:
- Wood or timber scraps- several required
- Webbing – 25mm wide around 85m
- 6ft feather edge boards
- Bright Steel Chain 4mm x 26mm x 10m
- Screws
- 6″ eye bolts
Tools:
- An axe
- Chainsaw
- Hammer
- Handsaw
- Stanley knife
- Cordless screwdriver
Steps:
The output of your wooden swing will depend on the materials that you will use. In our case, we will be using my parent’s scrap timber and wood. The materials won’t matter as long as the concept will be followed.
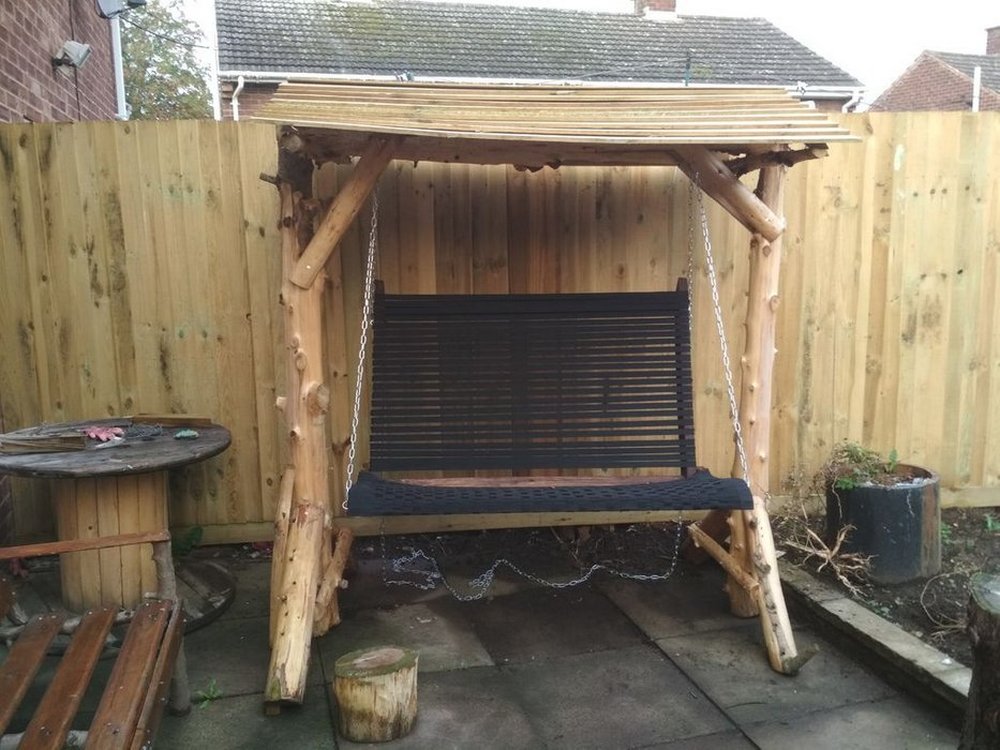
Let’s start with the frame of the swing. When it comes to choosing the wood or timber for your swing frames, it is important to select something that is both sturdy and durable. This will ensure that your swing will be able to withstand the weight of users and the elements over time.
Next, test the strength of your swing. It’s always a good feeling to know how stable a piece of furniture is, and that’s especially true for a wooden swing. There’s nothing worse than sitting on a swing and feeling like it might collapse at any moment. But with this swing, you can rest assured knowing that it’s built to last.

To build the chair, first cut the lumber to size according to the dimensions in the plans. Next, use a drill to make pilot holes in the seat and backrest, then attach the two pieces together using screws. Finally, use a drill to make holes in the armrests, then attach them to the seat and backrest using screws. To attach the chair to the swing, first measure the distance between the two points where the chair will be attached.
Cut a length of chain that is long enough to reach between these two points, plus extra few inches for each side. Next, use a drill to make two holes in the seat of the chair, one on each side. Thread the chain through these holes, making sure that the links of the chain are facing inwards. This will help to prevent the chain from getting caught on anything as you move the chair around.
Best Types of Wood for a DIY Wooden Swing
Choosing the right material makes all the difference in any outdoor project. When it comes to building a DIY wooden swing, the type of wood you select will impact not only the look but also the strength and longevity of your swing. Some woods handle the elements better, while others are easier to work with if you’re building it by hand. Here’s what you need to know before picking up your tools.
Cedar
Cedar is a top choice for outdoor furniture, especially for a DIY wooden swing. It’s naturally resistant to decay and insects, which makes it a low-maintenance option for long-term use. Cedar also has a pleasant scent and a rich, reddish color that weathers into a silvery gray. It’s lightweight yet strong, making it easy to handle if you’re cutting and assembling parts on your own.
Teak
If you want a high-end finish and unbeatable durability, teak is a great option. It contains natural oils that protect it from moisture and insects, which means your swing won’t crack or warp easily. Teak is dense and heavier than other woods, so it’s best for more experienced DIYers or when you’re building a swing meant to last for decades. Just keep in mind it’s one of the more expensive choices.
Pine
Pine is affordable and easy to find. That’s why it’s often the first choice for many who are new to DIY woodworking. A DIY wooden swing made from pine looks clean and classic, but it does need to be sealed properly since it isn’t naturally weather-resistant. With regular maintenance, pine can last a long time while still being budget-friendly.
Redwood
Redwood has a striking look with its deep reddish tones and smooth grain. It’s resistant to decay and pests, similar to cedar, and can handle outdoor exposure without a lot of upkeep. It’s a solid mid-range option for a DIY wooden swing if you’re looking for something visually appealing without going over budget.
Pressure-Treated Lumber
Pressure-treated wood is chemically treated to resist rot, fungi, and termites. It’s ideal if your swing will be exposed to damp conditions or if you’re installing it in a shaded area. While it may not be as beautiful as cedar or redwood right away, it holds up well over time. Just be sure to use gloves and a mask when cutting, and always seal it before adding any cushions or fabrics.
No matter which wood you choose, the key is to balance appearance, durability, and ease of handling. Your DIY wooden swing should reflect your style while standing up to daily use and changing weather. Whether you’re going for rustic charm or polished elegance, the right wood will bring your swing project to life and keep it swinging strong for years.
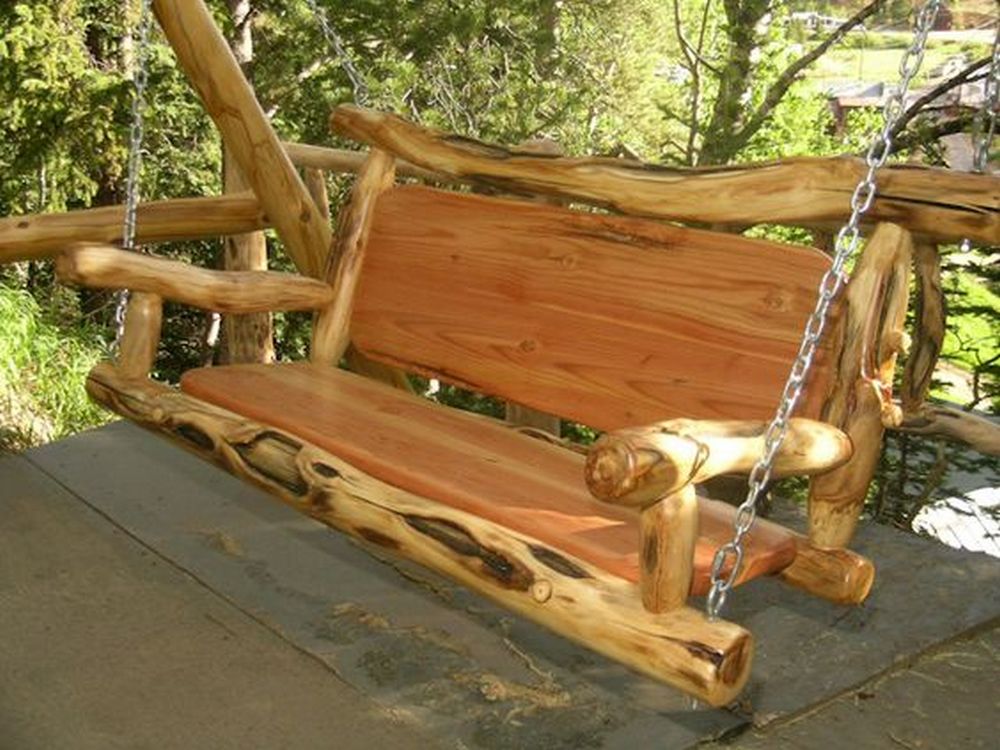
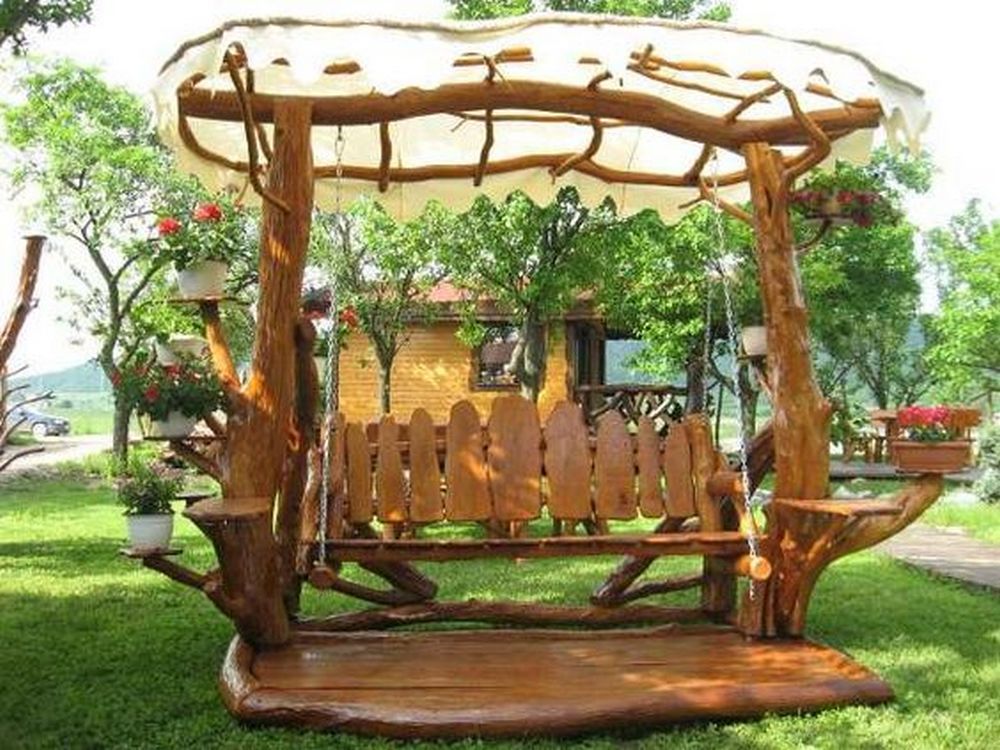
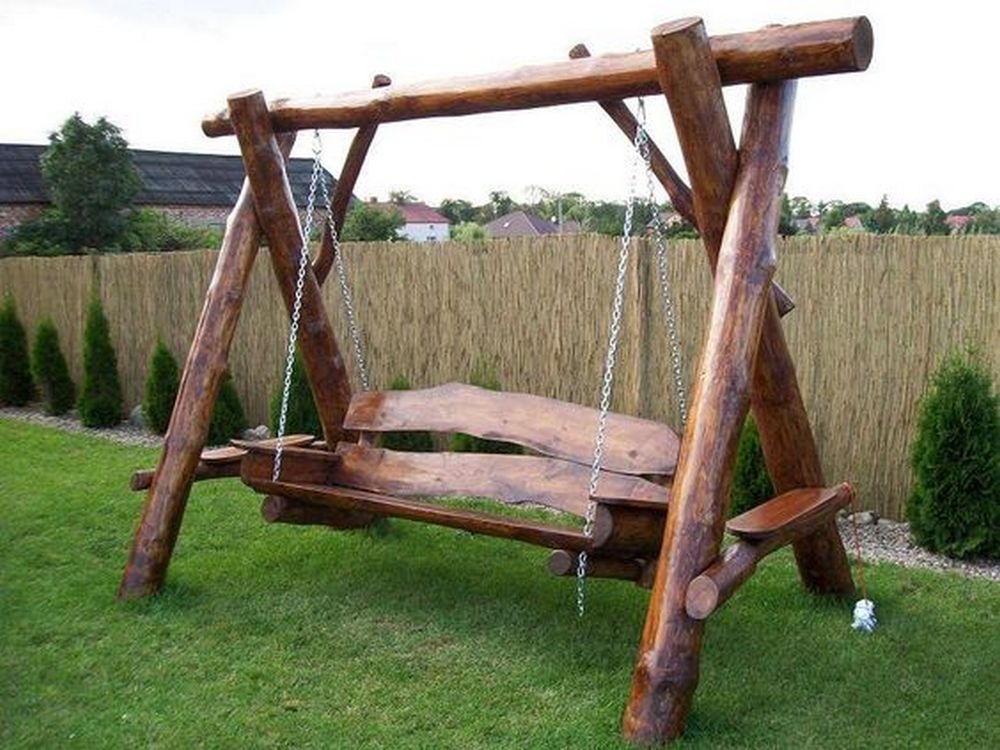
DIY Wooden Swing Gallery
Click on any image to start the lightbox display. Use your Esc key to close the lightbox.


How to Hang a DIY Wooden Swing Safely
Building a swing is one thing—making sure it’s safe to use is just as important. A DIY wooden swing should feel secure, balanced, and strong enough to handle daily use. Whether you’re attaching it to a sturdy tree or building a freestanding frame, proper installation will give you peace of mind every time someone sits down to relax.
Choose a Strong Support Structure
Before hanging anything, inspect the support. If you’re using a tree branch, it should be at least 8 inches thick, healthy, and free of cracks or signs of decay. For a porch or pergola beam, make sure it’s solid hardwood or pressure-treated lumber. Never hang a DIY wooden swing from a weak or questionable surface. The structure should be able to support at least 500 pounds, even if your swing is meant for one person.
Measure the Distance and Height
Make sure there’s enough clearance on all sides. You’ll want at least 2 feet of space behind and in front of the swing for a smooth motion. The seat should hang 17 to 20 inches off the ground—high enough to swing freely but low enough to sit down comfortably. Take these measurements before drilling or cutting any chains or rope.
Use the Right Hardware
Your hardware needs to be heavy-duty and weather-resistant. Galvanized or stainless-steel eye bolts, swing hangers, and chains are ideal. Avoid regular screws or hooks that can loosen over time. Drill pilot holes first to prevent splitting the wood. Then, install the hardware directly into the support beam or tree branch, not into soft or cracked areas.
Secure the Chains or Ropes Properly
If you’re using chains, double-check each connection point. Carabiner clips or quick links rated for heavy weight make adjustments easier and more secure. For rope, go with marine-grade polyester or nylon and use strong knots like a bowline or figure-eight. Be sure to check for fraying or wear before every use.
Test the Swing Before Use
Once everything is in place, give your DIY wooden swing a full check. Press down on the seat, then sit and gently rock before letting kids or guests use it. Listen for any creaks or see if any bolts shift. If anything feels loose or wobbly, tighten the hardware or adjust your hanging points. Safety should always come first.
Even the best-built swing needs occasional checks. Over time, wood expands, contracts, and weathers. Make it a habit to inspect your DIY wooden swing at the start of each season. A few minutes of maintenance can keep it safe and enjoyable for years to come.
Conclusion
Making a DIY wooden swing is a rewarding project that adds charm and function to your outdoor space. It’s a creative way to repurpose wood while building something the whole family can enjoy. With the right materials and a focus on safety, your swing will offer years of relaxation. Take your time, follow each step carefully, and enjoy the results.
We have other swing projects made from upcycled objects. Check out our DIY tire swing guide next!