Last Updated on February 14, 2024 by teamobn
A wooden cable spool can be transformed into a variety of different projects. With a little bit of creativity and some elbow grease, you can turn an old spool into a piece of furniture, a planter, or even a coat rack. With so many possibilities, it’s no wonder that cable spools are becoming a popular item for upcycling.
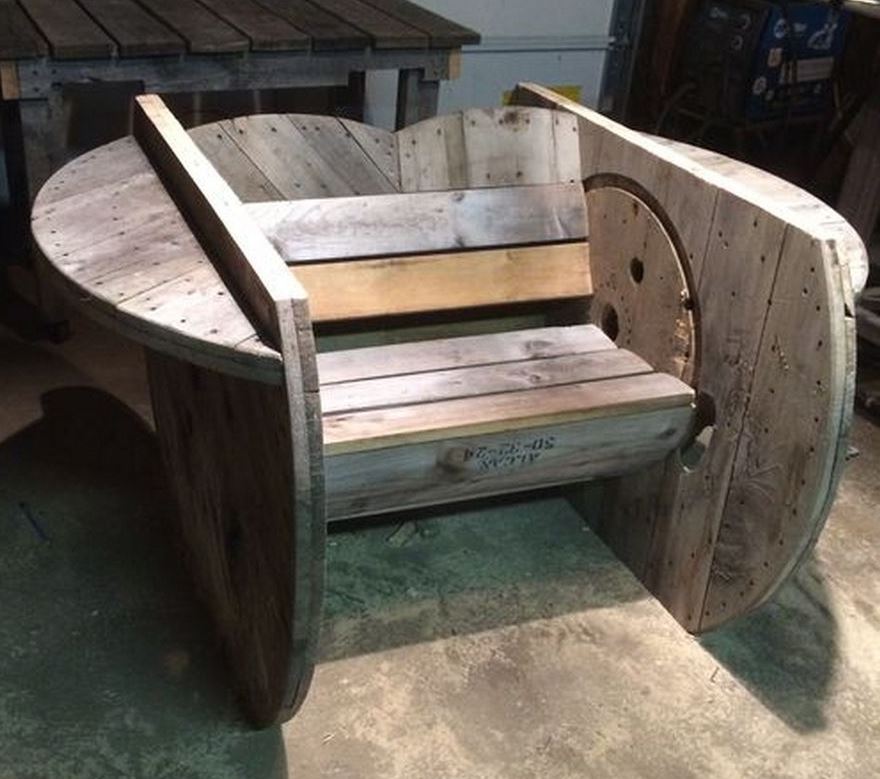
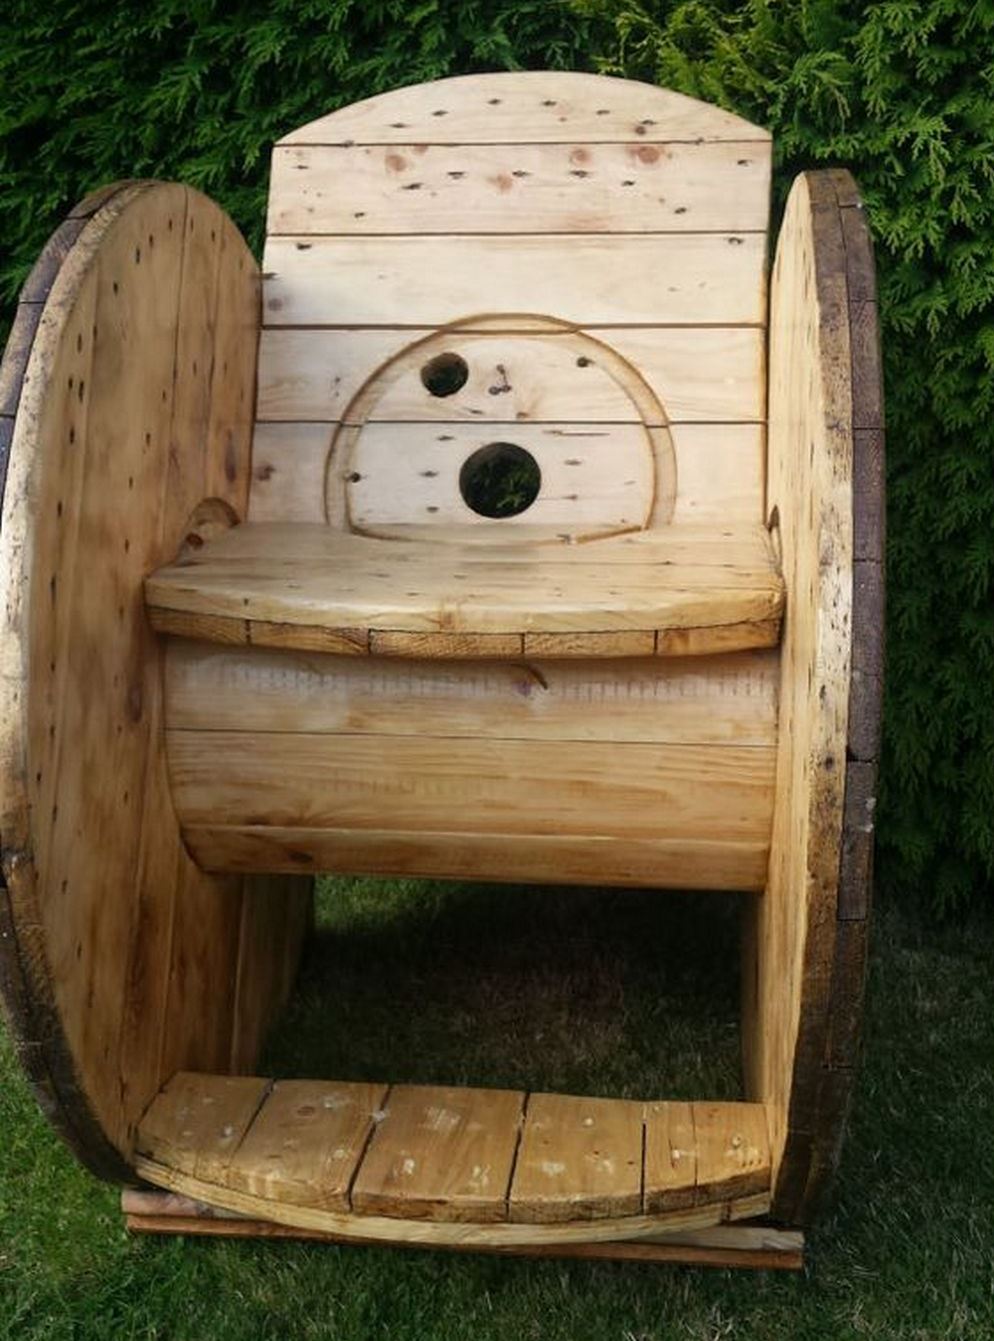
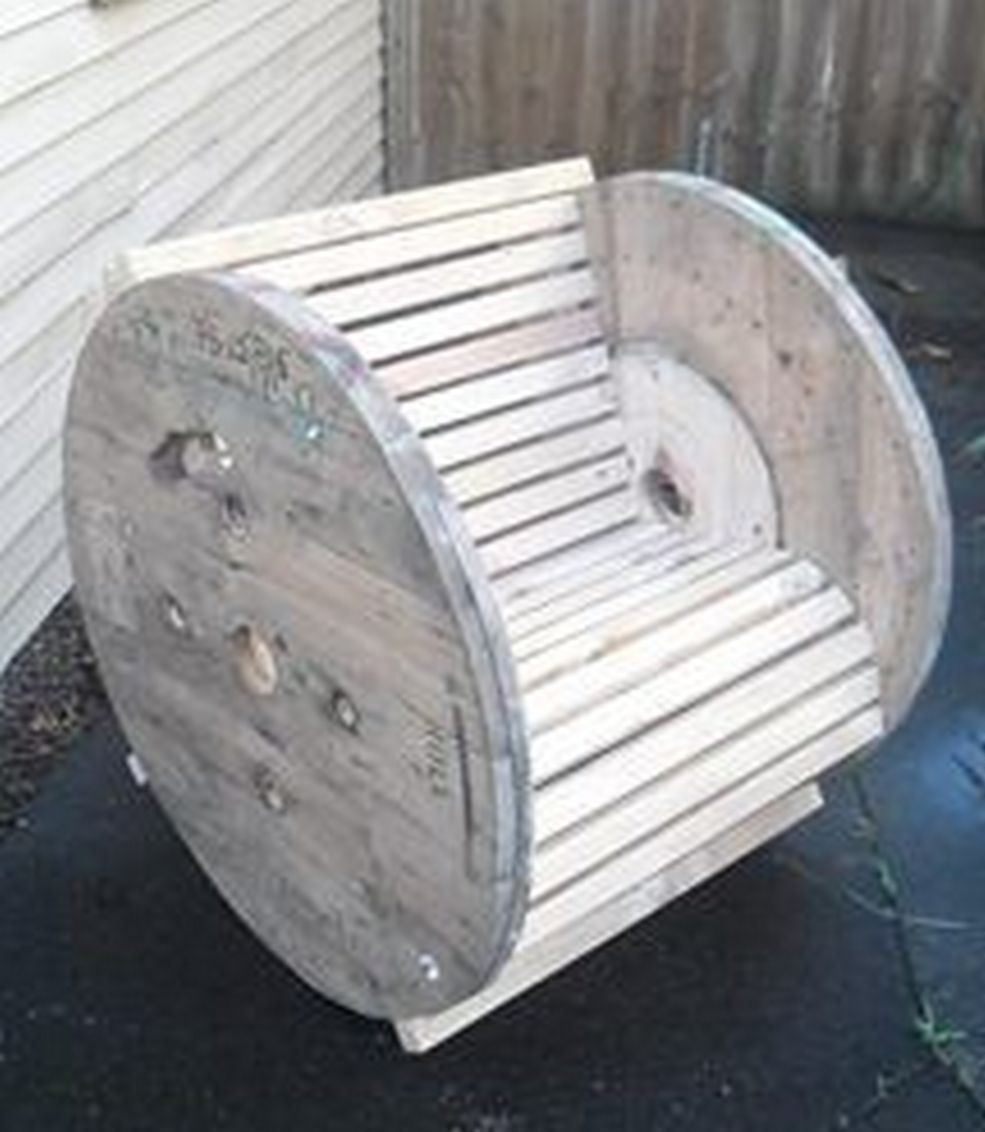
In our previous DIY project, we featured a cable spool bench. This time, we’re going to show you how to turn an old wooden cable spool into a stylish and modern rocking chair. This project is relatively simple and only requires a few tools and materials.
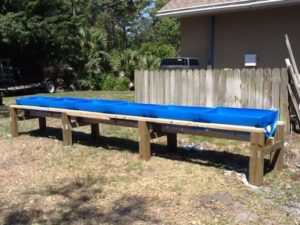
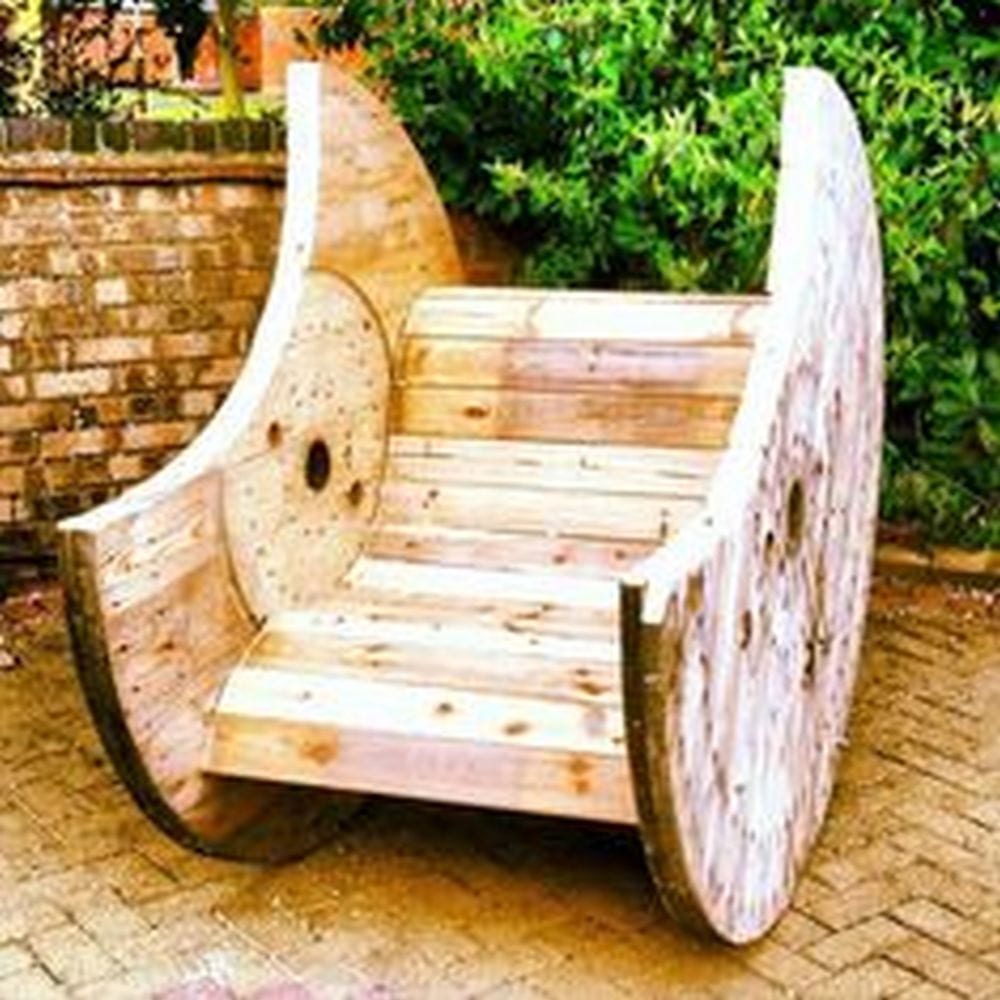
Turn a discarded cable spool into this rustic piece of furniture! A cable spool has been sitting inside our garage for the longest time. It was taking up a lot of floor space – space which we badly needed.
I’ve nagged my husband about it but he wouldn’t budge. He didn’t want to throw it away, saying he “might” need it in the future. However, when we were about to throw it away my brother asked for it planning to create a piece of rustic furniture – a rocking chair perhaps?
One day, my brother asked me if he could have the cable spool. I gladly gave it to him, with no second thoughts. I knew he would put it to good use and it would make him happy. I didn’t even ask him what he was going to do with it! Plus, it’s not like I was using it for anything. Obviously, my husband wasn’t very happy about it.
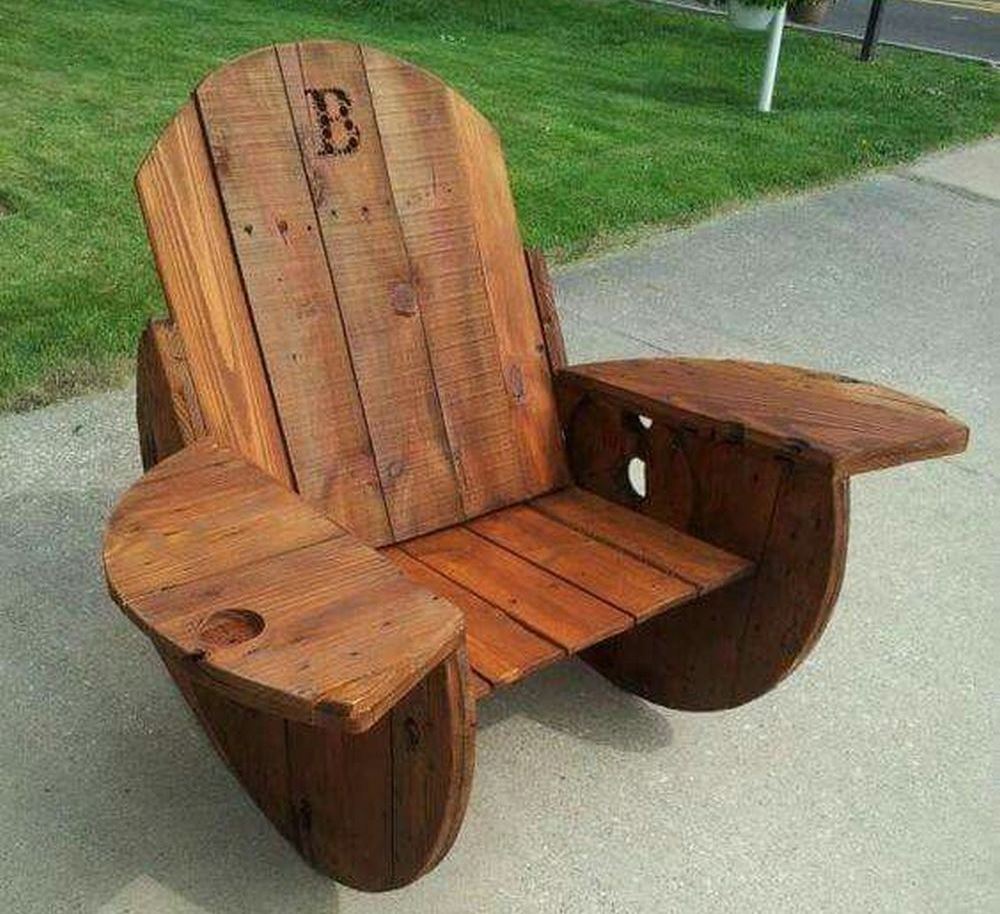
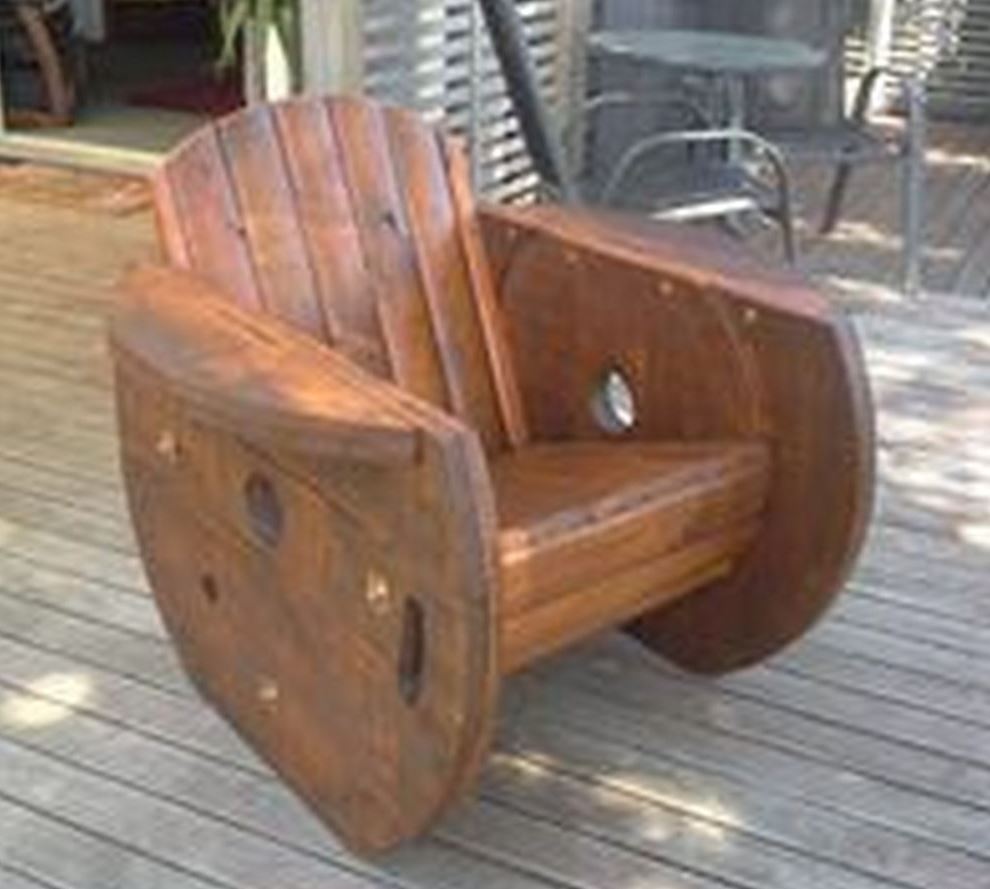
A few days later, my brother delivered a beautiful rocking chair to our driveway. He had crafted it out of an old cable spool and it was perfect for our patio. I was amazed by his genius and thanked him profusely.
When he saw the DIY tutorial online about how to turn a cable spool into a rocking chair, he knew he had to try it. He went to work right away, and when hubby saw it, he forgot he was mad at me. It was a great project that cost very little and resulted in a beautiful and unique piece of furniture.
This chair would be a great addition to any room. It looks very sturdy and has a vintage feel to it. We use it often in our house – when reading a book or enjoying a drink. It would make a great conversation piece for any guests you have over. This DIY project is perfect for when you want to relax and unwind. With just an old cable spool and some simple supplies, you can create a wonderful piece of furniture that will last for years.
Contents
Building a DIY Rocking Chair Guide
Materials:
- Old cable spool
- Nuts
- Washers
- Nails
- Tape
Tools:
- Router
- Drill
- Hammer
- Wrenches
- Tracing paper
Instructions
Step 1: Prepare the Cable Spool
- Inspect the spool: Check the cable spool for any damage or loose parts. Make sure it’s sturdy enough to be used as a chair.
- Clean the spool: Clean the spool thoroughly to remove any dirt, debris, or splinters. Sand the wood if necessary to create a smooth surface.
Step 2: Disassemble the Spool
- Remove the bolts: Use wrenches to remove the bolts holding the spool together. This step might require some effort, depending on the age and condition of the spool.
- Separate the spool parts: Carefully disassemble the spool into its main components – the two round ends and the central cylinder.
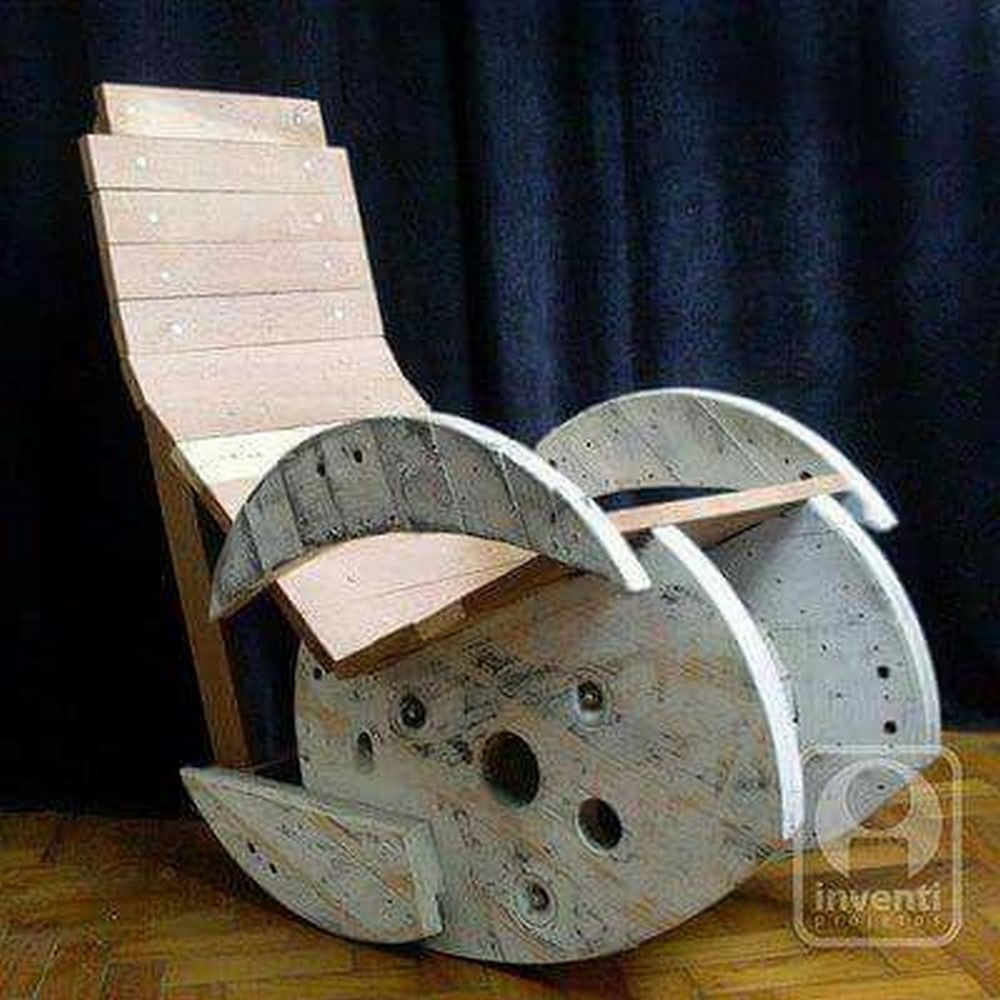
Step 3: Cut the Rockers
- Design the rockers: On tracing paper, draw the shape of the rockers that will attach to the bottom of your chair. The curve should be smooth and even to ensure a comfortable rocking motion.
- Transfer the design: Place the tracing paper on the wood you’ll use for the rockers (you can use the outer parts of the spool or additional wood if necessary). Trace the design onto the wood.
- Cut out the rockers: Use a router or a jigsaw to cut out the rocker shapes from the wood. Sand the edges smooth.
Step 4: Assemble the Chair Base
- Position the rockers: Place the rockers on a flat surface, parallel to each other. Ensure they are spaced correctly to match the width of the spool’s central cylinder.
- Attach the cylinder: Place the central cylinder of the spool on top of the rockers. Adjust it so it sits evenly.
- Secure with nails: Use a drill to make pilot holes, then hammer nails through the rockers into the bottom of the cylinder to secure it in place.
Step 5: Reassemble the Spool
- Attach the round ends: Reattach the round ends of the spool to the central cylinder. If you’ve taken the spool completely apart, you might need to cut these down to size depending on your design.
- Bolt together: Use nuts, washers, and the original bolts (or new ones if necessary) to bolt the pieces back together securely.
Step 6: Add Finishing Touches
- Smooth edges: Ensure all surfaces and edges are smooth to the touch to prevent splinters.
- Apply tape: If there are any gaps or areas that need reinforcement, use tape temporarily until you can secure them properly.
- Final check: Make sure the chair rocks smoothly and sits level on the ground. Adjust as necessary.
Step 7: Decorate and Protect
- Paint or stain: Paint or stain your rocking chair in the color or finish of your choice. Let it dry completely.
- Add cushions: For extra comfort, add cushions to the seat and backrest. You can make these yourself or repurpose existing ones.
Design Ideas for Your DIY Rocking Chair
Creating a DIY rocking chair from a recycled cable spool is a fantastic project that lets you express your creativity while adding a unique piece to your home. Whether you’re aiming for a rustic charm or a modern twist, here are some design ideas to make your DIY rocking chair stand out.
Paint and Finish
Enhancing your DIY rocking chair with the right paint and finish can dramatically change its appearance and feel. Start by choosing a paint color that aligns with your room’s decor. If your space features bold colors, consider a bright accent color that stands out. Alternatively, a soft, soothing tone can add a touch of elegance for a more subdued environment.
After painting, give your DIY rocking chair a vintage flair by distressing the paint. This technique lightly sands certain chair areas to create a worn look, giving it character and a sense of history. It’s a great way to add depth and texture to your chair.
Applying a sealant is crucial to ensure your DIY rocking chair withstands the test of time. A good sealant protects the paint from wear and tear, moisture, and UV rays, keeping your chair fresh for years. Consider using a polyurethane or a non-yellowing sealant for best results. This final step preserves your hard work and enhances the chair’s overall appearance, making it a standout piece in your home.
Cushioning and Comfort
Cushions are essential for maximizing the comfort of your DIY rocking chair. They provide a soft place to sit and contribute to the chair’s aesthetic appeal. You have the option to sew your cushions, allowing for complete customization in terms of size, shape, and fabric choice.
This is a great opportunity to bring your style into the project. Choose fabrics that complement the chair’s design and are durable and easy to clean, like canvas or outdoor upholstery fabric.
If sewing isn’t your forte, repurposing existing cushions is another viable option. Look for cushions that fit the seat and backrest of your chair, and don’t hesitate to modify them if necessary. You can also cover them with new fabric to match your DIY rocking chair’s color scheme and style.
When selecting fabrics, consider the chair’s intended use and location. If it will be used outdoors, opt for weather-resistant fabrics that can withstand sun exposure and moisture.
For indoor chairs, the fabric choice can be guided more by texture and comfort. Adding cushions to your DIY rocking chair increases its comfort and elevates its appearance, making it a cozy and inviting piece in your home.
Carving and Details
Incorporating detailed carvings into your DIY rocking chair can elevate it from a simple piece of furniture to a stunning work of art. If you have woodcarving skills, this is your chance to showcase your talent and add a personal touch to the chair.
Floral designs can bring a touch of nature into your home, creating a serene and inviting atmosphere. On the other hand, geometric patterns can give your chair a modern and sophisticated look, making it stand out in any contemporary setting.
Personal monograms are another fantastic way to customize your DIY rocking chair. Carving your initials, or those of a loved one, into the chair personalizes the piece and makes it a memorable keepsake that can be passed down through generations. When planning your carvings, consider the overall style of the chair and the room it will occupy to ensure a cohesive look.
These intricate details showcase your craftsmanship and transform your DIY rocking chair into a focal point of any room. It becomes more than just a chair; it’s a piece of art that reflects your style and creativity.
Accessorize
Accessorizing your DIY rocking chair can significantly enhance its functionality and aesthetic appeal. A small, attachable side table is a perfect addition for holding drinks, books, or a cozy lamp. This feature turns your rocking chair into the ideal spot for relaxation and convenience, ensuring everything you need is within arm’s reach.
A book holder can also be a great accessory for avid readers. It lets you keep your current read handy, making your rocking chair the perfect reading nook. Adding decorative lighting can create a warm and inviting ambiance for those who enjoy spending evenings in their chair. Consider string lights or a small, battery-operated lamp that can be attached to the chair or the nearby table.
These accessories increase the practicality of your DIY rocking chair and contribute to its charm and uniqueness. By choosing accessories that complement the chair’s design and your taste, you can create a comfortable and stylish retreat that reflects your lifestyle and interests.
Click on any image to start the lightbox display. Use your Esc key to close the lightbox.


Upcycling Ideas for Leftover Materials
After completing your DIY rocking chair, you might find yourself with leftover materials. Instead of discarding them, consider these creative upcycling ideas to make the most of every piece. These projects can add more charm and functionality to your home, matching the sustainable spirit of your original DIY rocking chair.
Create a Matching Side Table
Use extra pieces of wood from your cable spool to craft a side table that complements your DIY rocking chair. This table can hold your coffee, books, or decorative items, creating a cohesive look in your space. Sand down the wood, apply a finish that matches your chair, and enjoy a custom furniture set made by you.
Build a Bookshelf
If you have several large wooden planks left, consider assembling a bookshelf. Depending on your needs and available materials, this can be a simple, freestanding unit or a wall-mounted shelf. Stain or paint it to match your DIY rocking chair for a unified aesthetic. This bookshelf can store your favorite reads or display cherished mementos, adding character and storage to your room.
Fashion a Planter
Smaller wooden pieces can be transformed into a rustic planter for your garden or patio. This project is simple and enhances the greenery in your outdoor or indoor space. Drill drainage holes, fill it with soil, and plant your favorite flowers or herbs. Placing this planter near your DIY rocking chair can create a peaceful, nature-filled, relaxing nook.
Craft a Wall Art
Get creative with leftover materials by designing a piece of wall art. Arrange wood slices, spool ends, or other pieces into a unique pattern or shape. This can be an abstract design, a geometric pattern, or even a simple mural. Paint or stain the pieces to suit your decor, and hang your new artwork near your DIY rocking chair to add a personal touch to your space.
Craft a Footstool
Turn the remnants from your DIY rocking chair project into a handy footstool. This addition not only complements your chair but also elevates comfort. Measure and cut the wood to create a small, sturdy base. Cover the top with a cushion or a soft fabric that matches your chair. Now, you have a perfect spot to rest your feet while you relax.
Make a Picture Frame
You can create a rustic picture frame with thinner slats or smaller pieces of wood. This project is simple and adds a personalized touch to your space. Cut the wood to size, assemble into a frame, and add a finish that matches your DIY rocking chair. Your new frame can hold cherished memories on the wall or a side table near your chair.
Design a Key Holder
Use small wood pieces to make a key holder for your entryway. This practical item can be as simple or elaborate as you like. Add hooks for keys and maybe a small shelf for mail or sunglasses. Paint or stain it to complement your DIY rocking chair, creating a cohesive look at your front door.
Assemble a Birdhouse
If you’re feeling adventurous, use leftover materials to build a birdhouse. This project can be a fun addition to your garden and a great way to attract wildlife. Customize the size and design based on the materials you have. Once complete, paint it to match or contrast with your DIY rocking chair for a pop of color in your garden.
Create Coasters
Finally, small wood pieces can be turned into coasters. Sand them down and seal with a waterproof finish to protect them from moisture. These coasters can be used on your new side table or anywhere in your home, reminding you of your successful DIY rocking chair project.
Organizer Tray for Small Items
Transform smaller wood pieces from your DIY rocking chair project into an organizer tray. This tray can hold keys, jewelry, or office supplies. Measure and cut the wood to create a shallow box. Sand the edges for a smooth finish. You can paint or stain the tray to match your rocking chair, creating a cohesive look in your decor.
Wall-Mounted Coat Rack
Use longer, slender pieces of wood to create a wall-mounted coat rack. Attach hooks or knobs for hanging coats, hats, or bags. This functional piece adds rustic charm to your entryway or bedroom. Finish it in a style that complements your DIY rocking chair for a unified aesthetic throughout your home.
Lamp Base
Craft a unique lamp base using the sturdier parts of the cable spool. This requires a bit more skill, as you’ll need to drill a hole through the center for the wiring. The rustic look of the spool wood can add warmth to your space. Pair it with a simple lampshade that harmonizes with the color and style of your rocking chair.
Shelving Unit for Plants
Build a small shelving unit for your plants using leftover materials. This can be a simple freestanding shelf or a more elaborate tiered plant stand. It’s a great way to display your greenery indoors or on your patio next to your DIY rocking chair, creating a cozy, natural corner for relaxation.
Wine Rack
Construct a wine rack if you have several pieces of wood of similar size. Arrange the wood to hold wine bottles horizontally. This project adds a functional yet decorative piece to your kitchen or dining area, and it can be a great conversation starter when you have guests over.
Serving Tray
Make a serving tray using flat pieces of wood. Add handles on the sides for easy carrying. This tray can be used to serve drinks or snacks when entertaining or as a decorative piece on your coffee table or dining table. Customize the tray with paint or stain to coordinate with your DIY rocking chair, enhancing the overall look of your living space.
Conclusion
If you’ve been eyeing that old cable spool for a while and wondering what to do with it, why not try transforming it into a rocking chair? It’s a simple process that anyone can do, and in no time you’ll have your own little oasis to relax in.
For more upcycling projects, check out our upcycled tractor seat bar stool project!