Last Updated on March 5, 2024 by teamobn
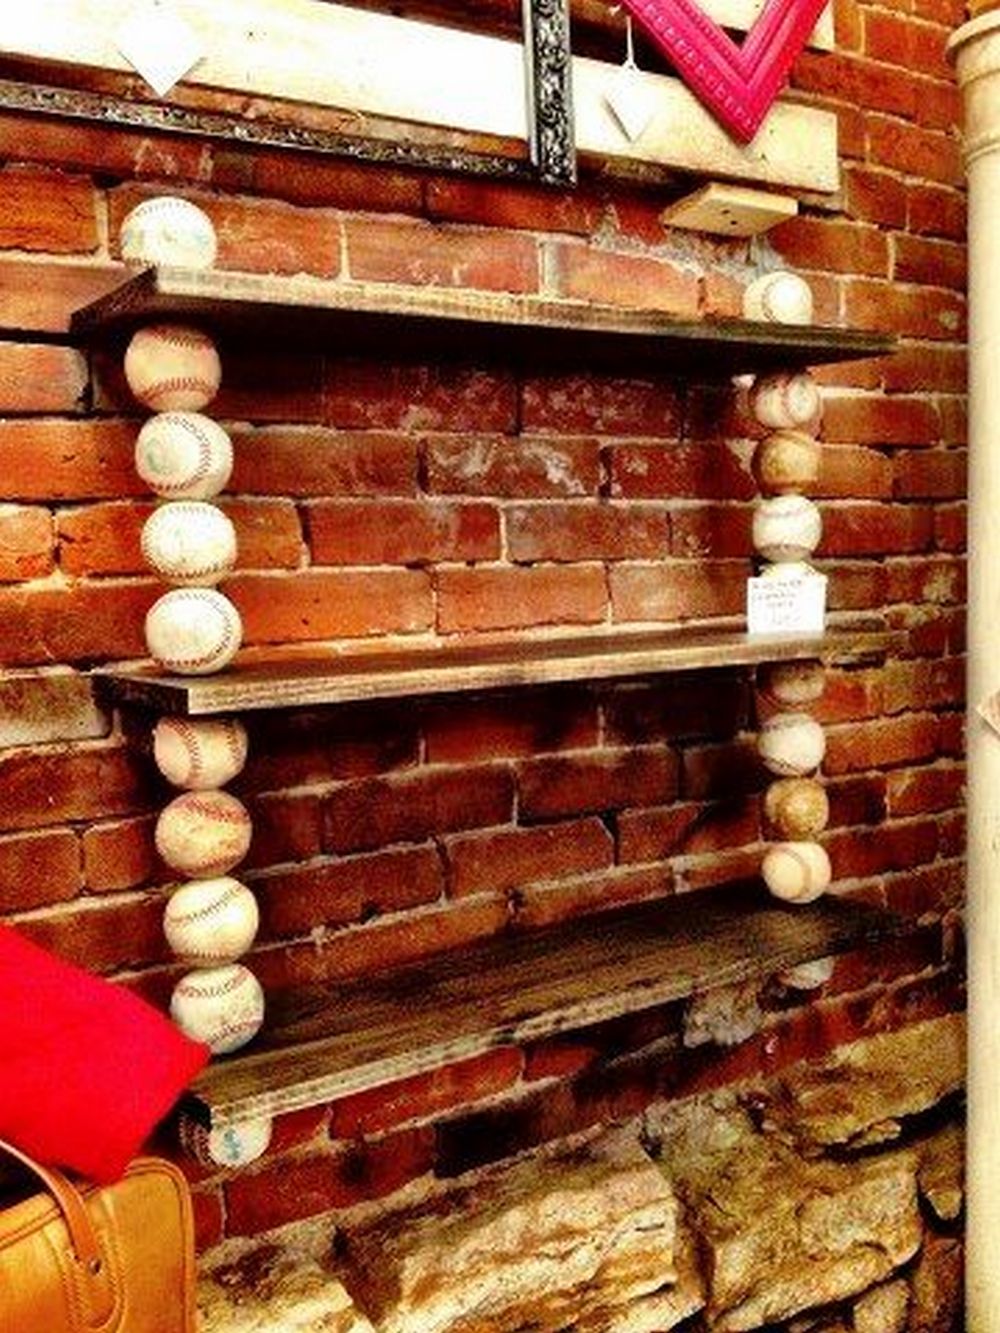
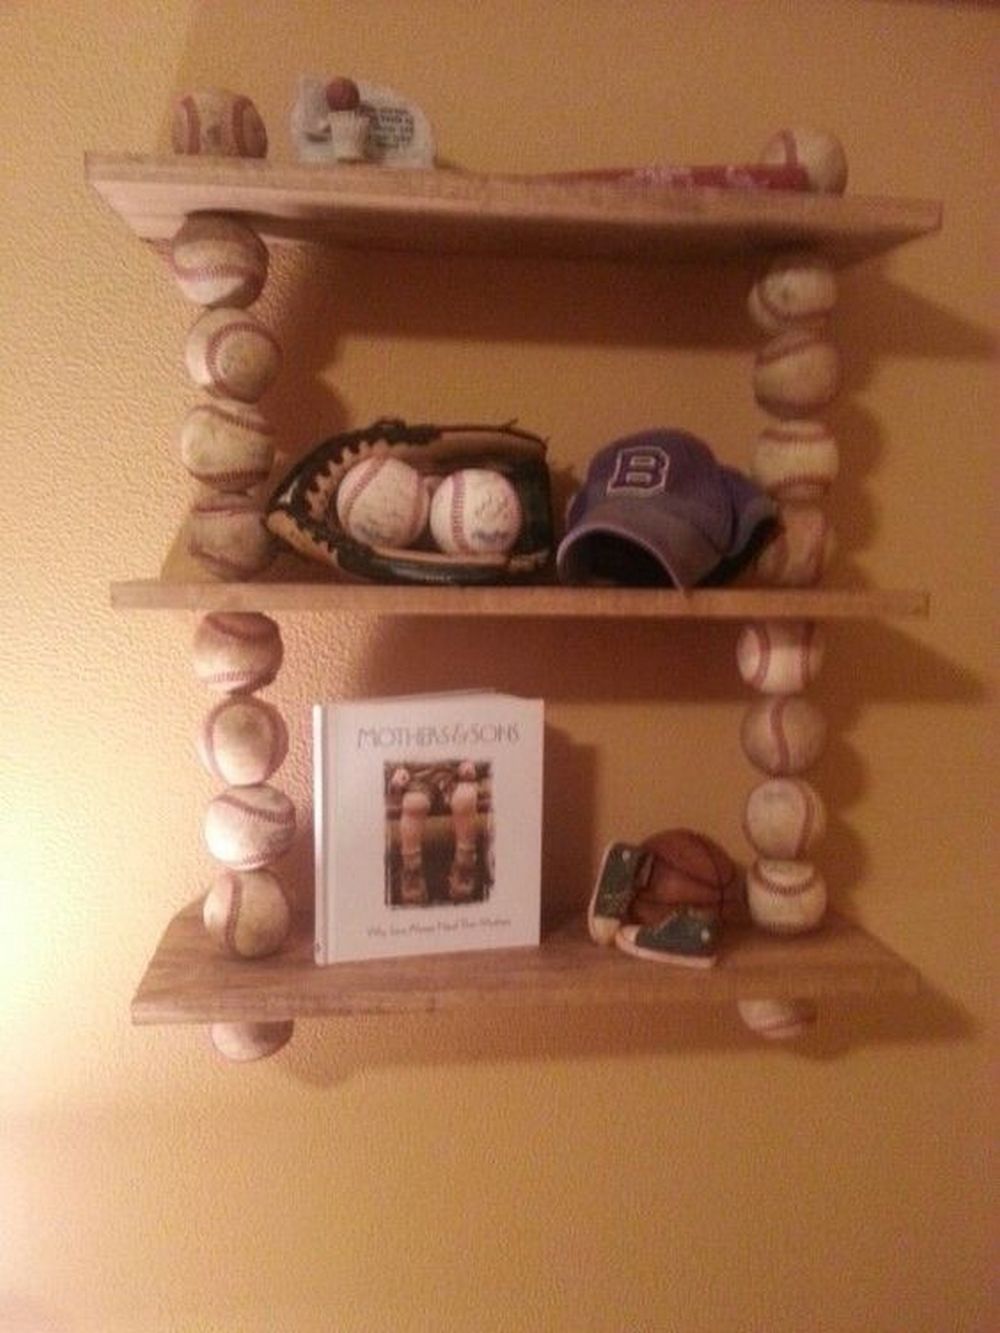
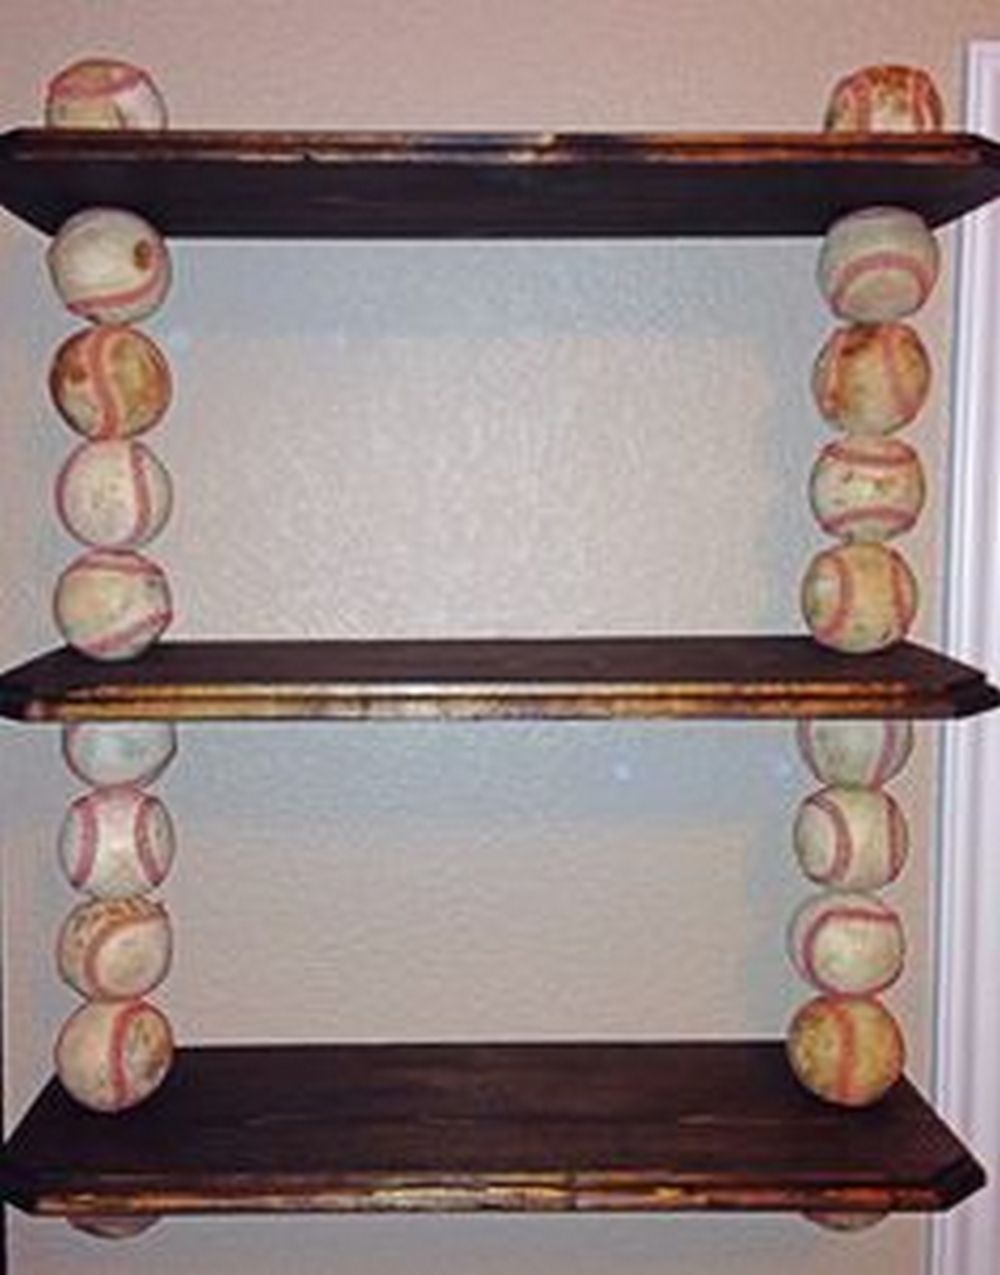
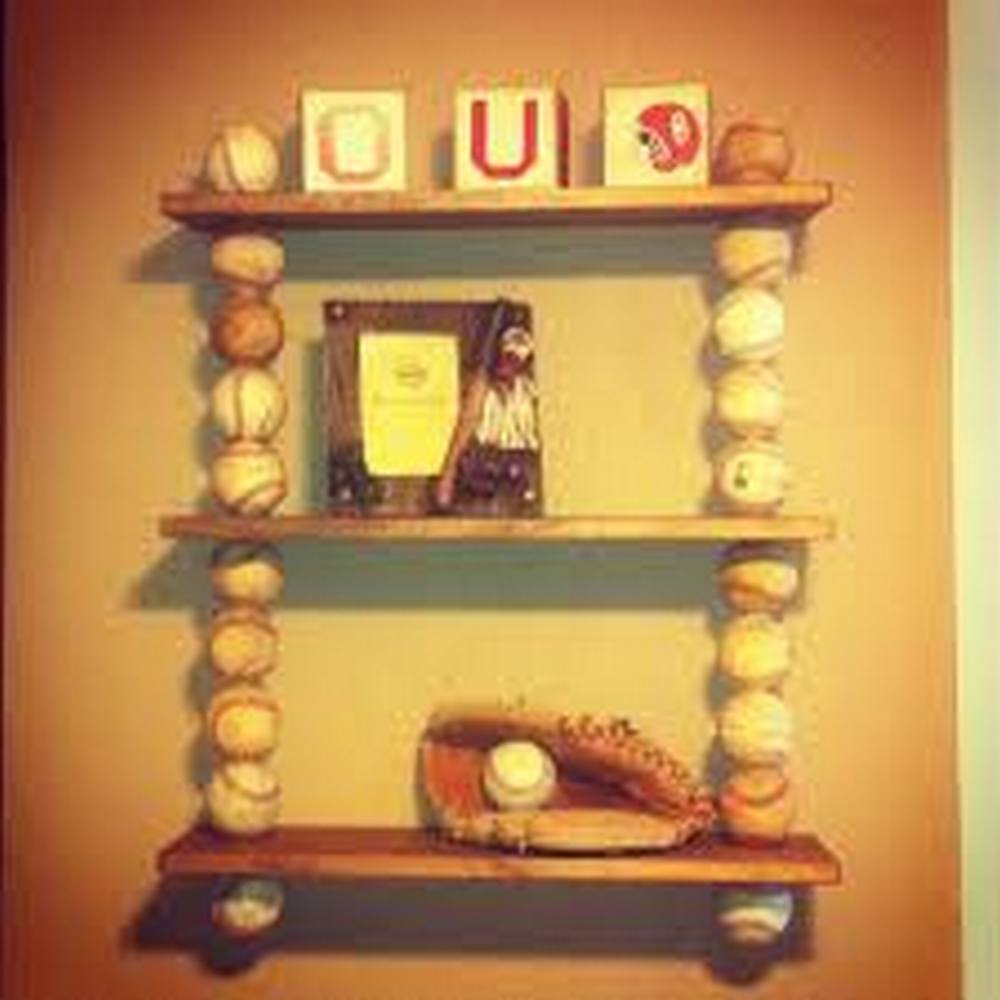
If you have a beautiful collection of baseballs lying around your house – whether it’s from your glory days or your dog’s favourite pile of toys – you can reuse them once more into this one nifty item. With a little bit of creativity, you can turn those old baseballs into a brand-new piece of home decor that is sure to be a conversation starter.
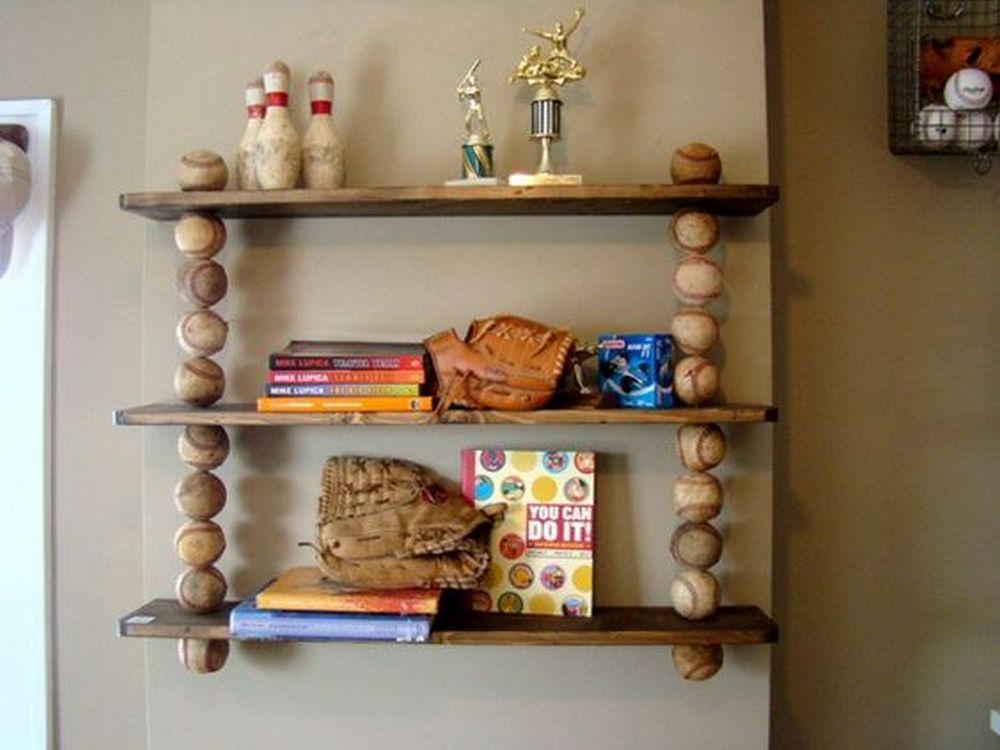
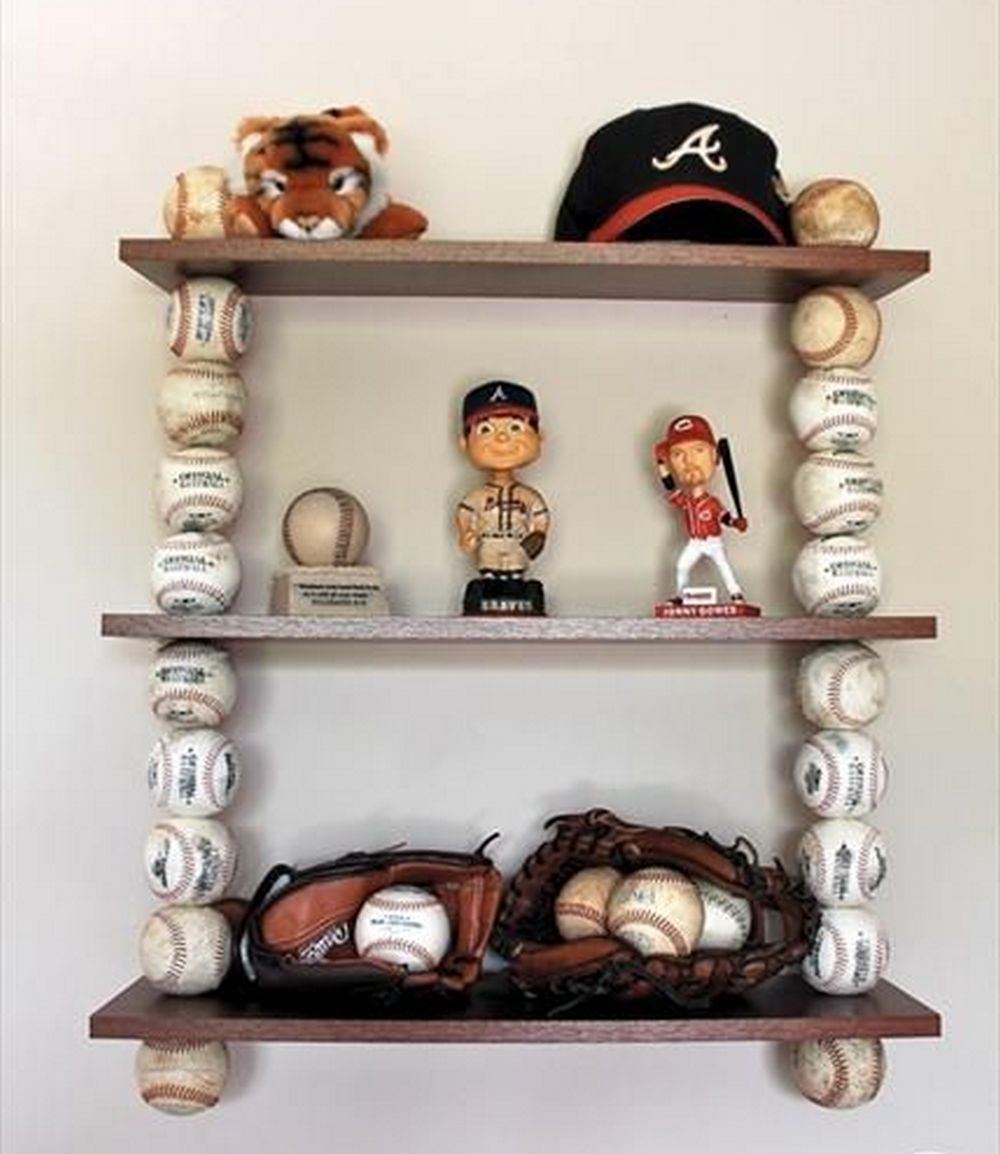
Before you begin this fun craft project, cleaning the baseballs first’s a good idea. This will ensure better results. You’re going to make a sports-themed shelf using balls as pillars. It’s a simple project that’s sure to impress your friends and family.
Teenagers will admit that their bedroom is the perfect opportunity to show off their style. It’s more than just a place for them to rest; it’s where they spend time playing with friends, catching up on homework assignments, and enjoying their favourite games.
It’s important to remember that teenagers are going through many changes and are trying to figure out who they are. Giving them a space specifically designed for them can help them feel more comfortable in their own skin. It can also help them creatively express themselves.
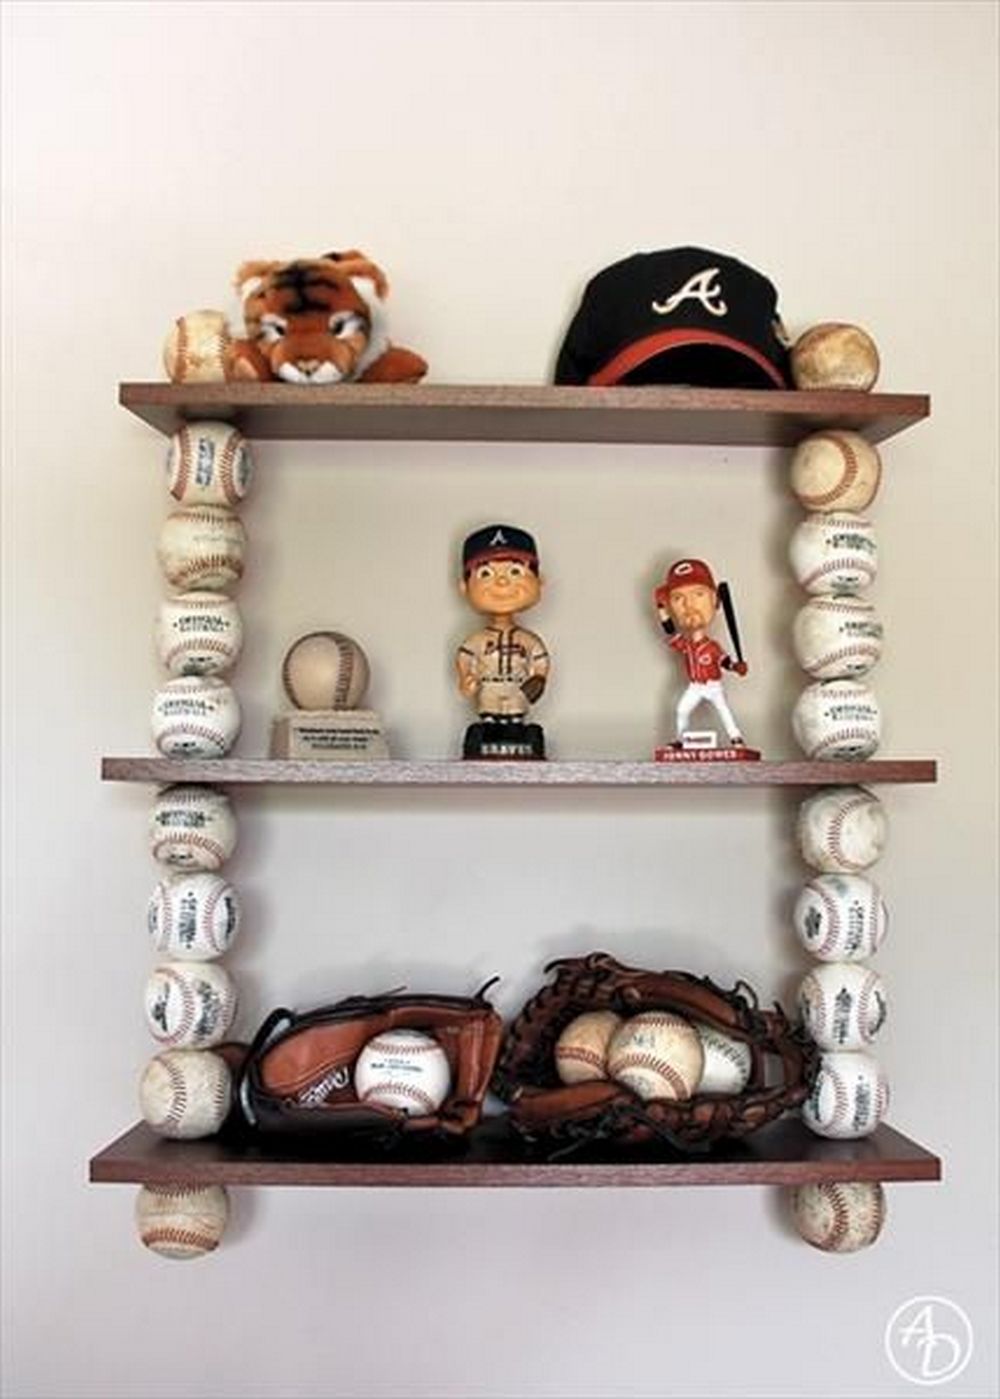
That’s why teenagers tend to be very specific about what they want inside their rooms. I have one friend who has two teenagers – a girl and a boy. The girl wanted a floral-themed bedroom; the boy wanted to showcase his love for baseball. And so in the spirit of helping, I showed her this project.
This do-it-yourself baseball shelf is perfect for what her son wanted. She could either hang it on the wall or just prop it on the floor. Plus, it’s so easy to do she even asked her son to help out with the project. I must say he enjoyed it, too.
If you have old baseballs lying around, give them a new lease on life and turn them into a baseball shelf. It’s one-of-a-kind!
Crafting a shelf from baseballs offers a unique and creative way to display your love for the game while adding a touch of personality to your home décor.
1. Personalized Décor: A baseball shelf allows you to showcase your passion for the sport in a personalized and creative way. By incorporating baseballs into the design, you can create a unique piece of décor that reflects your love for the game and adds character to any room.
2. Conversation Starter: A baseball shelf is sure to be a conversation starter when guests visit your home. Whether you’re hosting a game day party or simply entertaining friends and family, the shelf provides an opportunity to share stories and memories about your favourite teams, players, and games.
3. Nostalgic Charm: For many people, baseball holds a special place in their hearts, evoking memories of childhood games, family outings, and bonding experiences with friends and loved ones. A baseball shelf allows you to capture the nostalgic charm of the sport and bring those memories to life in your home.
4. Versatile Design Options: When it comes to designing a baseball shelf, the possibilities are endless. You can choose from a variety of designs, including floating shelves, tiered stands, shadow boxes, and more. Whether you prefer a minimalist look or a more elaborate display, there’s a design to suit your taste and style.
5. Cost-Effective Solution: Making a shelf from baseballs can be a cost-effective solution compared to purchasing pre-made shelving units or display cases. With just a few simple materials and some basic woodworking skills, you can create a custom shelf that perfectly fits your space and budget.
6. Functional Storage: In addition to its decorative appeal, a baseball shelf also provides functional storage space for displaying a variety of items. Whether you’re showcasing signed baseballs, memorabilia, or other collectibles, the shelf allows you to keep your favourite items organized and easily accessible.
7. DIY Satisfaction: There’s a sense of satisfaction that comes from creating something with your own two hands. Crafting a shelf from baseballs allows you to unleash your creativity and express yourself through your home décor. Whether you’re an experienced DIY enthusiast or a novice crafter, making a baseball shelf is a fun and rewarding project.
8. Unique Gift Idea: A baseball shelf makes a thoughtful and unique gift for the baseball fan in your life. Whether it’s for a birthday, holiday, or special occasion, the shelf is sure to be appreciated and cherished for years to come.
Making a shelf from baseballs offers a multitude of advantages, from personalized décor and nostalgic charm to cost-effective solutions and DIY satisfaction. Whether you’re displaying memorabilia from your baseball adventures or paying tribute to your favourite teams and players, a baseball shelf adds a touch of whimsy and creativity to any space.
Click on any image to start the lightbox display. Use your Esc key to close the lightbox.
Contents
How to Make a DIY Baseball Shelf
Materials:
- 3 pcs boards (according to your desired length)
- 2 pcs 3/8″x36″ all thread
- 4 pcs 3/8″ nuts
- 4 pcs 3/8″ flat washers
- 20 pcs used baseballs
- brackets to hang (optional)
Tools:
- saw drill
- drill
- grinder/hack saw
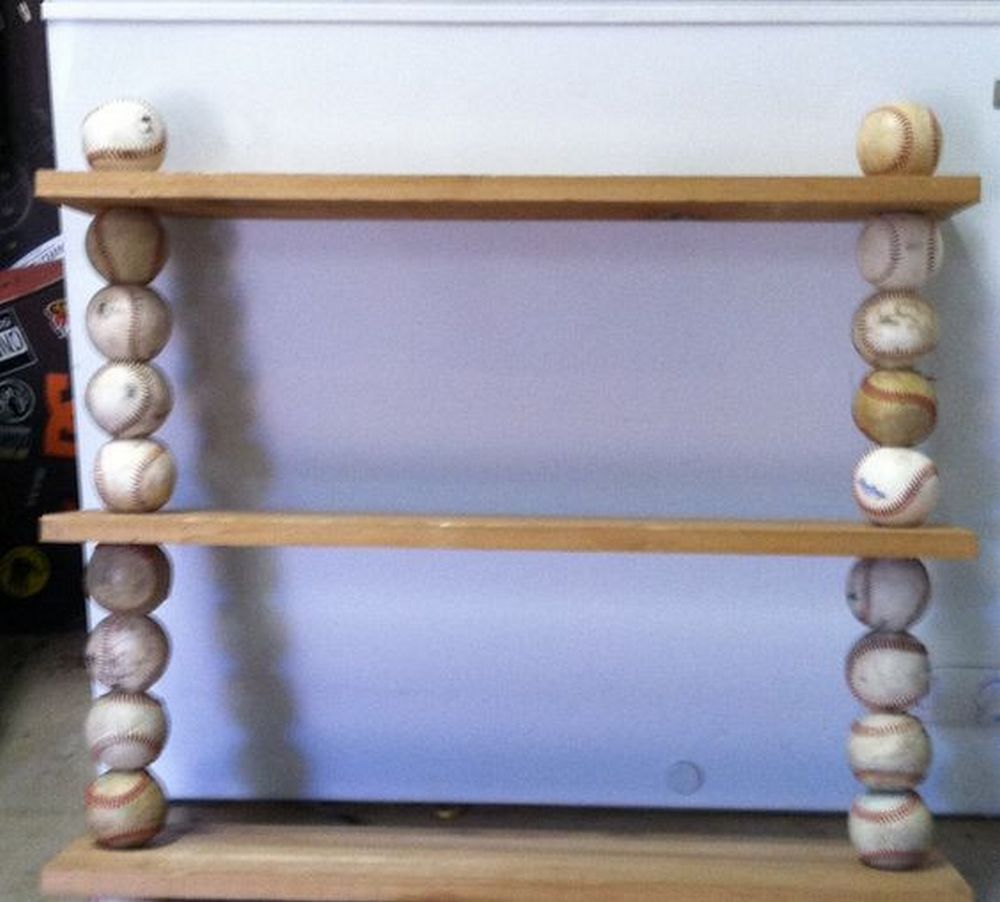
Steps to make a DIY shelf from baseballs:
1. First things first, well, as mentioned we need to clean our baseball first before proceeding to the next step. You can do this by using soap and water and a towel to dry them. After cleaning them, you need to drill holes through them. Make sure that the holes are in the centre of the balls.
2. You will need to drill holes in the boards that you will be using as shelves. This is so that you can insert the threaded rods or other supports that will keep the shelves in place. Make sure that you drill the holes in the same place on each board so that the shelves will be level.
3. To assemble the shelf, start by sliding four balls into each threaded rod, and then sliding the rod onto the board. Secure the rod in place with a washer and nut. Repeat the process until the desired height or level of shelves is reached. Make sure to tighten the nuts securely.
Now that you have your new shelves, you can now attach them to the wall.

Thanks to Petergottm for sharing tips and strategies on how to make a DIY baseball shelf.
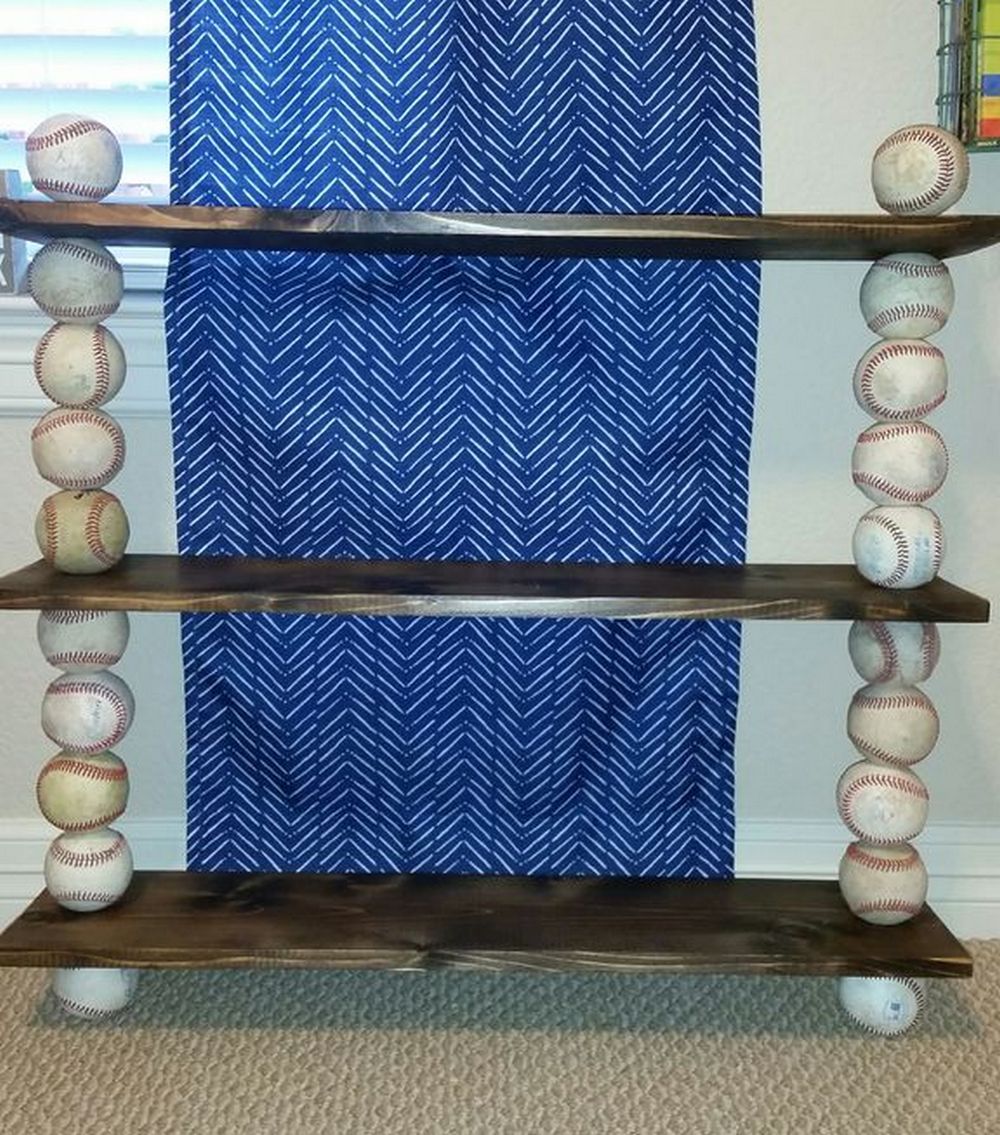
DIY Baseball Shelf Designs
Creating a DIY baseball shelf from baseballs can add a unique and sporty touch to your space. Here are 5 design ideas to inspire you:
1. Classic Display
Arrange baseballs evenly along the length of the shelf, stacking them in rows to create a classic and clean display. You can alternate between placing the balls with their seams facing outwards and inwards for visual interest.
2. Floating Baseballs
Mount clear acrylic shelves on the wall and secure baseballs onto them using invisible brackets or adhesive hooks. This creates the illusion of baseballs floating in mid-air, adding a modern and minimalist touch to your decor.
3. Tiered Stand
Construct a tiered stand using wooden dowels or metal rods, with baseballs stacked on each level. Vary the heights and spacing between the tiers for a dynamic and visually appealing display. This design is perfect for showcasing a larger collection of baseballs.
4. Shadow Box Display
Create a shadow box using a wooden frame and glass panels, with baseballs arranged inside. Add decorative elements such as team logos, player cards, or ticket stubs behind the baseballs for added visual interest and personalization.
5. Baseball Wall Art
Mount individual baseballs onto a wooden board in a grid pattern to create a unique piece of wall art. You can paint the board in team colours or add a baseball-themed quote or graphic to enhance the design. This versatile design can be customized to fit any space and decor style.
These design ideas offer creative ways to incorporate baseballs into your DIY shelf, allowing you to showcase your love for the sport while adding a stylish and personalized touch to your home decor.
Maintaining Your DIY Baseball Shelf
Maintaining a shelf made from baseballs not only preserves its aesthetic appeal but also ensures its longevity. While such a unique piece of furniture may require special care, following some maintenance guidelines can keep it looking great for years to come. Here’s a comprehensive guide to maintaining a baseball shelf:
1. Regular Dusting
Dust can accumulate on the surface of baseballs, making them appear dull and dirty. To prevent this, dust the shelf regularly using a soft cloth or a duster. Take care to reach between the baseballs and along the edges of the shelf to remove any trapped dust. Consider using a can of compressed air to blow away dust from hard-to-reach areas.
2. Cleaning Spots and Stains
Occasionally, spots or stains may appear on the baseballs due to spills or handling. To clean these, dampen a soft cloth with mild soap and water and gently wipe the affected areas. Avoid using harsh chemicals or abrasive cleaners, as they can damage the surface of the baseballs. For stubborn stains, consider using a specialized cleaner designed for sports equipment.
3. Preventing Sun Damage
Exposure to direct sunlight can cause baseballs to fade and deteriorate over time. To prevent sun damage, avoid placing the baseball shelf in areas where it will be exposed to prolonged sunlight. If this is unavoidable, consider using curtains or blinds to block out UV rays during the brightest parts of the day. Additionally, rotate the position of the shelf periodically to ensure even exposure to sunlight.
4. Protecting from Moisture
Moisture can cause baseballs to swell, crack, or become misshapen, compromising the integrity of the shelf. To protect the shelf from moisture damage, avoid placing it in areas prone to high humidity, such as bathrooms or kitchens. If the shelf is located in a damp environment, consider using a dehumidifier or moisture-absorbing packets to reduce humidity levels.
5. Inspecting for Damage
Regularly inspect the baseball shelf for any signs of damage, such as cracks, chips, or loose baseballs. Address any issues promptly to prevent them from worsening over time. If a baseball is damaged beyond repair, consider replacing it with a new one to maintain the shelf’s appearance and structural integrity.
6. Avoiding Excessive Weight
While baseballs are sturdy, they have their limits when it comes to supporting weight. Avoid placing excessively heavy items on the shelf, as this can cause the baseballs to compress or deform over time. If you need to display heavier items, distribute the weight evenly across the shelf and ensure that it is properly supported to prevent sagging or warping.
7. Securing Loose Baseballs
Over time, baseballs may become loose or dislodged from the shelf due to handling or vibration. Check the shelf regularly to ensure that all the baseballs are securely in place. If you notice any loose baseballs, gently press them back into position or use a small amount of adhesive to secure them to the shelf.
8. Protecting from Pests
Pests such as insects or rodents can cause damage to the baseballs and compromise the integrity of the shelf. To protect the shelf from pests, store it in a clean and well-sealed environment. Consider using pest deterrents such as traps or repellents to keep pests away from the shelf.
By following these maintenance tips, you can ensure that your shelf made from baseballs remains in excellent condition for years to come. Regular cleaning, inspection, and care will help preserve its appearance and functionality, allowing you to continue enjoying its unique and stylish design.
The Wrap Up
Crafting your cute baseball shelf in three easy steps offers a myriad of benefits, ranging from personalization and creativity to practicality and cost-effectiveness. By following these steps, you can transform ordinary materials into a unique and stylish piece of décor that reflects your love for the game.
The first step in creating your baseball shelf involves gathering the necessary materials. From wooden boards and baseballs to screws and paint, selecting high-quality materials ensures the durability and longevity of your shelf. Consider repurposing old baseballs or wooden boards to add a nostalgic touch to your creation.
Once you have all the materials on hand, the next step is assembling the shelf. Carefully following the instructions and using proper tools is essential. Take your time during this step to ensure that each component is securely attached and properly aligned.
You also have the option to add personal touches to make it truly unique. Whether you’re painting the shelf in your favourite team’s colours, displaying signed baseballs, or incorporating baseball-themed decals, this is your opportunity to let your creativity shine. Don’t be afraid to experiment and make the shelf your own.
Frequently Asked Questions
1. Can you use any type of wood for my baseball shelf?
While you can technically use any type of wood for your shelf, it’s best to choose a sturdy and durable option that can support the weight of the baseballs. Hardwoods such as oak, maple, or cherry are popular choices due to their strength and durability. However, if you’re on a budget, you can also use plywood or particleboard as long as it’s properly reinforced.
2. How do you attach the baseballs to the shelf?
There are several methods you can use to attach the baseballs to the shelf, depending on your preference and the design of the shelf. One common method is to drill small holes into the baseballs and screw them onto the shelf using wood screws. Alternatively, you can use adhesive or epoxy to glue the baseballs in place. Experiment with different methods to find the one that works best for your shelf.
3. Can you customize the design of my baseball shelf?
Absolutely! One of the advantages of crafting your own baseball shelf is the ability to customize the design to suit your preferences. Whether you want to paint the shelf in your favourite team’s colours, add decorative accents like baseball-themed decals or stencils, or incorporate other elements such as team logos or player signatures, the possibilities are endless. Let your imagination run wild and make the shelf uniquely yours.
Incorporate elements such as team logos or player signatures into the design of the shelf. You can use decals, stencils, or even custom-made plaques or signs to showcase your team’s pride or pay tribute to your favourite players.
If you’re a fan of baseball history, consider adding vintage elements to the shelf’s design. This could include antique baseball cards, old photographs of classic games, or vintage baseball equipment such as wooden bats or leather gloves. These nostalgic touches add character and charm to the shelf while honouring the sport’s rich heritage.
4. How do I ensure that my shelf is properly aligned and level?
Achieving proper alignment and levelness is crucial to the success of your baseball shelf. Use a level and measuring tape to ensure that the shelf is straight and evenly spaced. Take your time during the assembly process and double-check your measurements to avoid any mistakes. If you’re unsure, don’t hesitate to seek assistance from a friend or family member with experience in woodworking.
Take accurate measurements before cutting the wood or assembling the shelf. Double-check your measurements to avoid any mistakes that could result in an uneven or misaligned shelf.
5. How can you protect my baseball shelf from damage?
To protect your baseball shelf from damage, consider applying a protective finish or sealant to the surface. This will help prevent scratches, stains, and water damage, ensuring that your shelf remains in excellent condition for years to come. Additionally, avoid placing the shelf in areas where it will be exposed to direct sunlight or high humidity, as this can cause the wood to warp or the baseballs to fade.