Last Updated on September 5, 2024 by teamobn
A hanging basket planter? Well, if your outdoor area is looking a bit lacklustre, adding some seasonal flowers is a great way to brighten things up! Planters and hanging baskets are an easy way to display vibrant blooms, and they can really help to bring your space to life.
Plus, changing out your flowers regularly is a great way to keep your outdoor area looking fresh and inviting. So if you’re looking for a quick and easy way to add some colour and life to your yard or patio, consider adding some seasonal flowers to a hanging basket planter.
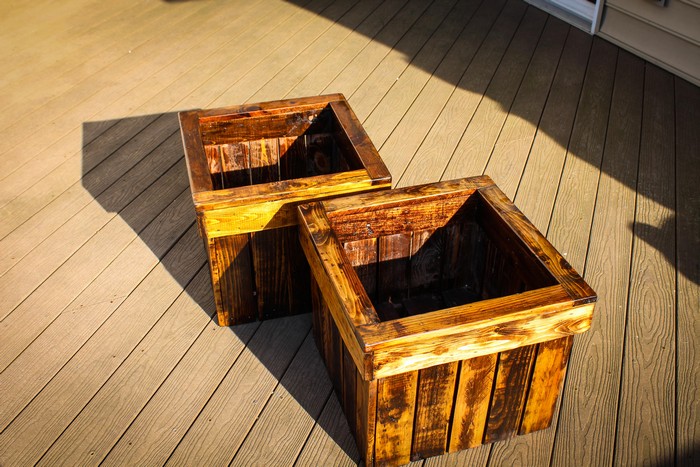
Hanging baskets are a great way to add some extra greenery to your home, but they can be quite expensive to buy from stores. If you’re looking to save some money, why not build your own hanging basket? It’s easy to do and will only cost a fraction of the price of a store-bought one. Plus, you can customize it to match your home’s decor.
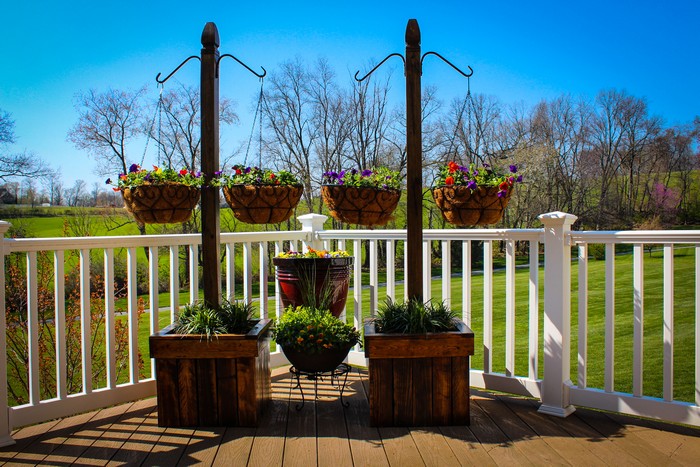
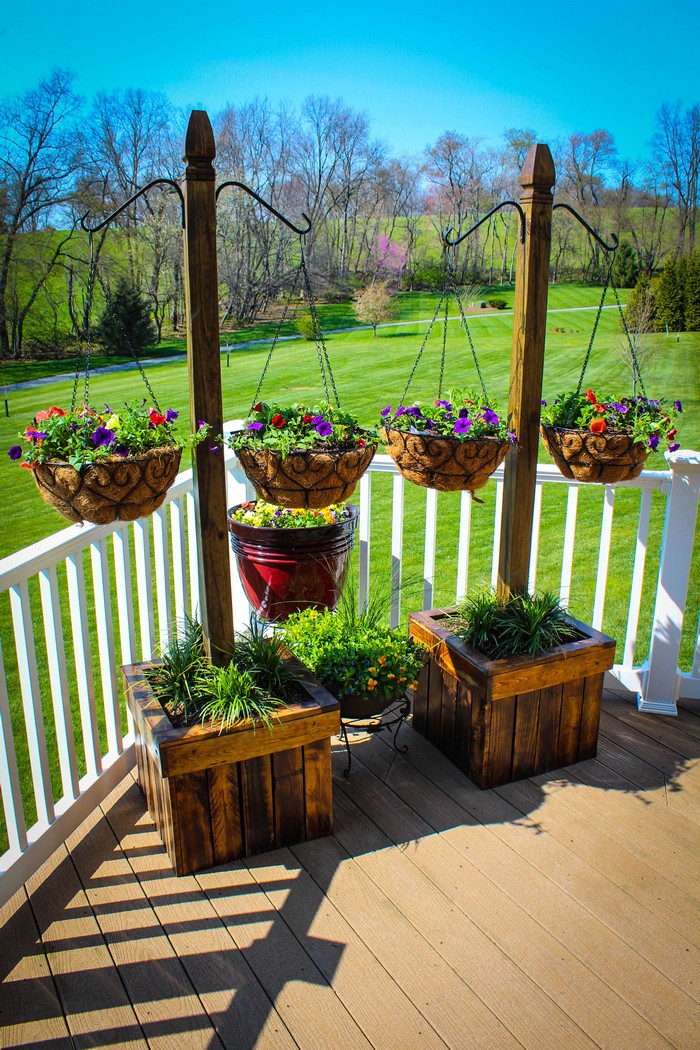
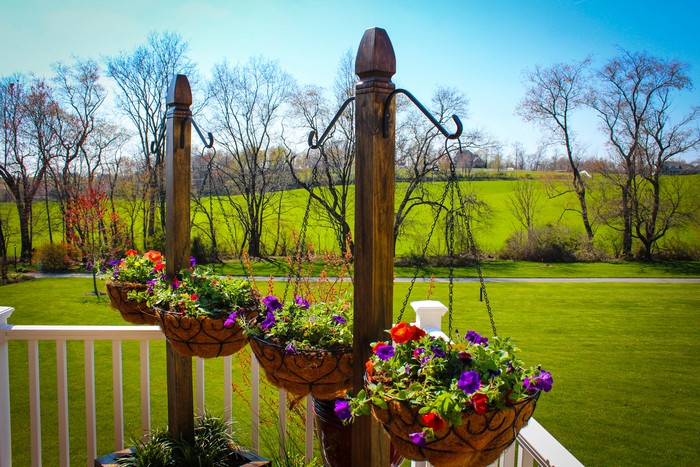
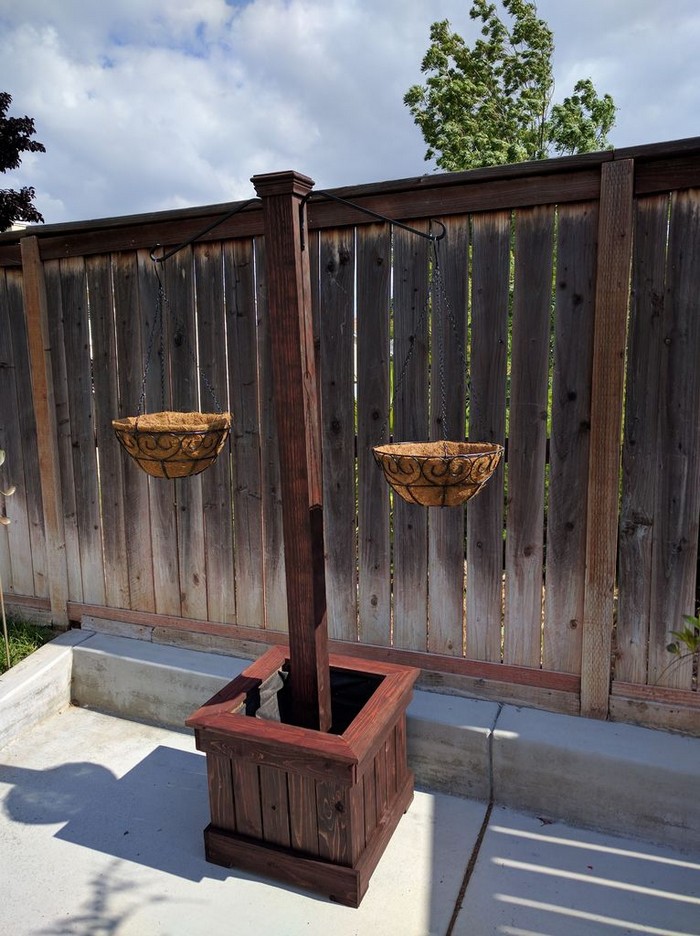
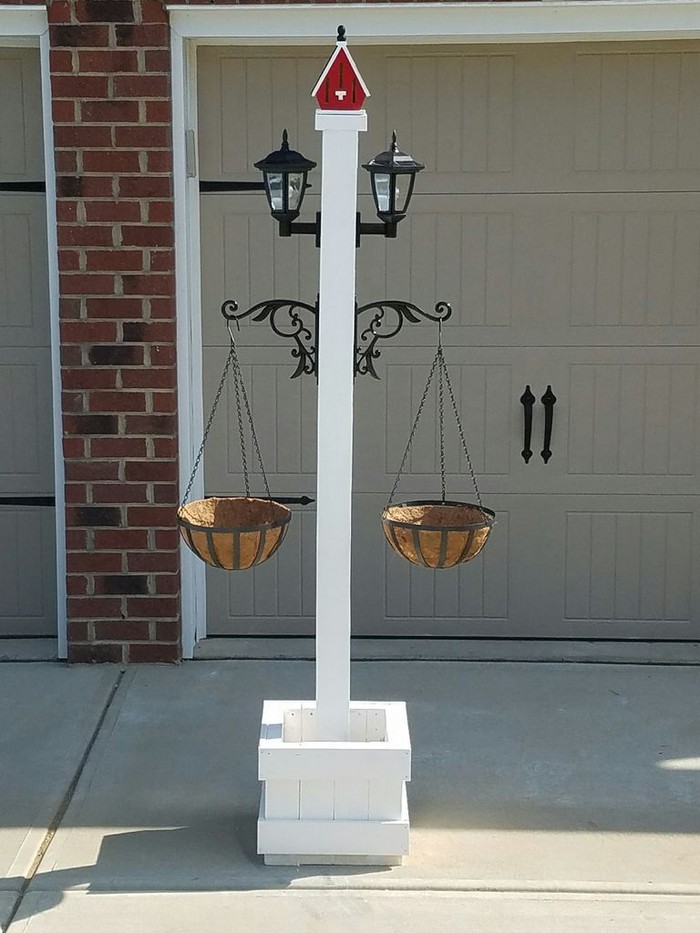
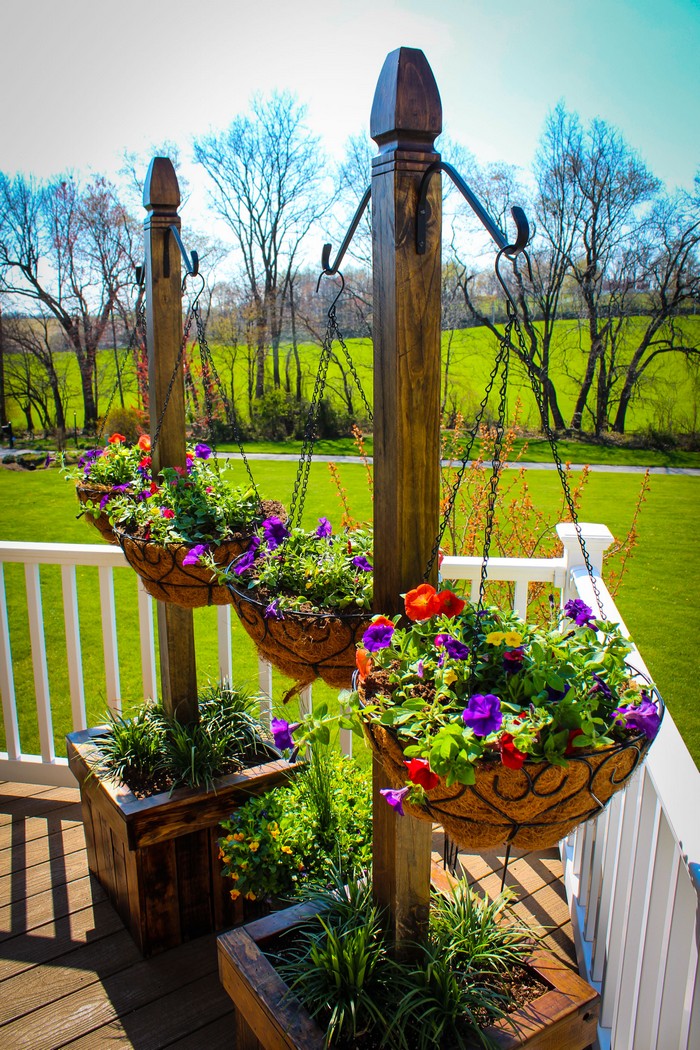
You can simply place your hanging basket column in the ground, but putting it in a planter is an even better idea if you love redesigning your outdoor area from time to time! You can also plant around the base of the column. And since it’s in a planter, you can easily move it around.
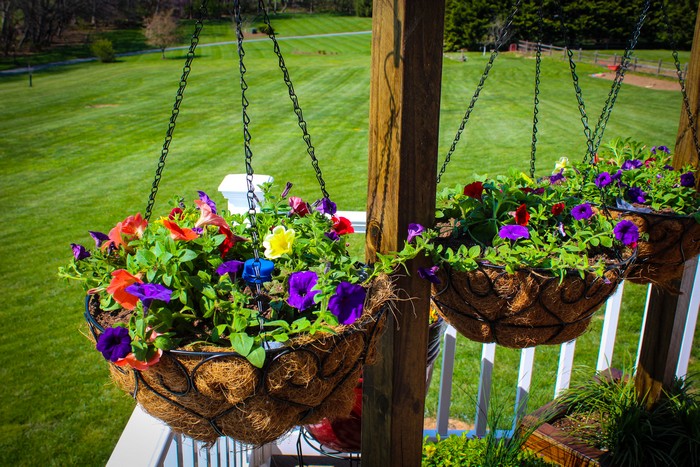
You can design it any way you like or colour it with your favourite paint or wood stain. Plant some colourful flowers like petunias, and wait until they grow and drape over the sides of the hanging baskets
This DIY project teaches you how to build your own hanging basket column with a planter.
Contents
Building a Hanging Basket Planter
Click on any image to start the lightbox display. Use your Esc key to close the lightbox.
Materials
- Pressure Treated Timber 4x4x6-inch – 1 piece each planter for the post
- Pressure Treated Wood 14x14x3/4-inch – 1 piece for the base of the post
- Wooden End Cap
- Hangers – 2 pcs
- Wood Screws
- Pallet Planter Box
Tools
- Table Saw
- Sander
- Cordless drill
- Tape measure
- Pencil
Steps
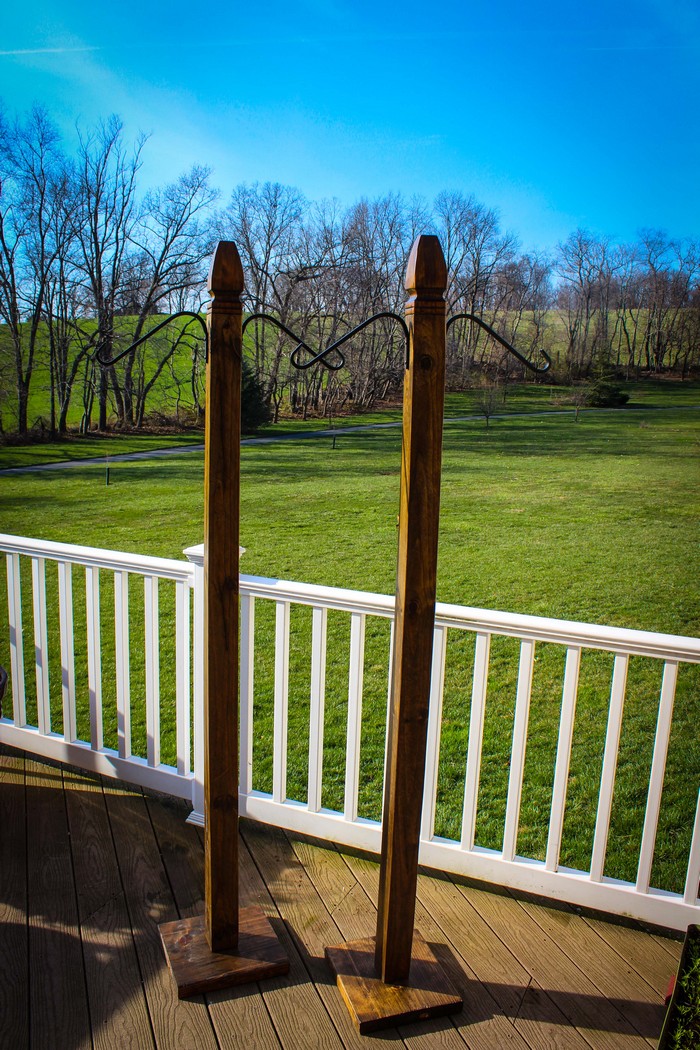
The first thing to do is to build the column with your 4x4x6-inch pressured-treated timber. If you were able to purchase a smooth and clean one, then you can proceed to the next step. However, if your timber is rough and not clean enough for the project, you may need to sand it to give your post a smooth surface. This will help you achieve a professional looking finish.
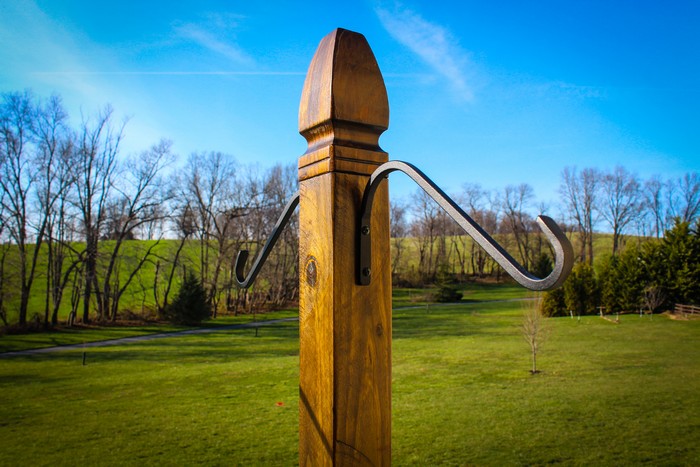
To attach the hangers, first use a drill to make pilot holes in the 2 opposite sides of the post. Then insert the wood screws and tighten them until they’re snug. This will ensure that the hangers are securely in place, even when loaded with hanging baskets.
Make sure that the hangers are evenly spaced on the post, so that the baskets will be balanced when hung. You may want to mark the placement of the hangers with a pencil before drilling the pilot holes. Once the hangers are in place, you’re ready to hang your baskets!
After you have attached your hangers to your posts, you can proceed to attaching the wooden end caps. You can do this by gluing them together or using small nails or screws. If you are using screws, make sure to countersink the heads so they are flush with the wood. This will give your fence a clean, finished look.
Next, you will need to attach the column to the base of the hanging basket planter. It is important to make sure that the post is attached to the centre of the post, in order to avoid it tipping over.
Then put your column into the pallet planter box and fill the box with soil. Finally, you cna now plant your seasonal flowers. 🙂 Enjoy!
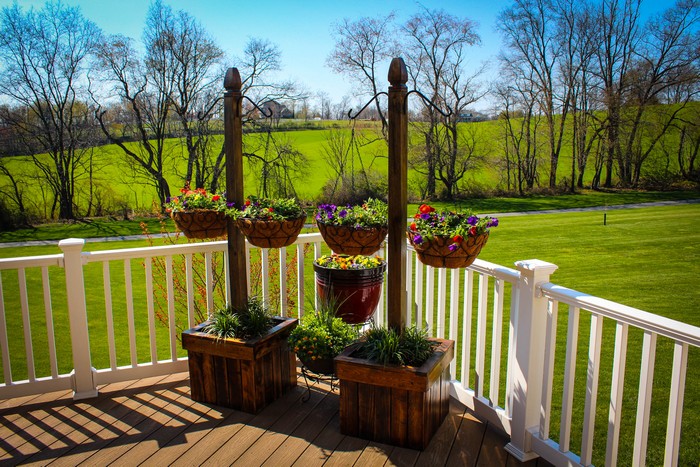
You can get step-by-step instructions from mtairymd over here…
Maintenance Tips for Hanging Basket Planters
Keeping your flowers and plants looking vivid and healthy all through the growing season depends on maintaining a hanging basket planter. Your hanging basket planter can become a beautiful focal point of your indoor or outdoor space with correct care. These basic maintenance ideas will help you keep your hanging basket planter in great shape.
Regular Watering
Because hanging basket plans are exposed to air on all sides, they usually dry out faster than ground-level containers. During hot weather, daily check the moisture level to maintain your plants healthy. If the ground is dry, a basic finger test, inserting it into the ground up to the first knuckle, will indicate so. To keep the soil moist but not waterlogged, you might have to water the hanging basket planter once or perhaps twice a day during the height of summer.
Fertilization for Growth
Feeding your hanging basket planter is crucial for encouraging rich growth and lots of flowering. Every two weeks, use a water-soluble fertilizer according to advised dosage on product label. Choose a balanced fertilizer with equal parts potassium, phosphorous, and nitrogen. This will support not only your plants’ development but also their flowering.
Pruning and Deadheading
Regular pruning and deadheading of old and spent flowers are vital in maintaining the aesthetic of your hanging basket planter. This practice not only helps in preventing the plants from becoming leggy but also encourages them to produce new blooms. Use a sharp pair of scissors or pruning shears to cut back any dead or yellowing leaves, and remove wilted flowers to make room for new growth.
Pest and Disease Management
Keep an eye out for signs of pests and diseases, which can spread rapidly in the confined space of a hanging basket planter. Common pests include aphids, spider mites, and whiteflies, which can be managed using organic insecticidal soaps or neem oil sprays. To prevent fungal diseases, avoid overhead watering that leaves foliage wet for extended periods, as this can create an ideal environment for mold and mildew.
Rotation for Even Growth
Since hanging basket planters often receive uneven sunlight, rotating them weekly ensures that all sides of the planter get equal exposure to light. This helps in preventing one-sided growth, keeping your plants balanced and uniformly lush. Regular rotation also gives you a chance to inspect all sides of the hanging basket planter for any hidden issues like pest infestation or disease.
Seasonal Refresh
At the start of each season, give your hanging basket planter a refresh. Remove any dead plants and replenish the soil with fresh potting mix. This is also a perfect time to add new plants to replace those that did not survive the previous season or to introduce new colors and textures to your display.
By following these maintenance tips, your hanging basket planter will remain a delightful addition to your garden or home, attracting admiration for its beauty and vitality. Whether you’re displaying vibrant blooms or lush greenery, the care you put into your hanging baskets will show in the health and beauty of the plants they house.
DIY Hanging Basket Accessories
Creating your own DIY hanging basket accessories is a fun and functional way to enhance both the practicality and aesthetics of your hanging basket planter. These accessories can range from self-watering systems to decorative elements, making maintaining and displaying your hanging baskets even more enjoyable. Here’s how to get creative with DIY accessories for your hanging basket planter.
Self-Watering System
One of the challenges with hanging baskets is ensuring consistent moisture, especially during hot weather. A DIY self-watering system can solve this problem. Use a water bottle or a wine bottle as a water reservoir. Fill it with water, and then insert it into the soil near the center of your hanging basket planter. The water will slowly seep into the soil, providing the plants a steady source of moisture. This is particularly useful if you’re away for a few days and can’t water your plants regularly.
Decorative Chains and Hooks
Replace standard hanging chains with decorative chains or create your own with braided rope, macramé, or even old jewelry chains for a unique look. You can also craft hooks from bent metal or wire for a rustic touch. These custom chains and hooks not only serve as sturdy supports but also add a personal touch to your hanging basket planter.
Liners with Personality
Standard coconut or moss liners work well, but you can also use alternative materials to line your hanging baskets. Try burlap for a rustic appearance, or use a colorful felt or fabric to add a splash of color. These materials can be cut to size and fitted inside the basket, helping to retain soil and moisture while also adding an unexpected decorative element to your hanging basket planter.
Glow-in-the-Dark Elements
For a whimsical touch, arrange glow-in-the-dark beads or paint in your hanging basket design. Either string the beads on the wires or chains, or lightly paint the basket itself glow-in-the-dark. Your hanging basket planter will stand out even after dark since these components will absorb sunlight during the day and emit a subdued glow at night.
Plant Markers
DIY plant markers are both useful and decorative if you want to monitor the several plant species in your hanging baskets. Base your work from popsicle sticks, little stones, or even broken terracotta bits. With a waterproof marker or paint pen, write the plant names. Your hanging basket planter will have a functional but artistic element from these markers, which can be as basic or as ornate as you want.
Including these do-it-yourself accessories into your hanging baskets will improve their usefulness and look. These imaginative additions not only simplify your life but also let your garden displays reflect your own style.
Conclusion
Creating your own hanging basket planters lets you customize the features and design to fit your own taste and the particular requirements of your plants. This do-it-yourself project not only gives your indoor or outdoor areas a distinctive accent but also provides a fulfilling approach for interacting with gardening. Customized hanging baskets allow you to create a vivid display adding life and color to any space.