Last Updated on January 31, 2024 by teamobn
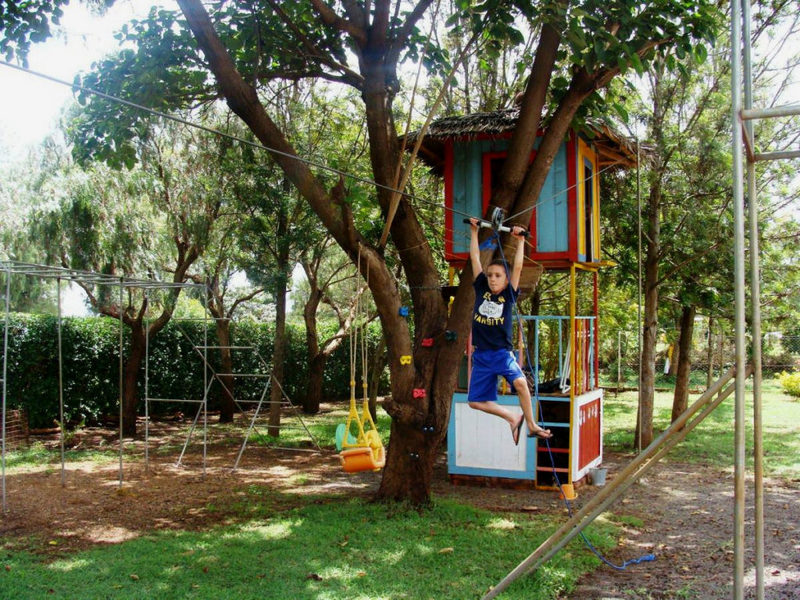
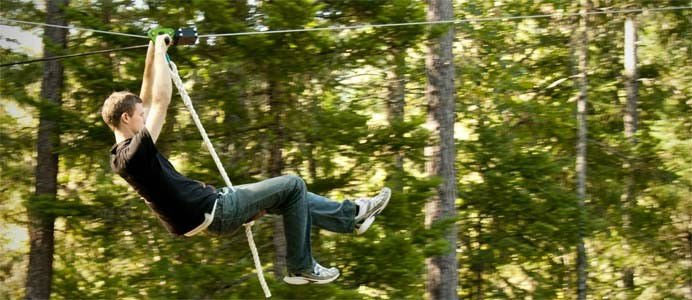
DIY backyard ziplines are a great way to get outdoors and have some fun. They provide a thrilling experience while also being safe and easy to use. There are many different types of zip lines, so you can choose the one that best suits your needs. If you’re looking for a challenging experience, you can try a zip line that is longer and has a steeper incline.
For a more relaxed experience, you can choose a shorter zip line with a gentler incline. No matter what type of zipline you choose, you’re sure to have a great time. Just make sure to follow the safety instructions and have a blast! But, do you know that you can build your own zipline in your backyard?
I love zip lines. I had my first experience at a recreational camp and boy, it was a whole lot of fun! As expected, a lot of kids were into it. But you know what’s surprising? Adults were lining up, waiting for their turn, too! I guess it’s the exhilarating rush that you get, zipping fast, the wind blowing through your face.
So imagine how happy I was when I came across a DIY backyard zipline. My kids were ecstatic when I told them, and they couldn’t wait to try it out, they were jumping up and down, crazily happy.
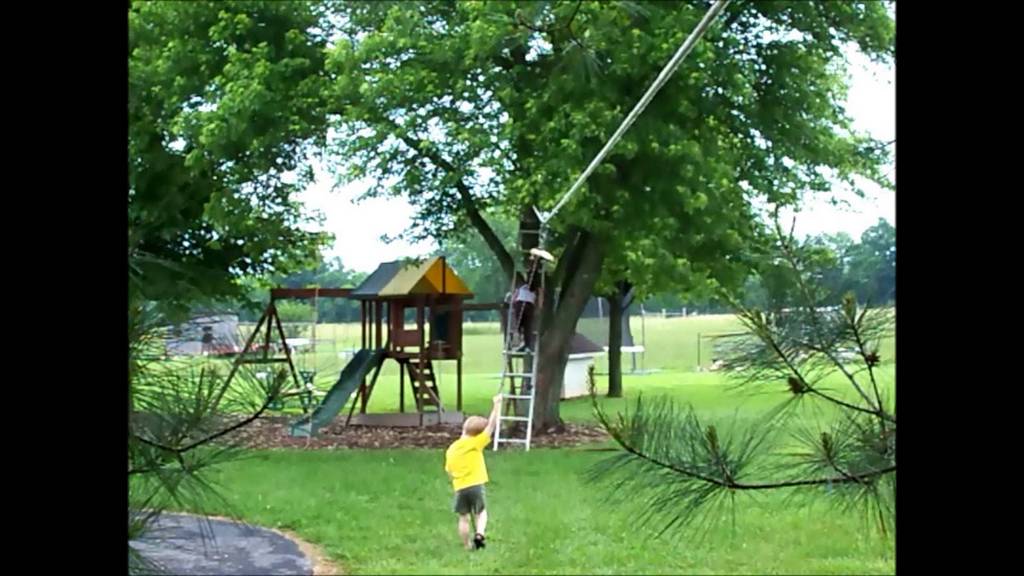
When conducting your survey, be sure to identify two large trees that can be used as starting and ending points for your zipline. This step is crucial, as it will determine the amount of cable you’ll need to purchase. After conducting a thorough survey of our backyard, we wasted no time heading to our local DIY store to get the materials.
In addition to the cable, there are a few other supplies you’ll need for your backyard zipline. The kids were literally dragging me along, eager to get started on the project. We spent the next few hours collecting everything we need, including a few tools we didn’t have at home. By the time we were done, we were all exhausted but excited to get started on the build.
As soon as you have all the tools and materials, ask some of your friends to help you out. After all, they’ll be using the zipline one of these days, too!
Contents
- 1 DIY Backyard Zipline Building Guide
- 2 Creative Themes and Landscaping Ideas for Your Backyard Zipline
- 3 Safety Guidelines for Backyard Ziplines
- 4 Frequently Asked Questions About DIY Backyard Ziplines
- 4.1 How Safe Is a DIY Backyard Zipline?
- 4.2 What Is the Ideal Length for a Backyard Zipline?
- 4.3 How Much Weight Can a DIY Backyard Zipline Hold?
- 4.4 Do I Need Special Tools to Install a Backyard Zipline?
- 4.5 How High Should the Starting Point Be for a Backyard Zipline?
- 4.6 Can I Install a Backyard Zipline if I Don’t Have Trees?
- 4.7 How Do I Maintain My Backyard Zipline?
- 4.8 Is It Necessary to Use a Harness on a Backyard Zipline?
- 4.9 What Age Is Appropriate for Using a Backyard Zipline?
- 4.10 How Often Should I Replace the Cable of My Backyard Zipline?
- 5 Conclusion
DIY Backyard Zipline Building Guide
Materials:
- 5mm steel cable
- The length of the cables will depend on the distance between your trees or poles where you will connect your zipline. If you are spanning a large distance, you will need longer cables. You can purchase cables of various lengths to accommodate your needs.
- Pulley
- It should be able to withstand a load of up to 100Kg. This is more than enough for a kids’ zip line to be able to use them securely. The pulleys should be also made of high-quality materials, so you can be sure that they will last for a long time.
- 28mm round wooden stick
- This will be used as a trolley handle.
- Nylon rope
- It should be 4mm thick with a rate of 75Kg will increase the maximum load. This will hold the trolley handle. You can do it in a braid for extra strength. This will ensure that the trolley handle can withstand more weight and will not break easily.
- Carabiner
- It should be 8mm thick
- 6 pcs malleable cable clamp
- 2 pcs eye-to-eye turnbuckles
- Rubber tube
- This rubber tube is designed to wrap around trees for protection. It should also be made of durable material that will withstand the elements and provide long-lasting protection for your tree.
Tools:
- Saw
- Drill
- Lighter
- Wrench
- Duct tape
- Paper tape
Instructions:
- Select and Prepare the Location:
- Identify two strong trees or poles as the start and end points.
- Ensure they are at an appropriate distance for your cable length.
- Install the Cable:
- Wrap rubber tubes around the trees or poles to protect them.
- Attach one end of the steel cable to the first tree using a cable clamp.
- Stretch the cable to the second tree, ensuring it is tight and secure.
- Use the turnbuckles to adjust the tension of the cable.
- Attach the Pulley:
- Slide the pulley onto the cable before securing the second end.
- Ensure the pulley moves smoothly along the cable.
- Prepare the Trolley Handle:
- Cut the 28mm round wooden stick to a comfortable length for a handle using the saw.
- Drill holes at both ends of the stick.
- Use the lighter to burn the ends slightly to prevent fraying.
- Assemble the Trolley System:
- Thread nylon rope through the drilled holes in the stick.
- Secure the rope with knots.
- Attach the rope to the pulley using the carabiner.
- Final Safety Checks:
- Double-check all clamps, turnbuckles, and the pulley for secure fitting.
- Test the zipline with a weight equivalent to the heaviest intended user.
- Adjust tension as needed.
- Reinforcement:
- Use duct tape and paper tape for additional reinforcement and marking any key points.
- Testing:
- Perform a few test runs, starting with lighter weights.
- Gradually increase to the full weight capacity.
Creative Themes and Landscaping Ideas for Your Backyard Zipline
Installing a DIY backyard zipline can transform your outdoor space into an adventure-filled area. With the right creative themes and landscaping, your zipline won’t just be a thrilling ride but also a visual delight. Let’s explore some ideas to enhance the aesthetics and fun of your zipline.
Enchanted Forest Theme
Create a magical forest around your DIY backyard zipline. Use lush green plants and flowering shrubs to create a canopy effect. Add fairy lights along the cable and around trees for a mystical ambiance. This theme is perfect for sparking the imagination of both kids and adults.
Tropical Paradise
Turn your zipline area into a tropical retreat. Plant palm trees and exotic flowers along the path of the zipline. You could add a sand pit at the landing area to give a beach-like feel. This theme is great for those who love a sunny, beachy vibe in their backyard.
Garden Oasis
Integrate your DIY backyard zipline with a blooming garden. Use colorful flower beds and green lawns around the zipline area. Installing benches or hammocks near the landing zone provides a relaxing space to enjoy the garden. This theme is ideal for those who love gardening and want to combine it with their love for adventure.
Adventure Course
For those seeking an adrenaline rush, turn your zipline into part of an adventure course. Add rope bridges, ladders, and climbing nets around the zipline. This setup is perfect for creating a challenging and fun outdoor activity area.
Seasonal Decor
Adapt your DIY backyard zipline with seasonal decorations. In autumn, use pumpkins and fall leaves for a festive look. For winter, add lights and snow-themed decor. This approach keeps the zipline exciting and fresh all year round.
With these creative themes and landscaping ideas, your DIY backyard zipline will be more than just a ride; it will become an integral and enchanting part of your outdoor living space.
Click on any image to start the lightbox display. Use your Esc key to close the lightbox.


Safety Guidelines for Backyard Ziplines
Ensuring safety is crucial when installing and using a DIY backyard zipline. Adhering to specific safety guidelines can provide a fun and secure experience for everyone. Here are essential safety measures to consider.
Regular Inspection and Maintenance
Ensuring the safety and longevity of your backyard zipline involves regular inspection and maintenance. This process is crucial to prevent accidents and ensure a smooth, enjoyable ride every time.
Cable Check
The steel cable is the backbone of your backyard zipline. Regular inspections are vital to detect any signs of wear and tear. Look out for fraying, rust, or any form of damage. If you notice any issues, it’s important to replace the cable immediately. This not only ensures safety but also maintains the quality of the ride.
Structure Stability
The strength and stability of the trees or poles used as support structures for your backyard zipline cannot be overstated. Periodically check these structures for signs of decay or weakness. This is particularly important after extreme weather conditions like storms or heavy snow. If the trees or poles show any signs of instability, it’s essential to reinforce or replace them to prevent accidents.
Bolt and Clamp Security
Bolts and clamps keep your backyard zipline securely attached to its supports. Over time, these can become loose due to regular use or environmental factors. Make it a habit to check and tighten all bolts and clamps frequently. This ensures that the zipline remains securely fastened, providing a safe and stable ride.
Proper Installation
Proper installation is critical for the safety and effectiveness of your backyard zipline. It’s essential to follow specific steps and guidelines to ensure that your zipline is both safe and enjoyable.
Following Instructions
When installing your backyard zipline, the importance of strictly adhering to the provided installation guide cannot be overstated. These instructions are designed to ensure every component of the zipline is correctly and safely assembled. Pay close attention to the details about cable tension, height, and clearance.
Incorrect installation can lead to accidents or reduce the lifespan of your zipline. It’s also important to use all the materials provided in the kit and avoid substituting them with other items that might not be suitable or safe.
Seeking Professional Assistance
If at any point during the installation process you are unsure or uncomfortable with the steps, it’s highly recommended to seek professional assistance. Professionals have the expertise and experience to install your backyard zipline safely and efficiently. They can ensure that the zipline is properly anchored, the cable tension is correct, and all safety measures are in place. This not only guarantees a safer setup but also provides peace of mind.
Use of Safety Gear
When enjoying your backyard zipline, using the right safety gear is essential. It significantly reduces the risk of injury and ensures a safer experience for everyone involved.
Helmets
Wearing a helmet is a fundamental safety rule for any backyard zipline activity. A helmet protects your head in case of falls or unexpected contact with surrounding objects. Choose a helmet that fits snugly and is specifically designed for outdoor adventure activities. Ensure that everyone, especially children, wears a helmet every time they use the zipline. This simple precaution can prevent serious head injuries and should never be overlooked.
Harnesses
For longer or higher backyard ziplines, a harness provides an additional level of safety. A harness secures the rider to the zipline, preventing falls and providing support. It is particularly important for ziplines that are set at greater heights or extend over areas where falling could be more dangerous. When choosing a harness, select one that is comfortable, well-fitting, and suitable for the weight and size of the user. Regularly check the harness for wear and tear, and replace it if necessary.
Supervision and Usage Rules
Ensuring safety on a backyard zipline involves not just the equipment and installation but also adhering to strict supervision and usage guidelines.
Adult Supervision
When it comes to children using the backyard zipline, adult supervision is non-negotiable. An adult should always be present to oversee the activity, ensuring that the children use the zipline correctly and safely. Supervisors should guide children on how to embark and disembark from the zipline properly and ensure they’re following all safety precautions, including wearing the appropriate gear. This oversight is crucial in preventing accidents and ensuring a safe and enjoyable experience.
Weight Limits
Every backyard zipline has specific weight limits, which are crucial to adhere to. Exceeding these limits can strain the zipline, leading to potential accidents or equipment failure. Always check the manufacturer’s specifications for weight limits and ensure that all users are within these guidelines. This not only ensures individual safety but also maintains the integrity and longevity of the zipline.
Emergency Preparedness
While enjoying your backyard zipline, it’s essential to be prepared for any emergencies that might arise.
First Aid Kit
Keep a well-stocked first aid kit accessible near the zipline area. This kit should include items like band-aids, antiseptic wipes, gauze, and any other basic medical supplies that can address minor injuries such as cuts or scrapes. Quick access to a first aid kit can provide immediate care for minor injuries and prevent them from becoming more serious.
Emergency Plan
Develop and familiarize all potential users with an emergency plan. This plan should include steps to take in case of more serious accidents, such as how to quickly stop the zipline, safely evacuate an injured person, and contact emergency services. Having a clear, well-thought-out emergency plan can significantly reduce the severity of accidents and ensure a quick response in critical situations.
Frequently Asked Questions About DIY Backyard Ziplines
How Safe Is a DIY Backyard Zipline?
When properly installed and maintained, a DIY backyard zipline can be very safe. Ensure you follow all safety guidelines, use high-quality materials, and conduct regular inspections and maintenance.
What Is the Ideal Length for a Backyard Zipline?
The ideal length depends on the size of your backyard and the height difference between the start and end points. Typically, backyard ziplines range from 50 to 200 feet.
How Much Weight Can a DIY Backyard Zipline Hold?
This depends on the materials used, especially the strength of the steel cable and the supporting structures. Most standard backyard ziplines can safely hold up to 250 pounds.
Do I Need Special Tools to Install a Backyard Zipline?
Basic tools like a wrench, drill, saw, and lighter are usually sufficient. The specific tools required might vary based on your zipline kit.
How High Should the Starting Point Be for a Backyard Zipline?
The height will vary based on the length of the zipline and desired speed. A general rule is a 6% incline, meaning for every 100 feet of cable, the starting point should be about 6 feet higher than the end point.
Can I Install a Backyard Zipline if I Don’t Have Trees?
Yes, you can use poles or other sturdy structures as long as they can safely bear the load and tension of the zipline.
How Do I Maintain My Backyard Zipline?
Regularly inspect the cable, pulley, and connections for wear and tear. Tighten any loose bolts, and replace any worn-out parts immediately.
Is It Necessary to Use a Harness on a Backyard Zipline?
For most backyard ziplines, a harness is not necessary. However, for longer or higher ziplines, a harness adds an extra layer of safety.
What Age Is Appropriate for Using a Backyard Zipline?
While there’s no specific age limit, it’s crucial to ensure that children are of an age and size that they can safely use and enjoy the zipline under adult supervision.
How Often Should I Replace the Cable of My Backyard Zipline?
This depends on usage and exposure to weather elements. As a general guideline, inspect the cable regularly and consider replacing it every few years, or sooner if there are signs of significant wear.
Conclusion
Building and maintaining a DIY backyard zipline offers a unique blend of adventure and craftsmanship. By following the detailed guidelines for installation, safety, and maintenance, you can create a thrilling yet secure experience right in your own backyard. Regular inspections and adherence to safety protocols are vital to ensure lasting enjoyment and peace of mind.
If you want more adventure at home, check out our indoor climbing wall guide!