Last Updated on March 7, 2024 by teamobn
Build a Toothbrush Holder From Scrap Wood.
Were you aware that scrap wood holds a remarkable potential for a variety of projects? The versatility of scrap wood is truly astonishing, offering numerous possibilities for both creating entirely new items and repurposing existing materials.
Whether your aim is to craft functional elements such as shelves and tables or to add an artistic touch to your space with decorative items like wall art and picture frames, scrap wood emerges as an excellent and multifaceted option.
The potential is truly limitless. What’s even more advantageous is that repurposing scrap wood offers an excellent opportunity to both cut costs and contribute to sustainability.
If you find yourself with surplus scrap wood, resist the urge to dispose of it casually. Instead, tap into your creativity and explore the myriad possibilities of crafting something meaningful and environmentally conscious with those overlooked materials.
One weekend, my husband and I were having our second cup of coffee when he suddenly stood up. Surprised, I asked him where he was going halfway through his drink. He said he’s making a toothbrush holder. I was confused as to why he would need to make a toothbrush holder when we already had one, but I didn’t say anything and just watched him leave the room.
After a short pause, he came back brandishing a drill and holding a piece of wood. My confusion intensified, prompting me to inquire once again about his intentions. With a sparkle of enthusiasm in his eyes, he went on to elucidate that he had come across an image of a distinctive toothbrush holder online that had captured his interest.
Motivated by the design, he chose to seize the initiative and create a customized rendition for us. A chuckle escaped me as he walked in, proudly displaying his handiwork. After hours of scouring for the ideal toothbrush holder, he had ultimately discovered one — and it came at no cost.
He had made it himself out of wood he had found lying around. It was genuinely impressive to witness what he crafted with such scarce resources. His ingenuity is among the qualities I hold in the highest regard.
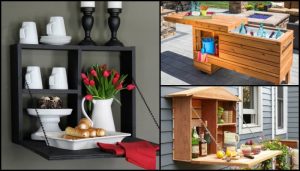
If you have scrap wood, this is a great project to work on. You can make several and then wrap them nicely, and give them out as presents. You could even stencil in names to make the gift more personalized. Not only is this a great way to repurpose wood, but it’s a thoughtful present that is sure to be appreciated.
Contents
How to Make a DIY Toothbrush Holder From Scrap Wood
In this part, explore crafting a practical and stylish toothbrush holder using scrap wood. Whether you possess extensive experience in woodworking or are a beginner filled with enthusiasm to commence a new project, this tutorial presents a cost-effective solution for organizing your bathroom essentials.
Prepare to collect all the necessary materials and tools to get started.
Materials
- Scrap wood
- Wood glue
- Finish
Tools
- Table saw
- Cordless drill with a 1-inch drill bit
- Planer
- Sander
Steps
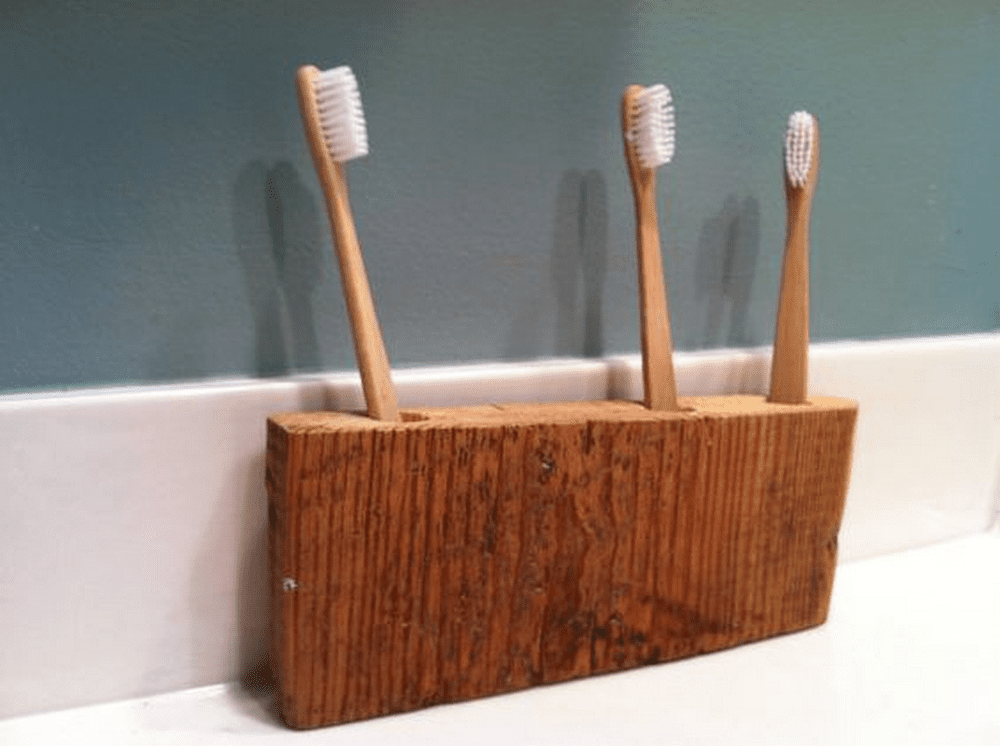
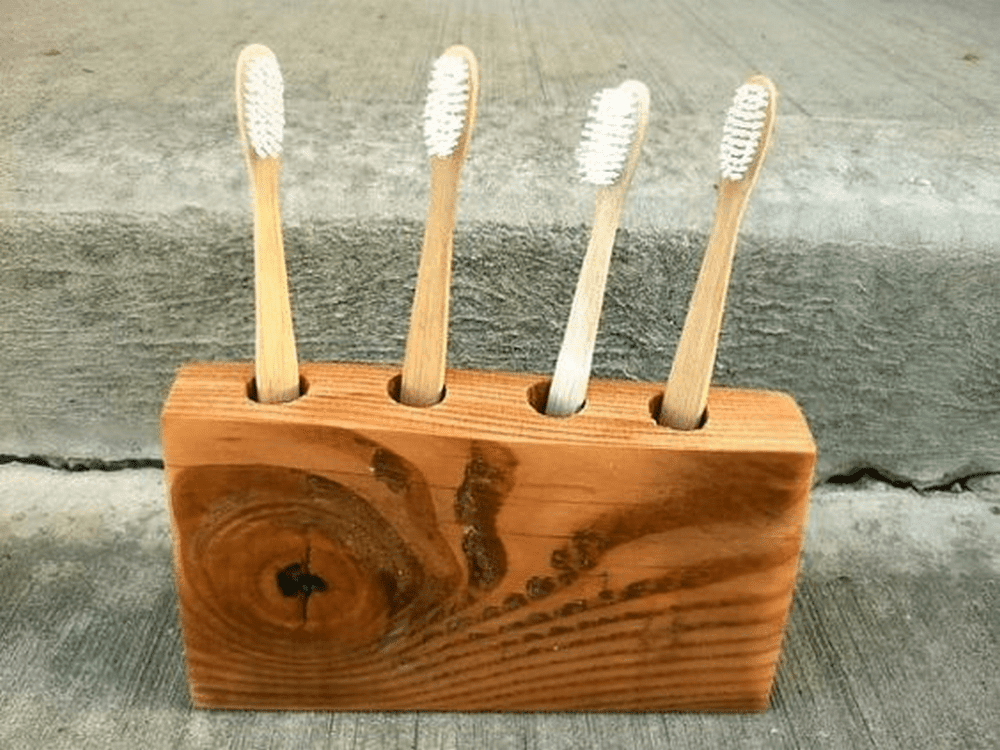
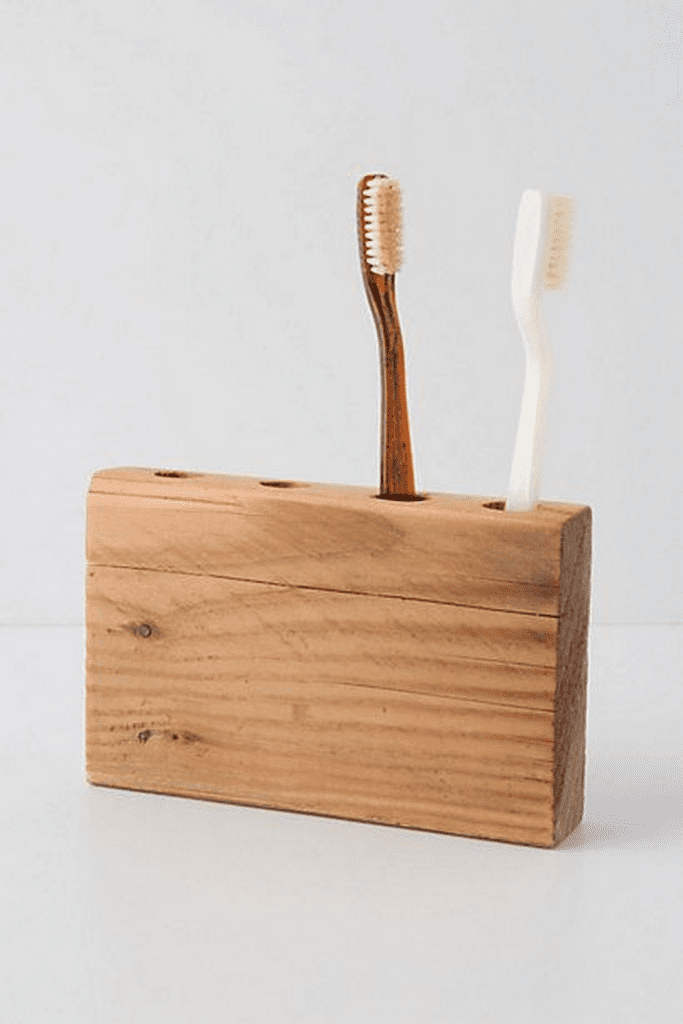
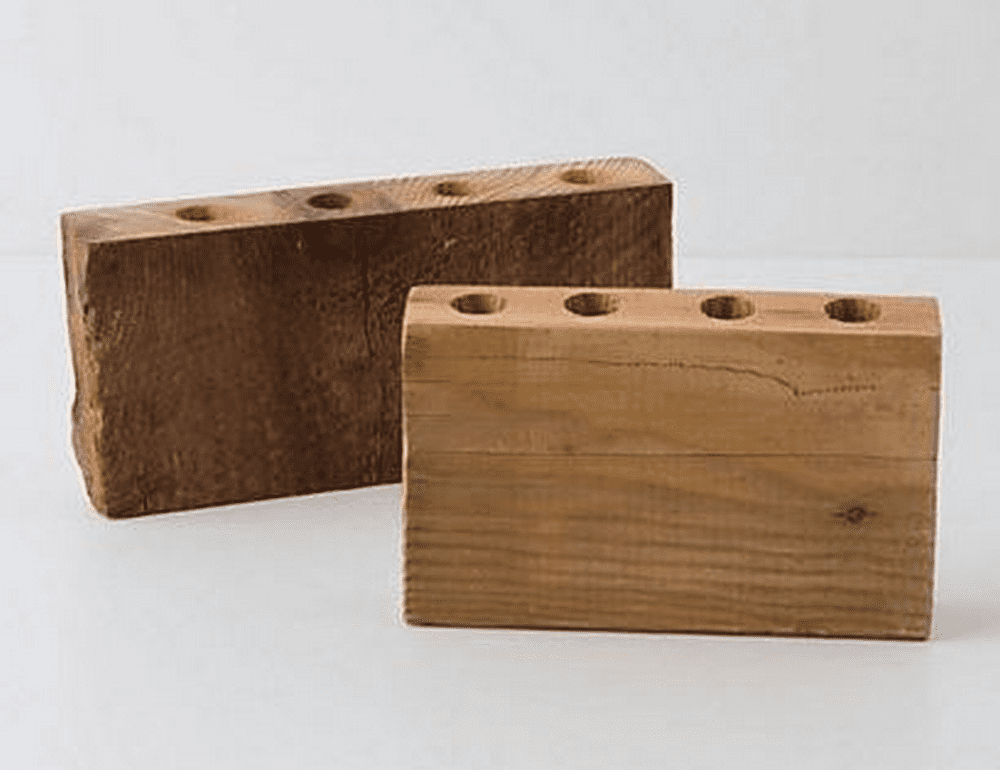
The success of your DIY project relies on the types of wood scraps you possess. For those with thicker wood scraps, crafting a toothbrush holder involves drilling holes on one side of the cleaned wood scrap. Before the drilling process, it is necessary to prepare the wood scrap by planning and sanding it down to achieve a smooth surface.
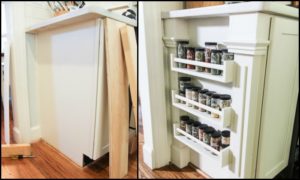
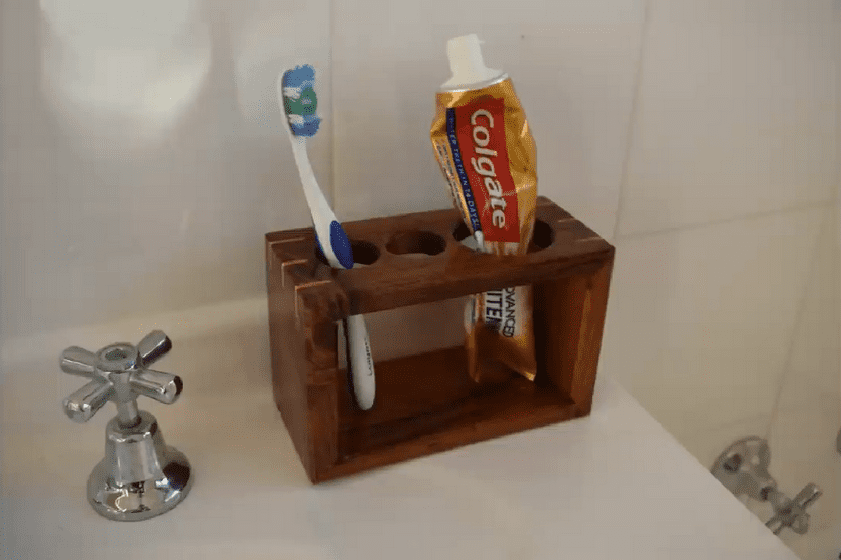
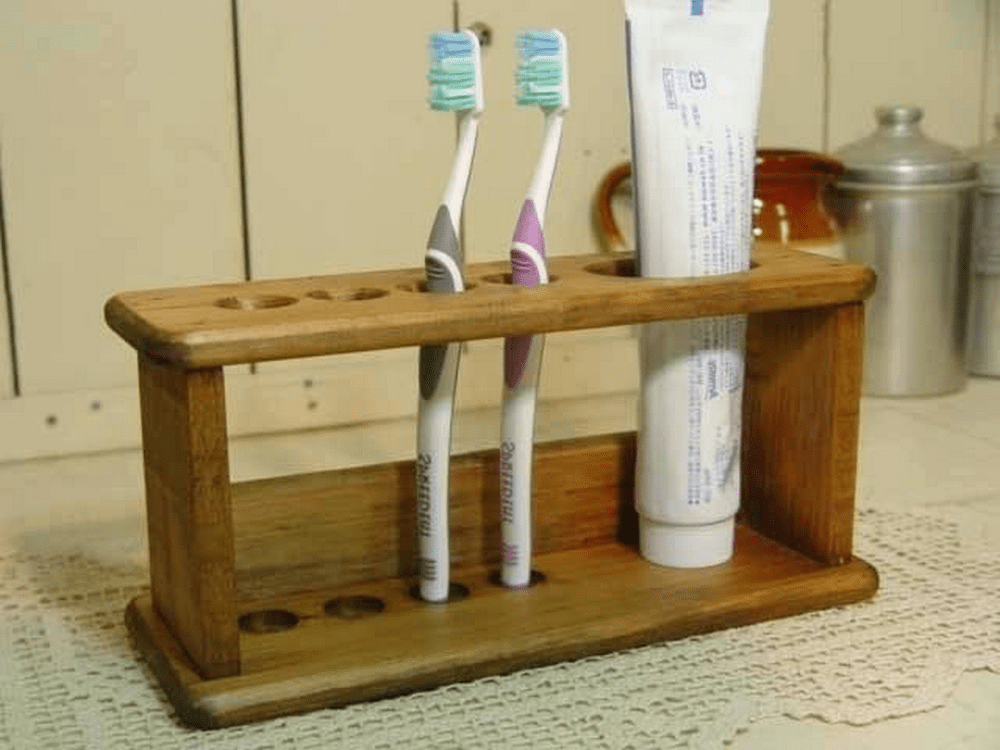
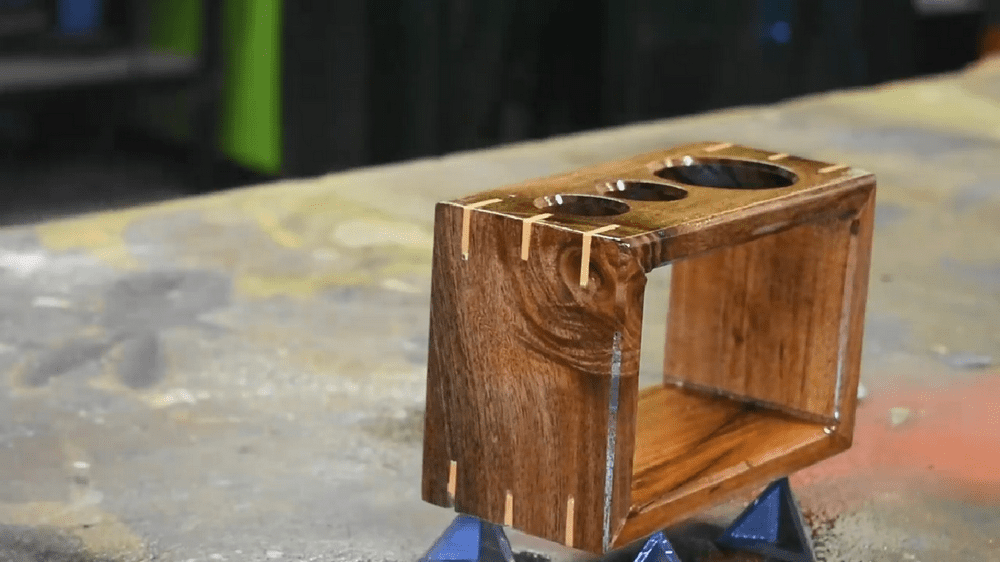
If you have thinner wood scraps, you can make a box out of them. You can start by cutting equal pieces of wood scraps. But clean them first; if they need to be sanded, sand them for a smoother surface. Once you have all your pieces cut, you can start assembling your box.
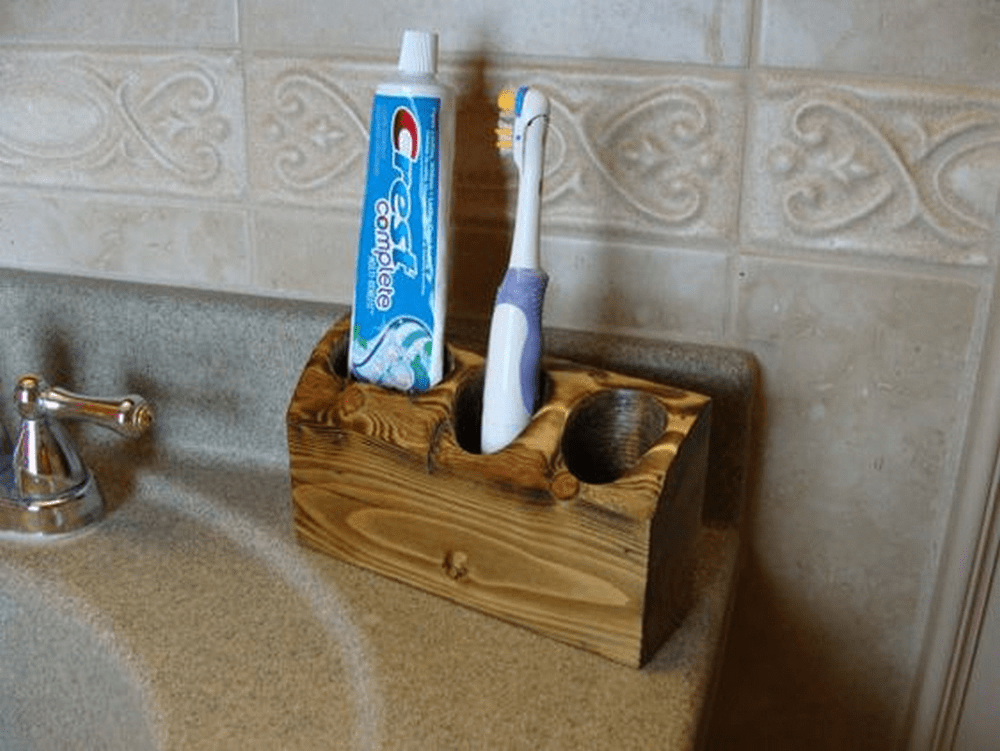
Drill holes on the upper surface of the box to accommodate your toothbrush and toothpaste. Ensure the holes are sufficiently large to allow easy access to the toothpaste, simplifying your morning routine.
Click on any image to start the lightbox display. Use your Esc key to close the lightbox.

The video below will show you how to build a toothbrush holder from scrap wood.
DIY Toothbrush Holder Ideas
1. Minimalist Block Holder
Stack and glue together simple rectangular blocks of wood to create a minimalist, modular toothbrush holder. Choose a type of wood that suits your aesthetic preferences and fits well with your bathroom decor. Oak, pine, or bamboo are popular for their natural and timeless appeal.
2. Driftwood Organizer
If you have pieces of driftwood, artistically arrange them, securing the toothbrushes in natural crevices. Look for interesting shapes and sizes and those with natural crevices and knots that can serve as convenient toothbrush holders.
3. Rustic Mason Jar Holder
Attach mason jars to scrap wood to hold toothbrushes and toothpaste. This adds a rustic and functional touch. This DIY project brings a rustic touch to your bathroom and provides a practical solution for keeping your dental essentials organized.
4. Branch and Log Design
Use a larger branch or log as the main support, carving out sections for individual toothbrushes. This hands-on DIY project merges functionality with a natural aesthetic, adding a distinctive element to your bathroom decor.
5. Geometric Wall-Mounted Holder
Cut scrap wood into geometric shapes (squares, triangles, hexagons) and arrange them on the wall to create a visually interesting, wall-mounted toothbrush holder. This DIY project provides a functional storage solution for your toothbrushes and transforms your bathroom wall into a dynamic focal point.
Sustainability and Eco-Friendliness in DIY Projects
In the realm of DIY projects, sustainability and eco-friendliness are not just trends; they are principles guiding a growing movement. The increasing awareness of environmental issues has sparked a surge in creativity among DIY enthusiasts. They seek to repurpose, reuse, and recycle materials, contributing to a more sustainable and eco-friendly lifestyle. This movement towards greener practices encourages individuals to look at everyday items differently, including the humble toothbrush holder.
The Importance of Sustainable Practices
Sustainability in DIY projects goes beyond the mere act of recycling. It involves thoughtful consideration of the materials used, their source, and their environmental impact. By repurposing materials like scrap wood, DIYers can significantly reduce waste and the demand for new resources. This approach conserves natural resources and minimizes the carbon footprint associated with manufacturing and transporting new materials.
Crafting with a Conscience
The decision to create a toothbrush holder from scrap wood exemplifies crafting with a conscience. This project embodies the essence of sustainability by giving new life to leftover materials that might otherwise end up in a landfill. By selecting non-toxic finishes and adhesives, DIYers can further enhance the eco-friendliness of their projects, ensuring that their creations are not only beautiful but also benign to the environment.
Encouraging Eco-Friendly Choices
DIY projects like the toothbrush holder catalyze change, inspiring others to make eco-friendly choices in their daily lives. They demonstrate that sustainability can be seamlessly integrated into our homes, offering functional and stylish solutions that do not compromise our planet’s health.
Moreover, these projects foster a culture of mindfulness and responsibility towards the environment, encouraging a shift in consumer behavior from buying new to making do and mending.
The Ripple Effect
The impact of choosing sustainability in DIY projects extends beyond the individual creator. It has a ripple effect, influencing communities and potentially sparking a broader movement towards eco-friendly living. Sharing these projects and their stories can inspire others to embark on their sustainable DIY journeys, amplifying the environmental benefits.
Creating a toothbrush holder from scrap wood is more than just a simple project. It is a statement of sustainability, a testament to the power of repurposing, and a step towards a more eco-conscious lifestyle. As the DIY community continues to embrace and promote eco-friendly practices, we move closer to a world where sustainability is woven into our daily lives.
Personalisation and Decorative Techniques
personalization and decorative techniques are key components that transform simple items into bespoke treasures. This approach allows creators to express their individual styles and adds a unique, personal touch to everyday objects. From a custom-made toothbrush holder to intricately designed furniture, the possibilities for customization are endless.
In exploring personalization and decorative techniques, we delve into various methods that can elevate the aesthetic appeal of DIY projects, making them truly one-of-a-kind.
Stenciling and Painting
Stenciling serves as an accessible entry point for those looking to personalize their DIY projects. It involves the use of cut-out patterns or designs which, when applied over a surface, act as a template for painting. This technique can dramatically transform the aesthetic of items like a wooden toothbrush holder or a ceramic vase.
By applying stencils, creators can infuse objects with vibrant colors, intricate patterns, or thematic designs that resonate with their personal style or the décor of a room. The beauty of stenciling lies in its versatility. It pairs wonderfully with various painting techniques to achieve different effects. For instance, the ombre effect, where colors gradually transition from light to dark, adds a contemporary touch to any object.
Distressed finishes, achieved by sanding certain areas to reveal underlying layers, lend a vintage charm that’s particularly appealing in rustic interiors. Chalk paint, known for its matte finish, can create a soft, tactile look that feels both modern and nostalgic. Each of these techniques can elevate the visual appeal of an item, offering a layered, textured, and highly customized finish.
Wood Burning and Carving
Wood burning and carving are tactile and deeply satisfying techniques for personalizing wooden items, such as toothbrush holders. Wood burning, or pyrography, involves the use of a specialized heated tool to burn designs into the surface of the wood.
This method can produce detailed artwork, text, or patterns, imbuing the piece with a rustic charm that’s reminiscent of campfires and natural simplicity. The warmth of the burned wood adds a cozy, inviting feel to any space, making it a popular choice for those seeking to add a touch of nature-inspired aesthetics to their bathrooms or kitchens.
Carving, on the other hand, offers a three-dimensional aspect to customization. Artists can etch into the wood using chisels, knives, or even rotary tools, removing parts to create relief designs or intricate patterns.
The method requires a bit more skill and patience but results in uniquely tactile and visually captivating pieces. Carved designs can range from simple geometric patterns to elaborate scenes or motifs, depending on the creator’s skill level and imagination.
Both wood burning and carving allow for a high degree of personal expression. They enable the creator to transform a simple piece of wood into a functional work of art. A toothbrush holder, for example, can be elevated from a mere bathroom accessory to a conversation piece that reflects the maker’s craftsmanship and artistic vision. Through these techniques, the act of personalization goes beyond aesthetic appeal, embedding items with personal stories and a sense of timelessness.
Decoupage
Decoupage is a transformative and creative technique that melds the simplicity of paper crafts with the sophistication of bespoke decor. This art form, rooted in layering paper cutouts onto an object and sealing them with a glossy varnish, offers endless possibilities for customization and creativity.
By employing decoupage, even the most unadorned items, such as a basic toothbrush holder, can be elevated into personalized statement pieces that reflect individual tastes and artistic inclinations.
At its core, decoupage is about storytelling through images, colors, and patterns. Selecting the right paper materials—be it vibrant magazine cutouts, elegant tissue papers, or bespoke printed designs—is the first step in the transformation process. This selection phase is crucial as it sets the theme and mood for the project, whether aiming for a modern minimalist design, a vintage floral motif, or a playful geometric pattern.
When applying decoupage to a toothbrush holder, consider the bathroom’s overall aesthetic or the user’s personality. For example, a child’s toothbrush holder might feature bright colors and cartoon characters, while a more mature design could lean towards elegant botanical prints or abstract art. This customization extends beyond mere decoration; it seamlessly integrates the item into the living space, making routine tasks more personalized and enjoyable.
The process involves cutting the selected paper into desired shapes and sizes before carefully arranging them onto the object. This stage allows for creative expression, as the pieces can be layered to create depth or arranged to convey a specific narrative.
Once satisfied with the design, the next step is to adhere the paper to the object using a special decoupage glue or medium. After drying, several coats of varnish are applied, creating a seal that protects the artwork from moisture and wear. This sealing process ensures durability and imparts a professional finish, making the object both functional and aesthetically pleasing.
.Adding Textures and Materials
Integrating various textures and materials into a DIY project can significantly transform its appearance and appeal. This approach to design not only enriches the sensory experience of an object but also infuses it with a level of sophistication and elegance that stands out.
When it comes to everyday items like a toothbrush holder, adding diverse materials such as leather, fabric, or metal accents can elevate a simple utility object into a piece of decorative art that enhances the overall aesthetic of a space.
With its rich texture and durability, leather offers a classic touch when wrapped around objects. A toothbrush holder adorned with leather can introduce a rustic or luxurious element to bathroom decor, depending on the type and finish of the leather used. This material adds visual depth and provides a tactile experience that can make daily routines feel more luxurious.
Fabric covers allow for the introduction of patterns, colors, and textures in a versatile and easily changeable form. Whether opting for a sleek, modern print or a cozy, textured fabric, covering a toothbrush holder in fabric can instantly match it to your bathroom’s theme or color scheme. This method particularly appeals to those who enjoy updating their decor regularly, as the covers can be swapped out with minimal effort.
Metal accents can add a touch of modernity or industrial chic to a toothbrush holder. Whether it’s a copper base, brass details, or a stainless steel band, these elements give the design a reflective quality and a sense of permanence. Metal accents can also serve to complement fixtures and fittings in the bathroom, creating a cohesive look throughout the space.
Embellishing with Beads and Mosaics
Beads and mosaics bring color, light, and intricacy to DIY projects. These decorative techniques are particularly effective in transforming utilitarian items like toothbrush holders into eye-catching decor pieces. Through carefully selecting and arranging beads and tiles, creators can impart personality and style to an ordinary object, turning it into a focal point of visual interest.
Utilizing beads to create patterns or cover surfaces adds a dynamic and playful element to any item. The variety of bead sizes, colors, and finishes means that designs can range from simple and understated to bold and elaborate. A beaded toothbrush holder can serve as a storage solution and a piece of art that reflects the maker’s creativity and attention to detail.
Mosaics offer a way to craft detailed and vibrant designs with a sense of timelessness. Creating a mosaic on a toothbrush holder, whether through glass, ceramic, or stone tiles, results in a unique and durable piece that can withstand the humid environment of a bathroom. Mosaics allow for an extensive range of styles, from geometric patterns to intricate landscapes or abstract compositions, providing endless possibilities for personalization.
Personalization and decorative techniques empower DIY enthusiasts to express their creativity and style. By exploring these methods, anyone can transform ordinary objects into personalized masterpieces that reflect their tastes and enhance their living spaces. Whether you’re crafting a toothbrush holder or redecorating an entire room, the key is to experiment and have fun with the process, allowing your unique vision to guide your creations.
The Wrap Up: The Budget-Friendly Guide
Transform your bathroom routine with the DIY toothbrush holder made from scrap wood. Embark on an affordable journey into the realms of creativity and craftsmanship as you create your own stylish toothbrush holder.
This guide not only leads you through each step but also invites a touch of individual creativity, enabling you to display your distinct style. Unleash your inner artisan by harmoniously combining thriftiness and aesthetics, transforming a basic woodworking project into a practical and visually appealing addition to your everyday routine.