Last Updated on February 27, 2024 by teamobn
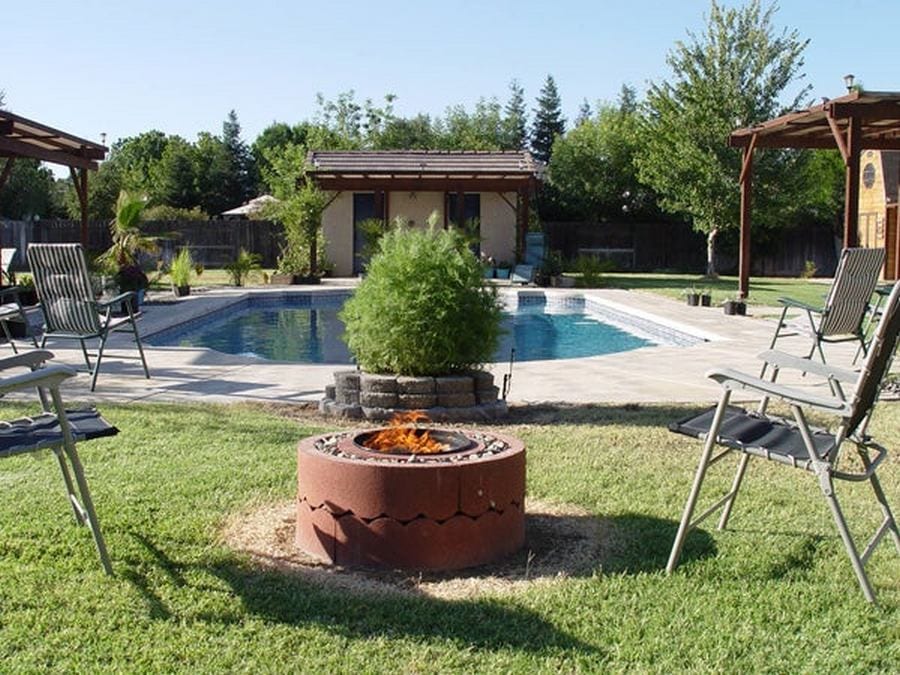
If you love spending time around an evening fire with friends and family, but don’t have a fire pit, there’s no need to spend a fortune on a pre-made fire pit or hire a contractor. All you need are concrete tree rings, a small Weber grill, and a few hours any weekend to build a DIY concrete rings fire pit.
With this simple DIY concrete rings fire pit project, you can easily create a beautiful and functional fire pit that will be the perfect centerpiece for your outdoor gatherings. So gather up your materials and get ready to enjoy many evenings spent around your very own DIY fire pit.
Aside from being inexpensive, this concrete rings fire pit is also easy to relocate. You can take it down and move it to a different spot without any trouble or cost, making it a great option for those who want to enjoy a fire pit without the hassle of a permanent installation.
Contents
Building a Concrete Rings Fire Pit
Materials:
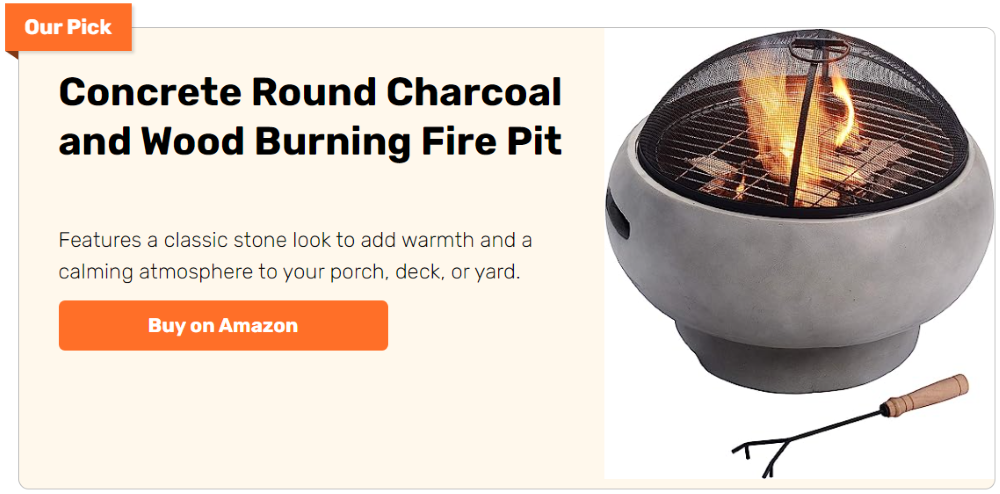
- Weber Smokey Joe Portable charcoal grill or equivalent 14″ diameter grill. ($30 new)
- 4 sections of 14″ inside diameter concrete tree ring ($2 to $3 each = $8 to $12 total)
- 6 sections of 24″ inside diameter concrete tree ring ($2 to $3 each = $12 to $18 total)
- Small stones, pebbles, and road gravel in your area to fill up the gap between the two rings
- Total cost $50 to $60.
Decide where you want to put the fire pit. You can place it on concrete (which is easier), but of course, you can also have it on the grass. If you do want to put it on grass, you might want to spray the area with some grass and weed killer so that they won’t grow up into the fire pit.
Now we are going to set up the bigger tree rings first. This is because the total height of the smaller rings is shorter than the larger ones. Later on, what I’m saying will make more sense.
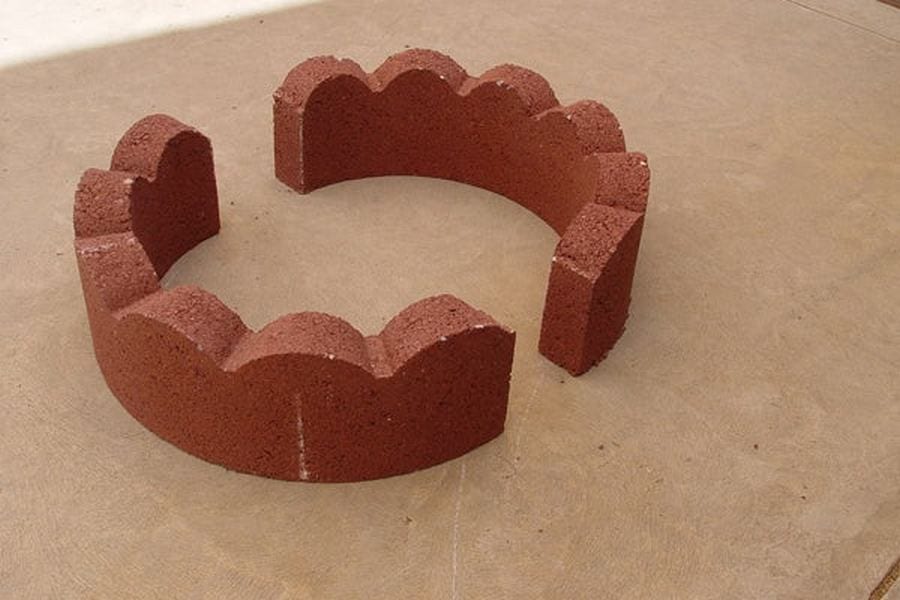
Put two pieces flat on the ground forming a circle. Then turn the other two pieces upside down, and place them on top of the circle, so that their ridged edges are interlocking. Place these upside-down pieces so that half of it is resting on half of the lower ring and its other half on the other ring.
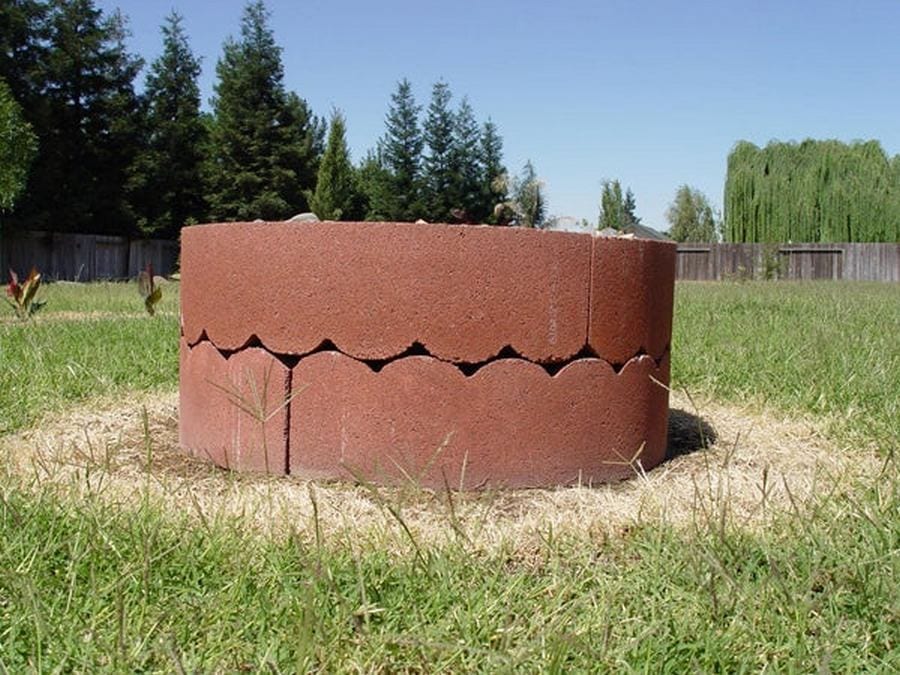
Fill the ground inside your circle with some stones. I mentioned a while ago that the smaller rings are shorter, so this is to have your inner ring level with the outer ring. Now try to put the small tree rings inside. Do the same steps you did stacking the outer tree rings. Remove or add some stones until the two circles are of the same height.
Fill the gap between two circles with more stones and pebbles.

I believe not all Home Depots have tree rings like these. So if you happen to find tree rings or other materials to build your pit with, that are of the same height, it would be wiser to stack the smaller rings first before the big ones.
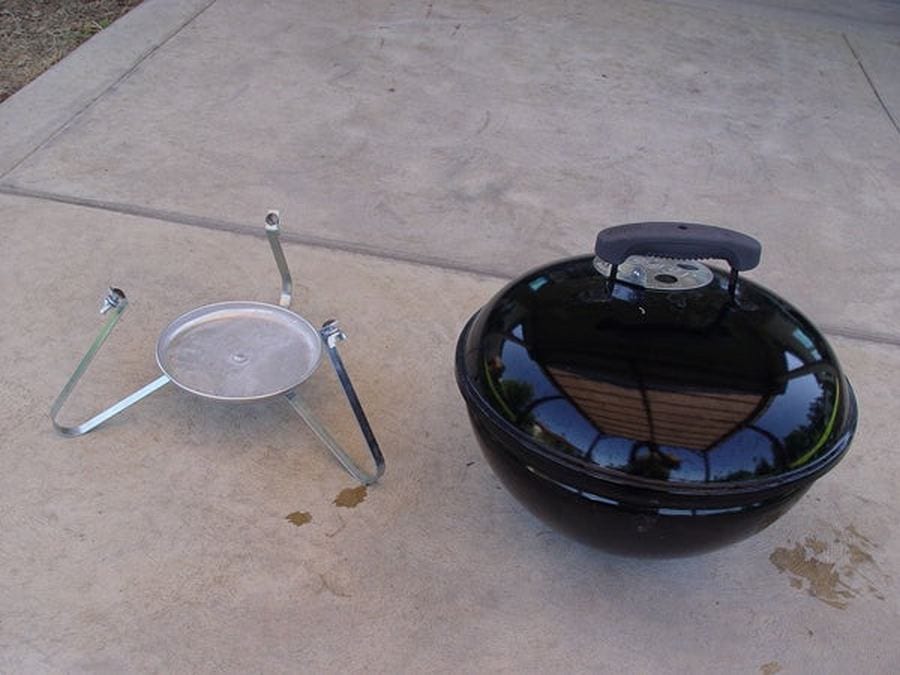
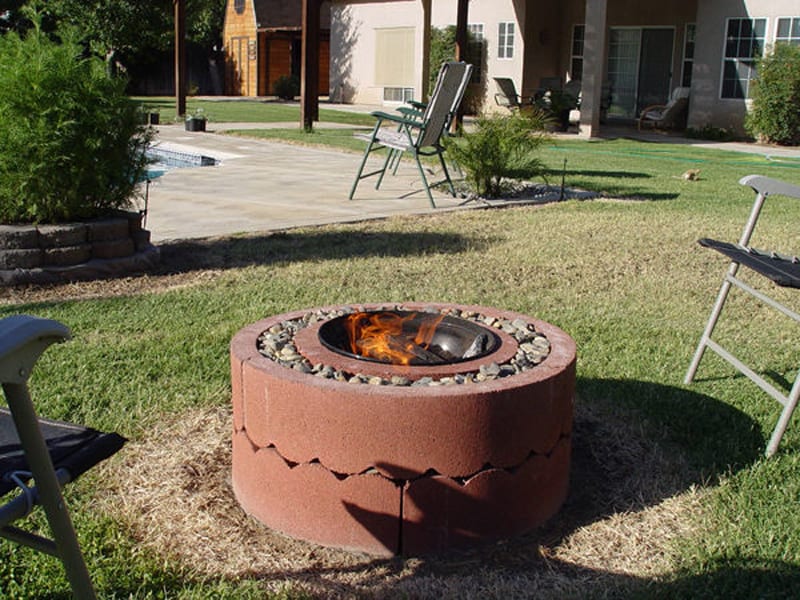
Now you are ready to install the Weber grill but first, unscrew the legs.
On a 14-inch diameter, the Weber grill should fit perfectly. Now you are ready to use it!
One reminder though: When you have started the fire already, it will be difficult and dangerous for you to adjust the lower air vent of the grill. So don’t forget to adjust it beforehand.
Now, where are the marshmallows and hotdogs?
Thanks to dewey302 for this original idea.
Safety Precautions and Maintenance Tips for Your DIY Fire Pit
A DIY concrete rings fire pit is a fantastic addition to any backyard, offering a place for relaxation and social gatherings. While it is relatively simple to build and use, it’s crucial to follow safety guidelines and perform regular maintenance. These practices not only extend the life of your fire pit but also protect you and your loved ones from potential hazards.
Safety Precautions
When setting up and enjoying your DIY concrete rings fire pit, prioritizing safety can transform your backyard into a safe and cozy gathering spot. Let’s delve deeper into essential safety precautions, incorporating the focus keyword to ensure you maximize your concrete rings fire pit experience.
Check Local Regulations
Before igniting your inaugural blaze in your concrete rings fire pit, it’s imperative to familiarize yourself with local fire codes and regulations. Different municipalities may have specific mandates regarding the permissible size, location, and type of fire pit.
These regulations are designed to ensure your safety, your property, and your community. Compliance with these rules ensures that your concrete rings fire pit is a source of warmth and enjoyment and adheres to legal standards, preventing potential fines and liabilities.
Keep a Safe Distance
Strategically positioning your concrete rings fire pit is crucial for safety and enjoyment. It’s recommended to place your fire pit at least 10 feet away from your house, other structures, trees, and flammable materials to prevent accidental fires. This safe distance ensures that your concrete rings fire pit can be enjoyed without posing a risk to your property or your neighbors, fostering a safer environment for everyone involved.
Use the Right Materials
The materials you choose to burn in your concrete rings fire pit can significantly impact not only the quality of the fire but also the safety of your environment. Opt for dry, seasoned wood or charcoal, which burn cleanly and efficiently.
Avoid burning treated wood, plastics, or any materials that release toxic chemicals when combusted. Using the appropriate fuel for your concrete rings fire pit not only contributes to a more pleasant and safer burning experience but also helps in minimizing your environmental footprint.
Fire Extinguishing Methods
Having a reliable method to extinguish the fire in your concrete rings fire pit quickly and efficiently is a safety essential. Keeping a bucket of water, sand, or an outdoor-rated fire extinguisher within easy reach ensures that you can respond swiftly in case the fire becomes unruly or an emergency arises.
Preparing for the unexpected with these fire extinguishing methods adds an extra layer of safety to your concrete rings fire pit gatherings, ensuring peace of mind for you and your guests.
Supervision
Never underestimate the importance of supervising your concrete rings fire pit when it’s in use. Unattended fires can escalate quickly, leading to potential accidents or property damage. Ensure that children and pets are always monitored around the fire, teaching them to maintain a safe distance and respect the flames. Active supervision ensures that your gatherings around the concrete rings fire pit remain safe and enjoyable for everyone involved.
Maintenance Tips
Maintaining your DIY concrete rings fire pit is crucial to ensure its longevity and performance. Incorporating these focused maintenance tips allows you to enjoy countless cozy nights around your fire pit with minimal hassle. Let’s explore keeping your concrete rings fire pit in top condition.
Regular Cleaning
To preserve the quality and functionality of your concrete rings fire pit, regular cleaning is essential. After the fire pit has cooled down following each use, take the time to remove ash and any unburned debris.
This routine cleaning prevents the accumulation of materials that can obstruct airflow and combustion during future uses. A clean concrete rings fire pit ensures a better burning experience and maintains the aesthetic appeal of your outdoor space.
Check for Damage
The durability of your concrete rings fire pit can be affected by repeated heat exposure, potentially leading to cracks or other forms of damage. Make it a habit to inspect your fire pit periodically for any signs of wear or deterioration.
Pay close attention to the concrete rings, as they are particularly susceptible to cracking over time. Promptly repairing or replacing damaged components is crucial to prevent minor issues from escalating into major problems, ensuring the safety and longevity of your concrete rings fire pit.
Protect from the Elements
Exposure to the elements can accelerate the wear and tear on your concrete rings fire pit. To mitigate this, consider investing in a cover specifically designed for fire pits. A good quality cover will shield your fire pit from rain, snow, and excessive sunlight, preventing water from pooling and reducing the impact of weathering. This simple step can significantly extend the life of your concrete rings fire pit, keeping it ready for use wherever you are.
Seasonal Care
For those in climates with harsh winters, taking additional steps to care for your concrete rings fire pit during the off-season is advisable. Removable components, such as the grill, should be stored in a dry, protected area when not in use.
This precaution prevents rust and other damage caused by cold and moisture, ensuring that your concrete rings fire pit remains in optimal condition for the warmer months. Seasonal care is a key aspect of maintenance that can greatly enhance the overall experience of owning a concrete rings fire pit.
By adhering to these safety precautions and maintenance tips, you can enjoy countless nights around your DIY concrete rings fire pit without worry. Regular care not only ensures a safer experience but also prolongs the life of your fire pit, making it a cherished feature of your outdoor living space for years to come.
Design Ideas to Enhance Your Concrete Rings Fire Pit
Creating a concrete rings fire pit in your backyard provides a focal point for outdoor gatherings and adds a warm ambiance to your evenings. However, the aesthetic appeal of your fire pit can be significantly enhanced with a few design tweaks and additions. These design ideas will not only elevate the visual appeal of your concrete rings fire pit but also make your outdoor space more inviting and functional. Let’s dive into some creative ways to upgrade your fire pit area.
Incorporate Lighting
Enhancing your concrete rings fire pit with lighting elevates the ambiance and ensures safety and functionality after sunset. Solar-powered lights are an eco-friendly option that can line the pathways to your fire pit, offering a guiding light without the need for electrical wiring. On the other hand, low-voltage landscape lighting can be strategically placed to accentuate the fire pit area, creating a warm and inviting glow.
Consider installing lights at varying heights, such as ground lights for pathways and string lights overhead, to add depth and texture to your outdoor space. The right lighting setup can turn your fire pit area into a mesmerizing retreat, perfect for extending the enjoyment of your outdoor space into the evening hours.
Landscaping and Planters
Thoughtful landscaping and the use of planters can significantly enhance the aesthetic appeal and functionality of your concrete rings fire pit area. Selecting fire-resistant plants that can withstand the proximity to heat ensures safety and longevity of your garden. Succulents, known for their low maintenance and drought resistance, along with shrubs and ornamental grasses, can add texture and color without posing a fire hazard.
Incorporate planters of different sizes and materials to add interest and depth to the landscaping. By arranging these elements around your fire pit, you create a natural barrier that defines the space, making it feel more intimate and secluded. This approach beautifies the area and creates a serene environment where guests can relax and unwind.
Seating Arrangements
The choice of seating around your concrete rings fire pit can make a significant difference in how the space is enjoyed. Comfortable, stylish seating encourages guests to linger and enjoy the warmth of the fire. When selecting furniture, consider the overall design theme of your outdoor space to ensure cohesion. Built-in benches can offer a seamless look and save space, while Adirondack chairs provide classic comfort and style.
For a more rustic or natural vibe, consider using log seats. Adding outdoor cushions and blankets can enhance comfort and add color and texture to your seating arrangement. Make sure to arrange the seats in a circle or semi-circle around the fire pit to facilitate conversation and allow everyone to enjoy the warmth of the fire. Adequate seating ensures that your fire pit area is a beautiful focal point in your garden and a functional space for entertaining.
Decorative Stones and Pebbles
Incorporating decorative stones and pebbles around your concrete rings fire pit is aesthetically pleasing and functional. Selecting stones that harmonize with the concrete rings creates a seamless blend of natural and man-made elements.
These stones can be used to fashion a decorative border, enhance the definition of the fire pit area, or fill the gaps within the pit’s structure, contributing to a polished and well-thought-out design. Beyond their visual appeal, decorative stones and pebbles serve practical purposes. They improve drainage around the fire pit, reducing water accumulation and the potential for damage.
Additionally, a well-placed layer of stones or pebbles can suppress weed growth, keeping the area tidy with minimal maintenance. This combination of beauty and utility makes decorative stones and pebbles an excellent choice for elevating the ambiance of your fire pit space.
Personal Touches
Adding personal touches to your concrete rings fire pit area can transform it from a standard outdoor feature to a unique reflection of your personality and style. Consider introducing outdoor rugs to add warmth and texture underfoot, creating a more inviting and comfortable space. Decorative fire pit screens enhance safety by containing sparks and can serve as a focal point with their intricate designs.
Weather-resistant art installations bring creativity and sophistication to the area, turning your fire pit into a gallery under the stars. These personal touches make the space more inviting and tell a story about the people who gather there.
Whether through the choice of colors, patterns, or art, personalizing your fire pit area encourages conversation and makes your outdoor gatherings more memorable. By infusing the space with elements you love, you create an oasis that is visually appealing and emotionally resonant, making every moment spent around the fire pit even more special.
Seasonal Fire Pit Ideas
Creating a year-round outdoor retreat with your concrete rings fire pit means embracing the changing seasons and adapting your space to suit. Whether you’re toasting marshmallows on a crisp autumn evening, sharing stories on a balmy summer night, or warming up during the chill of winter, your fire pit can be the heart of outdoor living throughout the year.
Here are some seasonal fire pit ideas to enhance your enjoyment and use of this versatile outdoor feature.
Spring Awakening
As the snow melts and the days grow longer, spring is the perfect time to refresh and rejuvenate your fire pit area. Begin by giving your space a thorough clean-up from winter’s touch. Introduce vibrant, spring-themed decor such as floral outdoor cushions, bright throw blankets, and seasonal planters filled with early bloomers like tulips and daffodils. This is also an ideal time to check and prepare your fire pit for the warmer months ahead, ensuring everything is clean and in good working order.
Summer Sizzle
Summer calls for long days and nights spent lounging by the fire pit. Enhance your space with comfortable seating, colorful outdoor rugs, and a variety of lighting options to create a cozy atmosphere well into the night. Incorporating a grill plate over your concrete rings fire pit can turn it into a cooking station, perfect for barbecues and marshmallow roasting. To keep cool, set up a nearby refreshment station with cold drinks and snacks, ensuring you and your guests stay hydrated and happy.
Autumn Ambiance
As the air turns crisp and leaves begin to fall, your fire pit becomes a cozy gathering spot for enjoying the autumnal charm. Embrace the season by decorating with pumpkins, gourds, and cornstalks, and swapping out summer decor for warmer tones and textures. Wool blankets and plush throw pillows invite guests to linger longer, while a stockpile of dry, seasoned wood ensures a crackling fire to ward off the evening chill. Consider hosting a themed fire pit party, such as a harvest festival or Halloween gathering, to fully embrace the season’s spirit.
Winter Warmth
Don’t let the cold weather damper your fire pit enjoyment. Winter provides a magical backdrop for fireside gatherings, especially amidst a snow landscape. To make your fire pit inviting, add extra layers of warmth with heavy blankets, fur throws, and heated lamps to keep your seating area cozy. Brighten up the dark evenings with string lights and lanterns for a festive touch. Hosting a hot cocoa or mulled wine night by the fire can be a delightful way to enjoy the winter wonderland and make memories with loved ones.
Conclusion
Building a concrete rings fire pit offers an affordable and versatile option for enhancing any outdoor space, providing a warm and inviting centerpiece for gatherings across all seasons. Its ease of construction and customization allows homeowners to create a unique focal point that blends seamlessly with their outdoor decor and landscaping. The benefits of such a DIY project extend beyond aesthetics, fostering a sense of community and connection as friends and family gather around the fire for memorable moments.
This is just one of many other decorative outdoor furnishings. Read our eight best fire pits post next!