Last Updated on May 30, 2024 by teamobn
If you are short on kitchen storage space, it’s time to trick out the cabinets, drawers, and that kitchen island with a few space-saving solutions. Often enough, creative storage solutions are a simple matter of rethinking those little nooks and niches you once thought were impossible to use.
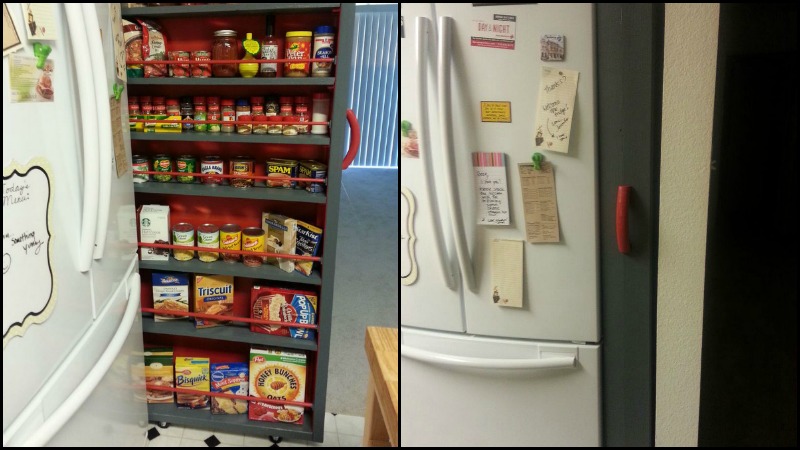
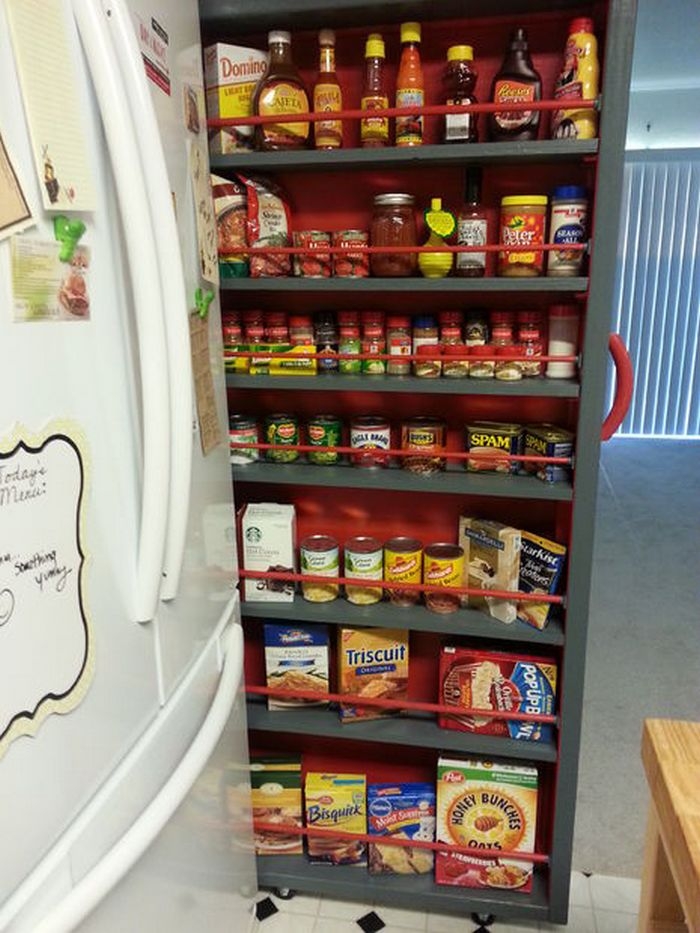
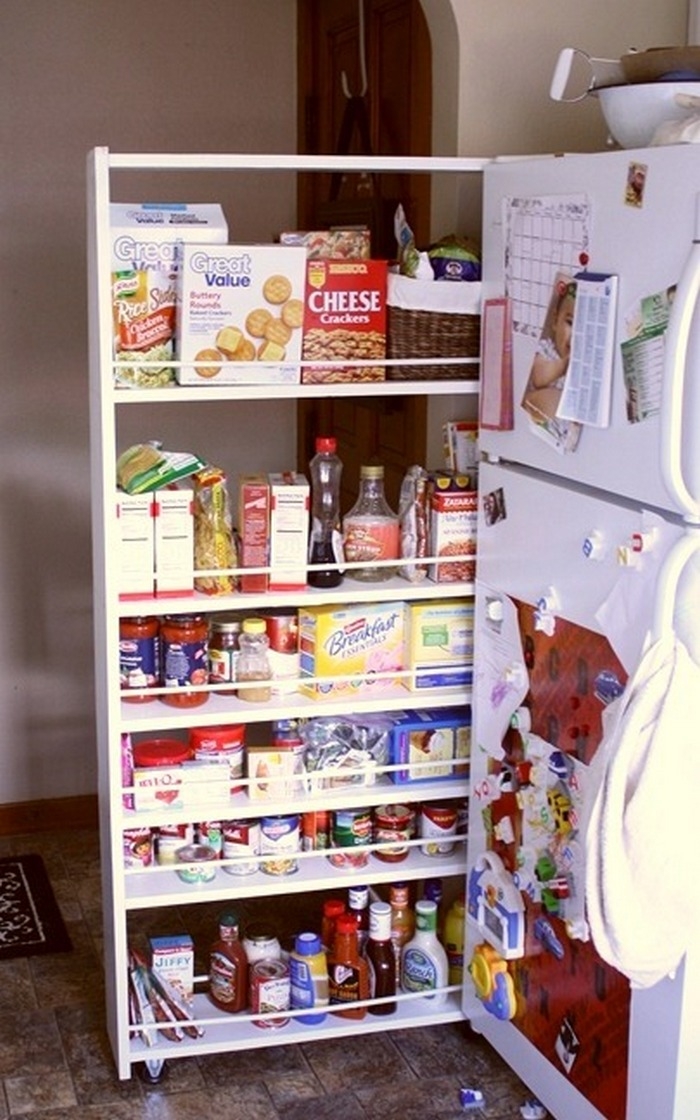
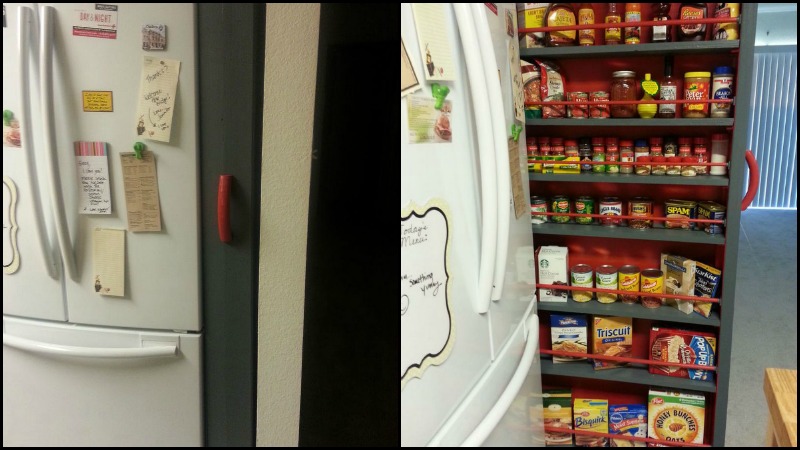
For instance, when building or remodelling a kitchen, it’s wise to leave space between the wall and the refrigerator in case you ever upgrade to a larger fridge. The downside is that you create an unusable space that will collect clutter, right? Think again.
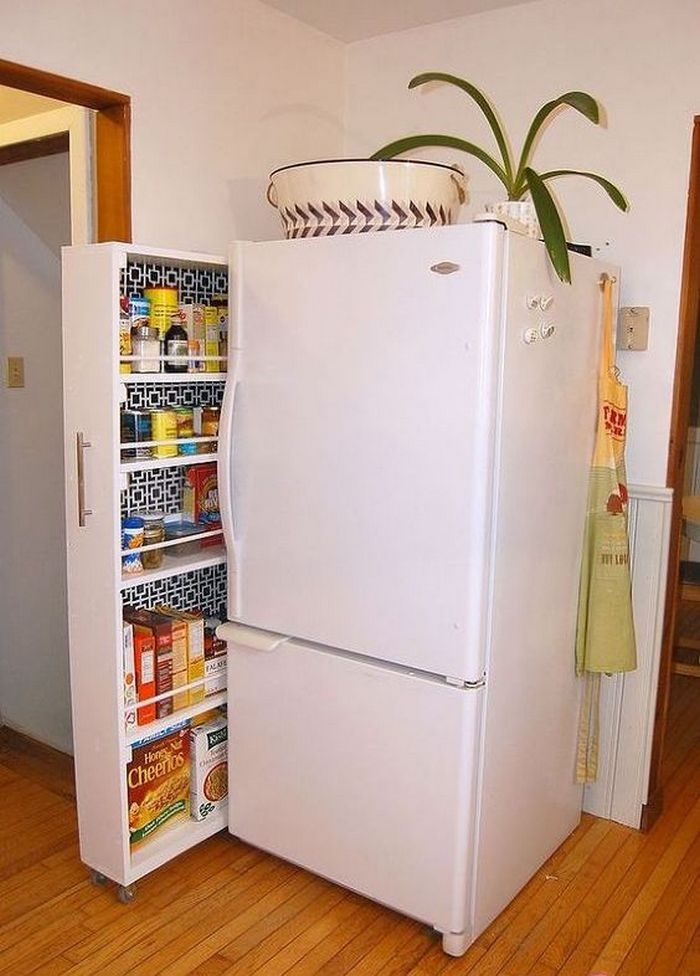
You can take advantage of the unused space by building your own roll-out shelf. It’s a very simple project that can be easily accomplished at a weekend and can be made from salvaged materials from your previous projects.
The size of storage space a roll-out shelf creates will make your life easier. The shallow shelves of this roll-out shelf allow easy access, saving you a lot of time looking for things that tend to disappear into the dark recesses of bigger cupboards. Then there’s the added bonus of avoiding the clutter which the space will create when left unused.
Click on any image to start the lightbox display. Use your Esc key to close the lightbox. You can also view the images as a slideshow if you prefer 😎
Do you have the same unused space in your home? What are your thoughts on this solution?
Contents
Building a Roll-Out Shelf
Materials
- (2) 2x6x8 Construction Lumber
- (1) 3/16x4x8 Plywood
- (1) 3/4x4x4 Plywood (scrap used)
- (4) Casters
- (8) Dowel Rods (as shelf holders and railings)
- (3) 1/4″x6 Quarter Round Molding
- (14) #6 3/4″ Flathead Screws (for dowel railing holders)
- (2) #6 32×3 Machine Screws with Nut (for handle)
- (38) 1″ Wood Screws (for casters and scrap pieces to hold backing)
- (6) Scrap Wood (can use leftovers from the 2x6x8 pieces)
- (48) Finishing Nails (guess, not sure how many were used)
- (2) Quarts of Paint
Tools
- Drill
- Hand Saw
- Measuring Tape
- Clamps
- Straight Edge (square)
- Painters Tape
- Kreg R3 Jr. Kit
- Dowel Rod Jig Kit
- Wood Glue
- Hacksaw Blade (off the hacksaw)
- Sandpaper
- Hammer
- Chisel
Instructions
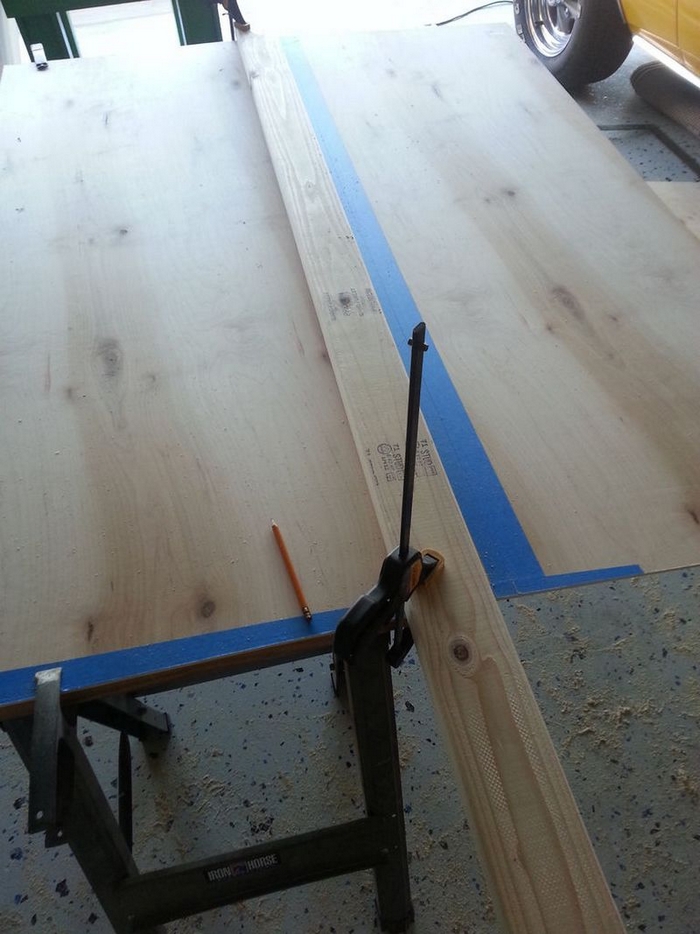
The first thing you need to do is measure the space allotted for the roll-out shelf. It’s best to keep the height the same as the height of your refrigerator. You would not want your roll-out shelf to be protruding on any side. And it would be nice if the depth fits exactly with the space available.
When cutting the lumber for the frames of your roll-out shelf, don’t forget to consider the casters. Subtract the estimated height of your casters to the height that you got.
Do not install frames just yet. Determine the roll-out shelf’s height by measuring some of the items that you plan to put there. Don’t forget to consider the thickness of your shelves when working on this. Distance between shelves plus the number of shelves (x their thickness) should be equal to the total length of the inside of the pantry.
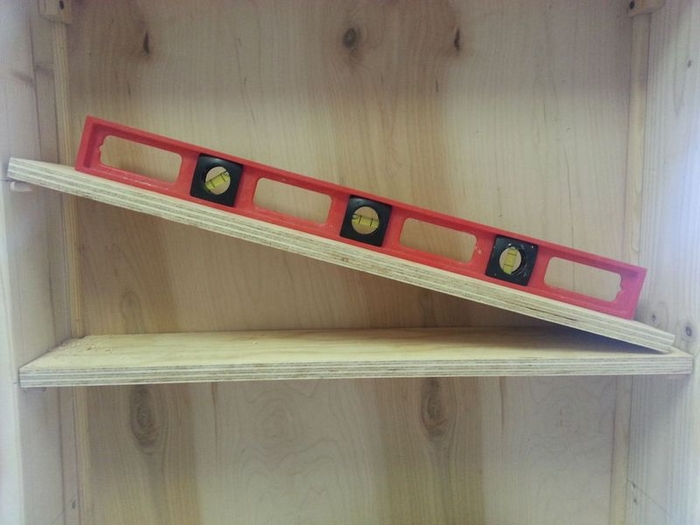
Mark the interior sides of the longer boards with measurements for your shelves. Use the measurement that will indicate where you will make holes. These are the pocket holes where your small dowel rods will hold the shelves in place. Make sure that the marks on the two boards are exactly aligned.
Using a dowel jig, create holes that are 3/4” deep.
Then get your shelves ready. A ¾” board for the shelves should be enough to carry all the items you will place on it.
Mark the side edges of the shelves where you will create holes. Make sure that your marks match the ones you made on the frames before making the holes.
Then cut the dowel rods into 1-1/2 inch pieces since you have ¾” deep holes in both the frame and the shelves.
Now before you assemble everything together let us consider the installation of the backing. You can attach scrap wood on the inside edges of the box with a thickness that is enough for you to nail the thin plywood on. This will result in your pantry backing being aligned with the box.
Since you have wood at the back part of your frame, you might need to cut out the back corners of your shelves so they won’t hit that backing frame.
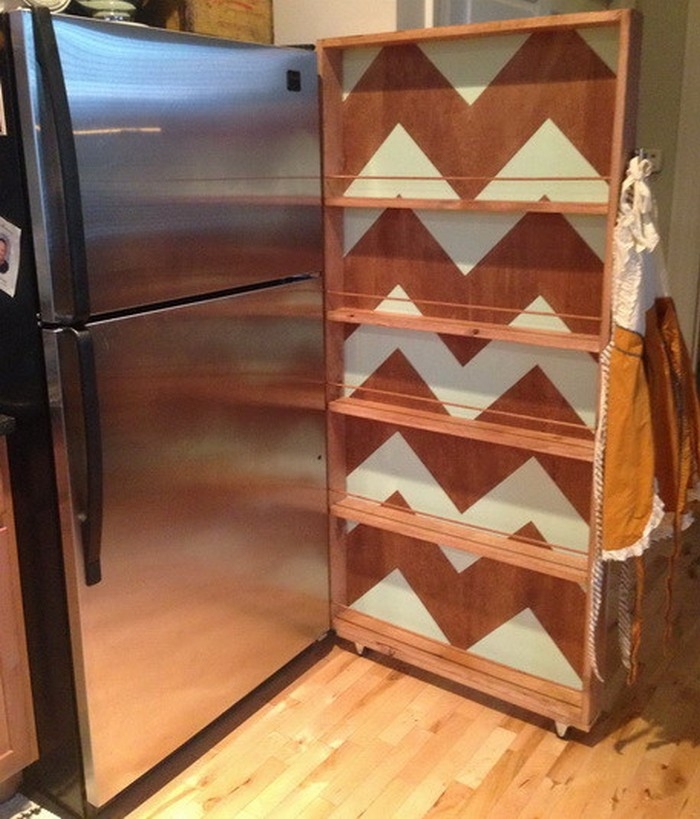
Sand and paint all wood pieces.
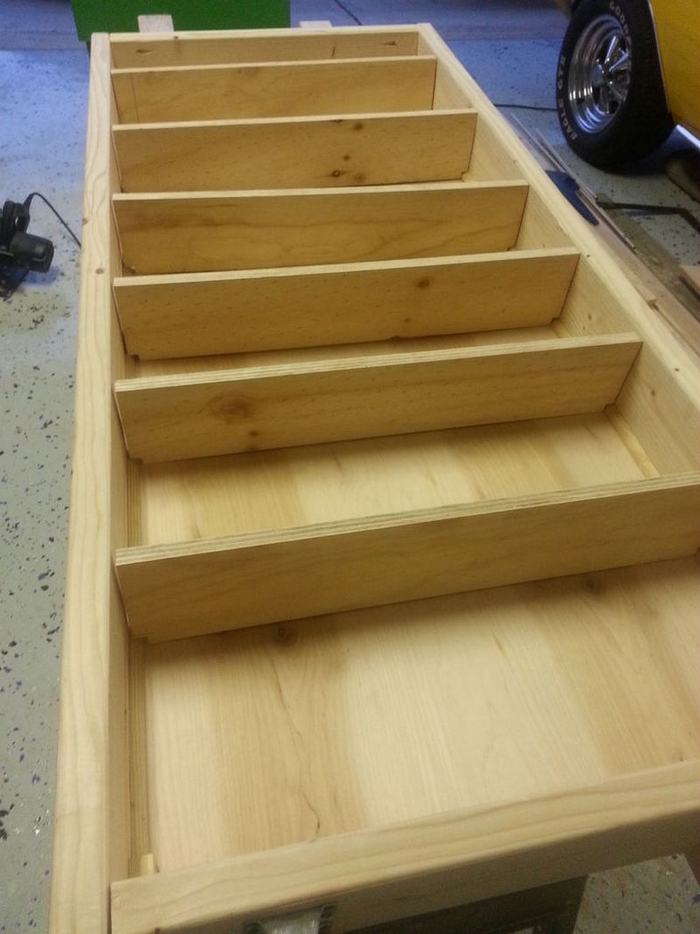
When it’s dry, screw the shorter sides of the frame to one of the long frames. Attach all shelves on one side, and then put the other long frame in place.
Screw all frames together, with the use of pocket screws for a cleaner finish. Make sure your screws are the right size for your board thickness. Use a Kreg R3 Jr with a clamp for this.
Turn your pantry facing down and then nail the plywood backing onto the scrap wood you attached. Install the casters at this stage as well. Make sure your casters are big enough to carry all that weight when you have your pantry full.
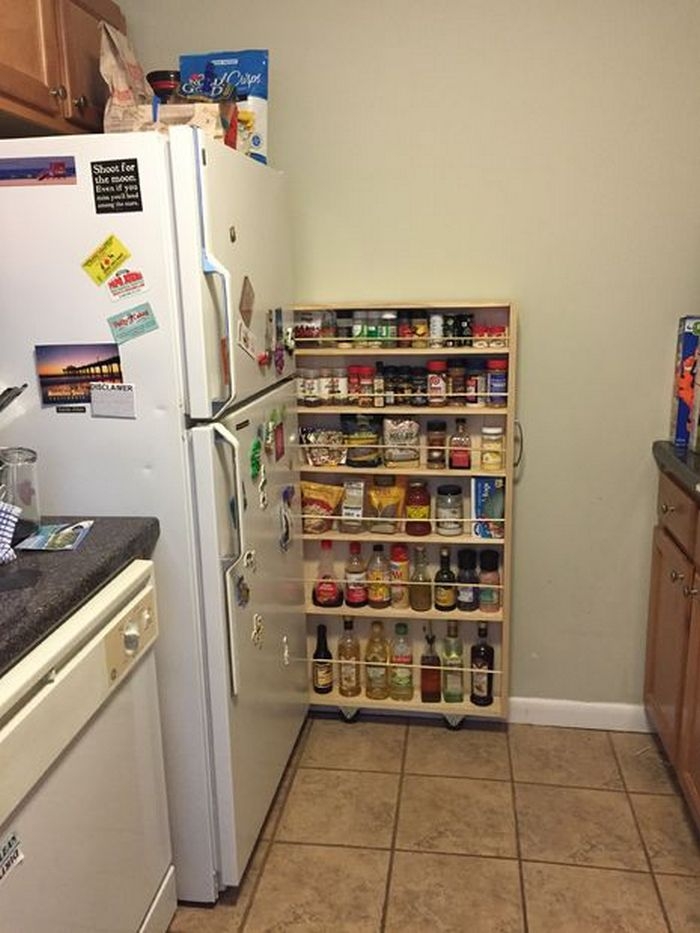
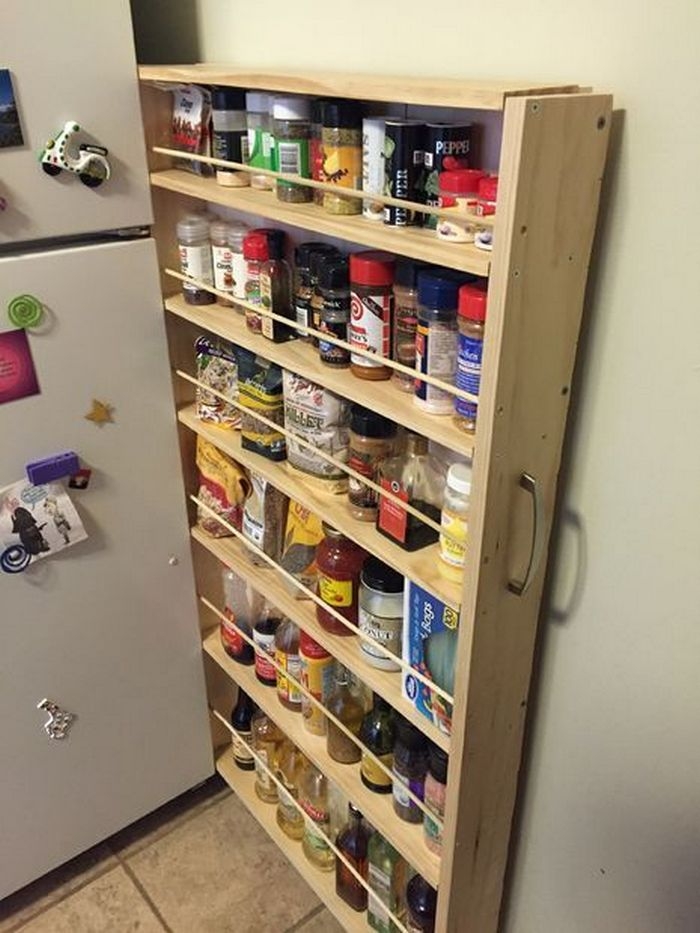
Put the pantry in its proper position and attach the railings and handles.
And you’re done. 🙂
Thanks to ratmax00 for the original idea!
Maintenance Tips for Roll-Out Shelves
Keeping your roll-out shelves in top condition not only extends their lifespan but also ensures they function smoothly and look great in your kitchen. Proper maintenance can prevent wear and tear and make your storage solutions more durable and reliable. Here are essential tips to help you maintain your roll-out shelves effectively.
Regular Cleaning
Regularly cleaning your roll-out shelf is crucial for maintaining its appearance and functionality. Use a soft cloth or sponge with a mild soap solution to wipe down the surfaces. Avoid using abrasive cleaners or pads, as these can scratch the finish. For wooden shelves, consider using a wood cleaner to enhance the natural grain and protect the surface.
Lubricate the Tracks
The tracks of your roll-out shelf can become clogged with debris or start to stick over time. To ensure smooth operation, clean the tracks with a damp cloth to remove any dust or spills. After cleaning, apply a light lubricant designed for this purpose—such as silicone spray—to the tracks. This will help the shelf glide more smoothly and reduce wear on the moving parts.
Check and Tighten Hardware
Regular use can loosen the hardware that holds your roll-out shelf together. Periodically check screws, bolts, and other fittings to ensure they are tight. Use a screwdriver to tighten any loose components to prevent the shelf from wobbling or sagging. This simple step can significantly extend the life of your shelves and maintain safety in your kitchen.
By following these maintenance tips, your roll-out shelf will continue to serve as a practical and attractive feature in your kitchen for years to come. Regular care will keep it looking new and functioning at its best, making your kitchen storage solutions both dependable and visually appealing.
Customization Ideas for Roll-Out Shelves
Any kitchen would benefit from roll-out shelves, which provide an easy method to reach things kept in cabinets. Changing these shelves to suit your particular requirements and kitchen décor might improve their usefulness and visual appeal. Several original ways to customize your roll-out shelves are listed below.
Adjustable Dividers
Your roll-out shelf can be made more functionally organized by adding movable dividers. Pots and pans and small appliances are among the things you can move or remove these dividers to fit. This personalization facilitates the maintenance of everything neatly arranged and reachable.
Decorative Finishes
Select from a range of finishes to go with or contrast the style of your kitchen. The shelves can have their natural wood grain highlighted with a stain or painted to match your cabinetry. For a more robust surface, think about using a clear varnish that also facilitates cleaning.
Built-In Spice Rack
Incorporate a built-in spice rack into your roll-out shelf to save space and keep spices within easy reach. This is particularly useful if you enjoy cooking and use a variety of spices frequently. The rack can be customized with different tier heights to accommodate both small and large spice containers.
Under-Shelf Lighting
A little elegance and better visibility can be achieved by adding lights beneath your roll-out shelves. Being energy-efficient and able to be cut to precisely match the length of your shelves, LED strip lights are a popular option for this modification. Particularly beneficial is this feature in lower cabinets where more light may make a great impact.
Pull-Out Bins
Make part of your roll-out shelf into a pull-out bin system to store kitchen waste or sort recycling. In addition to helping to maintain a clean kitchen, this promotes appropriate waste management. You have options for readily detachable dumpsters for trash disposal and cleaning.
These creative ideas will help you to personalize your roll-out shelves and optimize the look and use of your kitchen storage. Every adjustment increases the general effectiveness of your kitchen workspace in addition to making the shelves more user-friendly.
Conclusion
Constructing a roll-out shelf is a fulfilling undertaking that improves kitchen functionality and spatial arrangement. Anyone may make a useful and fashionable storage solution with the correct supplies and a little do-it-yourself expertise. This upgrade not only makes the most of wasted space but also gives the organization in your house a unique touch.