If you are short on kitchen storage space, it’s time to trick out the cabinets, drawers, and that kitchen island with a few space-saving solutions. Often enough, creative storage solutions are a simple matter of rethinking those little nooks and niches you once thought were impossible to use.
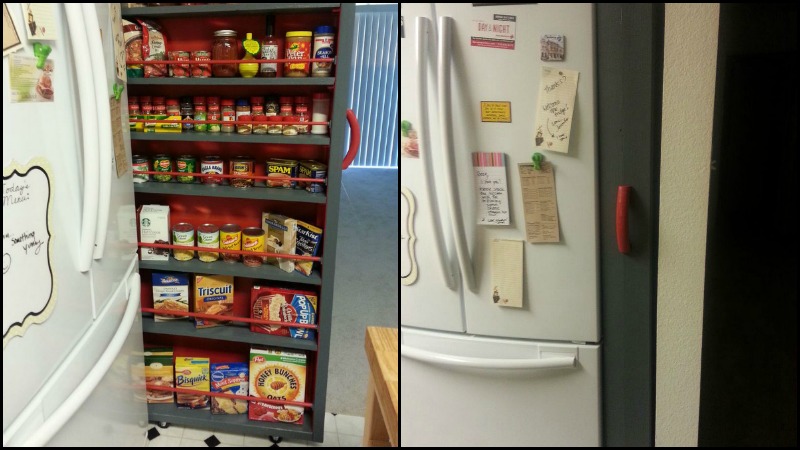
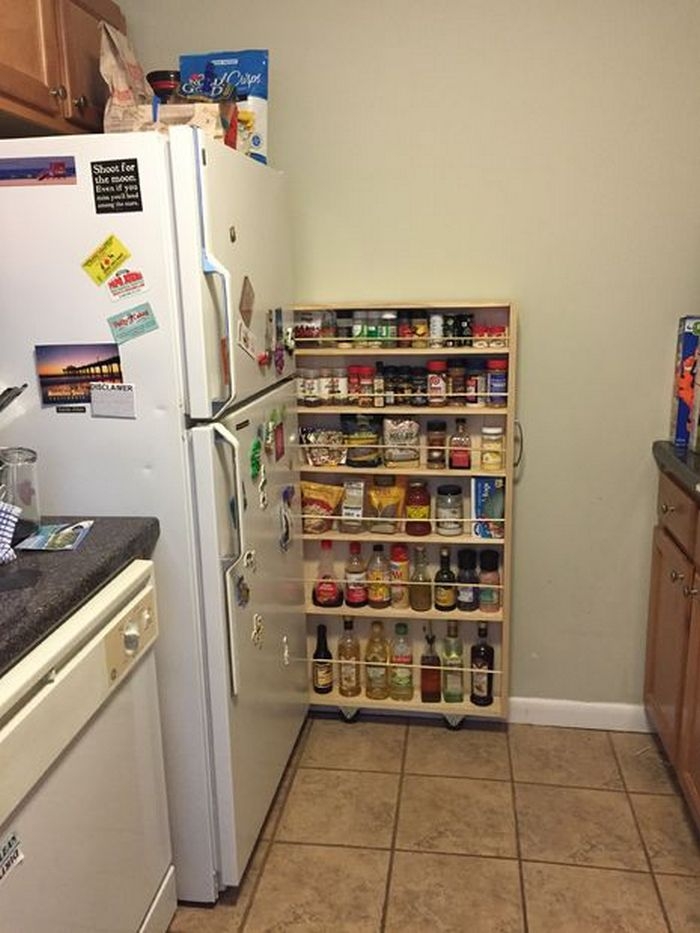
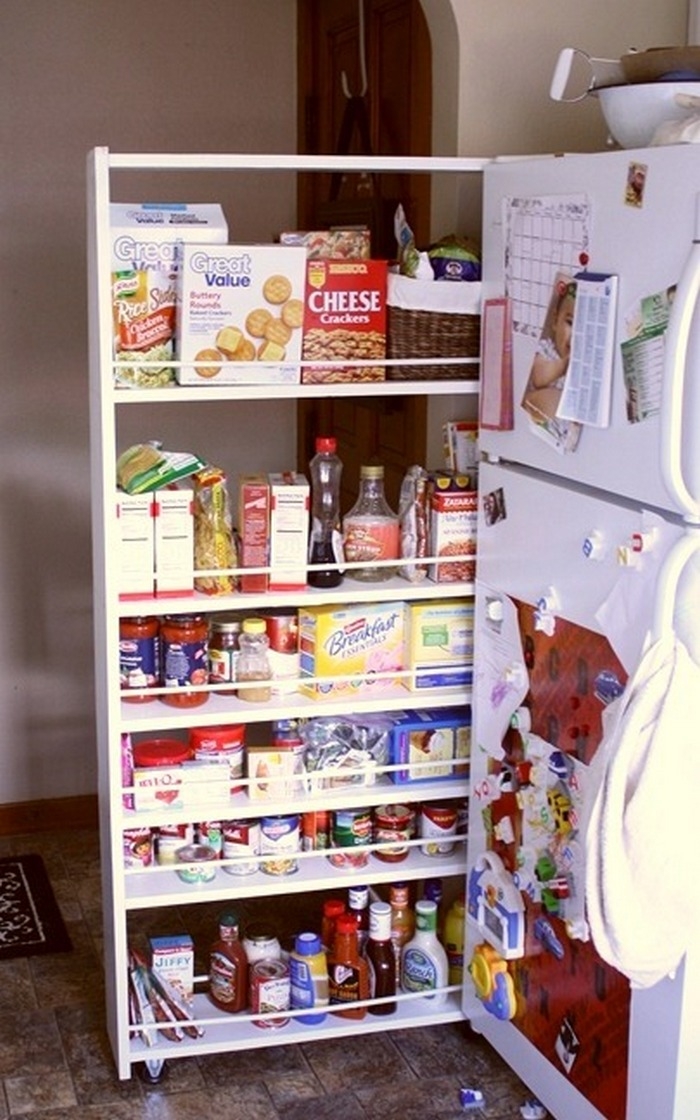
For instance, when building or remodelling a kitchen, it’s wise to leave space between the wall and the refrigerator in case you ever upgrade to a larger fridge. The downside is that you create an unusable space that will collect clutter, right? Think again.
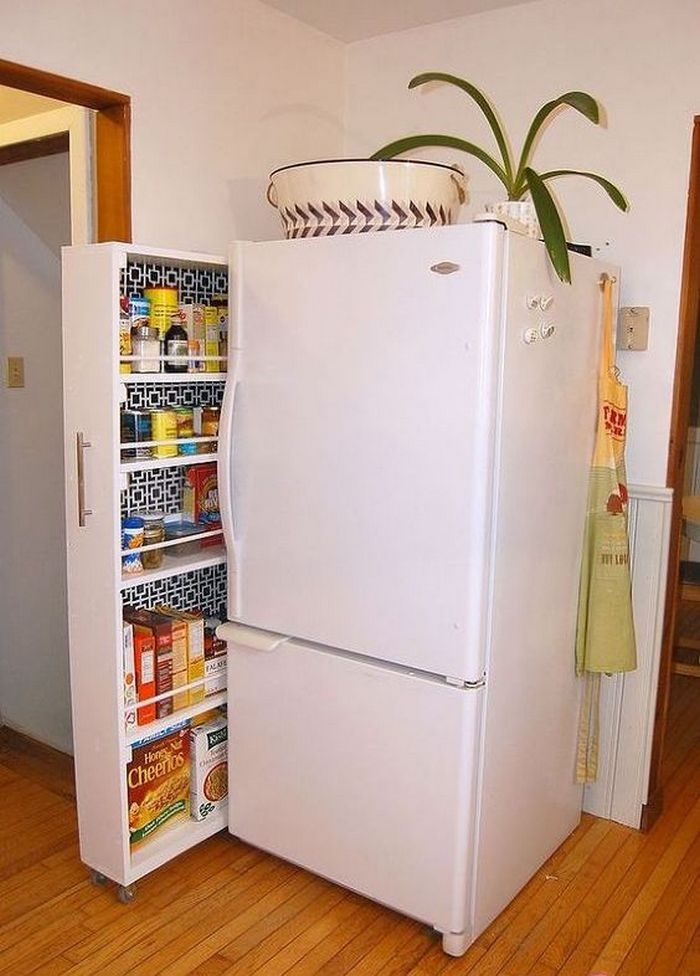
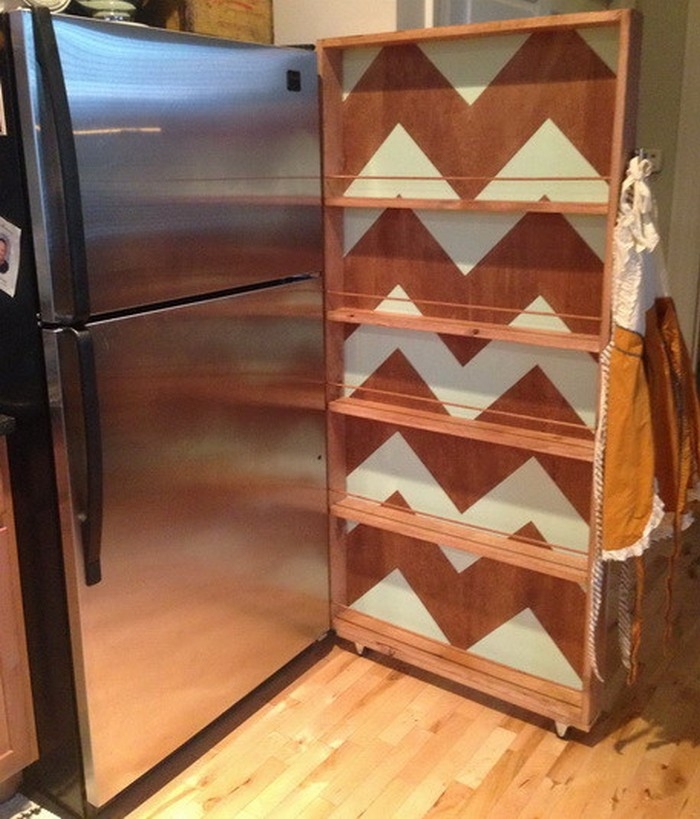
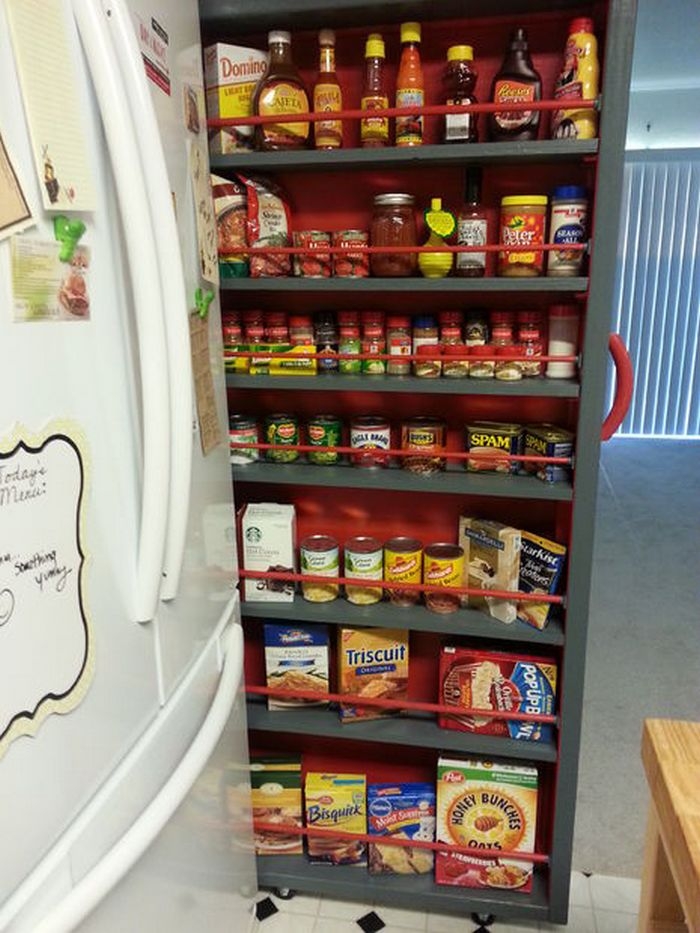
You can take advantage of the unused space by building your own roll-out shelf. It’s a very simple project that can be easily accomplished at a weekend and can be made from salvaged materials from your previous projects.
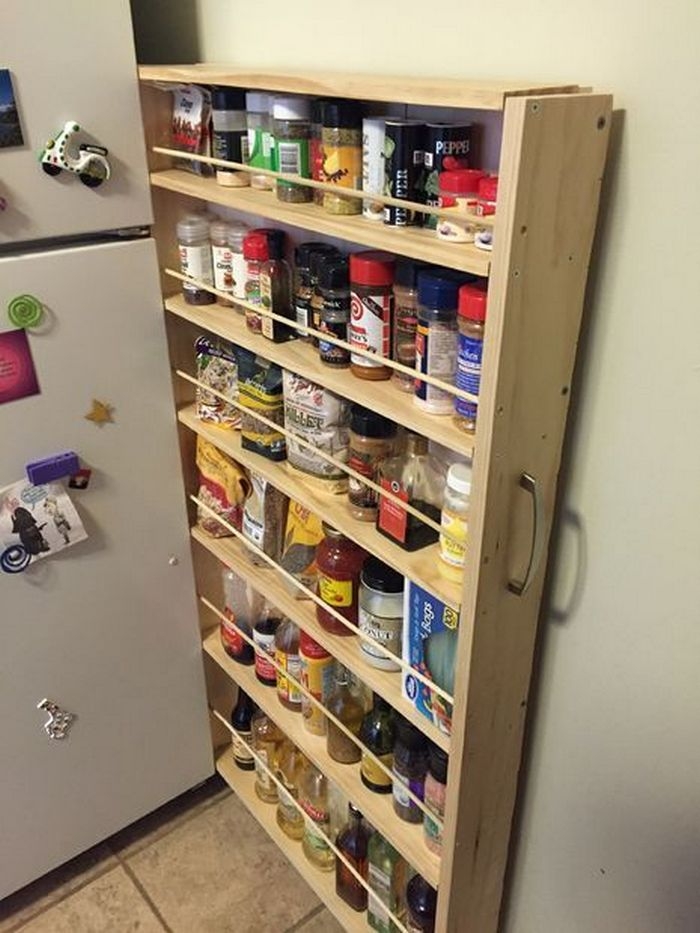
The size of storage space a roll-out shelf creates will make your life easier. The shallow shelves of this roll-out shelf allow easy access, saving you a lot of time looking for things that tend to disappear into the dark recesses of bigger cupboards. Then there’s the added bonus of avoiding the clutter which the space will create when left unused.
Click on any image to start the lightbox display. Use your Esc key to close the lightbox. You can also view the images as a slideshow if you prefer 😎
Do you have the same unused space in your home? What are your thoughts on this solution?
You’ll need these materials:
- (2) 2x6x8 Construction Lumber
- (1) 3/16x4x8 Plywood
- (1) 3/4x4x4 Plywood (scrap used)
- (4) Casters
- (8) Dowel Rods (as shelf holders and railings)
- (3) 1/4″x6 Quarter Round Molding
- (14) #6 3/4″ Flathead Screws (for dowel railing holders)
- (2) #6 32×3 Machine Screws with Nut (for handle)
- (38) 1″ Wood Screws (for casters and scrap pieces to hold backing)
- (6) Scrap Wood (can use leftovers from the 2x6x8 pieces)
- (48) Finishing Nails (guess, not sure how many were used)
- (2) Quarts of Paint
And these tools:
- Drill
- Hand Saw
- Measuring Tape
- Clamps
- Straight Edge (square)
- Painters Tape
- Kreg R3 Jr. Kit
- Dowel Rod Jig Kit
- Wood Glue
- Hacksaw Blade (off the hacksaw)
- Sandpaper
- Hammer
- Chisel
How to build a roll-out shelf?
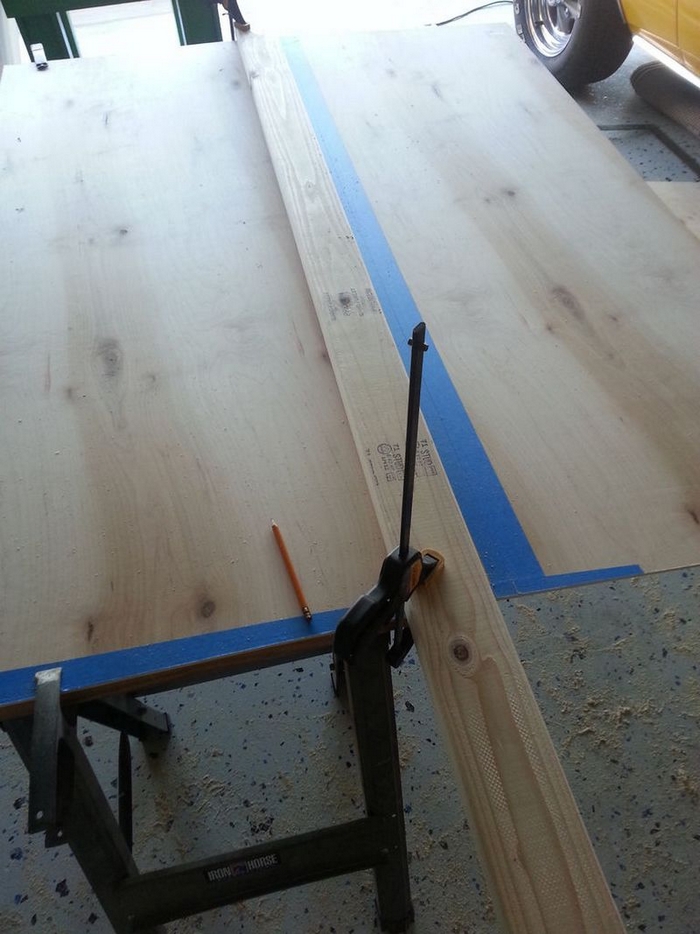
The first thing you need to do is measure the space allotted for the roll-out shelf. It’s best to keep the height the same as the height of your refrigerator. You would not want your roll-out shelf to be protruding on any side. And it would be nice if the depth fits exactly with the space available.
When cutting the lumber for the frames of your roll-out shelf, don’t forget to consider the casters. Subtract the estimated height of your casters to the height that you got.
Do not install frames just yet. Determine the roll-out shelf’s height by measuring some of the items that you plan to put there. Don’t forget to consider the thickness of your shelves when working on this. Distance between shelves plus the number of shelves (x their thickness) should be equal to the total length of the inside of the pantry.
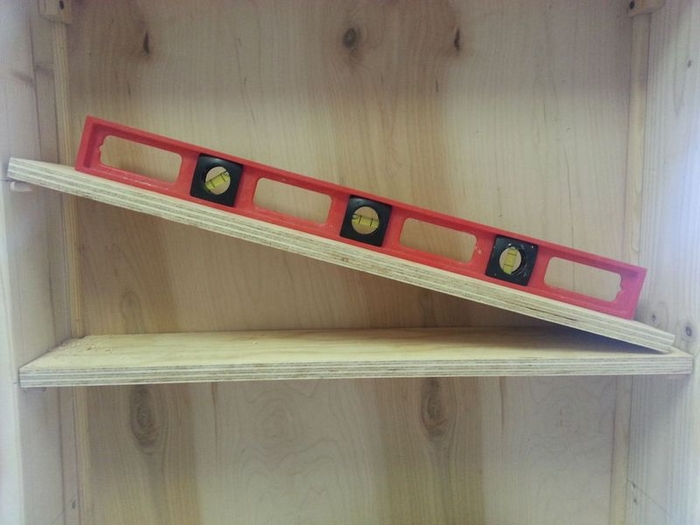
Mark the interior sides of the longer boards with measurements for your shelves. Use the measurement that will indicate where you will make holes. These are the pocket holes where your small dowel rods will hold the shelves in place. Make sure that the marks on the two boards are exactly aligned.
Using a dowel jig, create holes that are 3/4” deep.
Then get your shelves ready. A ¾” board for the shelves should be enough to carry all the items you will place on it.
Mark the side edges of the shelves where you will create holes. Make sure that your marks match the ones you made on the frames before making the holes.
Then cut the dowel rods into 1-1/2 inch pieces since you have ¾” deep holes in both the frame and the shelves.
Now before you assemble everything together let us consider the installation of the backing. You can attach scrap wood on the inside edges of the box with a thickness that is enough for you to nail the thin plywood on. This will result in your pantry backing being aligned with the box.
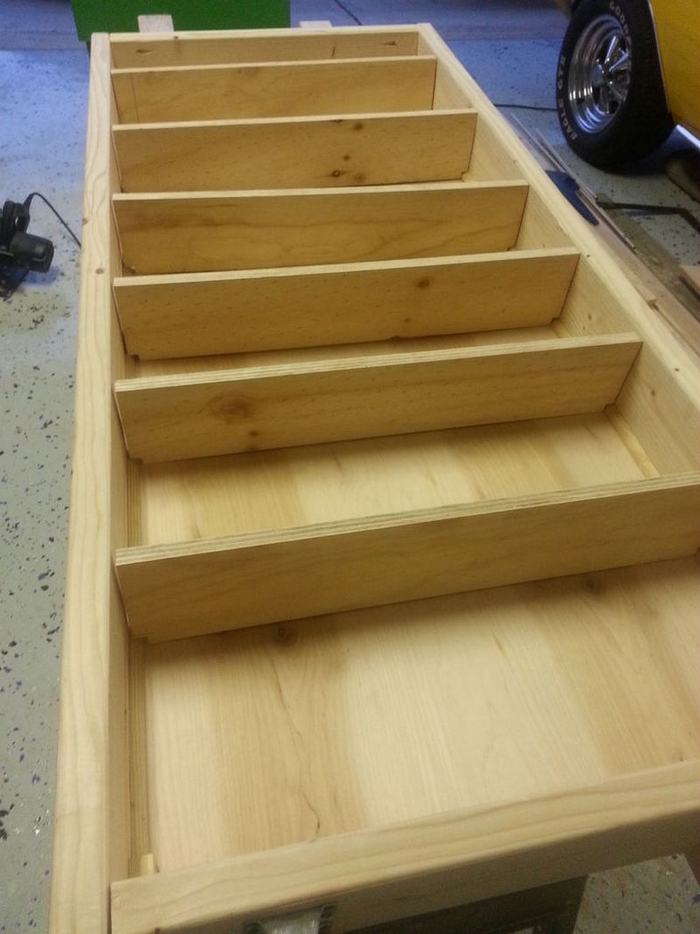
Since you have wood at the back part of your frame, you might need to cut out the back corners of your shelves so they won’t hit that backing frame.
Sand and paint all wood pieces.
When it’s dry, screw the shorter sides of the frame to one of the long frames. Attach all shelves on one side, and then put the other long frame in place.
Screw all frames together, with the use of pocket screws for a cleaner finish. Make sure your screws are the right size for your board thickness. Use a Kreg R3 Jr with a clamp for this.
Turn your pantry facing down and then nail the plywood backing onto the scrap wood you attached. Install the casters at this stage as well. Make sure your casters are big enough to carry all that weight when you have your pantry full.
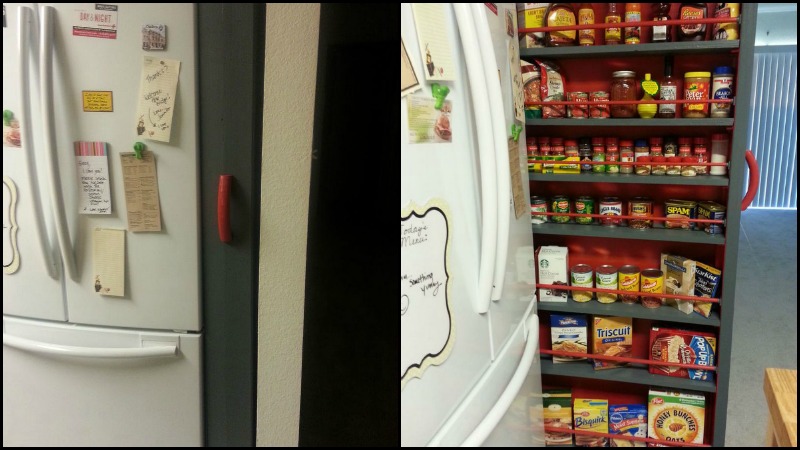
Put the pantry in its proper position and attach the railings and handles.
And you’re done. 🙂
Thanks to ratmax00 for the original idea!