Last Updated on February 6, 2024 by teamobn
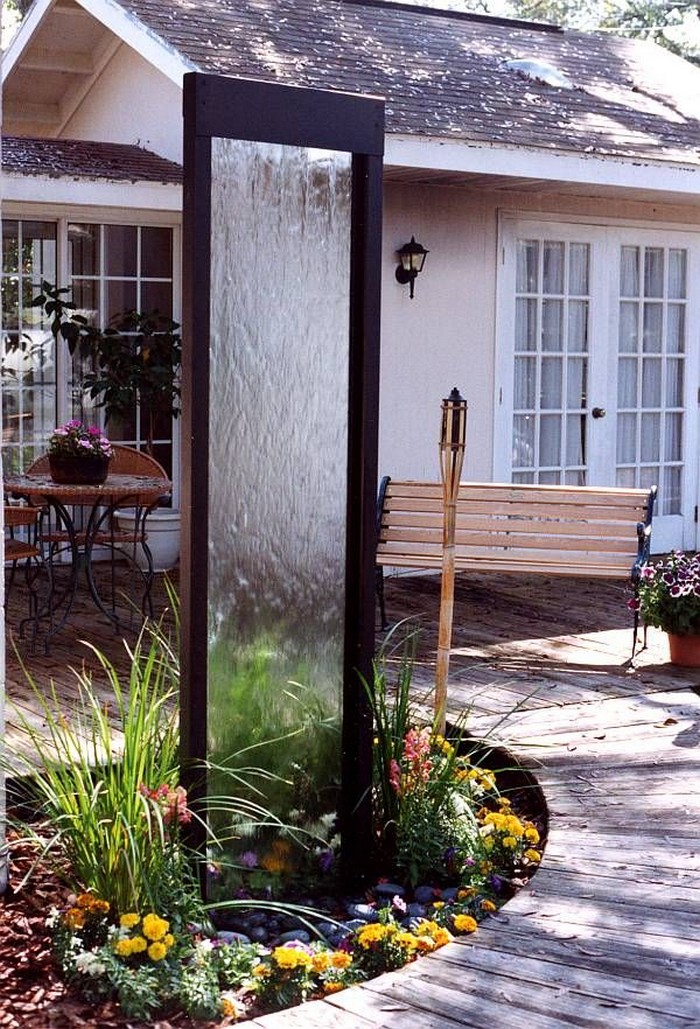
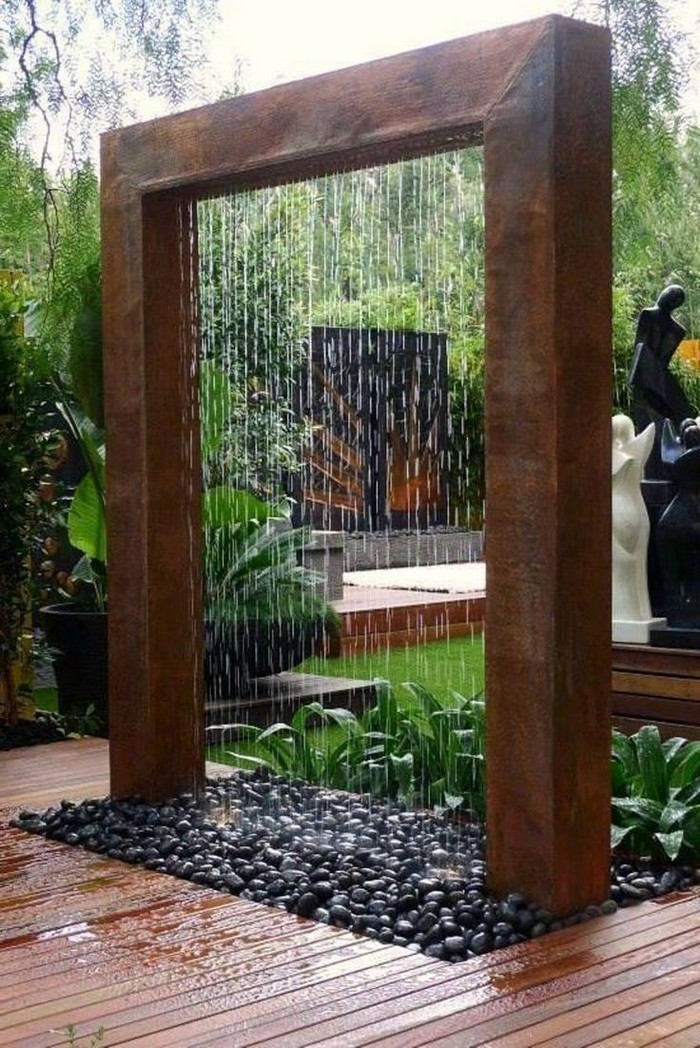
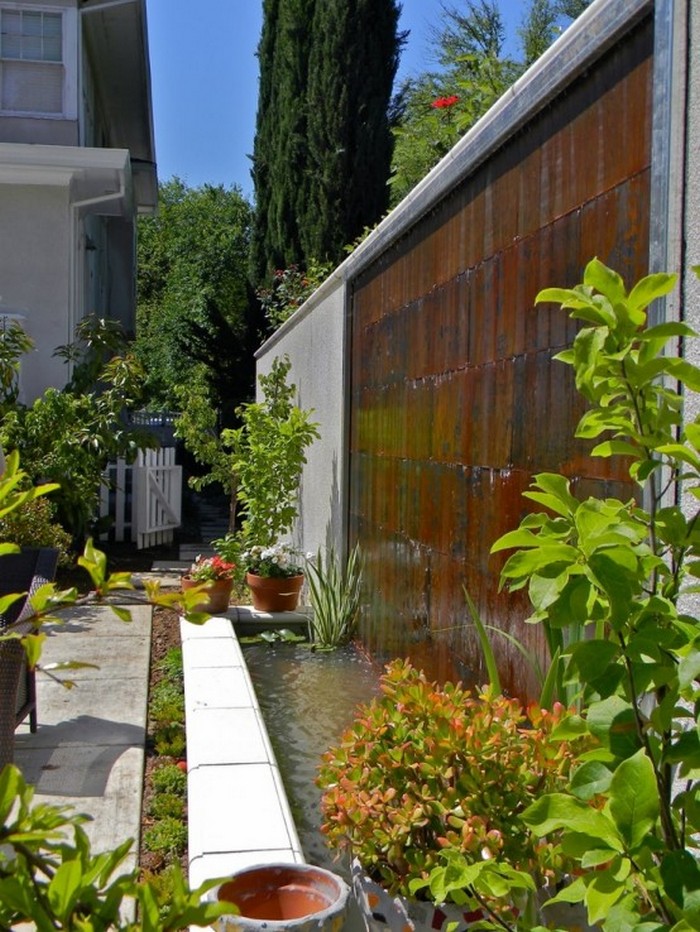
A water wall is a beautiful addition to any garden, and can take it from ‘nice’ to ‘splendid’. But you may be wondering if you need to spend a lot of money installing a water feature in your yard. The truth is, you do not need to spend a fortune to have a water wall installed in your garden. You can find many affordable options that will still look fantastic and add a touch of luxury to your outdoor space. And yes — you can DIY your water wall!
When it comes to home improvement, there are many ways to save money. Building your water wall is one way to do this. By taking on this project yourself, you can avoid paying for expensive materials. Of course, building your water wall may not be the cheapest option.
However, if you are willing to put in the work, you can save a significant amount of money. This is a great way to add a unique and stylish feature to your home without breaking the bank. By doing it yourself, you are assured of the quality of your materials while keeping those costs at a minimum. You can also forget about labour costs!?
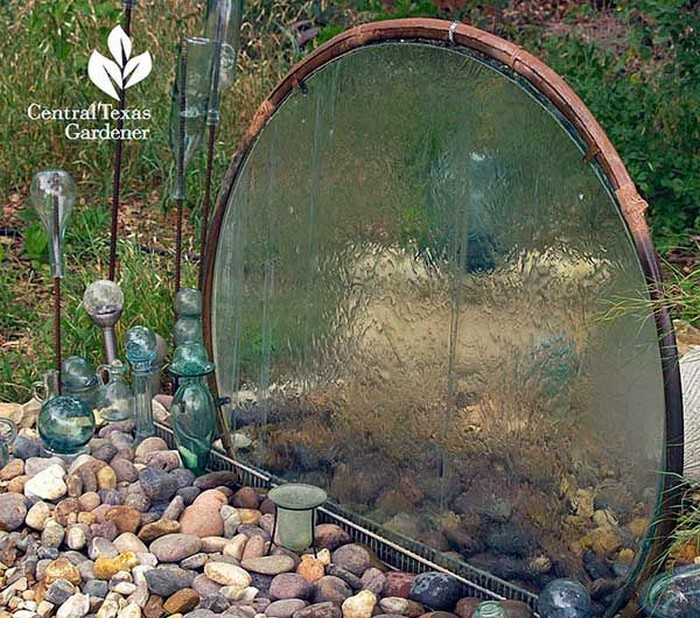
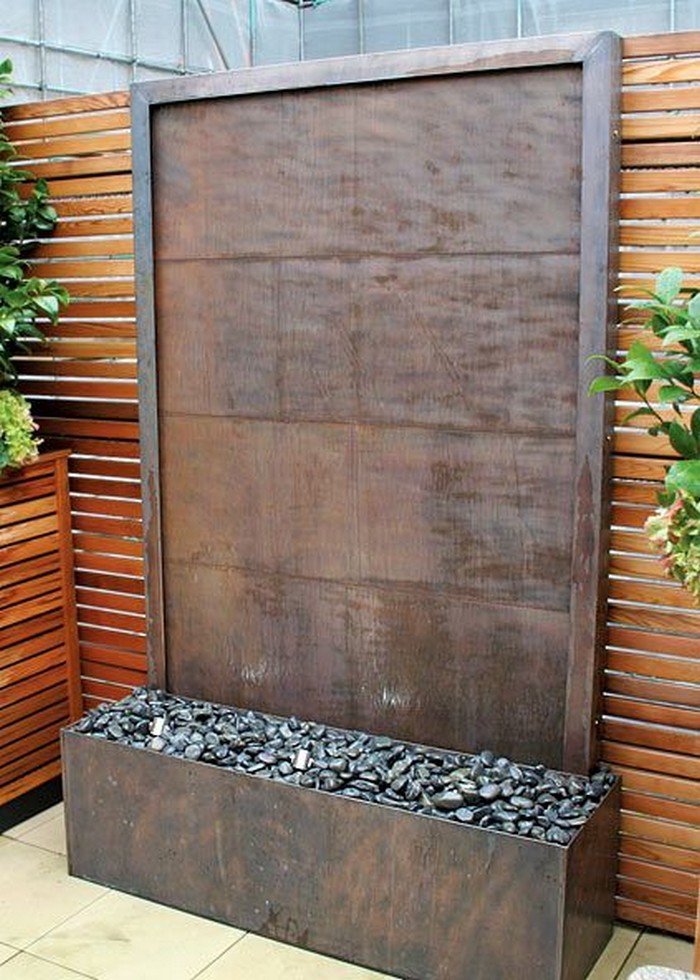
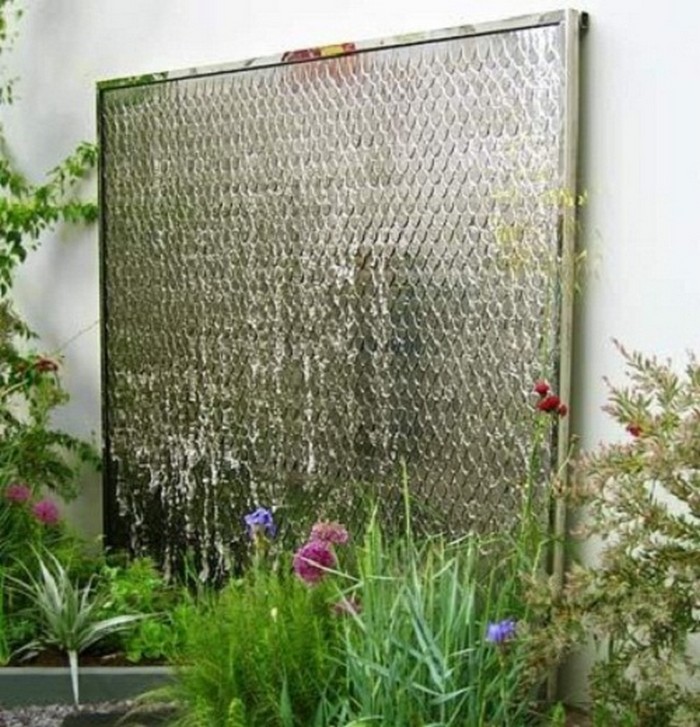
What do you think of a glass water wall?
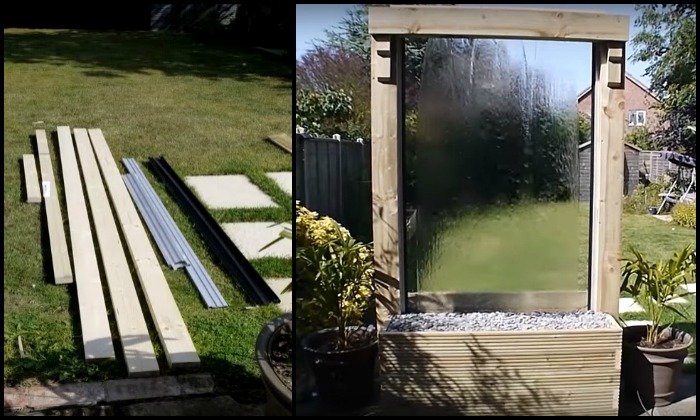
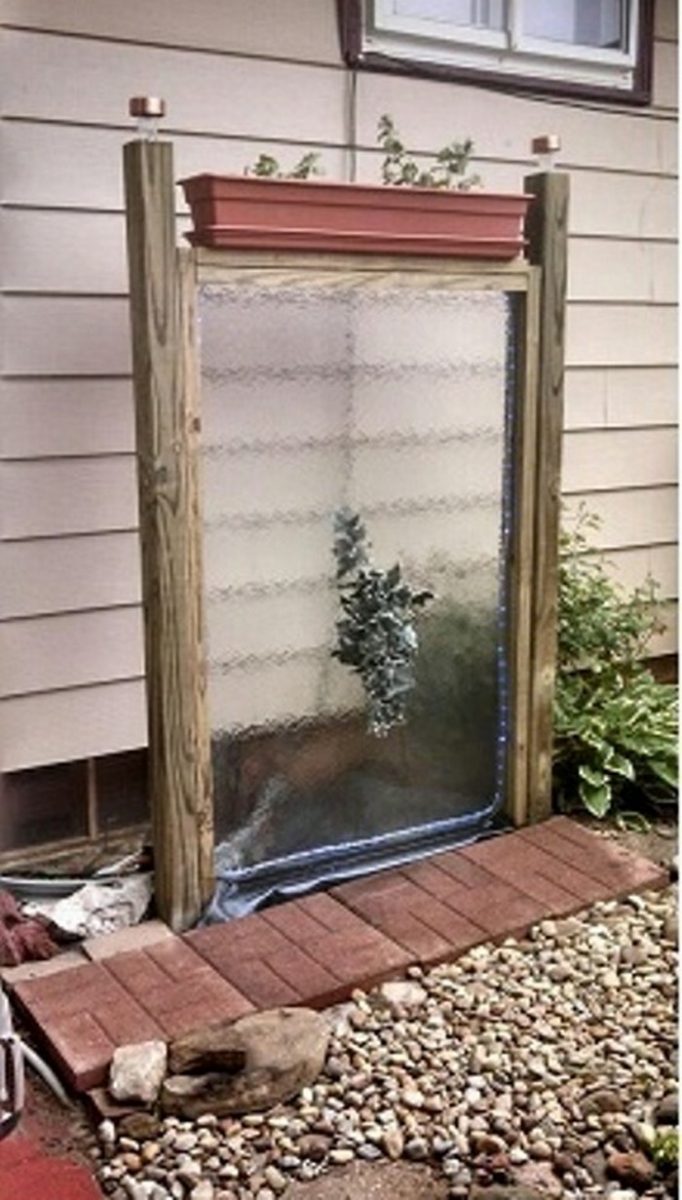
If you are looking to build a stunning glass waterfall for your home, you may be able to lower your expenses by sourcing glass material for free. One resourceful owner-builder was able to do just that, and he was also able to get an aluminium frame with rubber strips for securing the glass.
While not everyone may be as lucky, there are ways to build this glass water wall without breaking the bank. By being resourceful and creative, you can create a beautiful glass waterfall that will be the envy of your neighbourhood.
If you are unsure of your ability to build a water feature, it may be helpful to consult with a friend who is knowledgeable about the process. Even with help, it is important to do your research before beginning the project.
This will ensure that you have a clear understanding of the necessary steps and components. By taking the time to prepare, you can increase your chances of success and avoid potential problems.
Want a water feature in your garden? Start getting ideas from our album of glass water walls and be inspired to DIY by watching the quick guide below!
Click on any image to start the lightbox display. Use your Esc key to close the lightbox. ![]()
Contents
How to Build Your Glass Water Wall Feature
Get ready to elevate your space with the mesmerizing allure of a DIY glass water wall! Turn your vision into a reality.
Picture a serene sanctuary within your living space, a tranquil haven where peace reigns supreme. Envision crafting a cozy nook, adorned with plush cushions and soft throws, inviting you to sink into comfort. Or perhaps, conjure a striking centrepiece, commanding attention with its elegance and charm, becoming the focal point of your home.
Whatever your vision, let your creativity soar, transforming your surroundings into a reflection of your unique style and personality.
You’ll need these materials:
- Toughened Glass
- 4×2 Timber
- Timber Decking (for the base)
- 8×1 Treated Gravel Board (Cladding)
- Builders Mixing Bath (Water Tank)
- 75-watt Water Pump
- Valve
- 2″ Waste Pipe
- Y or T Junctions (for water outlet)
- Polyethene
- Slate
- Silicone Caulking
And these tools:
- Measuring Tape
- Cordless Drill
- Circular Saw
We have prepared all the necessary materials for you to complete this water wall feature. To start, you’ll need to build a frame to support your glass panels. Make sure the frame is secure and the glass is firmly in place. Then, position your water tank below the frame.
When you are ready to build the base of your water wall feature, you have a few options. You can choose to bury it in the ground or use a wooden or concrete base. Each option has its benefits and drawbacks, so be sure to weigh your options carefully before making a decision.
If you bury your water wall base in the ground, it will be more stable and less likely to move. However, it can be more difficult to access if you need to make repairs. If you use a wooden or concrete base, it will be easier to access if you need to make repairs, but it may be less stable and more likely to move.
Now that you have the basic structure of your water wall feature in place, it is time to tackle the plumbing. This can be a little tricky, but following these steps will help you get it done right. Begin by attaching the pump to the base of the water wall. Make sure the pump is properly secured and that all connections are tight. Next, run the tubing from the pump to the top of the water wall. Again, make sure all connections are secure.
Once everything is in place, you can fill the tank with water and enjoy your new water wall.


Thanks to Stucknuts for sharing invaluable strategies to make a glass water wall.
Step 1: Prep Your Space
Choose a spot for your water wall and clear the area. Make sure it is level and sturdy enough to support the structure.
Step 2: Build Your Frame
Cut your timber to size and assemble the frame for your water wall. Use your spirit level to ensure it’s straight and true.
Step 3: Line Your Tank
Line your builders’ mixing bath with polyethene to prevent leaks. This will be your water reservoir, so make sure it’s watertight!
Prioritize the integrity of your setup, confirming that every corner and crevice is tightly sealed, guaranteeing a watertight enclosure. With this precaution in place, you can proceed with confidence, knowing that your water supply remains secure and reliable throughout your project.
Step 4: Install Your Pump
Attach your water pump to the tank and connect it to your water wall frame using the waste pipe and junctions. Embrace meticulous attention to detail, ensuring each component aligns flawlessly, facilitating smooth water circulation. With this meticulous approach, your water wall will come to life, enchanting all who behold its mesmerizing beauty.
Step 5: Add the Glass
Carefully place your toughened glass panels into the frame, securing them in place with silicone caulking.
Step 6: Finishing Touches
Clad the sides of your water wall with treated gravel board for a polished look. Add slate and other decorative elements as desired.
Step 7: Test and Enjoy!
Fill your tank with water, turn on the pump, and watch as your glass water wall comes to life! Adjust the flow with the valve until you are happy with the effect. Then sit back, relax, and enjoy the soothing sounds of your new creation.
With a little creativity and a lot of elbow grease, you have just built your very own glass water wall – congratulations! Now go ahead and bask in the glory of your DIY masterpiece.
Pro Strategies for Your Water Glass Wall
Get ready to level up your space with a jaw-dropping glass water wall that’ll have everyone talking. We’ve got the insider tips and pro strategies to make your project a breeze. Let’s dive in!
1. Start with Safety First
Before you dive headfirst into the exhilarating world of crafting your glass water wall, let us prioritize safety. Think safety goggles and gloves – they’re your steadfast allies when handling toughened glass.
Check the goggles, and double-check those gloves. Working with glass demands caution, so armour up and protect yourself before embarking on the creation of your masterpiece.
2. Plan Like a Pro
Now, onto the blueprint. Imagine this: you are about to embark on an adventure of design and construction, but before you unleash your creativity, it’s time to channel your inner architect. Precision is paramount. Grab your trusty tape measure and get ready to measure twice, cut once. Take the time to meticulously measure every inch of your space.
From the height and width of your chosen area to the specific dimensions of each glass panel, leave no detail overlooked. This meticulous planning isn’t just for show – it is the bedrock of your entire project. A solid plan ensures a seamless journey from conception to completion. So, gear up, measure up, and let the magic unfold!
3. Choose the Right Glass
When it comes to choosing the right material for your glass water wall, there is one clear winner: toughened glass. This sturdy option isn’t just about aesthetics – it is all about durability and safety.
Opting for toughened glass ensures that your water wall will stand the test of time, resisting breakage and providing peace of mind for years to come. So, when you are selecting your glass panels, remember: toughened is the way to go.
4. Seal the Deal
Now, let us talk about sealing the deal. Once you have got your toughened glass panels in place, it’s time to ensure everything stays securely sealed. Enter high-quality silicone caulking – your secret weapon for creating a watertight seal that keeps your water wall flowing smoothly. Invest in the good stuff – trust us, it is worth it. Apply the caulking around the edges of your glass panels with precision, making sure to seal every nook and cranny.
This extra step may seem small, but it is essential for ensuring the longevity and performance of your water wall. So, seal it up tight and get ready to enjoy the soothing sounds of cascading water in your oasis
5. Pump Up the Volume
When it comes to selecting the right water pump for your glass water wall, power is key. You’ll want a pump that can create the perfect flow to bring your vision to life. So, opt for a pump with ample power to create the desired effect. Pro tip: consider going for a submersible pump. Not only does it provide quieter operation, but it also offers a sleeker look, seamlessly blending into your water wall design.
With a submersible pump, you’ll enjoy both form and function in one neat package.
6. Elevate Your Aesthetic
Do not be afraid to let your creativity shine! Your glass water wall is more than just a functional feature – it’s a work of art. So, think outside the box and add decorative elements that truly make a statement. Consider incorporating LED lighting for a mesmerizing glow that enhances the ambience of your space.
Or, why not play with coloured glass panels to add a pop of personality? The sky is the limit when it comes to expressing your unique style. So, go ahead – let your imagination run wild and create a glass water wall that is as stunning as it is functional.
The Wrap Up
Venturing into the realm of DIY glass water wall creation promises a deeply gratifying and enriching experience for individuals seeking to infuse their surroundings with an aura of sophistication and serenity.
The outlined seven-step process serves as a comprehensive roadmap, guiding both experienced DIY aficionados and newcomers alike towards achieving stunning outcomes with remarkable ease.
Commencing with the initial task of gathering materials, each subsequent step is meticulously structured to seamlessly lead you through the process of assembling and installing your water feature.
The deliberate design of these steps ensures that the journey is not only efficient but also immensely rewarding, culminating in the realization of your vision for a harmonious and visually captivating environment.
Whether you possess a wealth of DIY expertise or are embarking on this endeavour as a fresh undertaking, the allure of this project lies in its capacity to ignite and nurture your creative spirit.
It presents an ideal canvas upon which to unleash your imagination, allowing you to tailor every aspect to suit your unique aesthetic preferences and spatial requirements.
Indeed, the allure of crafting a DIY glass water wall transcends the mere act of construction—it embodies a transformative opportunity to elevate the ambience of your home or garden to new heights.
As you embark on this exhilarating journey, let the tools in your hands and the musings of your imagination converge, propelling you towards the creation of a magnificent masterpiece that resonates with tranquillity and beauty.
So, gather your tools with anticipation, unbridled the depths of your creativity, and embark on this captivating odyssey towards fashioning your very own exquisite glass water wall.
In doing so, you will not only breathe new life into your surroundings but also bask in the pride of having manifested a tangible manifestation of elegance and refinement.
Frequently Asked Questions
1. What is a glass water wall?
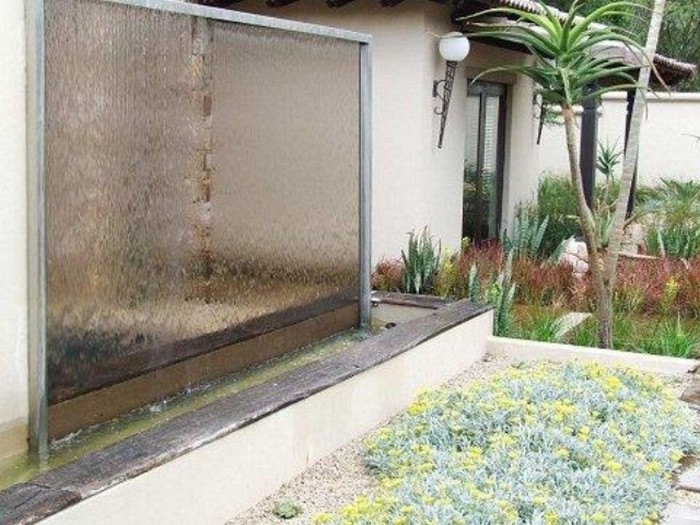
A glass water wall is a decorative feature that typically consists of a vertical panel of glass with water flowing down its surface. It adds a sense of elegance and tranquillity to indoor or outdoor spaces.
2. Why should you consider building a glass water wall myself?
Building a DIY glass water wall allows you to customize the design to suit your space and preferences, and it can be a rewarding creative project. Additionally, it can be more cost-effective than purchasing a pre-made water feature.
3. Is building a glass water wall difficult?
While it requires some basic DIY skills, building a glass water wall following the seven simple steps outlined in the guide can be relatively straightforward, even for beginners.
4. What materials do you need to build a glass water wall?
The materials typically include a glass panel, a water pump, tubing, a basin or reservoir, waterproof sealant, and decorative elements like stones or LED lights. Specific requirements may vary based on your design.
5. Do you need any special tools for this project?
Basic tools such as a drill, screwdriver, silicone gun, and level are typically required. You may also need a glass cutter if you plan to customize the glass panel.
6. Can you install a glass water wall indoors and outdoors?
Yes, glass water walls can be installed both indoors and outdoors. However, proper waterproofing and drainage considerations are essential for indoor installations.
7. How much maintenance does a glass water wall require?
Glass water walls require regular maintenance to keep the water clean and flowing smoothly. This may include periodic cleaning of the glass surface, refilling the reservoir, and checking the pump for any issues.
7. Is it safe to have a glass water wall around children or pets?
While glass water walls can be safe when installed correctly, it is essential to consider safety precautions, especially if you have children or pets. Ensure that the glass is sturdy and securely installed, and consider adding safety features such as protective barriers if necessary.
8. Can you customize the design of my glass water wall?
Absolutely! DIY glass water walls offer endless possibilities for customization. You can choose different glass textures, colours, and sizes, as well as add decorative elements like LED lights or etched designs to make it uniquely yours.
9. Where can you find additional inspiration and guidance for building a glass water wall?
In addition to the guide provided, you can find inspiration and helpful tips from online guides, home improvement websites, and forums dedicated to DIY projects and interior design.
Local hardware stores offer personalized assistance and expert advice, providing a valuable resource for sourcing materials, selecting tools, and addressing specific project requirements. When you step into a local hardware store, you’re met with a team of knowledgeable staff members eager to assist you.
These seasoned professionals possess a wealth of experience and expertise, honed through years of serving customers and tackling a myriad of DIY projects. By consulting with them, you gain access to invaluable insights and recommendations tailored to your specific project requirements. Your glass water wall is underway.