Last Updated on April 8, 2024 by teamobn
If you’re looking for a fun and unique way to spruce up your home, look no further than this fire extinguisher mini bar! This creative DIY project is perfect for any party or gathering and is sure to be a hit with your guests. Plus, it’s a great way to repurpose an old fire extinguisher that you may have lying around.
We all have stuff that no longer serves any purpose around the house. Whether it’s “still OK” or “might come in handy,” this kind of thinking can lead to hoarding in extreme cases. However, if you’re creative enough, you can solve the problem with clever repurposing.
For example, an old dresser can be turned into a beautiful new bookshelf with some sanding, paint, and new hardware. An old door can be reused as a unique tabletop or hung on the wall as rustic decoration. And those mason jars you’ve been holding onto can be used to create pretty much anything, from planters to soap dispensers or an empty fire extinguisher you thought you can never use again!
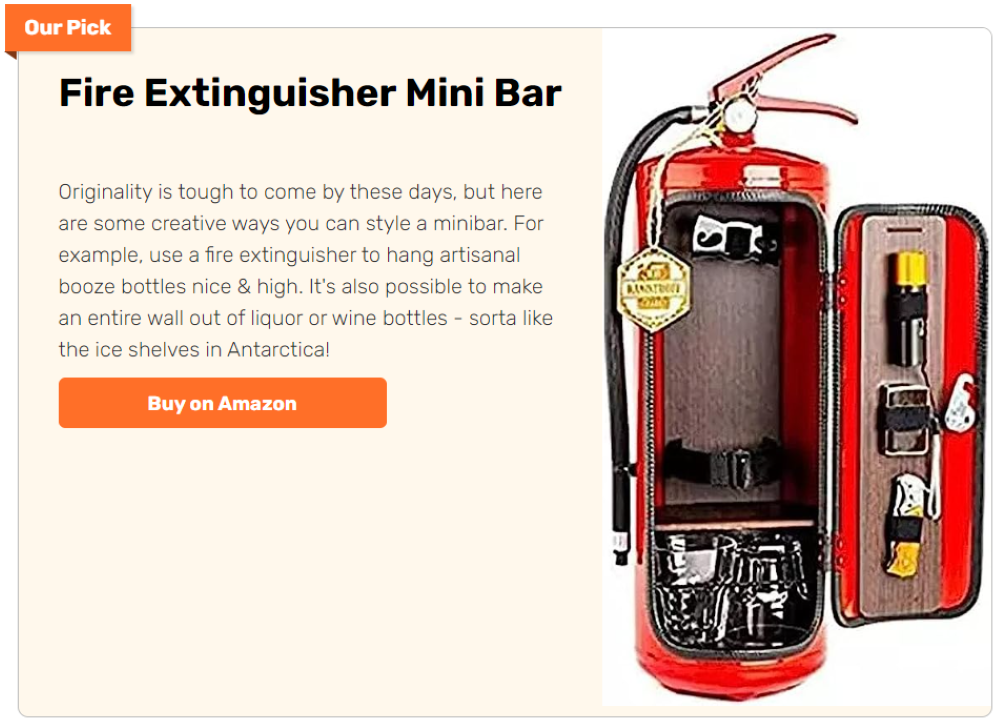
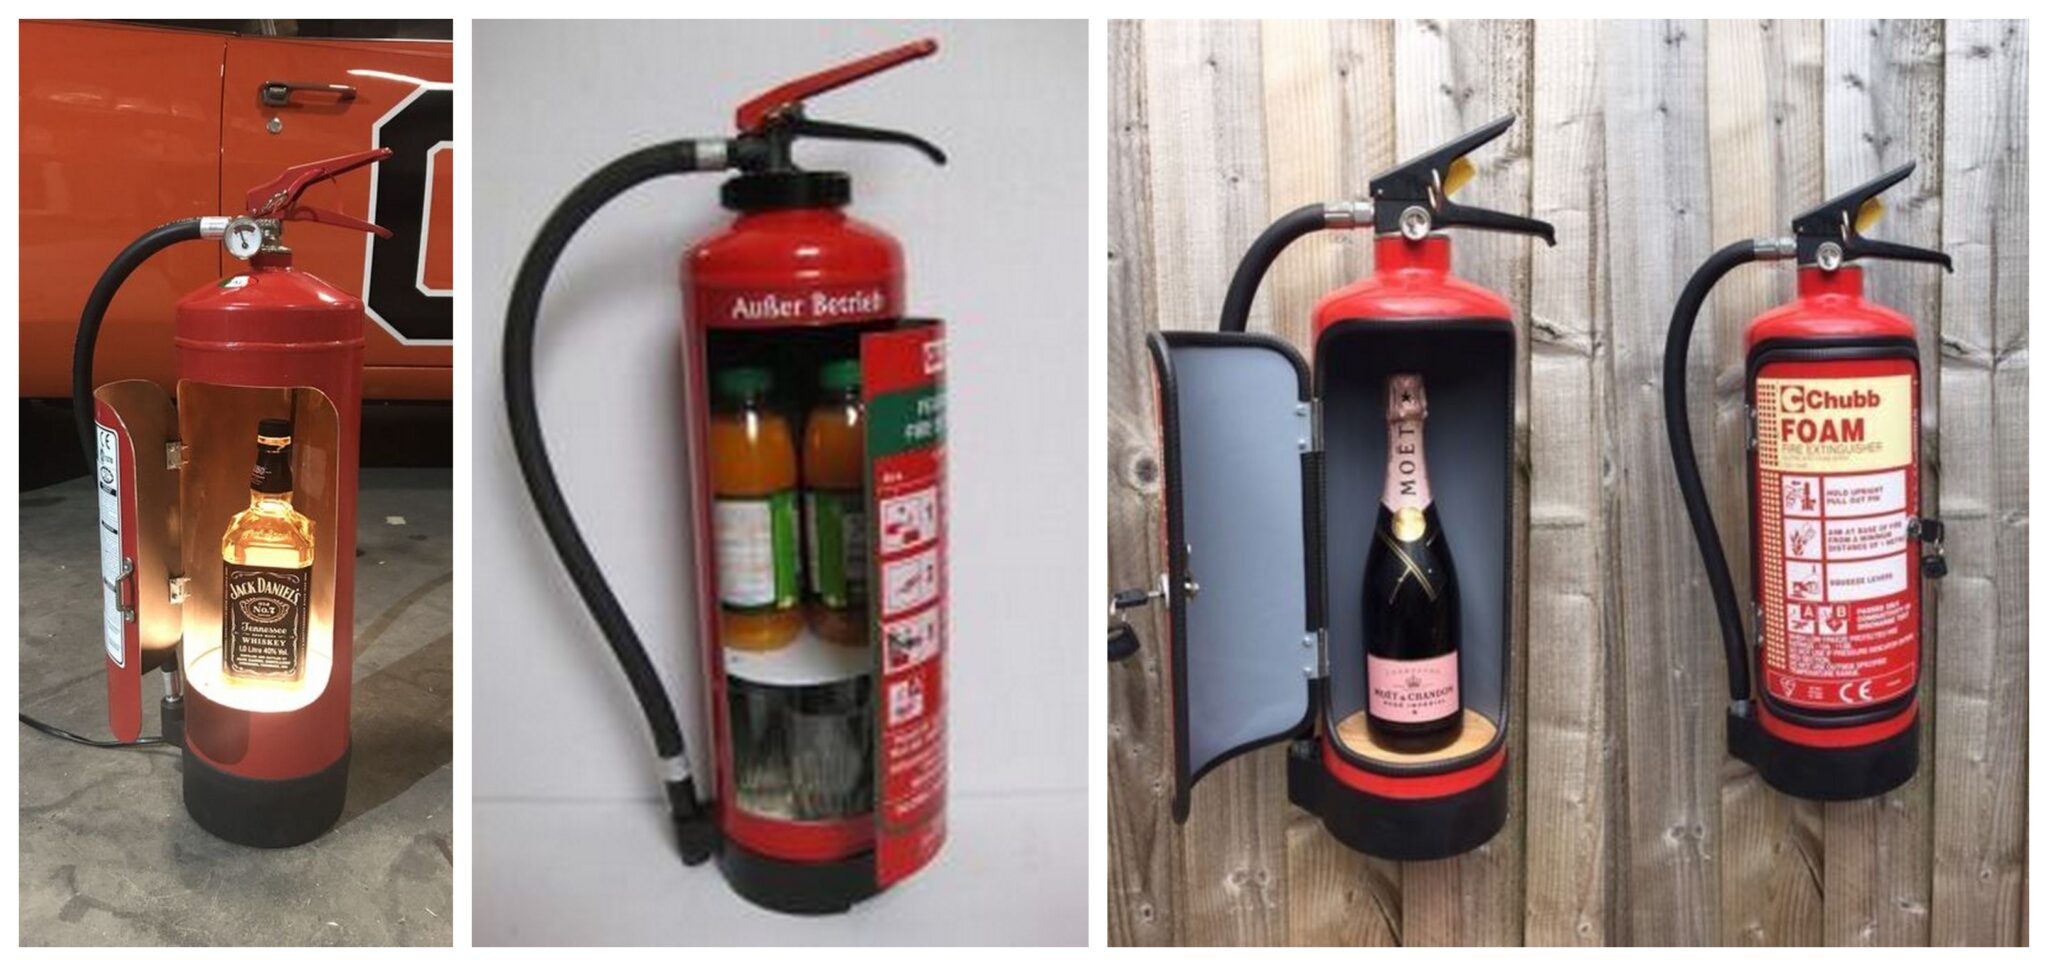
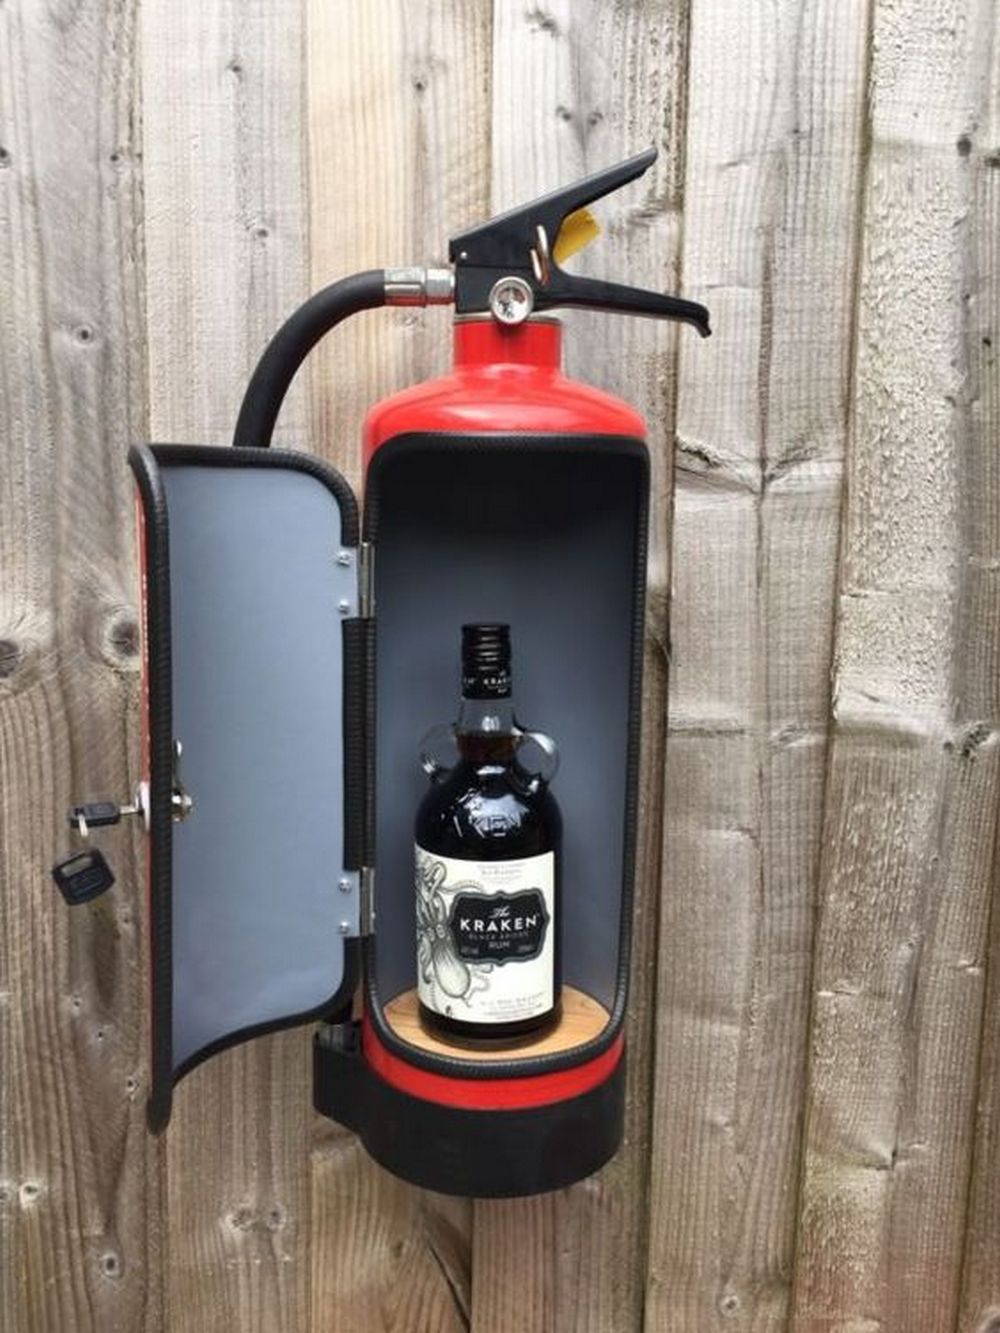
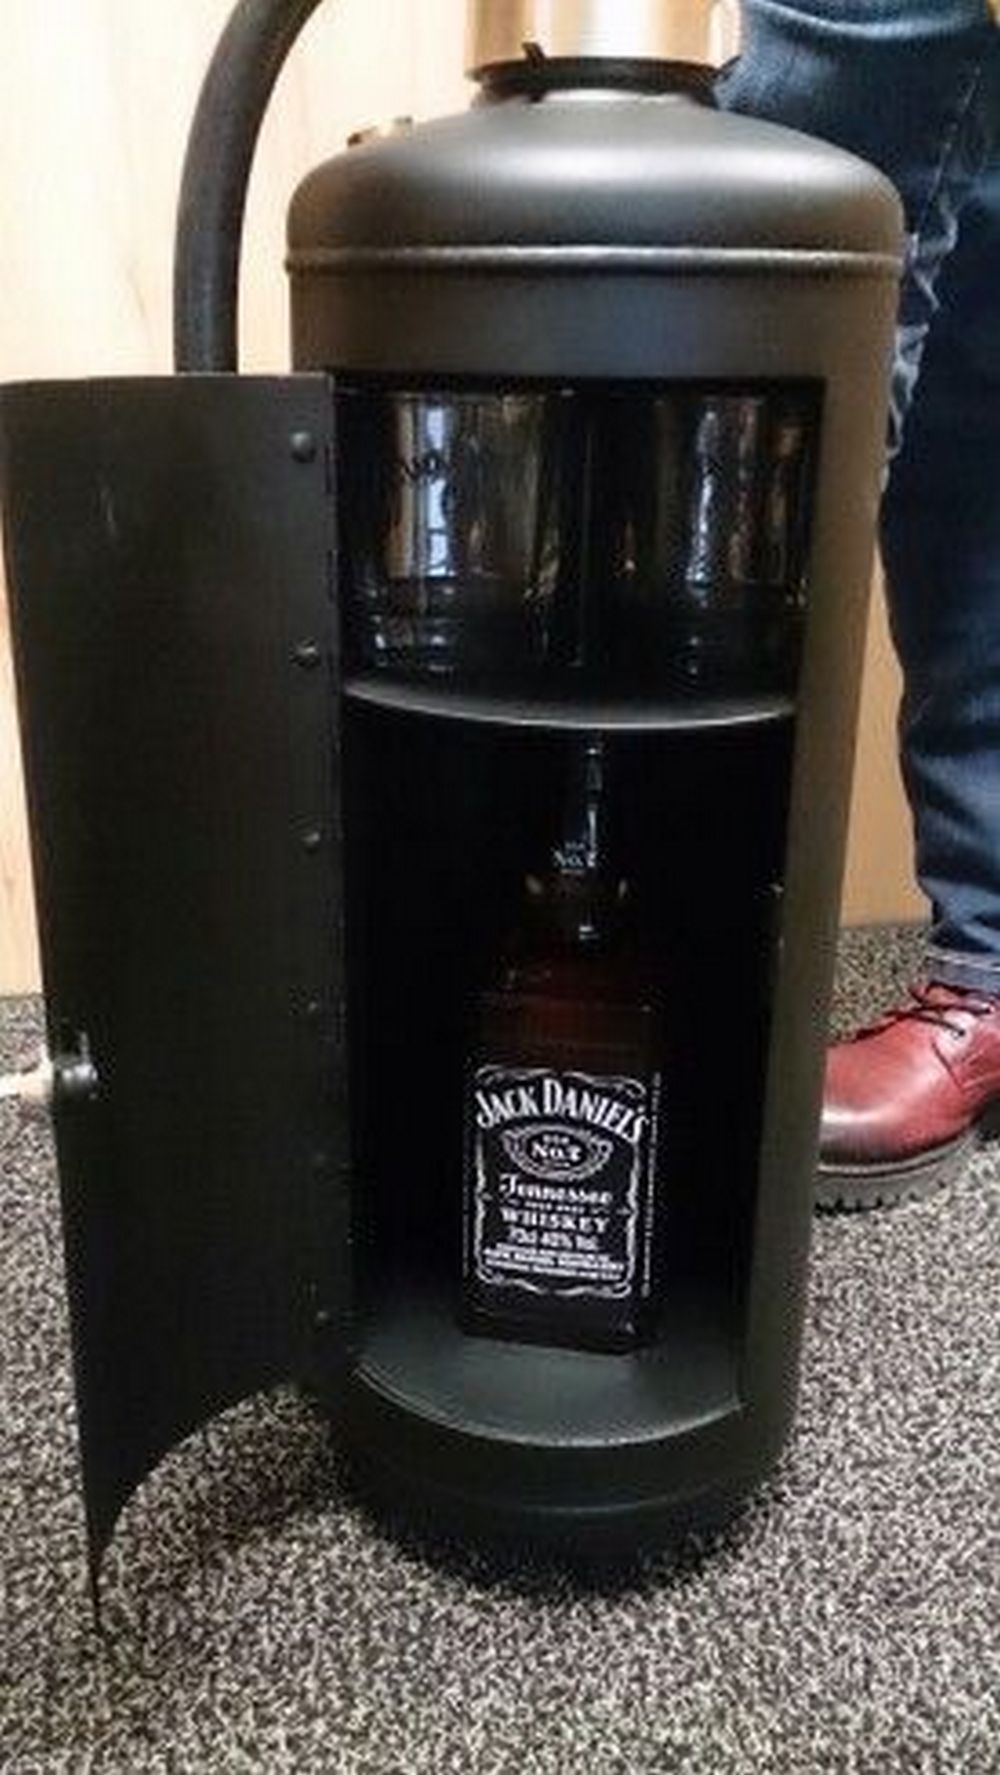
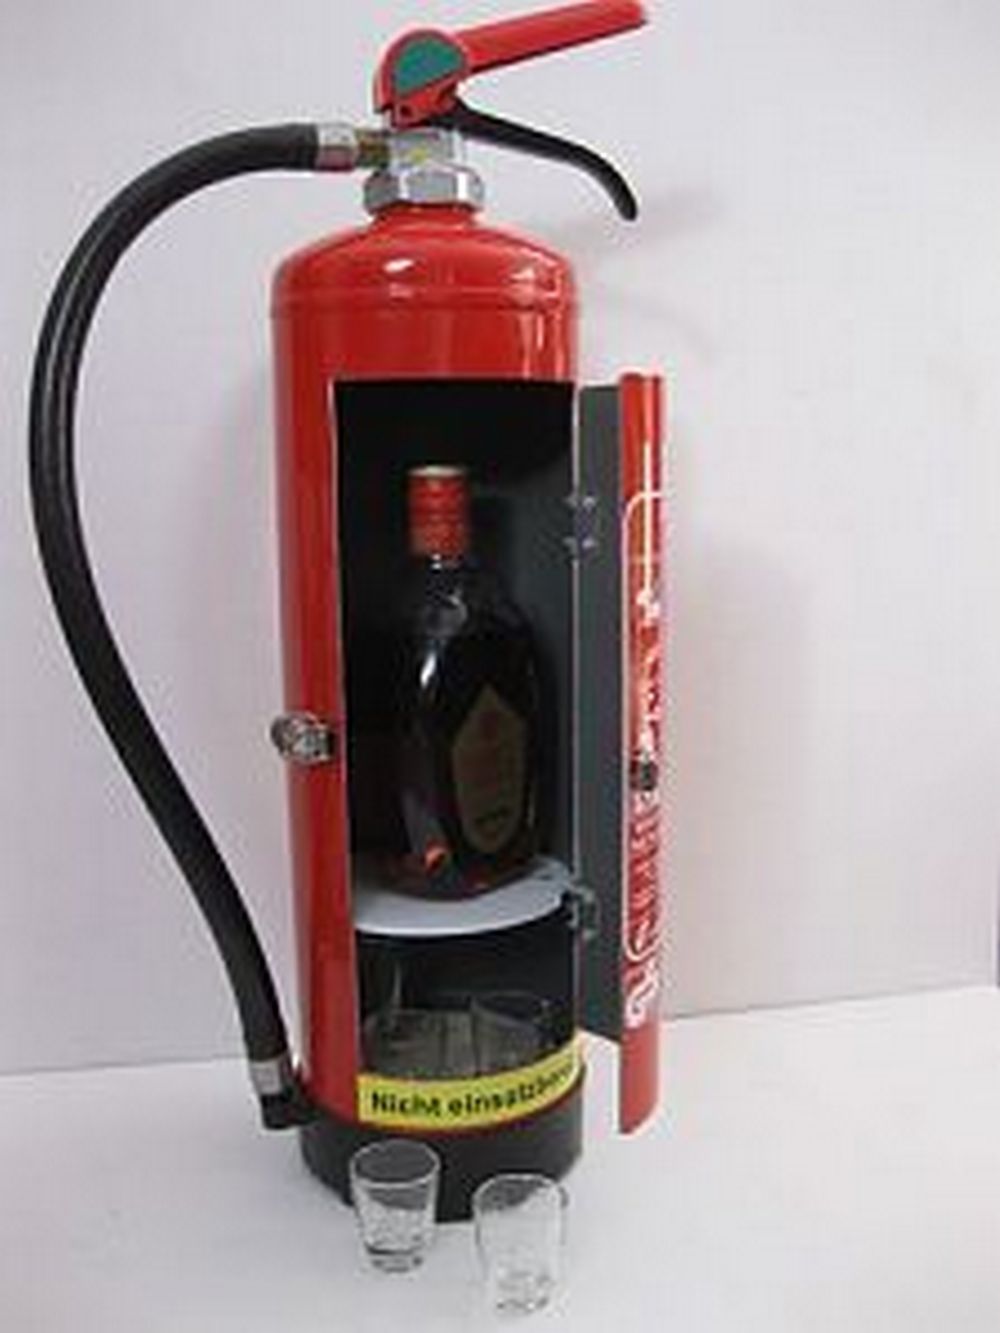
Believe it or not, you can still use an empty fire extinguisher. Since it has served its purpose of putting off flames, it can now be used to quench your thirst. Yes, you can keep a bottle of drink in there when you transform it into a minibar.
If you are looking for a creative way to recycle an old fire extinguisher, why not turn it into a mini fridge? This is a great way to upcycle an otherwise useless item, and it’s sure to be a conversation starter at your next party. Plus, it’s a great way to keep your drinks cold. So if you have an extra fire extinguisher lying around, put it to good use and turn it into a mini bar.
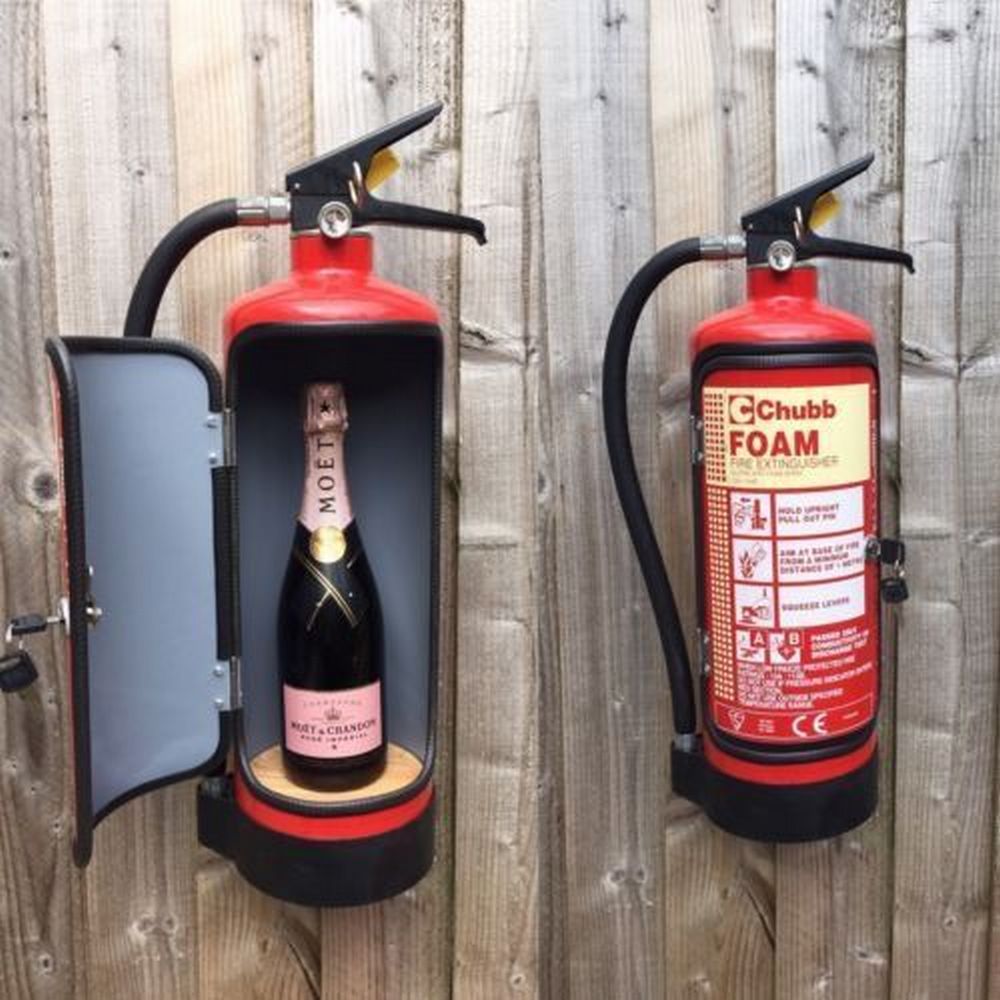
This project is a great way to repurpose empty fire extinguishers. You’ll soon have your very own mini-bar with a drink when you need it most. You can put in a bottle of wine, whiskey, or soda can. Your friends will love this cool idea. It’ll surely be the subject of many conversations one day!
Contents
Building a Fire Extinguisher Mini Bar
Materials
- Fire Extinguisher
- 22-ohm resistors (6 of them)
- Wires
- Thin plywood
- 1″ by 1″ rectangular wooden pole
- Electrical tape
- Heat sinks (2)
- CPU fan
- Peltier device
- Thermal paste
- 9-volt power source
- Insulation
- Thin fabric
- Hinges (1 inch tall)
- Clasp (1-2 inches)
Tools
- Dremel (metal cutting bit)
- Hot glue gun
- Scroll saw
- Drill
- Rivet popper and rivets
Instructions
Preparation
- Safety First: Wear protective gear, including gloves and eyewear.
- Material Check: Ensure you have all the materials and tools listed above.
Empty the Fire Extinguisher
- Discharge: Make sure the fire extinguisher is fully discharged in a safe, outdoor environment.
- Remove Contents: Unscrew the cap, pour out any remaining contents into a hazardous waste container.
- Clean: Rinse the inside with warm water and mild soap. Use a brush for stubborn dirt. Let it dry.
Cut the Fire Extinguisher
- Marking: Use a marker to outline where you’ll cut the bottom and a door.
- Cutting Bottom: With the Dremel and a metal cutting bit, carefully cut the bottom off. A clamp might help secure the extinguisher during this step.
- Door Creation: Cut out a rectangle for the door, ensuring it’s large enough to insert and remove bottles easily.
Prepare the Door
- Attach Hinges: Drill holes for the hinges at the bottom edge of the door you’ve cut out and on the body of the extinguisher. Secure them with rivets.
- Install Clasp: Attach a clasp to the side of the door and the extinguisher’s body for easy opening and secure closing.
Insulate the Interior
- Cut Insulation: Measure and cut the insulation to fit the inside walls of the extinguisher.
- Apply Insulation: Use the hot glue gun to secure the insulation in place.
- Cover with Fabric: Measure and cut a piece of thin fabric to cover the insulation. Glue it in place for a cleaner look.
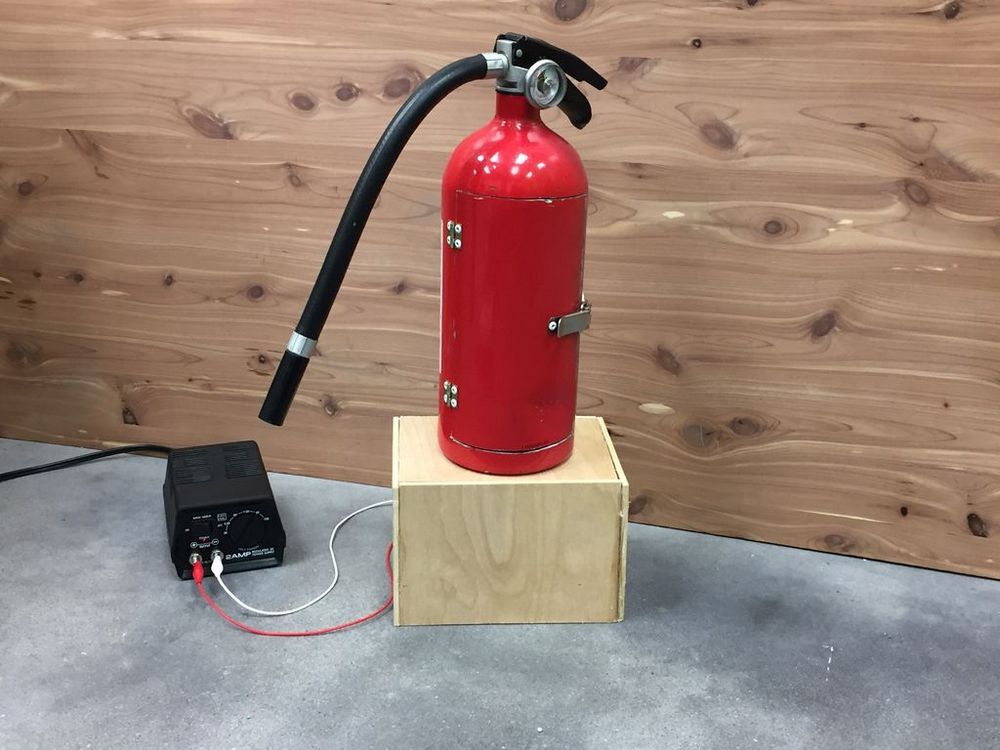
Assemble the Cooling System
- Prepare the Peltier Device: Attach heat sinks on both sides of the Peltier device with thermal paste for effective heat transfer.
- Mount the CPU Fan: Secure the CPU fan to one of the heat sinks using the hot glue gun. This will help dissipate heat efficiently.
- Connect the Electronics: Connect the Peltier device, CPU fan, and resistors to the 9-volt power source using wires and electrical tape. Follow safety standards and double-check connections to prevent short circuits.
Install the Cooling System
- Cut Plywood: Measure and cut thin plywood to create a platform inside the extinguisher for the cooling system.
- Secure Platform: Use the wooden pole for support, and attach the plywood platform inside the extinguisher with screws.
- Mount the System: Place the cooling system on the platform. Ensure the hot side faces outwards and the cool side faces the interior.
Final Touches
- Test: Connect the 9-volt power source to test the cooling system. Adjust as necessary.
- Secure Door: If the door or clasp feels loose, use additional rivets or adjust the hinges.
Enjoy Your Mini Bar
- Stock It Up: Place your favorite drinks inside. The cooling system will keep them chilled.
- Showcase: Place your fire extinguisher mini bar in a prominent spot. It’s not just a functional item but also a conversation starter.
Here’s a quick video…
Innovative Uses for Other Household Items
Exploring innovative ways to repurpose household items not only benefits the environment but also adds a unique touch to your living space. Among these creative endeavors, the fire extinguisher mini bar stands out as a prime example of how an everyday object can be transformed into something both functional and stylish.
This section delves into various household items that, like the fire extinguisher mini bar, can be given a second life through imagination and a bit of DIY spirit.
Ladder Bookshelf: Elevate Your Reading Space
Just as the fire extinguisher mini bar repurposes a fire safety device into a conversation piece, an old ladder can become a charming bookshelf. Lean it against the wall, secure it for stability, and place your books on the steps. This project mirrors the innovative spirit of the fire extinguisher mini bar, turning the mundane into the magnificent.
Suitcase Side Table: Travel Through Time
The fire extinguisher mini bar isn’t the only item that can tell a story. A vintage suitcase can be transformed into a quaint side table, reminiscent of the creativity behind the fire extinguisher mini bar. Attach legs to the bottom of the suitcase for a portable history piece that serves a practical purpose while sparking conversation.
Drum Washing Machine Pedestal: A Rhythmic Revolution
In the same way that the fire extinguisher mini bar gives new life to a fire extinguisher, an unused drum from an old washing machine can be repurposed into a stylish pedestal. Use it as a base for potted plants or as an eccentric side table. This inventive reuse embodies the same ingenuity as the fire extinguisher mini bar, creating something new and useful out of the forgotten.
Skateboard Shelf: Ride the Wave of Creativity
The fire extinguisher mini bar showcases how objects can be seen in a new light, and so does turning old skateboards into shelves. Mounting the skateboards to the wall provides a sturdy and eye-catching shelf space. This project skates along the same creative pipeline as the fire extinguisher mini bar, proving that anything is possible with a bit of imagination.
Tennis Racket Mirror: Reflecting on Sportsmanship
Drawing inspiration from the fire extinguisher mini bar, an old tennis racket can serve a new purpose as a quirky wall mirror. Remove the strings and fit a circular mirror inside the frame. This reuse pays homage to the original sport and echoes the innovative reuse theme of the fire extinguisher mini bar.
The fire extinguisher mini bar is more than just a DIY project; it symbolises the endless possibilities of repurposing everyday items. By looking at household objects through a lens of creativity, similar to how one views a fire extinguisher when envisioning a mini bar, we can find sustainable and stylish solutions to decorating our homes. Let the fire extinguisher mini bar inspire you to see potential in the mundane and transform the ordinary into the extraordinary.
Click on any image to start the lightbox display. Use your Esc key to close the lightbox.


Safety and Precautions
When embarking on any DIY project, especially one as unique as transforming a fire extinguisher into a mini bar, prioritizing safety is crucial. Creating a fire extinguisher mini bar, while innovative and exciting, involves steps that require careful handling and awareness of potential hazards.
This section outlines essential safety measures and precautions to ensure your project progresses smoothly and safely.
Understanding the Basics of the Fire Extinguisher
Before you start converting a fire extinguisher into a mini bar, familiarize yourself with its components and how it operates. Recognize that even an “empty” extinguisher may contain pressurized gas, which can pose a risk if mishandled.
Proper Discharge of the Fire Extinguisher
- Complete Discharge: Ensure the fire extinguisher is fully discharged in a safe, outdoor area away from people and animals.
- Consultation: If unsure about the extinguisher’s status, consult with a professional before proceeding.
Protective Gear
- Eye Protection: Always wear safety goggles to protect your eyes from metal filings, dust, and chemical residue.
- Hand Protection: Use gloves to guard against sharp edges and prevent contact with chemical remnants.
- Respiratory Protection: A mask or respirator is recommended to avoid inhaling dust or potentially hazardous substances.
Handling Tools and Materials
- Tool Mastery: Familiarize yourself with each tool you plan to use. Knowing how to operate them safely is paramount whether it’s a Dremel drill or glue gun.
- Ventilation: Ensure your workspace is well-ventilated, especially when dealing with chemicals or performing tasks that generate fumes or dust.
- Clarity and Precision: Keep your working area clean and organized. A cluttered space can lead to accidents.
Electrical Safety
- Understanding Circuitry: When assembling the cooling system for your fire extinguisher mini bar, a basic understanding of electrical components is essential to avoid short circuits or overheating.
- Isolation: Use electrical tape to insulate all connections properly. Ensure electrical components do not come into contact with the metal body of the fire extinguisher, as this could lead to electrical shocks.
Final Checks and Precautions
- Leak Tests: Check for leaks or loose parts once your fire extinguisher mini bar is assembled. Ensure the door seals tightly and that the cooling system functions without overheating.
- Professional Advice: If you are unsure about the safety of your project at any point, seek advice from a professional. This could be regarding the discharge of the extinguisher, the electrical setup, or the structural modifications you’ve made.
Safety should never be an afterthought when undertaking a project like creating a fire extinguisher mini bar. By following these guidelines and approaching each step with caution and respect for the tools and materials involved, you can enjoy the process of bringing your fire extinguisher mini bar to life while ensuring a safe environment for yourself and others.
Conclusion
Crafting a fire extinguisher mini bar is a unique blend of creativity, sustainability, and technical skill, transforming an ordinary object into an extraordinary conversation piece. This DIY project not only challenges your crafting abilities but also promotes the repurposing of items in innovative ways. With safety and precision at the forefront, anyone can turn a redundant fire extinguisher into a mini bar that impresses guests and adds a personal touch to any space.