Last Updated on February 22, 2024 by teamobn
You can’t countdown to the new year without a drink in your hand. New Year’s drinks and cocktails are a staple at New Year’s Eve parties, after all. Whether you’re a tequila, champagne, vodka, wine, or whiskey fan, there is always a drink for you.
If you celebrated the new year in, chances are you have the materials to do this project sitting in your recycling bin! It’s a fun DIY lighting project that can remind you of the great time you had celebrating (or the pain the next morning), every time you flip the switch 😉
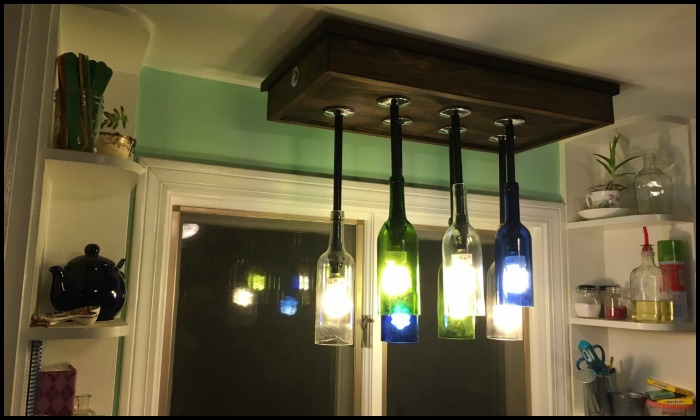
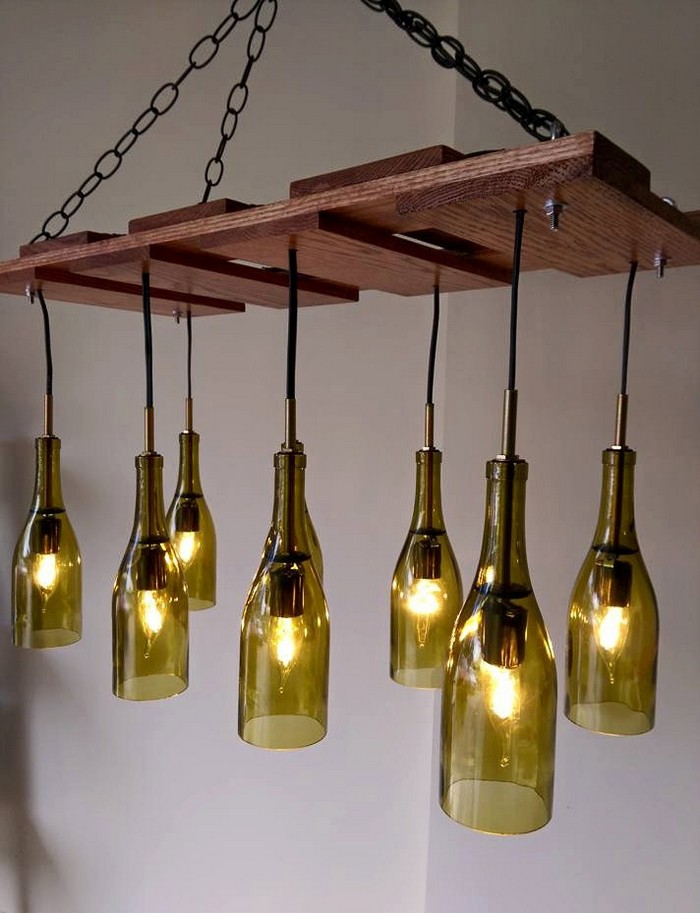
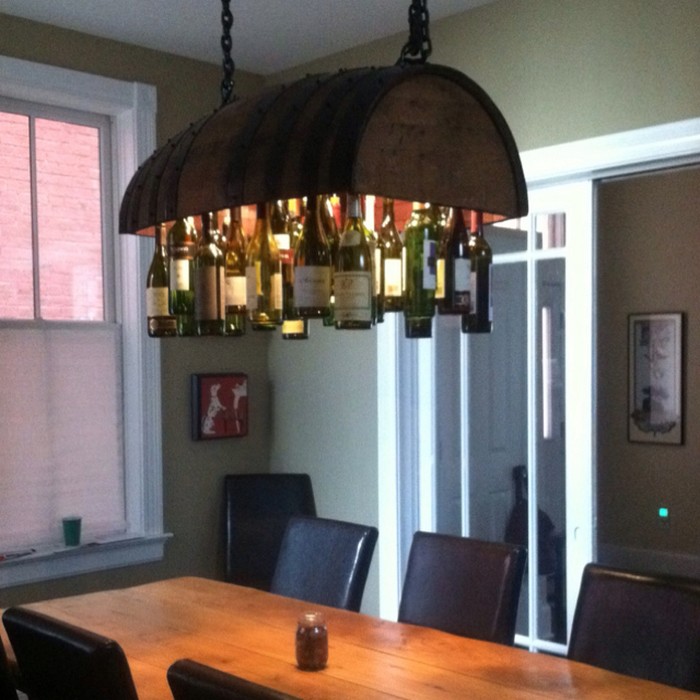
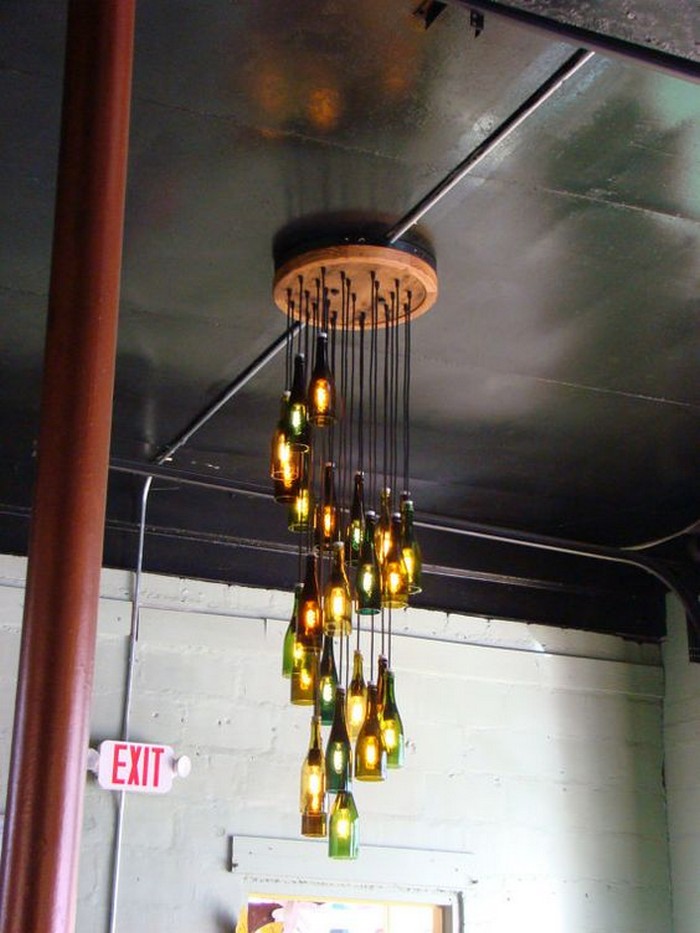
Give your kitchen a new look by installing a DIY wine bottle chandelier! A wine bottle chandelier is a great recycling project for all those wine bottles emptied during the holiday celebrations. You can also put this above your dining table or kitchen island.
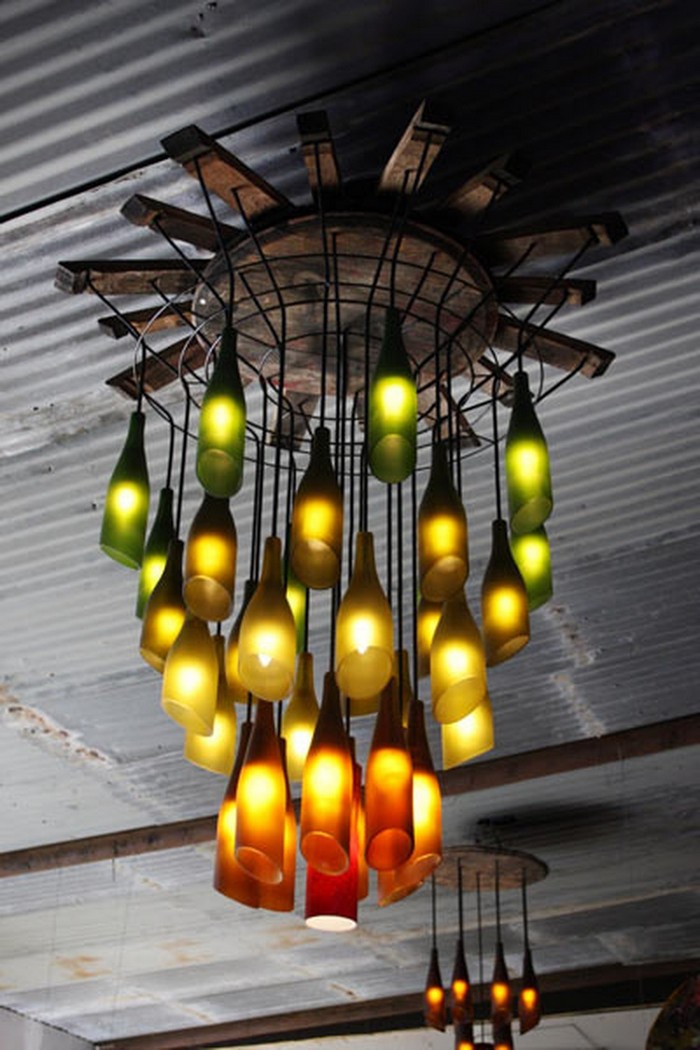
Don’t have enough empty wine bottles in your recycle bin? You can ask your friends and family. Of course, you aren’t restricted to wine bottles… how about a Jack Daniel’s, Martell or Glen Fiddich version?
Pick your poison and get started on this easy DIY project. The tutorial below shows you in detail how to build this wine bottle chandelier a beautiful and secure light fixture and attach it to your ceiling!
Will this be the project to keep you busy this weekend? 🙂
Click on any image to start the lightbox display. Use your Esc key to close the lightbox. ?
You’ll need these materials:
- Wine Bottles
- 8′ of 3/4″ by 3″ Pine Trim Board
- 2’x4′ 3/4″ Plywood
- Wood Glue
- Wood Stain
- Acetone
- Rags
- 1/2″ Plumbing Pipes (1/2″ O.D. is key since it has to fit through the neck of the bottle)
- 1/2″ to 3/4″ Plumbing Coupling Converter (1 per number of bottles)
- 3/8″ Flange/Escutcheon (1 per number of bottles)
- #0 Conduit Hangers, or the smallest size you can find (1 per number of bottles)
- 4 Screw Eyes (capable of holding 50 lbs min)
- 2 Screw eyes (with a 1″ minimum opening)
- 2 Plastic Electrical Junction Boxes
- Mini Candelabra Light Sockets with wiring (however many bottles you are hanging)
- About 2′ of chain (25 lb load)
- 4 Quick links (25 lb load)
- Electrical Tape
- 2 5/8″ Toggle Bolts (basically the biggest I could find)
- 2 5/8″ x 1 1/4″ Fender Washers
And these tools:
- Table Saw
- Chop Saw
- Wood Clamps
- Drill
- Sandpaper
- Foam Paint Brushes
- Pliers
- Screw Driver
How to Build a Wine Bottle Chandelier?
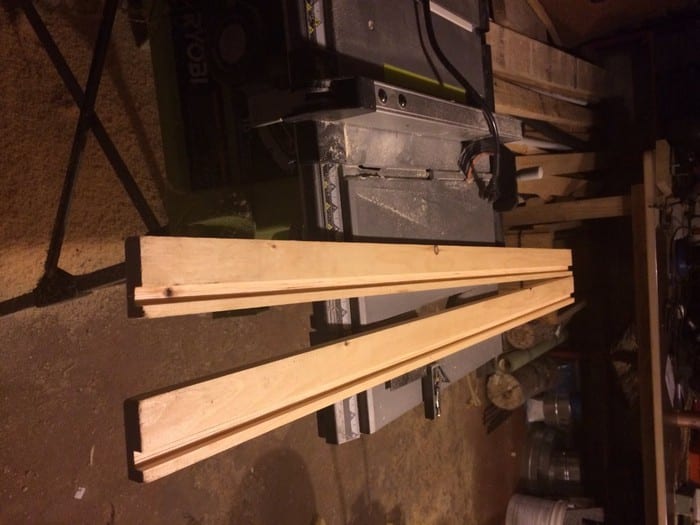
Cut a groove in the trim board to allow the plywood to be recessed inside. I cut a 3/8″ deep by 3/4″ wide groove using a table saw. It could be done with a skill saw if done carefully to keep the groove straight and consistent. I cut the 8′ piece of trim in half, just for ease of working with the pieces of my wine bottle chandelier.
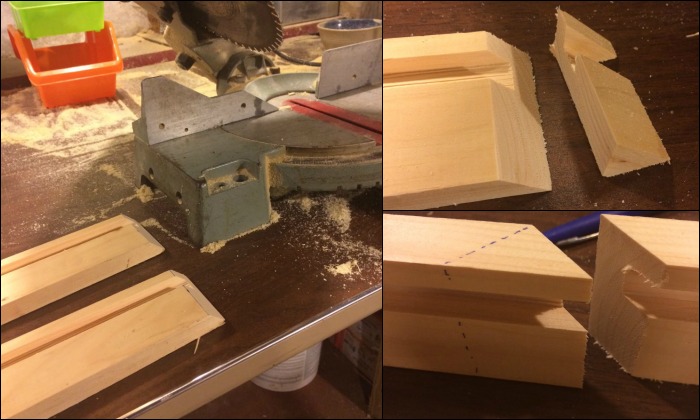
Cut the trim board to form the outside edge of the box. Using a chop saw, I cut the trim boards using mitre joints (45-degree angles), making sure to plan for the groove to be on the inside of the box. My box’s outside dimensions were 12″ x 25.5″.
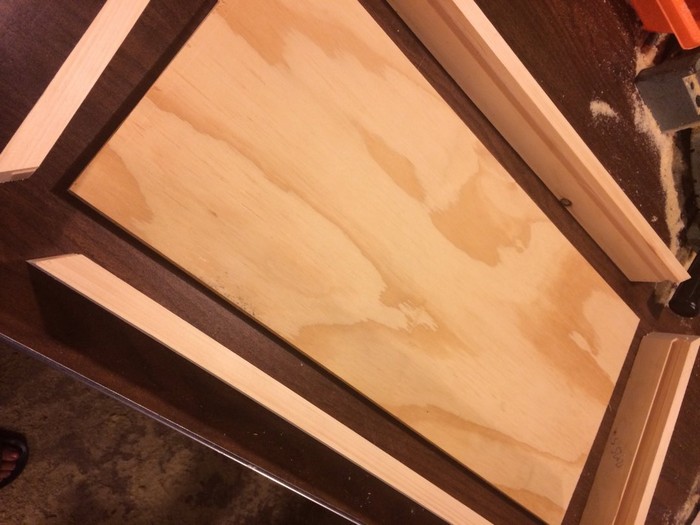
Cut the plywood to fit inside the box, in the groove. To have it set into the trim boards and retain my outside dimensions, I cut to 11.25″ x 24.75″ (3/8″ deep groove on all four sides, so 3/4″ off outside box dimensions).
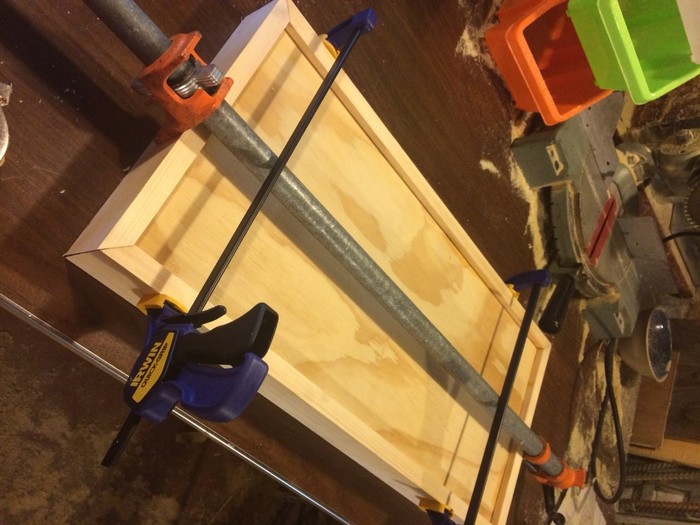
Dab some wood glue inside the groove on all 4 sides, and place the plywood inside. Clamp all 4 sides of the trim pieces and leave overnight.

Layout holes for tubing/bottles. See above for the layout of my wine bottle chandelier.
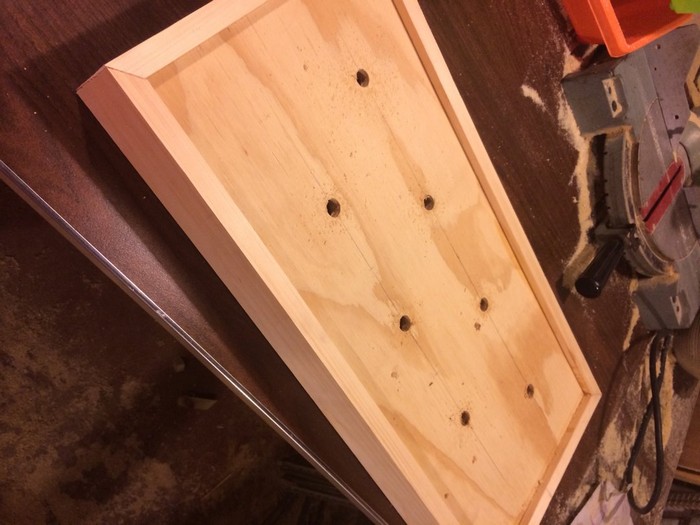
Drill 1/2″ holes for each tube/bottle. 1/2″ worked perfect for the tubing/piping in the next steps (encloses the electrical cables and supports the bottle) that I used, but if you use different tubing, just make sure it fits through the hole, but not by too much since the bottle will hang on the lip of the plywood at each hole.
Sand away! Sand to remove all pencil marks and excess glue. Use higher grit to finish nicely
Clean using rags and pour on some acetone. This will clean up any dirt/sawdust on the box and will dry almost instantly.
Stain the box in whatever colour your wine bottle chandelier would like. No need to do the inside, since it won’t be seen.

Attach bottles to box: This is the part that took the most planning and testing, but here is what I found to work really well.
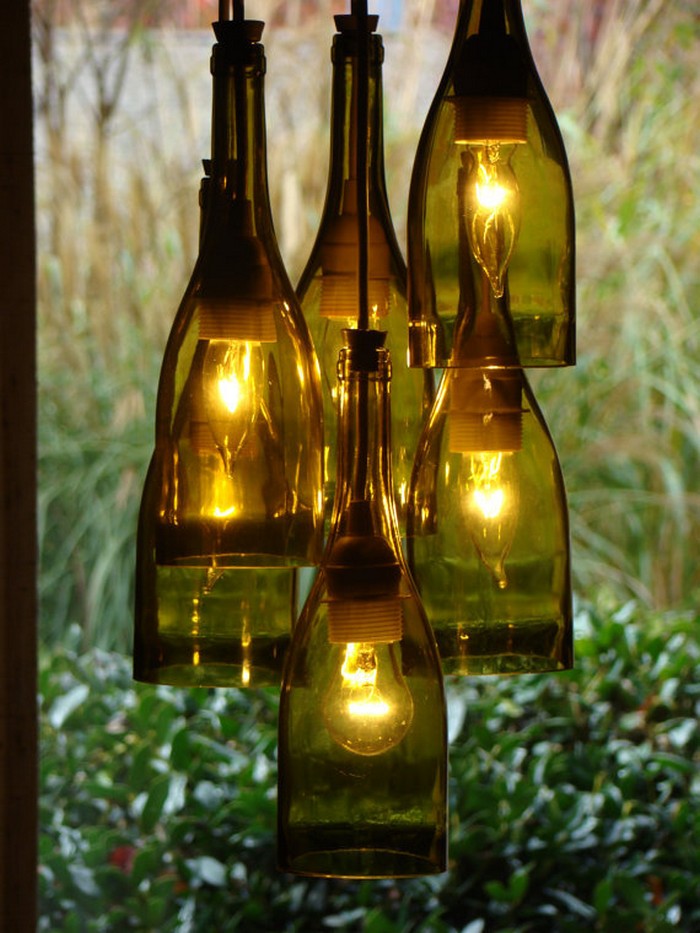
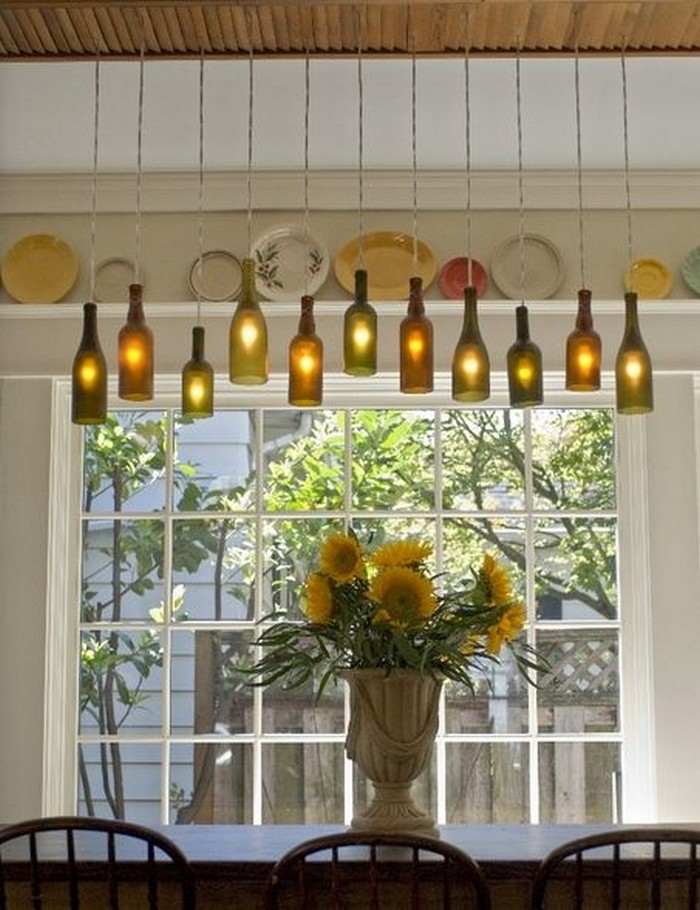
I am not going to explain how to cut/sand down the wine bottles since there are tons of examples on Youtube and others. I use a jig, and it works fairly well. I also cut all bottles to the same height, but you could definitely add another level of depth and do different lengths for your wine bottle chandelier.
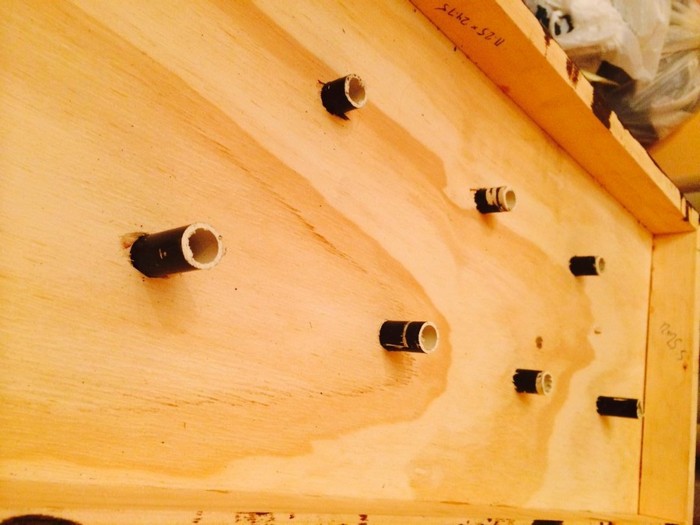
Cut the Plumbing pipe in segments, I did (3) at 15″ and (4) at 17″ for the front vs. back rows.
Using gorilla glue to secure them, plug the coupling into the end of the pipe. Make sure the conduit stays clear and you will have to pull the wire through later on.
Spray paint black to eliminate any of the writing that is visible on the pipe.

Insert the pipe piece through the next of the bottle, then place the flange/escutcheon on (make sure it is in the correct direction), then insert the pipe into the hole already drilled in the box. Mine was a tight fit, which was good since you don’t want it to slide back through by accident.
Pull the pipe through so that about 1 1/2″ is visible on the inside of the box.
Attach the conduit hanger to the pipe so it rests directly on the box. This will keep the pipe from sliding through as well. Since the conduit hangers are generally built for wider pipe, you may have to wrap the pipe with tape prior to this step. Try to tighten as much as possible.
Give the pipe/bottle a pull and shake when all tightened up to make sure it doesn’t slide through. You don’t want a glass bottle to come crashing down!

Clamp down the flange/escutcheon so it is flush with the bottom of the box. I used a little hot glue as well to make sure they stayed in place. These are purely cosmetic.
Continued Page 2…