Last Updated on July 1, 2023 by teamobn
Picnic tables are the perfect addition to any outdoor space, providing a place for people to gather and enjoy the fresh air.
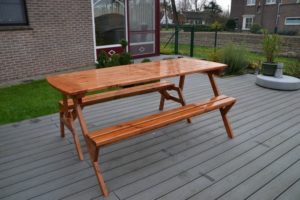
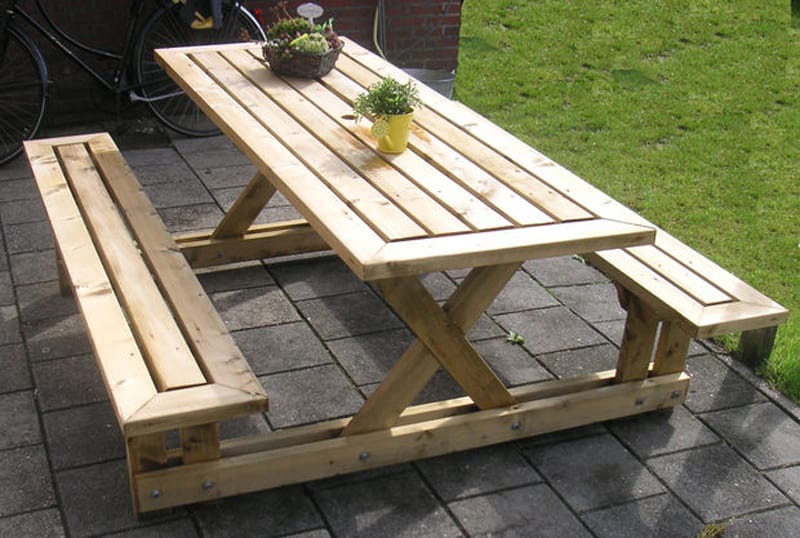
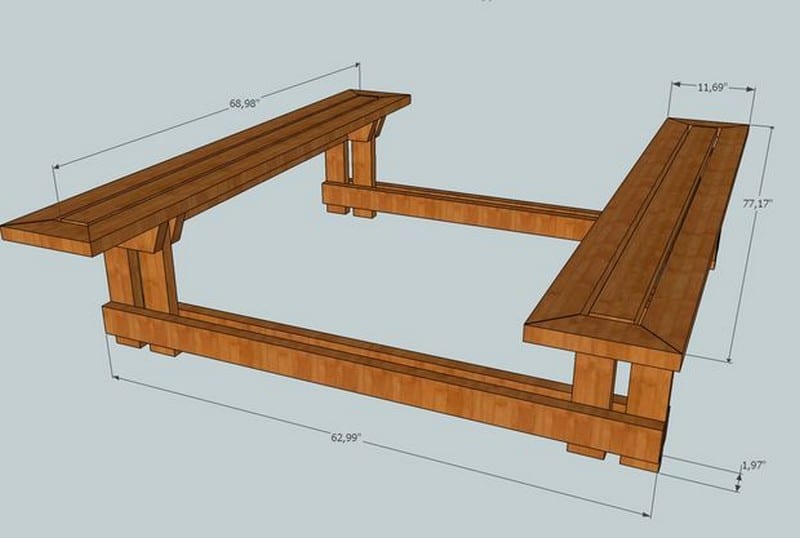
Like us, you’ve probably seen a lot of picnic tables in your life. But I think you’ll admit that this one gets a few extra points for the aesthetics. If you like it as much as we do, we figure you can make it for about a third of the cost of a store-bought picnic table. So gather with your family and maybe a friend or two and get started. This sturdy-looking picnic table will comfortably seat a whole family but if you need something bigger, there’s a three-meter (10′) version shown here as well!
It’s easy to make as you can see from the provided plans, materials list, and instructions. If you have a lot of big gatherings, you might even prefer to make two! With just a few tools and some basic woodworking skills, you can have this project completed in no time.
Materials:
- 2×4 Lumber
- m8 Threaded Rods and Nuts/Bolts
- 80mm Wood Screws
- Sander
Steps to make your own picnic table:
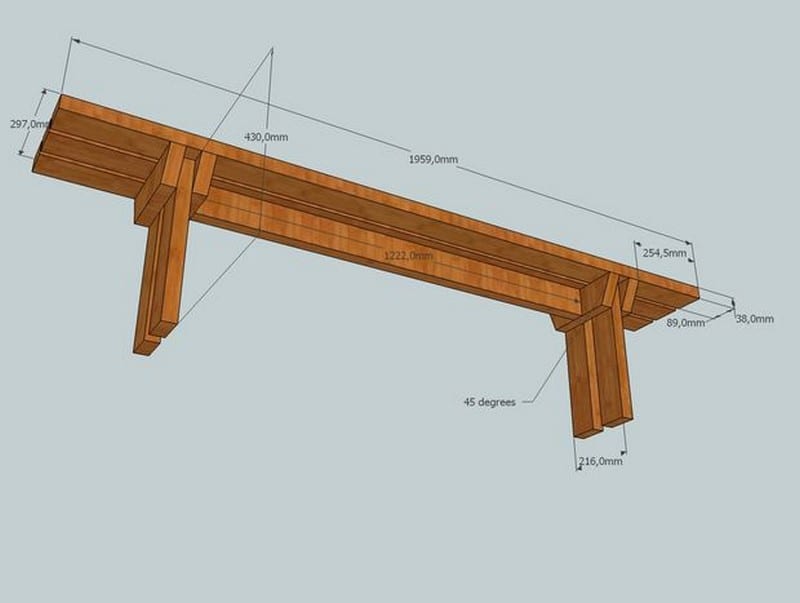
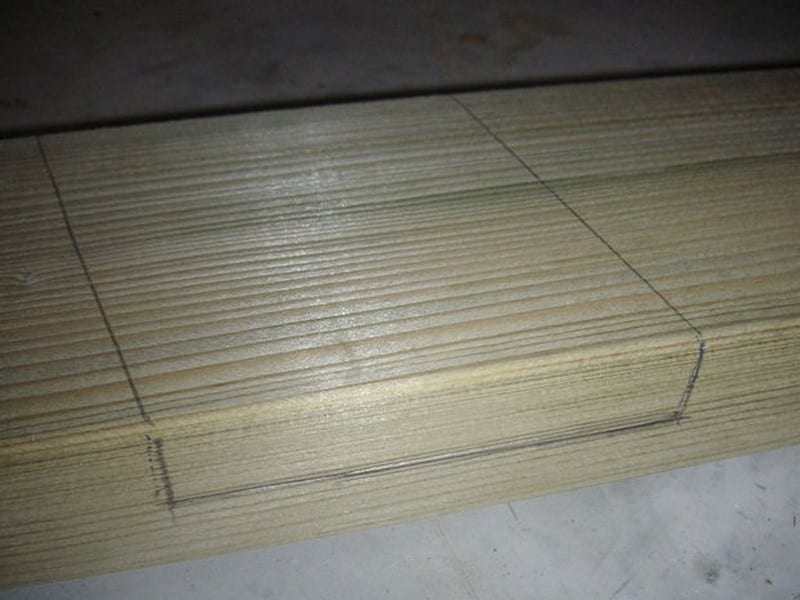
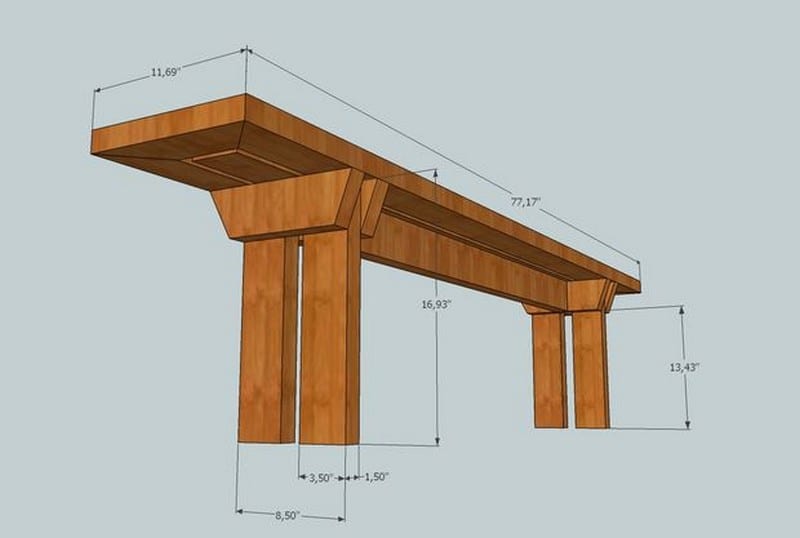
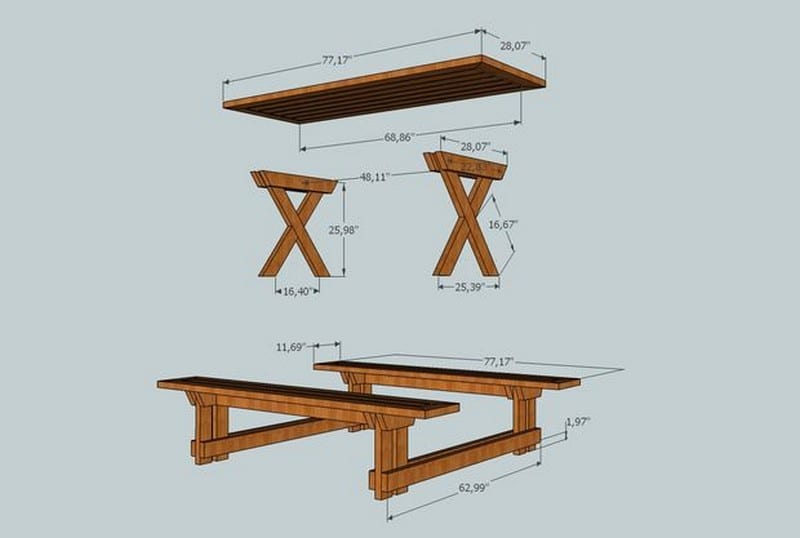
To begin this project, start with the benches. Cut wood pieces to the dimensions indicated in the pictures below. When cutting the corners of the bench seat, you can choose to use a mitre cut. This type of cut is just like the one shown in the first photo. To do this, you’ll need to take three equal measurements. However, if you prefer, you can simply cut the corners without using a mitre cut. Once all the pieces are cut, use a drill to make pilot holes in the boards.
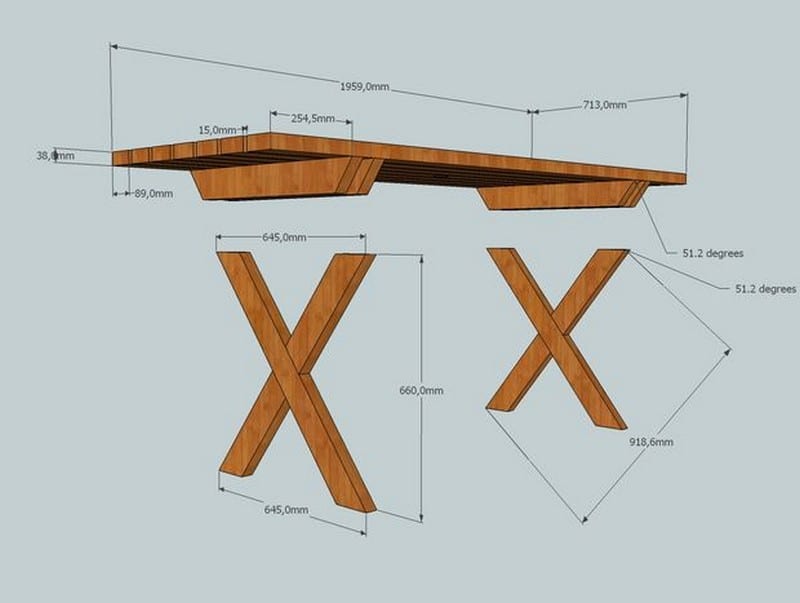
This will make it easier to assemble the benches later on. After the pilot holes are drilled, use screws to attach the boards together. Make sure the screws are inserted tightly so the bench will be sturdy. Repeat this process for the other bench. You can choose to mitre cut the corners of the bench seat (just like in the first photo here) or you can simply cut three equal measurements as shown in the metric plans here.
Use sandpaper to smooth the edges of the wood pieces for your picnic table project. This will help create a professional and polished look for your finished product. Depending on the size of your project, you may want to use a power sander to make the job go faster. Just be sure to go slowly and evenly around all the edges to avoid damaging the wood.
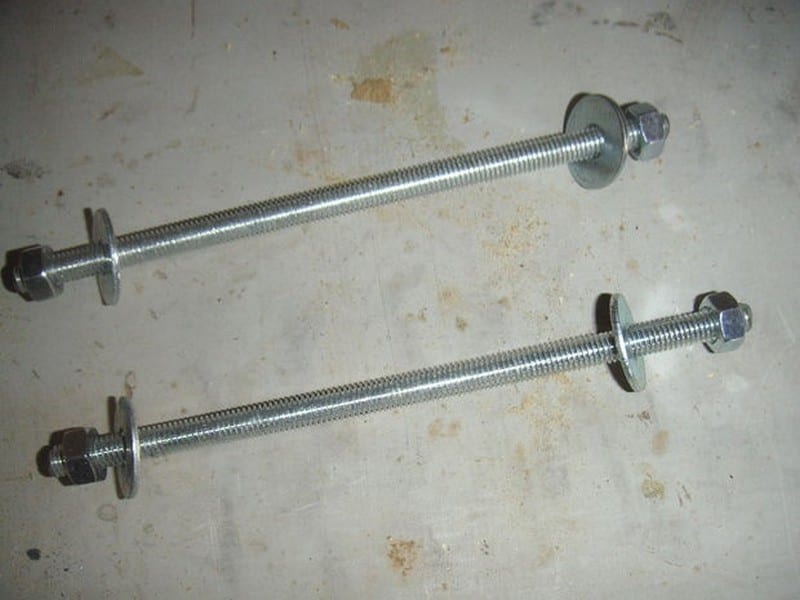
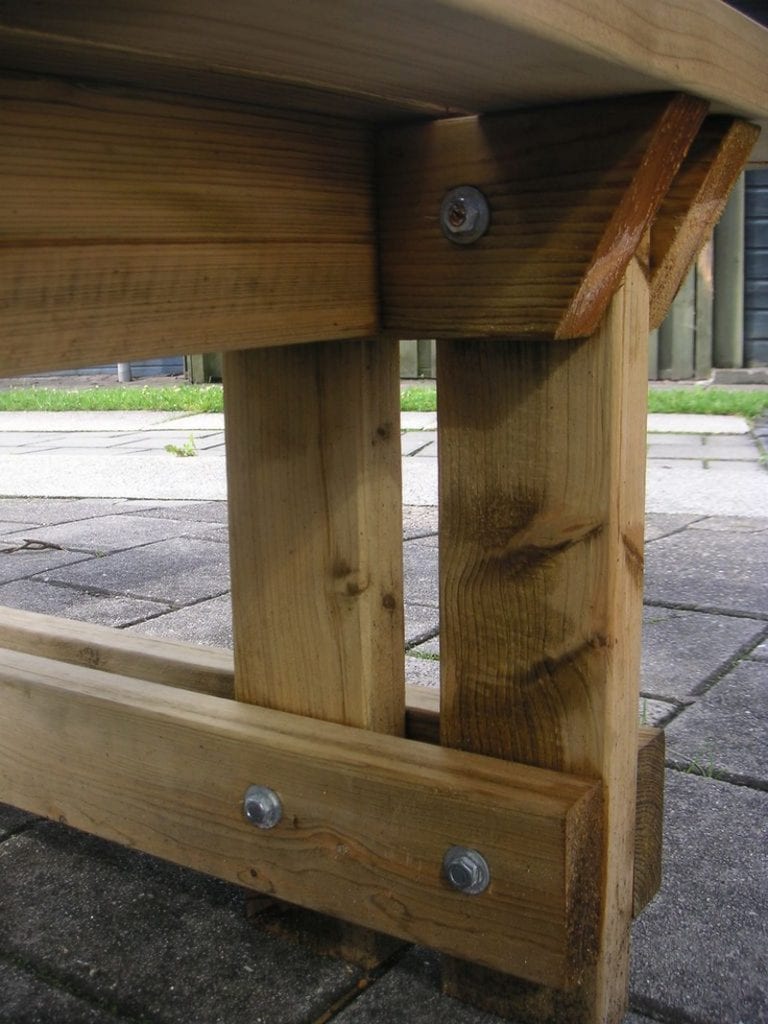
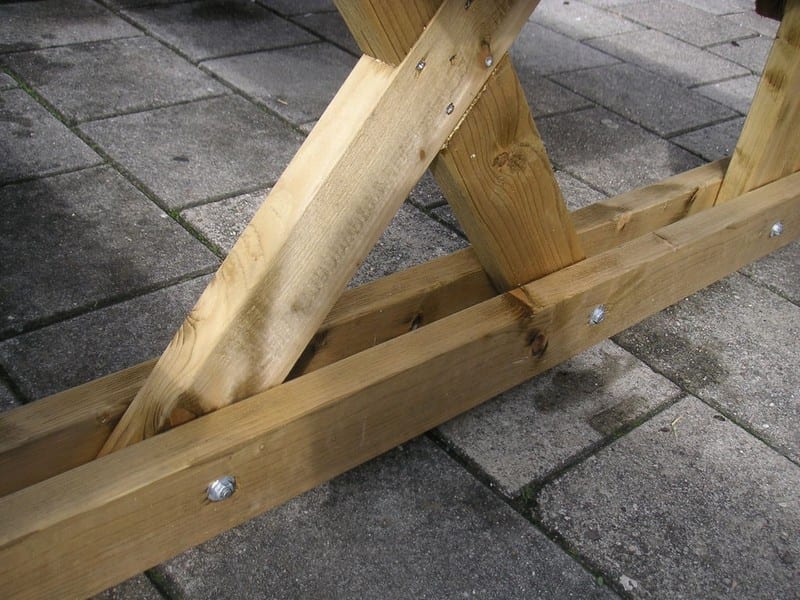
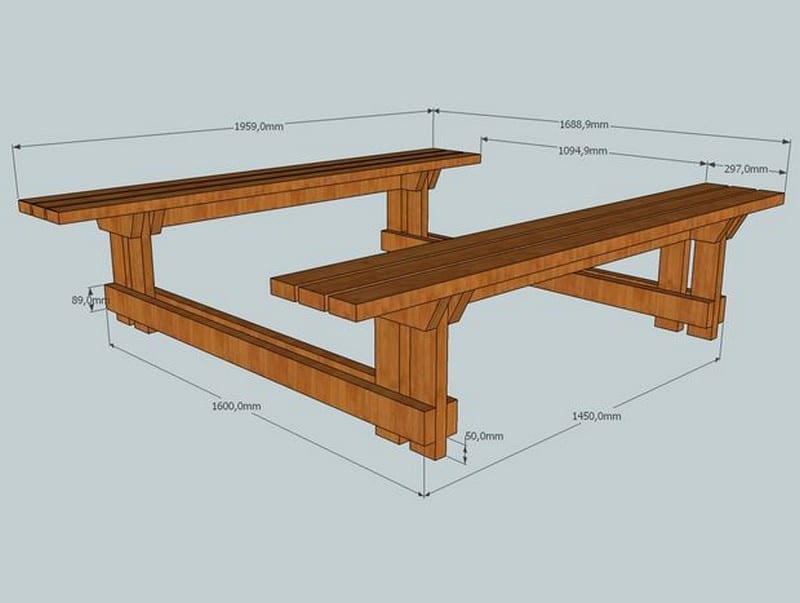
Assemble the benches by screwing them into the connecting wood. To do this, use threaded rods in order to ensure a sturdy connection. Use a wrench to screw the rods in until they are tight.
Screw the connecting wood 2 inches from the ground. This will ensure that the wood is properly secured and will not come loose.
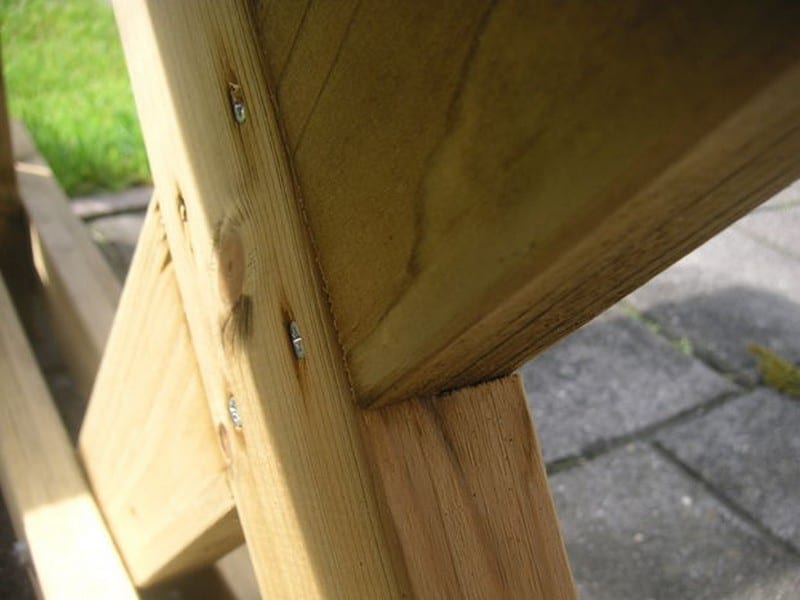
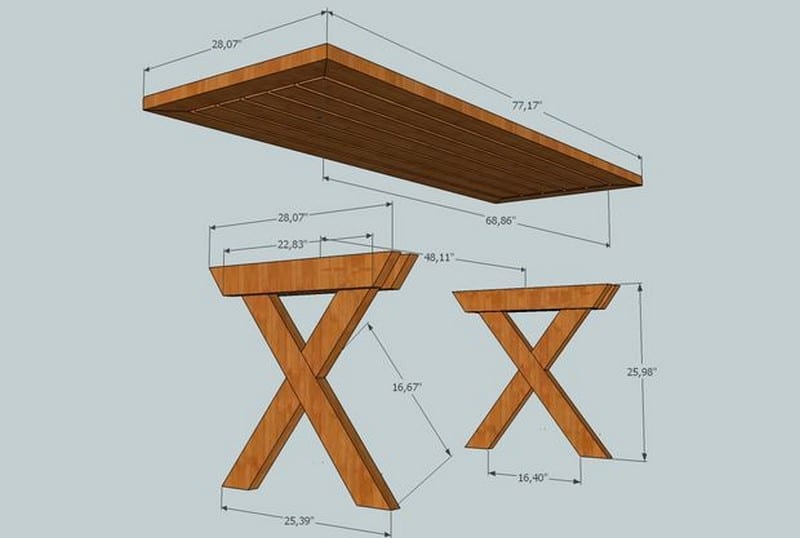
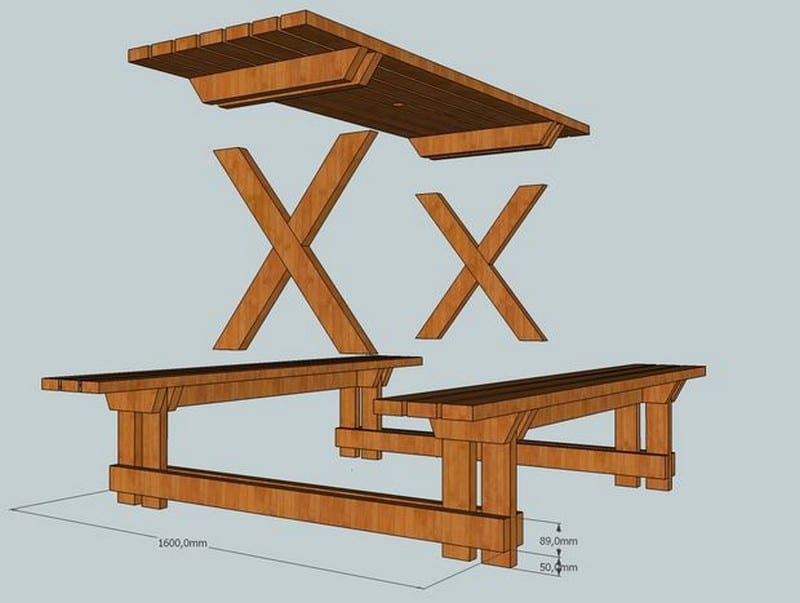
Now that you have the benches together, you can go next to the table, starting with the “X” legs. Form an “X” following the measurements given and mark the wood with a pencil. Make a groove with these marks which should be about 2/3 deep.
Join them together and secure them with wood screws. And then attach the tabletop.
Lastly, connect the table with the bench set. The underside of the table’s legs should be level with the underside/edge of the connecting wood. Therefore, the “X” legs should also be 2 inches high from the ground. This will create a more sturdy and stable structure for your outdoor picnic table.
Imperial Measurements:
Metric Measurements:
Thanks drean, for the great idea!