Last Updated on April 15, 2024 by teamobn
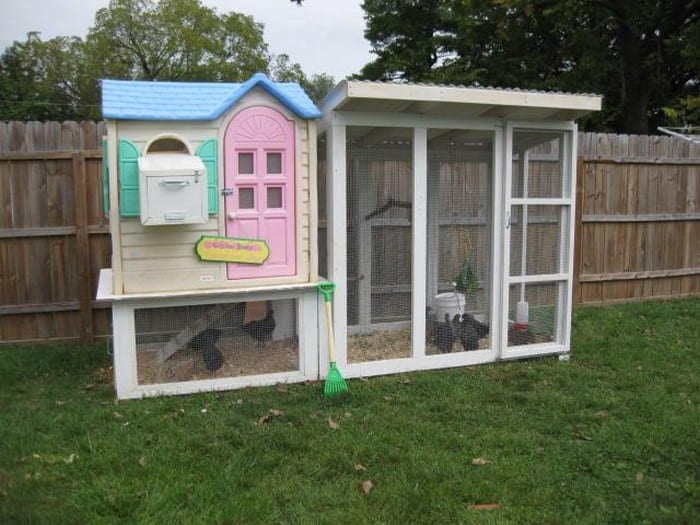
Want to build a chicken coop? But, you realize you don’t have enough money for it right now.
If you are worried about the cost, you may be relieved to know that you can repurpose an old playhouse into an equally effective chicken coop.
If you have an idle playhouse, this presents an excellent opportunity for cost savings. Transforming a playhouse into a chicken coop will just require minimal structural modifications.

Take, for instance, a mother who has harboured the desire to raise chickens for years. Her hurdle? Budget constraints prevented her from acquiring all the necessary materials. Despite diligent savings, the cost of lumber continued to be a discouraging factor.
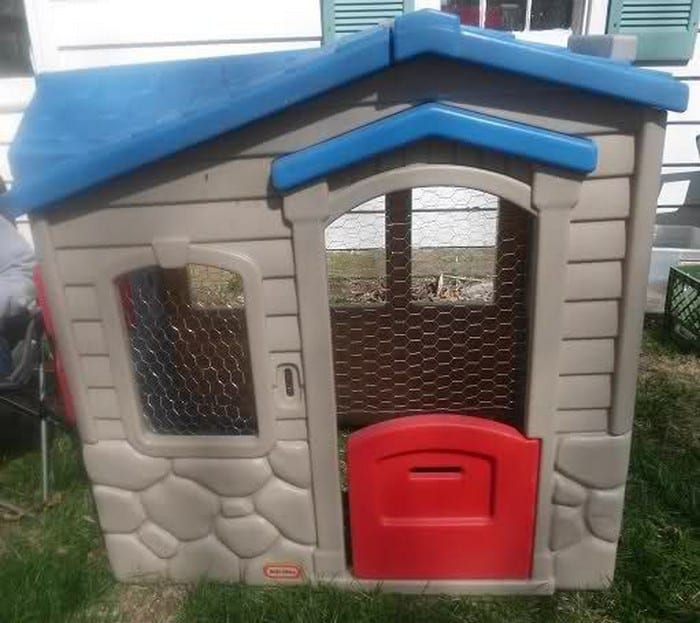
However, with a bit of creativity and resourcefulness, she was able to build a coop using an old playhouse. Not only did this save her money, but it also helped reduce her environmental burden.
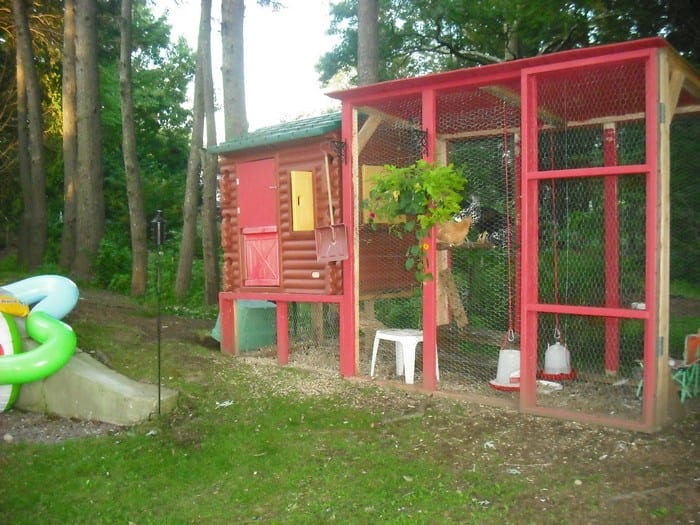
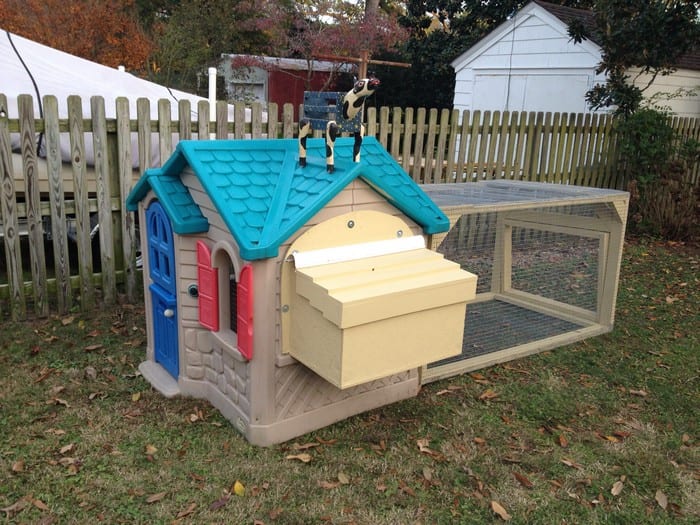
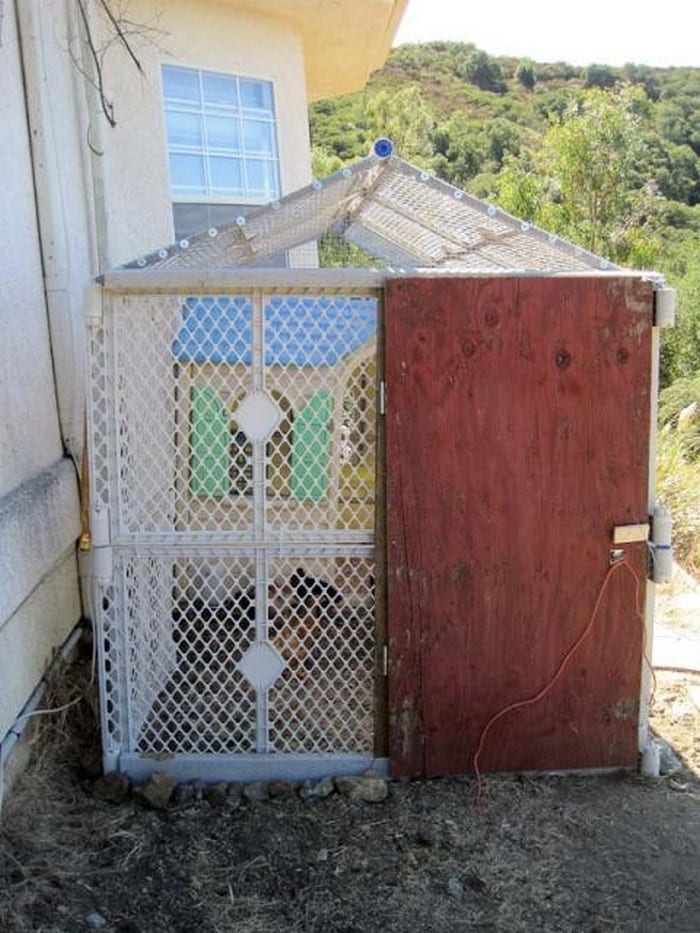
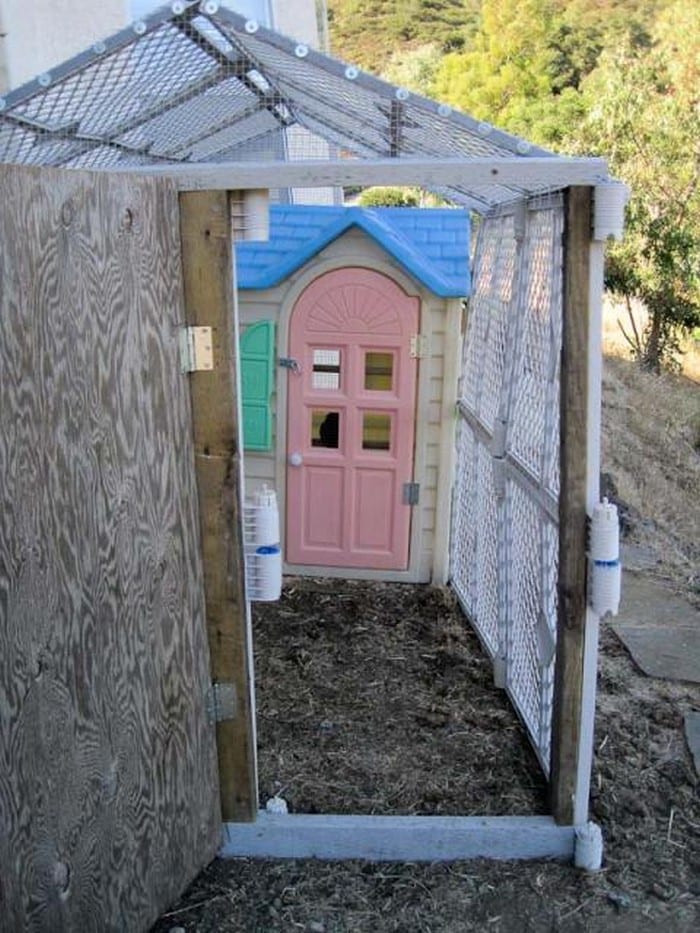
When she saw their hand-me-down playhouse her children never played with, she had a brilliant idea of repurposing it into a chicken coop. With just a little bit of tweaking and extensions, they now have a home for their backyard chickens!
There are definitely several ways to build an inexpensive chicken coop. If you have access to cost-effective timber, it may prove to be more advantageous. But if on a restricted budget, the construction of a chicken coop from old, unused structures remains a feasible option.
You can also try using other old recyclable materials. This old playhouse chicken coop, however, is no doubt the best idea for those who own a playhouse already! This is a great way to upcycle materials and give your chickens a fun new home.
When designing your chicken coop, it’s essential to consider a few important factors to guarantee the well-being and security of your feathered friends. To start, ensure that your coop provides adequate space for all your chickens. The required space can vary based on their breed and size, but it is advisable to allocate a minimum of four square feet per chicken.
For a chicken coop accommodating six chickens, a minimum of twenty-four square feet is necessary to ensure they have ample space for movement and wing stretching. Alongside size considerations, it’s equally important to ensure your coop boasts effective ventilation. Chickens generate a substantial amount of ammonia, which can pose risks to their respiratory health.

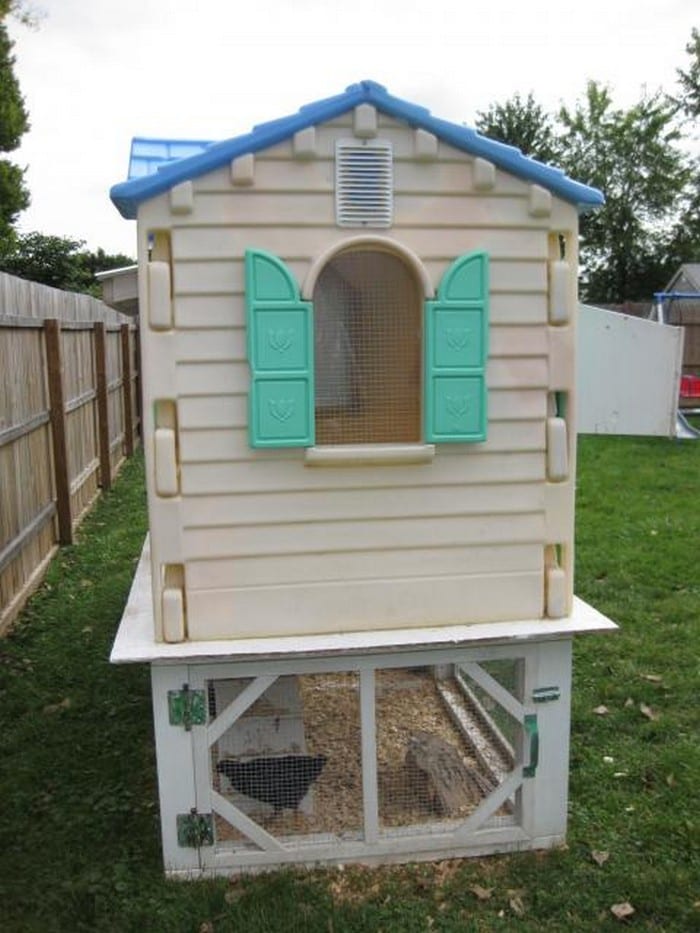
Maintaining the health of chickens requires a steady supply of fresh air, underscoring the importance of incorporating numerous windows and vents in the coop. These features will promote proper ventilation within the chickens’ living space, ensuring it remains free from noxious fumes or unpleasant odors.
Additionally, good ventilation will help to keep the coop cooler in the summer months and warmer in the winter months, making it a more comfortable environment for the chickens year-round.
Do you know someone who can use this cheap chicken coop idea?
Contents
How to Make a Chicken Coop Using an Old Playhouse
Repurposing an old playhouse into a practical and charming chicken coop is not only a cost-effective solution but also a creative way to provide a safe and comfortable home for your feathered friends. In this part, learn the step-by-step process of transforming that neglected playhouse into a functional and stylish chicken coop.
Whether you possess extensive experience in DIY projects or simply seek an exciting and distinctive endeavour, the instructions will guide you in fashioning a comfortable sanctuary for your chickens while revitalizing an existing structure. Ready to convert your playhouse into a delightful chicken coop? It’s just some simple steps.
First, gather the necessary supplies and tools for the chicken coop.
Materials
- Old Playhouse
- 2×2, 2×4, 4×4, Timber
- Plywood
- Fender Washers and Screws
- Hardware Cloth
- Paint
- Vent Covers
- Clear Silicone
- Plastic Roofing Sheets
Tools
- Pliers
- Staple Gun
- Cordless Drill
- Paintbrush
- Tin Snips
- Hole Saw
- Caulking Gun
Click on any image to start the lightbox display. Use your Esc key to close the lightbox.![]()


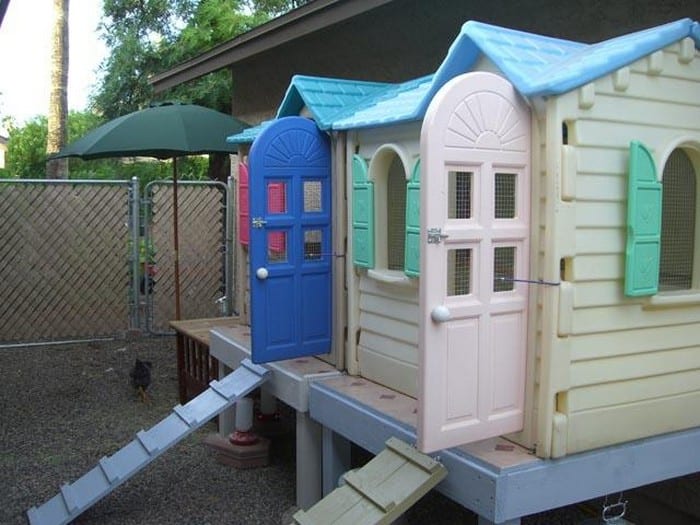
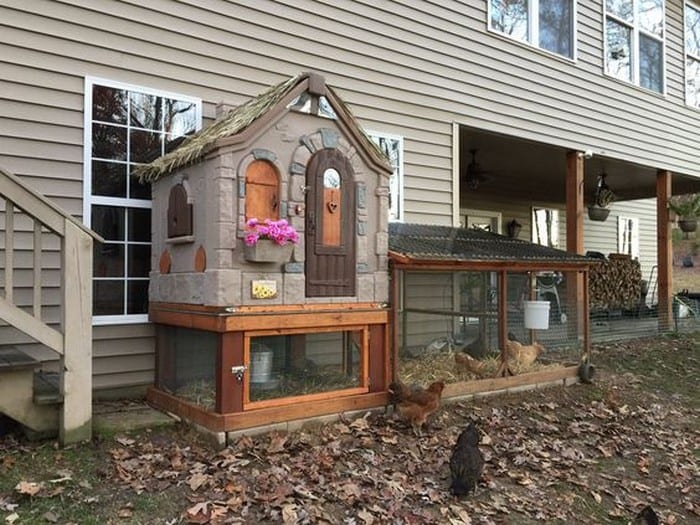
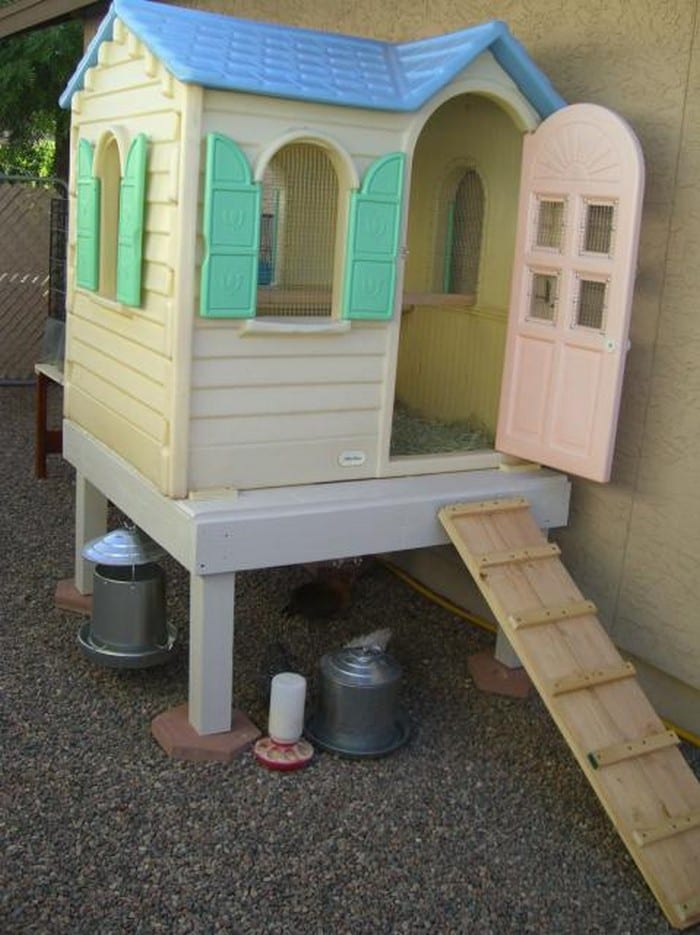
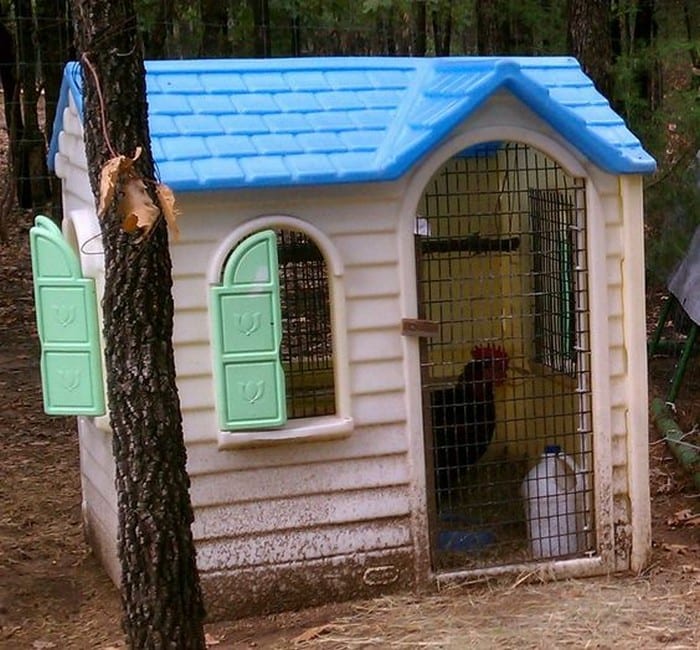
Steps
Step 1: Assess Your Playhouse
Begin by evaluating your old playhouse’s condition and layout. Identify any repairs needed and plan how you will convert it into a chicken coop. Remove any unnecessary features, such as windows or doors that you won’t be using.
Step 2: Prepare the Playhouse
Clean the playhouse thoroughly, inside and out, to ensure it’s free from dirt, debris, and any existing paint or finishes. Sand the surfaces if needed, and repair any structural issues.
Step 3: Create the Coop Frame
Using the 2×2, 2×4, and 4×4 timber, construct a sturdy frame inside the playhouse to support roosts and nesting boxes. Ensure the frame is securely attached to the playhouse walls and floor using fender washers and screws.
Step 4: Install Roosts and Nesting Boxes
Design and install roosting bars and nesting boxes within the frame. Chickens prefer to roost at night, so provide them with comfortable places to perch.
Step 5: Ventilation and Lighting
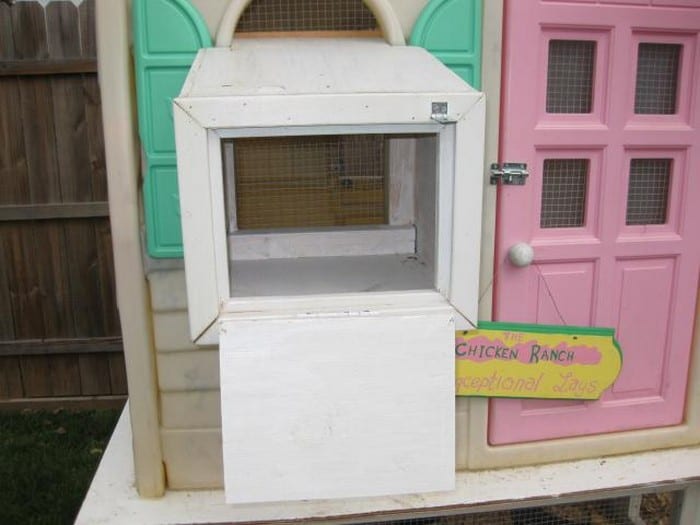
Cut holes for ventilation and light sources in the playhouse walls. Cover these openings with hardware cloth. Install vent covers on the exterior for regulation.
Step 6: Weatherproofing and Insulation
Seal any gaps or cracks in the playhouse walls with clear silicone to prevent drafts. If you plan to use the chicken coop in colder climates, consider adding insulation for temperature control.
Step 7: Roofing
Attach plastic roofing sheets to the playhouse roof to protect your chickens from rain and provide shade. Use the cordless drill and screws to secure the roofing material in place.
Step 8: Flooring and Bedding
Install a plywood floor inside the playhouse for easy cleaning. Cover it with bedding material, such as straw or wood shavings, to keep the coop clean and comfortable.
Step 9: Entry and Exit
Create a chicken-sized door using plywood and hinges. Make sure it’s secure and fully functional. This will let your chickens access the outdoor area.
Step 10: Painting and Finishing
Apply a coat of paint to the exterior of the playhouse to protect it from the elements and add a touch of style. Use a paintbrush for precision.
Step 11: Outdoor Run
If you have space, build an outdoor run for your chickens using hardware cloth and timber. Ensure it’s sturdy and provides ample space for your flock to roam.
Step 12: Final Touches
Add any additional features you desire, such as nesting box curtains or a secure food and water system. Use the caulking gun to seal any gaps or joints for added protection.
Now, a snug chicken coop is pretty much available, providing a secure and comfortable dwelling for your feathered friends.
Do you have an abandoned playhouse? Well, how about transforming it into a chicken coop today? Your feathered friends will feel right at home while you enjoy fresh eggs every morning. Transform it, and thank Backyard Chickens for providing insights into this unique chicken coop project.
Understanding Chicken Behavior and Needs
Creating a comfortable and functional chicken coop requires more than just converting a structure; it demands an understanding of the natural behaviors and needs of chickens. This knowledge ensures that the coop not only shelters your chickens but also supports their health and happiness.
Space Requirements
Chickens need adequate space to move, forage, and exhibit natural behaviors. Crowded conditions can lead to stress, aggression, and increased vulnerability to diseases. As a general rule, each chicken should have at least four square feet of coop space. This space allocation helps prevent pecking and bullying among flock members.
Nesting and Roosting
Nesting boxes are essential for egg-laying hens. Each box should be spacious enough to accommodate a hen comfortably, usually at least 12×12 inches. Providing one nesting box for every three to four hens is typically sufficient. For roosting, chickens prefer to sleep off the ground. Install roosting bars in the coop that allow each chicken about 8-10 inches of perching space. Ensure these are positioned higher than the nesting boxes to adhere to their natural instinct to roost in the highest available spot.
Access to Light and Fresh Air
Chickens are sensitive to light, which influences their laying cycles. Natural light is ideal, but in its absence, artificial lighting can be used to provide approximately 14-16 hours of light per day. Ventilation is crucial to dispel ammonia from droppings and maintain good air quality. Ensure the coop has sufficient vents or windows that can be opened or closed based on the weather.
Protection and Security
Chickens are prey animals and need protection from predators. The coop should be secure from all sides, including beneath the floor and above. Use predator-proof hardware cloth instead of chicken wire to cover windows and runs. Ensure all doors and openings latch securely.
By incorporating these considerations into your chicken coop design, you provide a safe, comfortable environment that caters to the instinctual behaviors and physical needs of your chickens. This not only boosts their well-being but can also increase their productivity, giving you a plentiful supply of fresh eggs.
Effortless Playhouse-to-Chicken Coop Transition
Unlock the magic of repurposing as you master the twelve simple steps to turn your neglected playhouse into a thriving chicken coop. With a touch of creativity and some basic tools, you’ll craft a cozy haven for your feathered friends. From frame construction to ventilation and painting, this transformation journey is not only cost-effective but also a testament to resourcefulness.
Embrace the charm of recycling and give your chickens the ultimate retreat they deserve while elevating your DIY skills. Excited to transform your playhouse into an efficient chicken coop? Happy upcycling!
Are you still looking for more ways to improve your chicken’s life? Check out our post on the 10 best chicken feeder!


