Last Updated on March 21, 2024 by teamobn
When we think of a focal point in a room, we often think of a mantelpiece, interesting decor, or a rare piece of art. But mirrors can also make a wonderful statement in a given space. You can use large mirrors with decorative frames to attract the eye, situating them on the most visually prominent walls or tables.
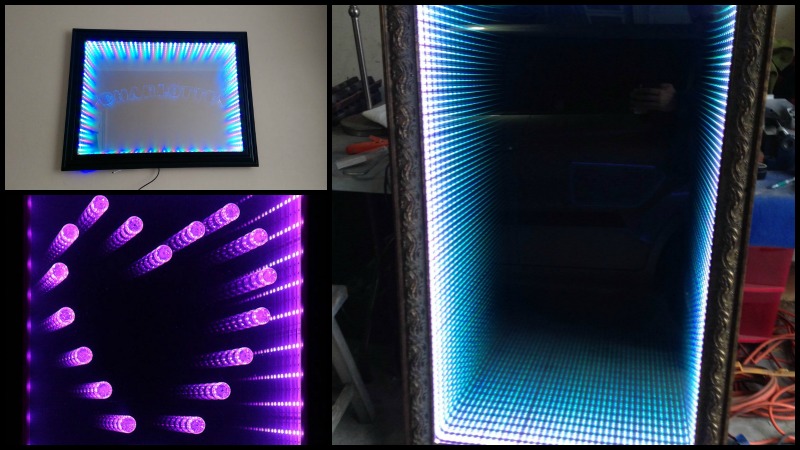
Have you got a big mirror that you don’t actually use? Make it a bedroom decor by turning it into an infinity LED mirror.
The kids are most probably the ones to want this DIY project in their bedrooms. But the kids at heart who enjoy science fiction will want it, too!
Though not necessarily inexpensive, this infinity DIY project is sure to impress anyone who sees it. You can even apply this idea to the existing mirror in your living room. When the LED lights are turned off, it functions as a regular mirror.
Do you want an infinity one in your home? Who else do you think will love this idea? 🙂
Learn how to make this fun project by reading
You’ll need these materials:
- Hardwood Frame (frame must be heavy)
- Oak Wood
- Two Way Glass
- Colour Changing LED Light Strip
- Sandpaper
- Corner Trim
- Construction Adhesive
- Screws
- Epoxy
- Glass Suction Cups
- Mirror Adhesive
- Bracket Gun for Mirrors
- Spray Paint (optional)
And these tools:
- Measuring Tape
- Drill
Steps in making your DIY infinity LED mirror:
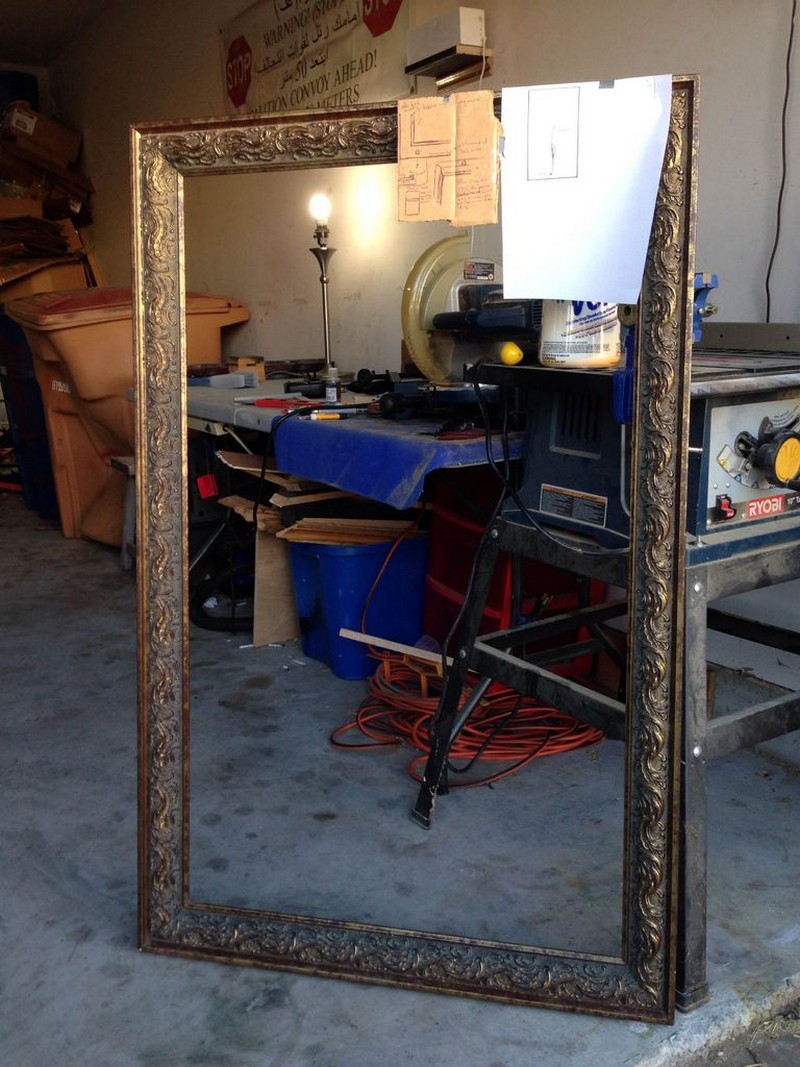
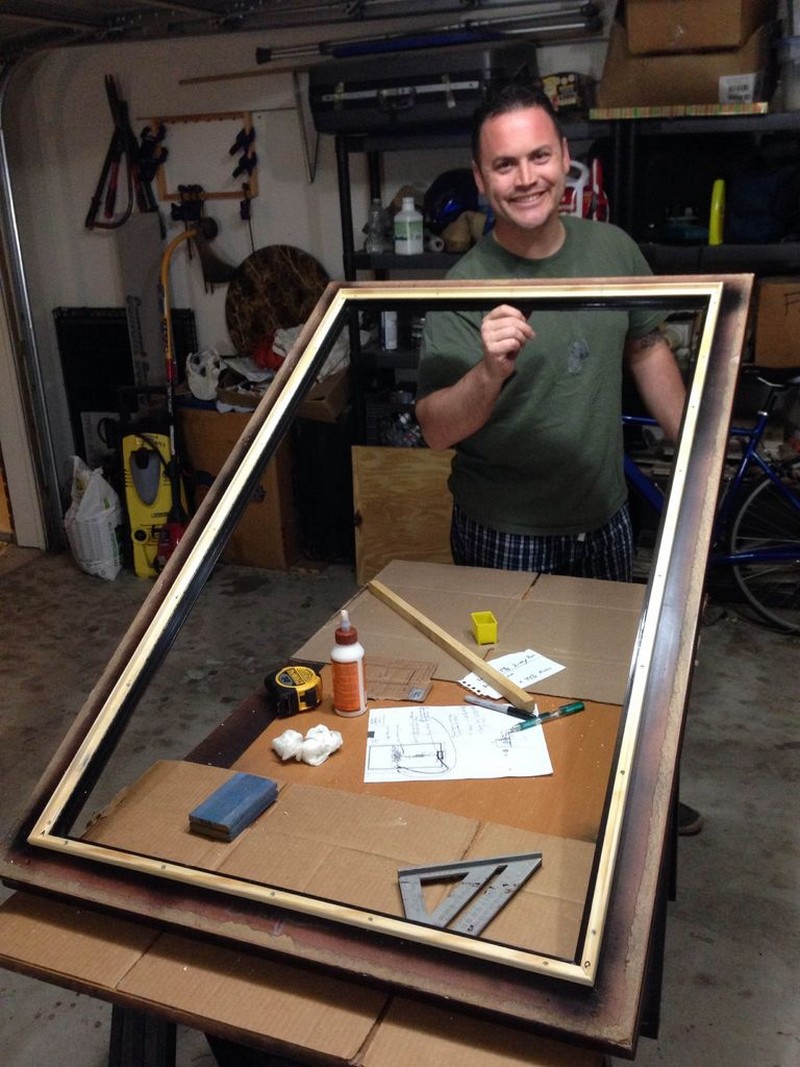
This is the antique hardwood frame that my buddy got for free! I would definitely recommend hardwood for the frame, as we will be adding on quite a few components and two HEAVY sheets of glass to get the desired reflective effect. Also, make sure that you plan out the entire build before starting.
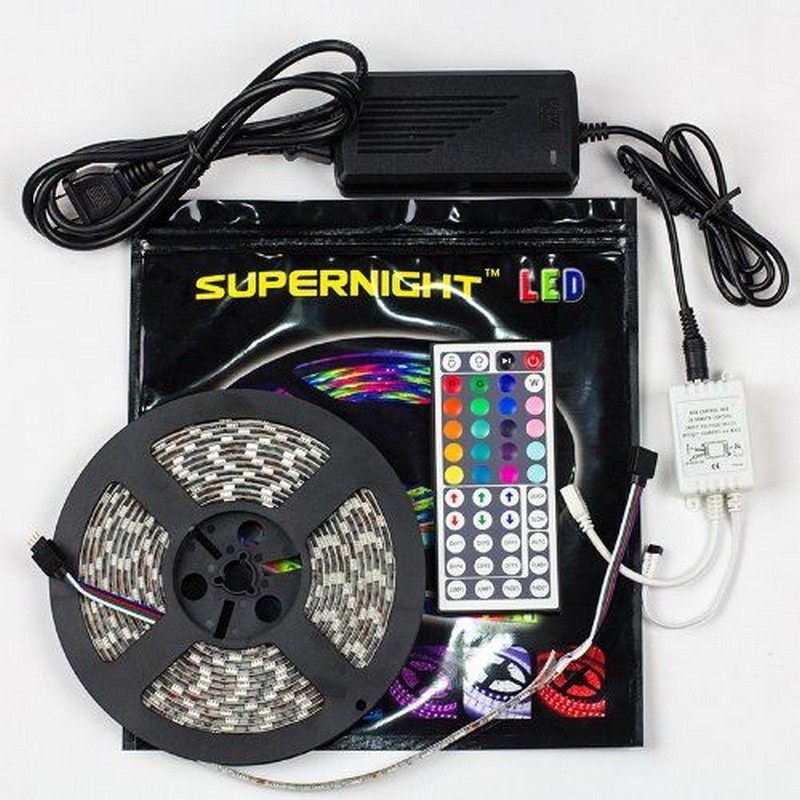
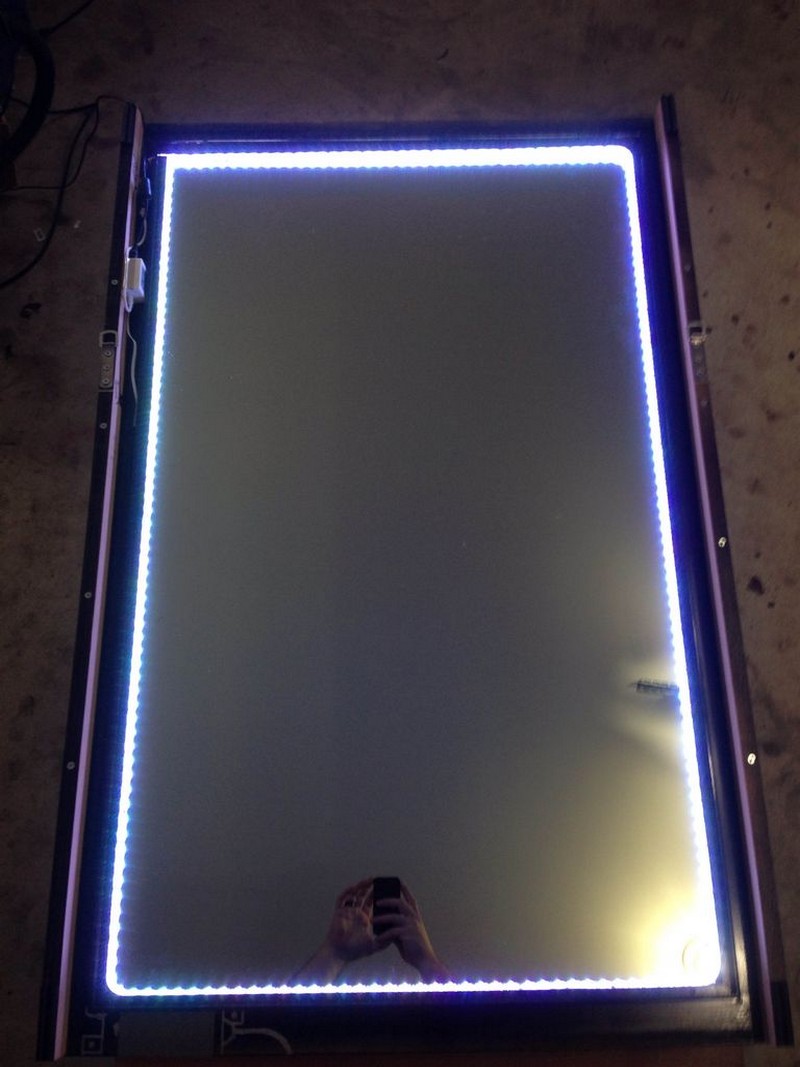
This is the LED used in this project which you can buy here. This kit comes with a power adapter, remote, IR sensor, and 16.4 feet of LED strip w/ adhesive backing for around $30. The LEDs can be trimmed every 1.5 inches or 3 inches depending on which kit you get.
I sanded the inside lip of the frame here in order to remove any old paint. I repainted it later, but you’ll want a nice smooth surface to adhere to the LED strip.
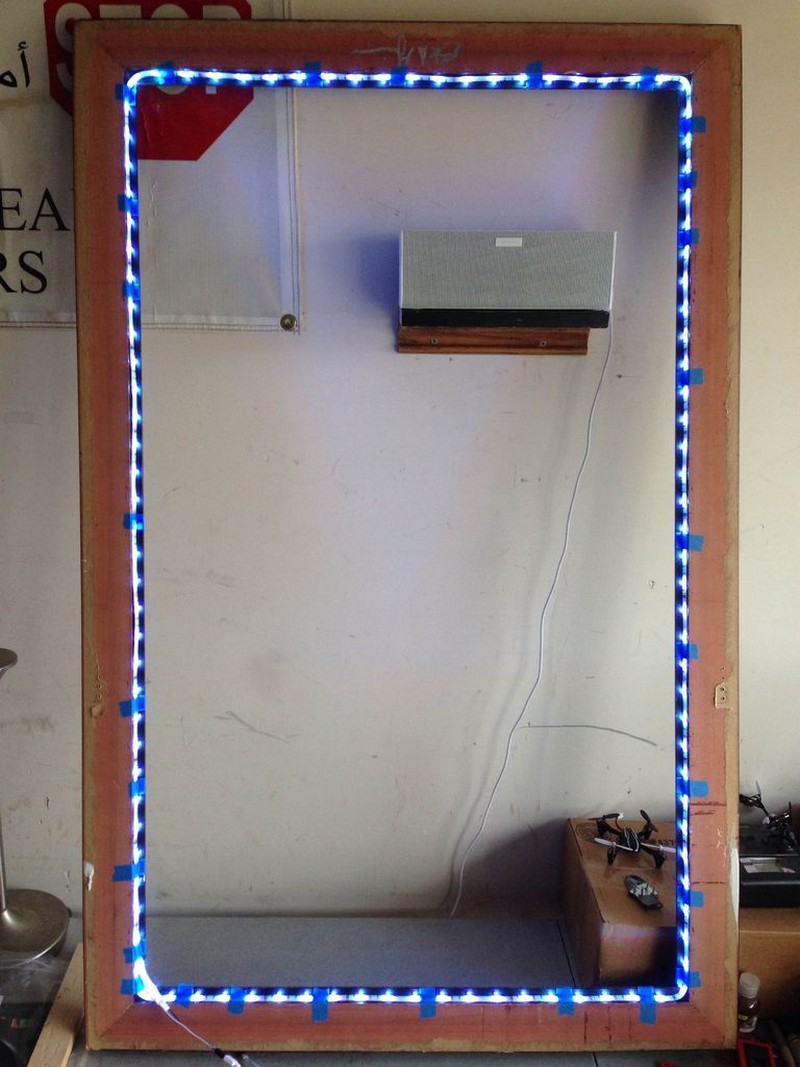
From here, I measured the interior dimensions of the frame to determine the length of LED strip I would need.
This step can be tricky. You’ll need to account for the thickness of the front pane of glass, which will be “two-way” glass. You can purchase this glass from any local glass company, but it can be pricey. This front sheet of glass at 4 feet by 2 1/2 feet cost me around 90 dollars! You can also use a two-way film, but that may separate over time. The reflective side of this glass should face the REAR of the frame.
After you get the glass, lay it on the front lip of the mirror. From here, place the LED strip around the edge. You’ll want your rear mirror to be as close to flush with the LED strip as humanly possible. This will allow the reflection to be more uniform toward the end of the build.
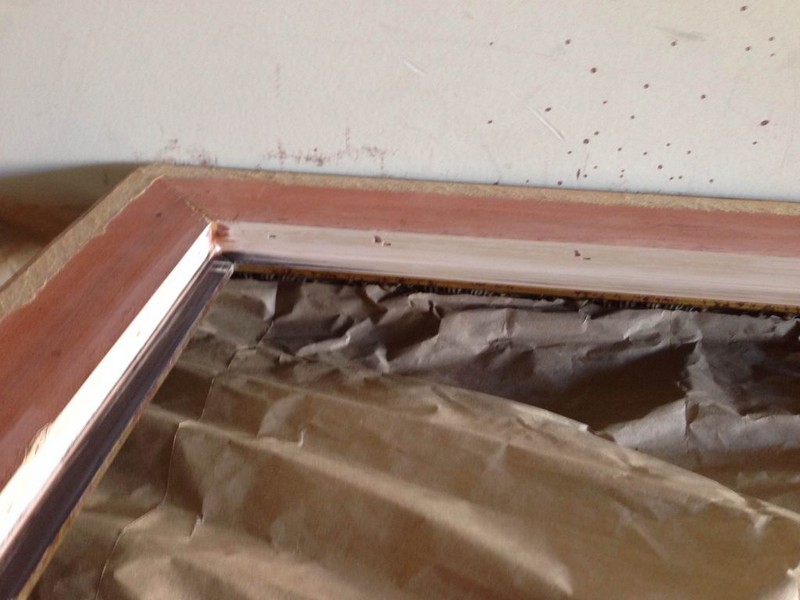
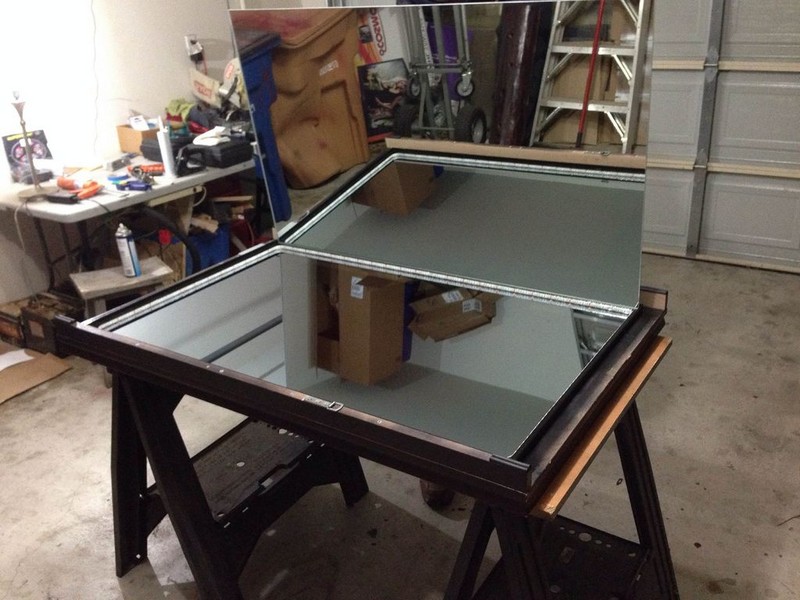
I found that buying some corner trim from Home Depot allowed me to build a sturdy support rail with the correct offset. Also, make sure you use construction adhesive (PL375 is what I used) and also screw the rails into the frame from the rear. It’s important to note that you will need to countersink the screws into the rail, so your rear mirror is not resting on the screw heads at the end of construction.
More planning is ahead here. Using lengths of oak, I again glued and screwed them on the side of the frame. The reason for this step is to have an offset from the back of the frame and the wall after hanging. It also makes sense to attach your hangers to the oak rails instead of the original frame.
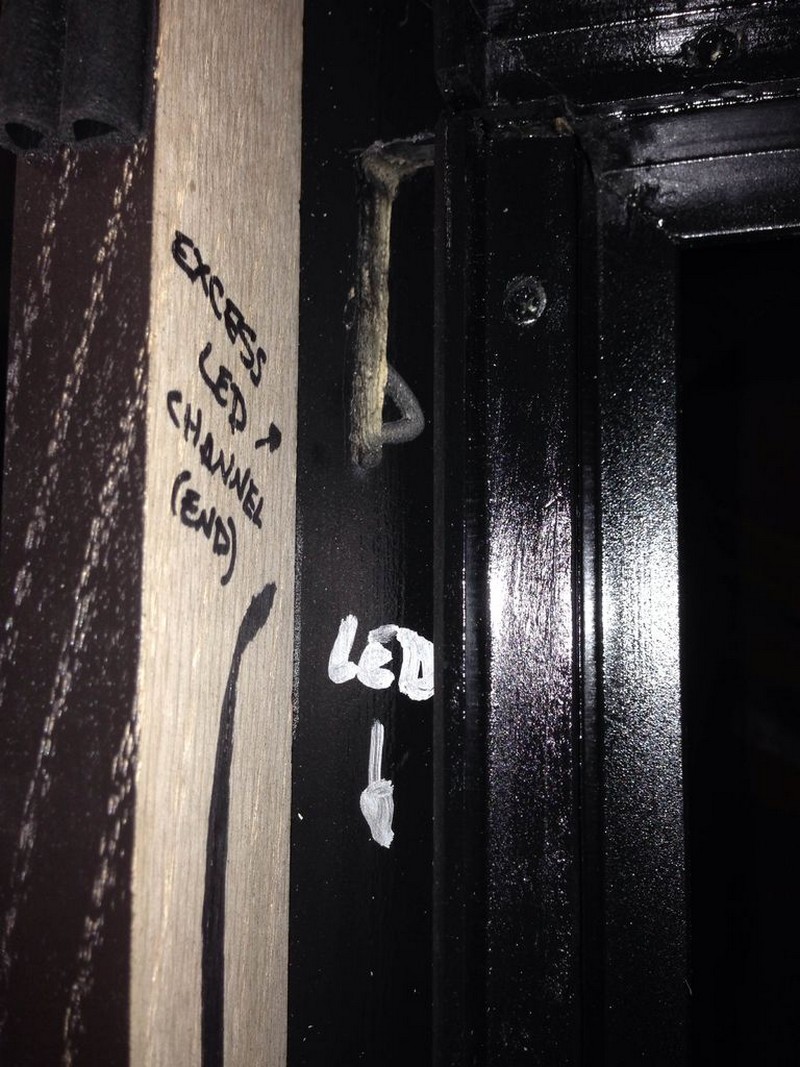
You can also see more planning here with regard to cutting a channel in the back of the frame for the end of the LED strip. Additionally (not pictured), you can drill a hole through the original frame to run your IR sensor to the front of the mirror. Otherwise, you’ll have to have an ugly little wire hanging off the side of your mirror to have the remote work.
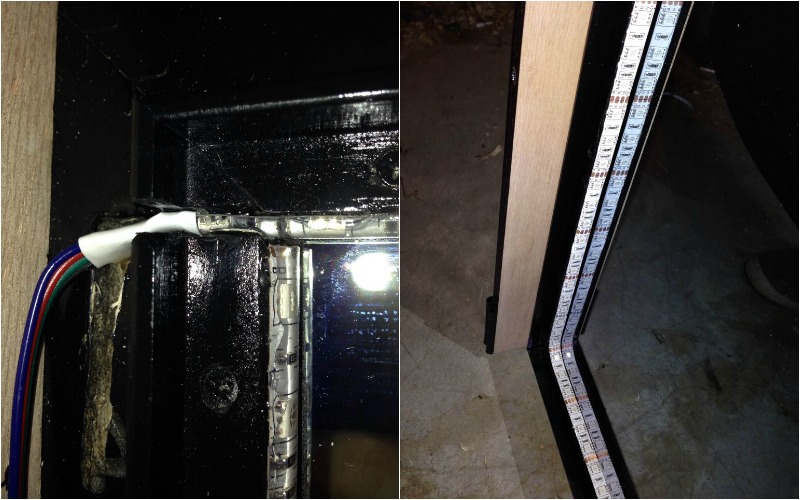
Here’s something I learned the hard way: the adhesive on the back of these strips is good, but not great, and the strip kept separating from the frame. Since we’re going to be enclosing them, it made sense to reinforce this adhesive. I used a 2-part epoxy that I mixed in the nozzle and ran a thin bead along the edge of the LED strip to make sure it didn’t detach again.
Test your lights before installing it.
Install the rear mirror.
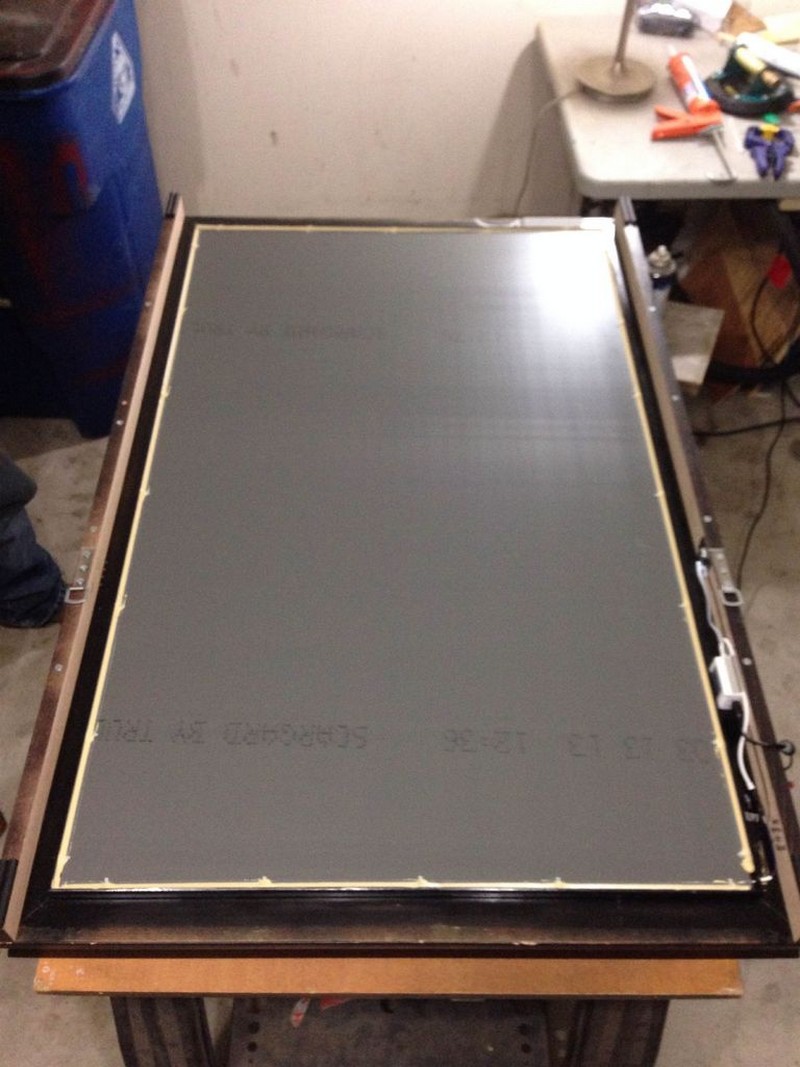
Having a friend who works for a glass company was INCREDIBLY helpful here. He had the big suction cups, mirror adhesive, and a fancy staple gun that fires brackets to support the rear mirror.
Do NOT put any adhesive or silicone on the inside lip of the support rail before you put this rear mirror in! It will detract from the reflective illusion we’re going after here. Instead, place the mirror in the rail and use adhesive on the back lip for support.

With the remote, you’ll be able to set flashing effects, fade colours, and increase or decrease the brightness of the LEDs.
I hope you enjoyed learning about how to build one of these mirrors; I definitely enjoyed making it!
Thanks to
Embrace Elegance: The Beauty of the Infinity LED Mirror
In the realm of modern interior design, the infinity LED mirror stands as a captivating fusion of functionality and aesthetics. With its mesmerizing illusion of endless depth and luminous glow, this innovative fixture has captured the imagination of homeowners and designers alike.
1. Aesthetic Appeal
At the heart of the infinity LED mirror’s allure lies its unparalleled aesthetic appeal. Crafted with precision and artistry, this mirror exudes a sense of luxury and sophistication that effortlessly elevates any room.
The seamless integration of LED lighting along the mirror’s perimeter creates a soft, diffused glow that bathes the space in a warm ambience, casting a flattering light that enhances the overall atmosphere. Whether mounted in a bathroom, bedroom, or hallway, the infinity LED mirror serves as a striking focal point that commands attention and leaves a lasting impression.
2. Illusion of Infinity
The defining feature of the infinity LED mirror is its mesmerizing illusion of infinity, achieved through clever design and strategic placement of LED lights. As the light reflects and refracts within the mirror’s mirrored surface, it creates the illusion of infinite depth, drawing the viewer’s gaze into an enchanting visual vortex.
This captivating effect not only adds depth and dimension to the room but also imbues it with a sense of magic and wonder. Whether used as a standalone piece or incorporated into a larger design scheme, the Infinity LED Mirror infuses any space with a touch of whimsy and enchantment.
3. Versatile Design
One of the most appealing aspects of the infinity LED mirror is its versatile design, which lends itself to a wide range of interior styles and settings. Whether your aesthetic preferences lean towards minimalist modernism, classic elegance, or eclectic bohemian chic, the infinity LED mirror seamlessly integrates into any design scheme with effortless grace.
Its sleek, streamlined silhouette and understated elegance complement a variety of décor styles, from contemporary and transitional to traditional and eclectic. Whether adorning the walls of a sleek urban loft or a cozy countryside cottage, the infinity LED mirror adds a touch of timeless elegance and sophistication to any space.
4. Functional Illumination
Beyond its aesthetic allure, the infinity LED mirror also serves a practical purpose by providing functional illumination for grooming and daily tasks. The integrated LED lights emit a soft, diffused glow that evenly illuminates the face, making it ideal for applying makeup, shaving, or performing skincare routines with precision and accuracy.
Unlike traditional bathroom mirrors that often cast harsh shadows or uneven lighting, the infinity LED mirror offers consistent and flattering illumination that enhances visibility and ensures optimal results. Whether used in the bathroom, bedroom, or dressing area, this mirror provides the perfect combination of form and function, enhancing both the aesthetics and functionality of the space.
5. Energy Efficiency
In an era of increasing environmental consciousness, the infinity LED mirror stands out for its energy-efficient design and eco-friendly operation. The integrated LED lights consume minimal energy while delivering maximum illumination, making them an environmentally responsible choice for eco-conscious homeowners. Additionally, LED technology boasts a long lifespan, reducing the need for frequent bulb replacements and minimizing waste.
By choosing the infinity LED mirror for your home, you not only enhance your space with its beauty and functionality but also contribute to a more sustainable future for generations to come.
Wrapping It Up
The infinity LED mirror represents a captivating marriage of form and function that transcends the ordinary and elevates the extraordinary. With its mesmerizing illusion of infinity, versatile design, functional illumination, and energy-efficient operation, this innovative fixture offers a multitude of benefits that appeal to homeowners and designers alike.
Whether adorning the walls of a modern bathroom, a chic dressing area, or a stylish living room, the infinity LED mirror adds a touch of elegance, sophistication, and enchantment to any space it inhabits. Embrace the beauty of the infinity LED mirror and transform your living space into a realm of infinite possibility and timeless allure.
Frequently Asked Questions
1. What is a DIY infinity LED mirror?
A DIY Infinity LED Mirror is a project where individuals create their own version of an infinity mirror using LED lights and mirrors. It creates the illusion of infinite depth by reflecting lights between two mirrors, resulting in a captivating visual effect.
2. How difficult is it to make a DIY infinity LED mirror?
The difficulty level can vary based on the complexity of the design chosen and your experience with DIY projects. Basic versions can be relatively simple, requiring basic skills in handling tools and electronics. However, more intricate designs may require advanced woodworking and electrical knowledge.
3. Can you customize the design of your DIY Infinity LED Mirror?
Yes, DIY Infinity LED Mirrors offer ample opportunities for customization. You can adjust the size, shape, and style of the frame, as well as experiment with various LED colours and patterns to match your preferences and decor.