Last Updated on April 2, 2015 by teamobn
This tetris themed bookshelf doesn’t only look cool, but is also a great storage solution.

Since this bookshelf is completely DIY, the size of each box is fully customizable allowing you to save space. You also have control of the orientation of each blocks so you can arrange books and other items according to your preference. You can take organizing a notch higher through color coding. Each block can be painted different colors. And if you need more storage space, just build and add new blocks.
Anyone for a game of DIY bookcase Tetris?
Materials:
- 3mm MDF – 2′ x 6′ sheet
- 12mm MDF – 4′ x 8′ sheet
- Spray Paint
- Wood Glue
- PPE – Dust Mask, Goggles, Ear Defenders
- Sand Paper
- Rags
Tools:
- Steel Ruler
- Squares
- Knife
- Router with Dovetail Bit
- Dovetail Jig
- Table Saw
Steps:
When you think about it, each Tetris block can be broken down into four equal squares.
I decided each square would be 160mm2, and be 224mm deep. I took to AutoCAD and drew up some plans.
I chose to use 12mm MDF, and they’d be backed with 3mm MDF. The joints would be dovetailed as they’re nice and strong, and not that hard when you’ve got a router and a dovetail jig. (you can get away with rabbit joints though)
Once I was happy I wrote all the measurements down as a “shed reference sheet” and took to my little workshop.

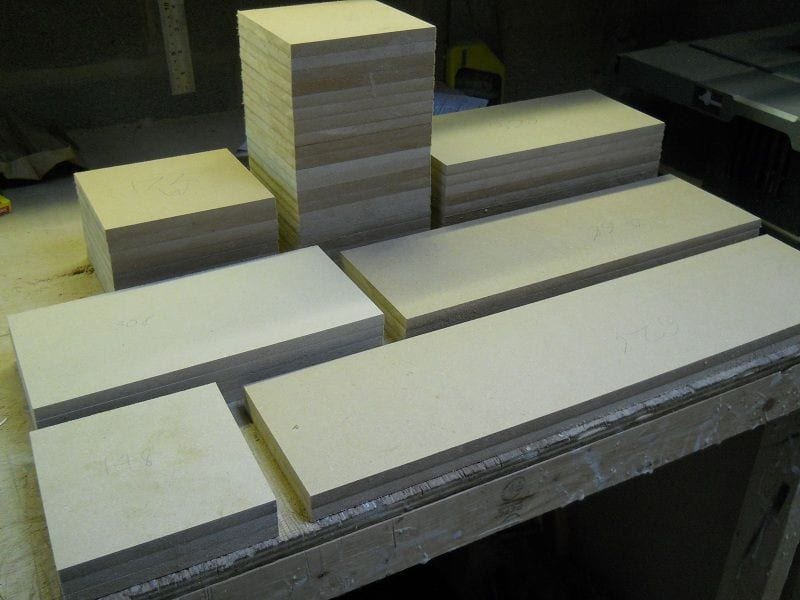
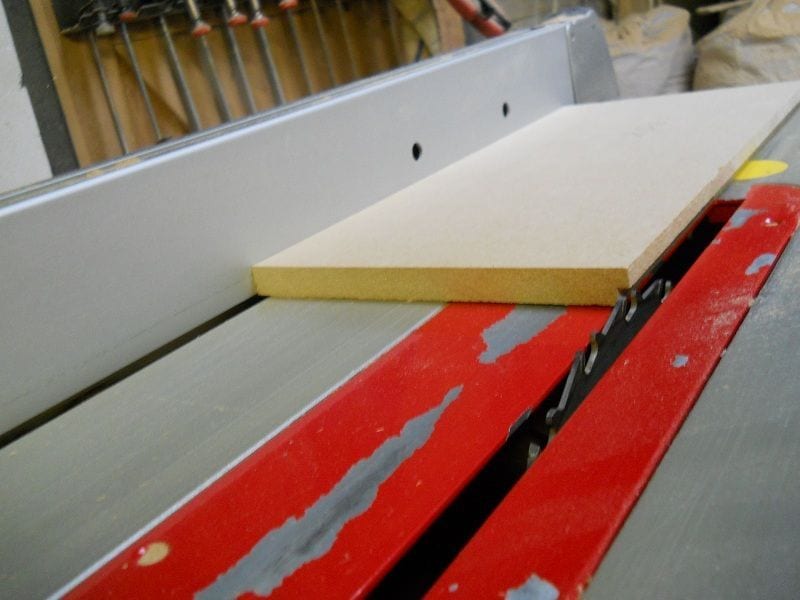
I gathered up all the bits of 12mm MDF I had left over from other projects and cut it into 150mm strips with a table saw. I reckon you’d have enough to make a full set of 7 blocks from an 8ft x 4ft sheet.
I marked out the lengths allowing for a bit off each end, and ticked them off my reference sheet as I worked. It’s a good idea to have a few extra lengths handy as the occasional cock up is pretty inevitable.
If you haven’t got a table saw don’t do this with a jigsaw…Use a hand saw, a square, and a tonne of patience. You really do have to be spot on, and there’s too much flex in a jigsaw blade.
They then got cut to length on the table saw using a template piece for each length to ensure they came out the same.
Take your time with this. If your pieces aren’t spot on it’ll have a knock on effect on the angles later.
Then with a couple of passes through the table saw I cut rebates for the back panel into each piece. Alternatively use a router with a rebating bit.
Use the blade guard on your table saw!! I only took mine off briefly to cut the rebate for the back panel.
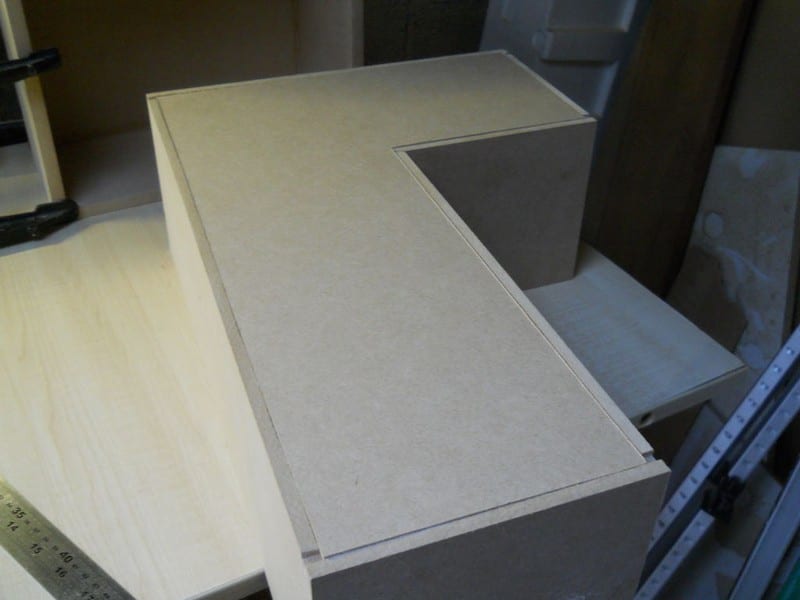
I then labeled up which pieces were next to each other…it can get pretty confusing so it’s good idea to mark, cut, and glue one block at a time.
Then I set up the dovetail jig, testing and tweaking it with some offcuts until the joints are coming out just right. I chose to use 6mm dovetails.

Although dovetails are a bit over the top, you can get away with just rebating each edge 6mm and doing a rabbit joint with some pins, glue, and plenty of clamps.
Then a long day of cutting joints! Make sure you’re fully covered in your PPE, as this stage is very dusty…and MDF dust is nasty stuff.

I used “Resintite” wood glue. Just use plenty of clamps and keep checking everything’s square.
For the more complicated shapes you’ll want to do the gluing in a few phases. Maybe make a jig to help you along too.
You’ll have a little bit of play in the joints before you put the back panels on, but it can’t hurt to get em as accurate as possible now.
I scraped the glue on the inside joints off now, as sanding it off later would have been a nightmare.

Simply cut the back panels to fit each piece.

I measured the channels on each block and copied it onto some 3mm MDF using squares and suchlike. Get it as square and accurate as possible as the back panels will hold it in shape.
3mm MDF isn’t the toughest material in the world so with a bit of persistence I got through it with a knife & a straight edge.
Then I glued them in place, wiping the glue off the inside
Once that was dry I rubbed in a good amount of filler, and it all got a good sanding (use a dust mask).

Before painting I gave each surface a wipe with damp cloth to get the dust off.
Then I gave each block a couple of coats of primer, sanding with 240grit after each coat.
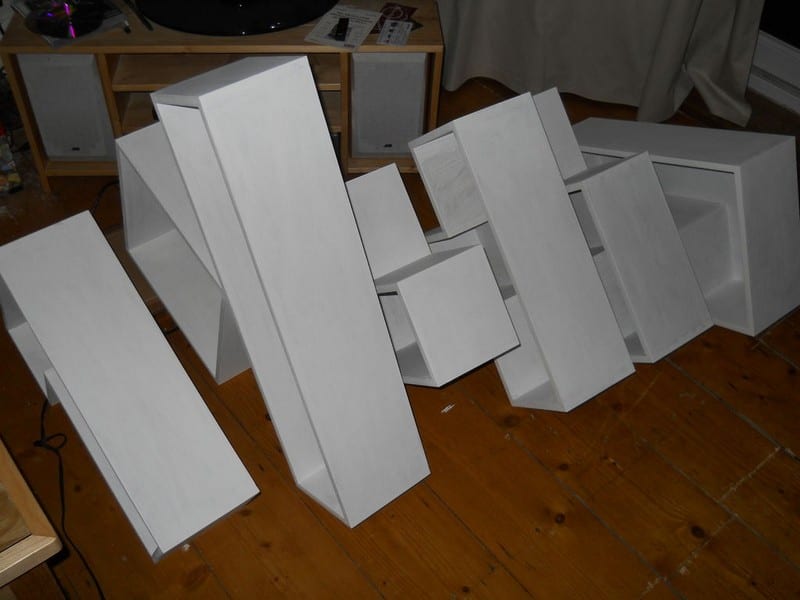

I went for the “Tetris worlds” colour scheme…as all the other versions have a magenta (pink!) block. I thought I’d give spray paint a chance as I found it hard to get a smooth finish with brushes on my first set.
Basically….spray at about 6inches & perpendicular to the surface, wear a good quality mask, and it’s better to do lots of thin coats instead of fewer thick coats.

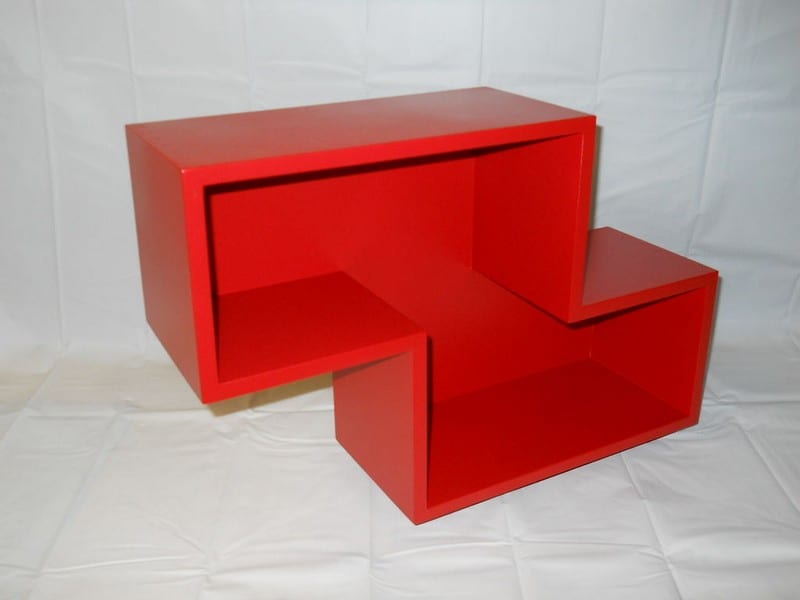


Stack them and there we go! Add more pieces later on until they reach the ceiling! Haha.

And if ever you are moving out, you can easily transport this bookshelf and simply rearrange the blocks to fit your new space.
For those of you who haven’t done a lot of carpentry projects, you will need assistance from those who have more experience. This project will require a bit of precision and advance woodworking tools. But with the advantages it offers, we’re sure it will all be worth it.
Thanks to HicksCustomFurniture for this great tutorial.