Last Updated on January 29, 2024 by teamobn
One of the great ways to enjoy the outdoors is through outdoor cooking. Outdoor portable kitchens have so many advantages but cost, usually, isn’t one of them ![]()
The cost of a portable kitchen will depend largely on its size, the materials you select, and the appliances you want to be installed. A basic outdoor cooking area with a patio, grill, and countertop will cost you a few thousand dollars. Of course, a luxury design outdoor kitchen with top-of-the-line appliances will cost many times more.
So a full outdoor kitchen not only requires a dedicated space but also demands a hefty bank account. If you don’t have the dedicated space or the bank balance, don’t despair…
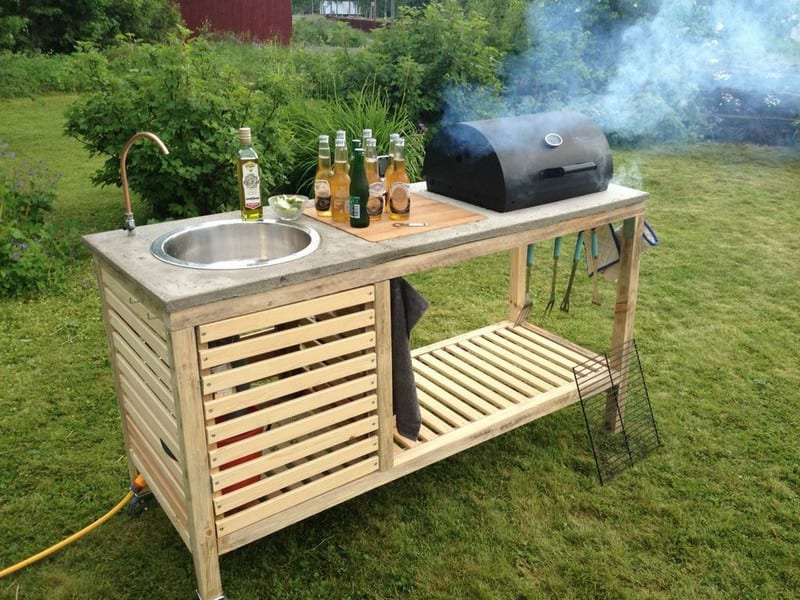
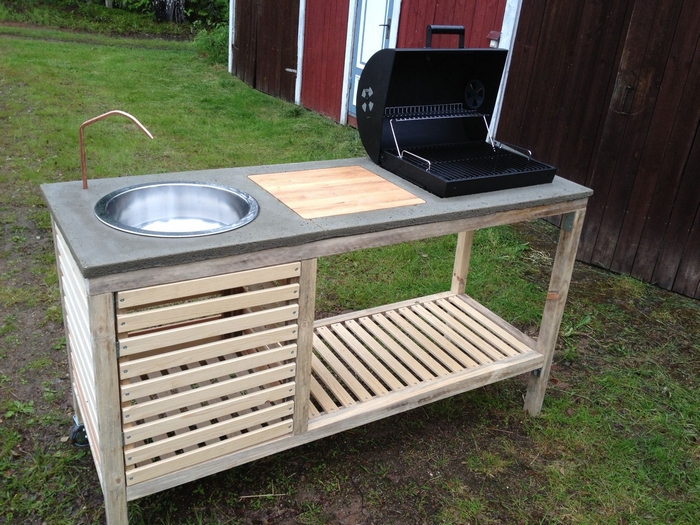
This portable kitchen barbecue is a clever solution! You don’t need an expensive and full-size outdoor kitchen. It just has to be functional and practical. This outdoor kitchen meets both criteria.
This is perfect for those of you who are short on backyard space. It’s easy to move around your yard and when not in use, you can easily store it in your garage or shed to keep it protected from outdoor elements.
Could this be your next weekend project?
Click on any image to start the lightbox display. Use your Esc key to close the lightbox.![]()

Contents
Spice Up Your Culinary Game on the Go – 5 Essentials
Ready to take your taste buds on a wild adventure? Whether you’re a nomadic chef or a road-trip enthusiast, having a budget-friendly portable kitchen can turn any mundane journey into a flavorful feast.
In this guide, we’re dishing out five sizzling hacks to help you build the ultimate kitchen-on-wheels without burning a hole in your pocket. So, buckle up, toss on your chef’s hat, and let’s whip up some magic in the world of portable cooking!
1. Plan Like a Pro: Lay the Foundation for Success
Before you start assembling your kitchen empire, it’s time to channel your inner architect. Whip out that blueprint and strategize like a pro. Map out your cooking needs, space constraints, and budget boundaries to ensure your portable kitchen hits the sweet spot but do not break the bank.
Pro Tip: Keep it simple, folks! Stick to the essentials and steer clear of fancy gadgets that’ll only leave your wallet feeling lighter than a soufflé.
2. Get Creative with Design: Think Outside the Kitchen Box
It’s time to unleash your inner design genius and break free from the shackles of conventional kitchen norms. Embrace collapsible countertops, modular storage solutions, and ingenious gadgets to make every inch of your portable kitchen’s real estate count.
Pro Tip: Dive deep into the depths of the internet and communities for game-changing hacks that’ll have you cooking up a storm but do not empty your pockets.
3. Roll Up Your Sleeves: Dive into the Construction Zone
Gear up, folks – it’s time to get your hands dirty! Whether you’re a DIY aficionado or a rookie with a toolkit, building your portable kitchen is an adventure in itself. Stick to the game plan, measure twice, cut once, and don’t be afraid to call in reinforcements if the going gets tough.
Pro Tip: Slow and steady wins the race. Take your time and avoid costly mishaps by triple-checking those measurements and staying cool under pressure.
4. Test Drive Your Creation: Ensure Functionality
With the sawdust settled and the paint dried, it’s time to put your portable kitchen through its paces. Experiment with different setups and configurations to ensure it’s as functional as it is fabulous. Pay close attention to stability, user-friendliness, and accessibility to guarantee your culinary haven is ready to rock and roll.
Pro Tip: Take your kitchen for a spin in your backyard or a local park to fine-tune any quirks before hitting the road like a seasoned culinary nomad.
5. Keep It Fresh: Maintenance Matters
Don’t let your kitchen gather dust – a little tender loving care goes a long way! Regular cleaning, maintenance, and the occasional upgrade will keep your portable kitchen in tip-top shape for all your gastronomic escapades.
Pro Tip: Invest in rugged storage solutions to shield your kitchen from the bumps and bruises of travel, ensuring it stays fresh and functional no matter where your adventures take you.
There you have it – your recipe for cooking up a storm with a portable kitchen that’s as practical as it is portable. With a dash of planning, a sprinkle of creativity, and a dollop of elbow grease, you’ll whip up a culinary haven fit for any adventure.
So, what are you waiting for? Let’s fire up those burners, hit the road, and savour the flavours of the world – because with your portable kitchen, the world truly is your oyster!
How to Build a Portable Kitchen
Ready to transform any space into a chef’s paradise? Whether you’re a camping champ or a backyard BBQ boss, having a portable kitchen opens up a world of culinary possibilities. In this guide, we’re serving up the recipe for building your very own on-the-go cooking oasis. So grab your toolkit and let’s get cooking!
Materials
- Concrete Mix
- Scrap Wood Pieces – for concrete frame
- Wood Pieces – mock-up shapes/sizes of the barbecue, cutting board, and sink for making holes in concrete
- Copper Tube
- Bolts
- Barbeque
- Cutting Board
- Sink
- Reinforcing Metal Bars – old dog cage
- Hooks
- Screws
- Water Tap
- Hose
- Wheel Casters
- 2×2 Lumber
- Plywood
- Water
Tools:
- Drill
- Trowel
- Tub – for mixing concrete
- Concrete Float
- Saw
Steps:
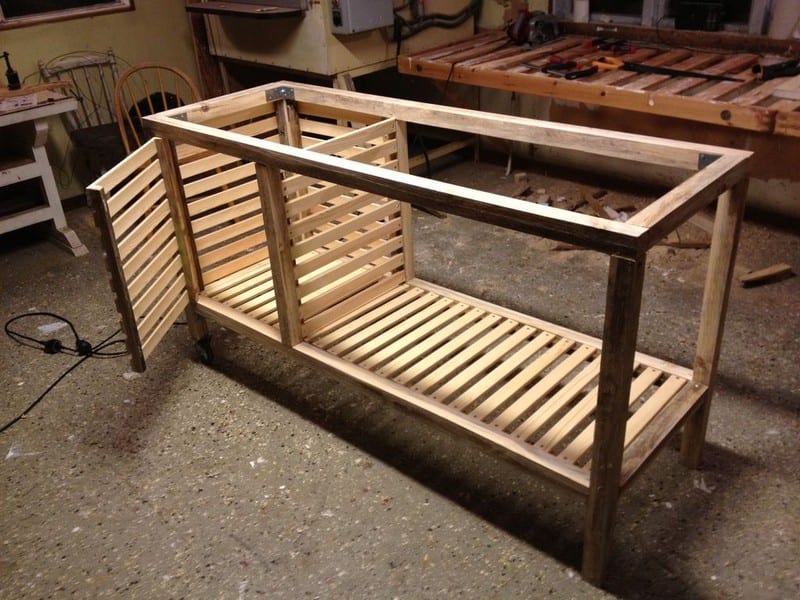
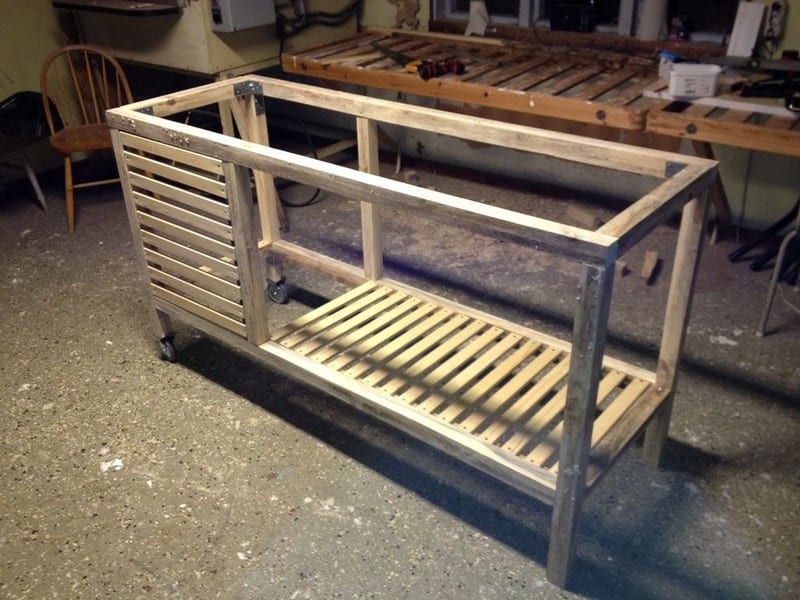
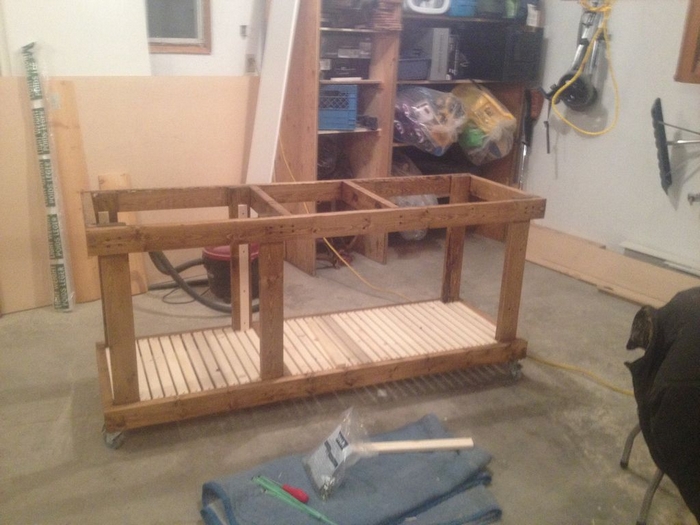
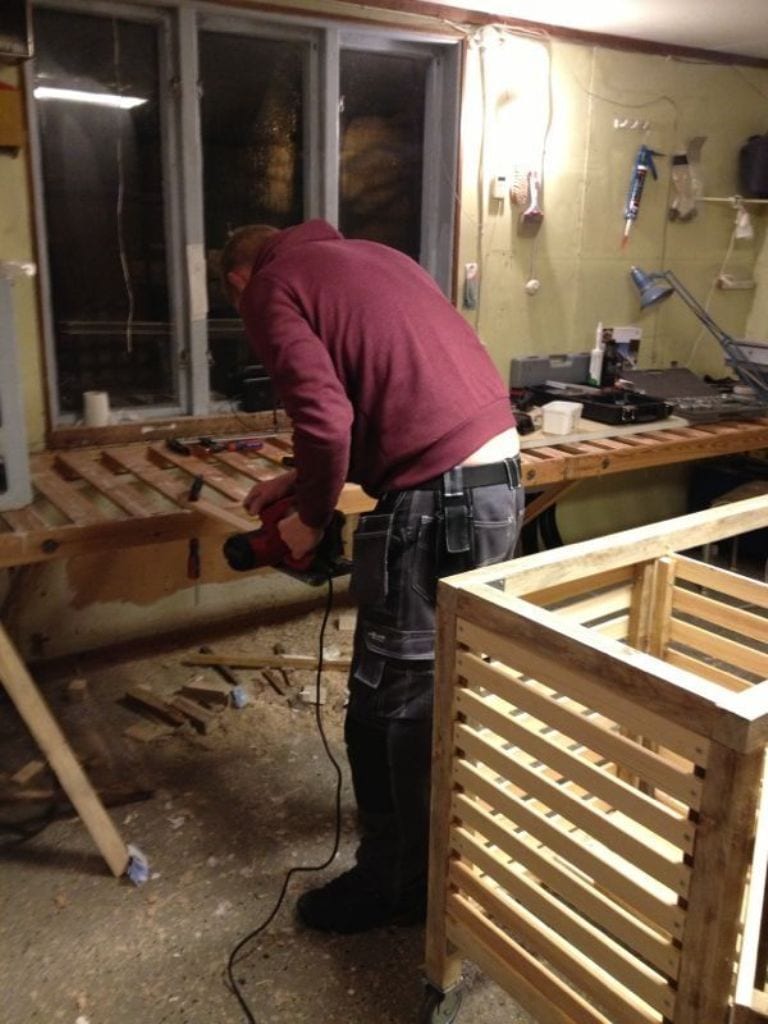
First, we need a base for our potable kitchen, it’s optional how you want to build it but I decided to have a cupboard to cover the sink and bucket for wastewater.
I put two wheels on my portable kitchen to be able to move it. But I recommend putting another two wheels on the other side of the portable kitchen because it will get very heavy with the concrete top.


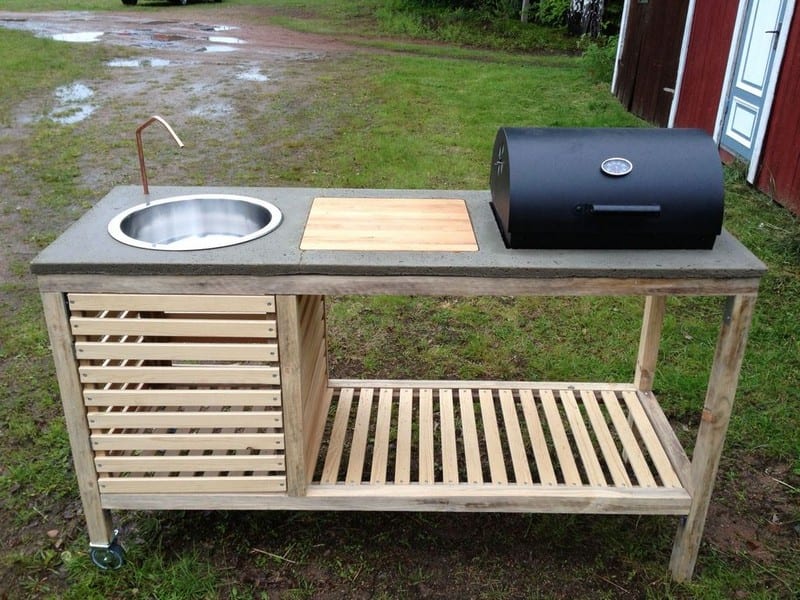
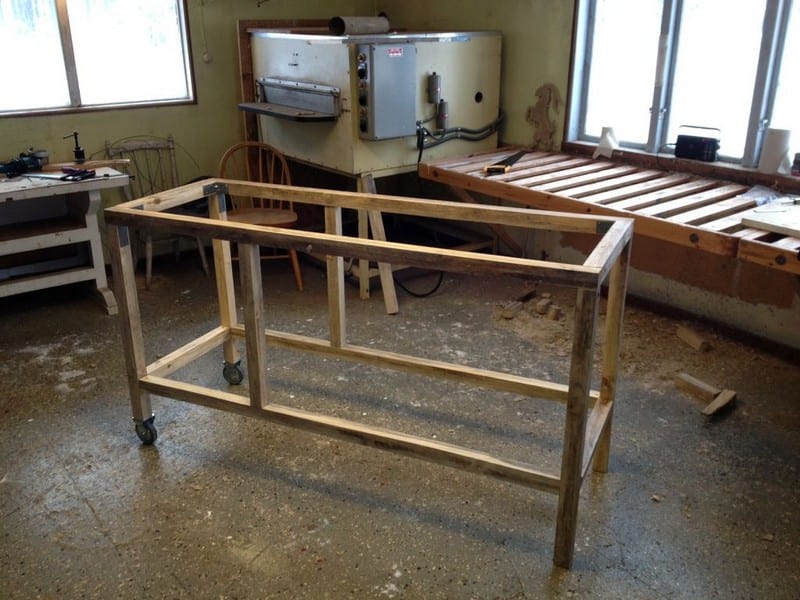
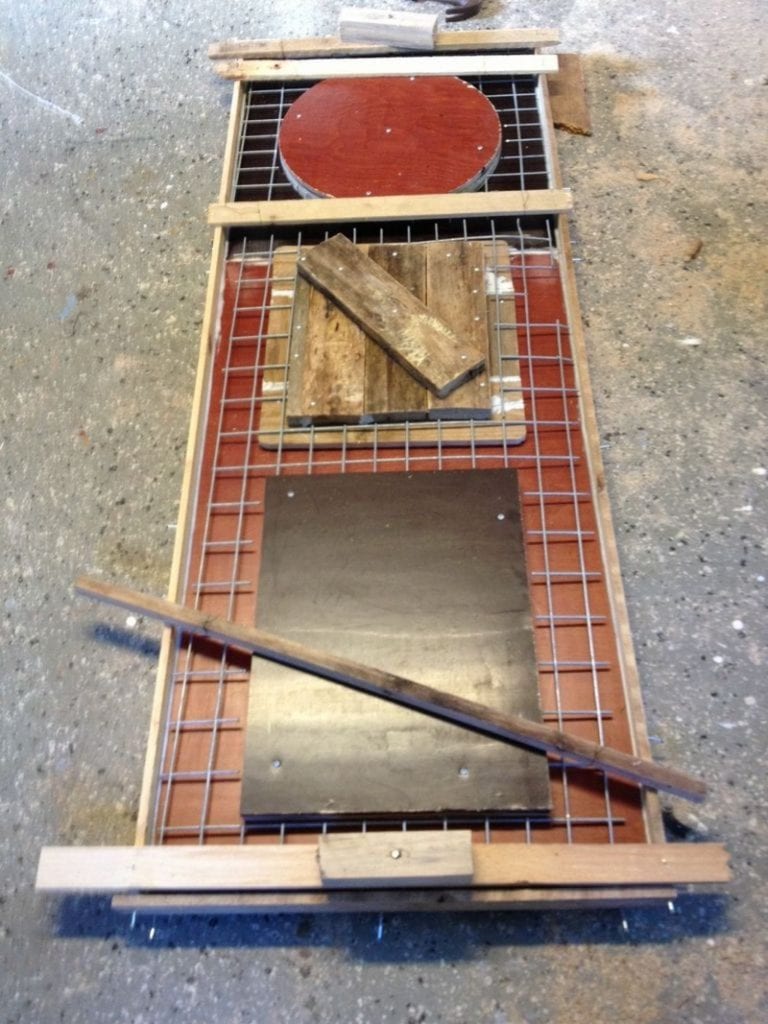
First, I bought the barbecue, cutting board and sink. Then I started building the frame for the concrete with sized holes where they will fit. The hole for the cutting board is made of two layers of wood. One is the same size as the cutting board, and one is a little smaller. I wanted my portable kitchen to be empty underneath the cutting board to save some weight.
The reinforcing bar is made from an old dog cage. The smaller holes the stronger they will be. Make sure it doesn’t touch the bottom of the frame which will be the top surface when it’s complete.
Take your time when you add the concrete, make sure you don’t get any air bubbles inside.
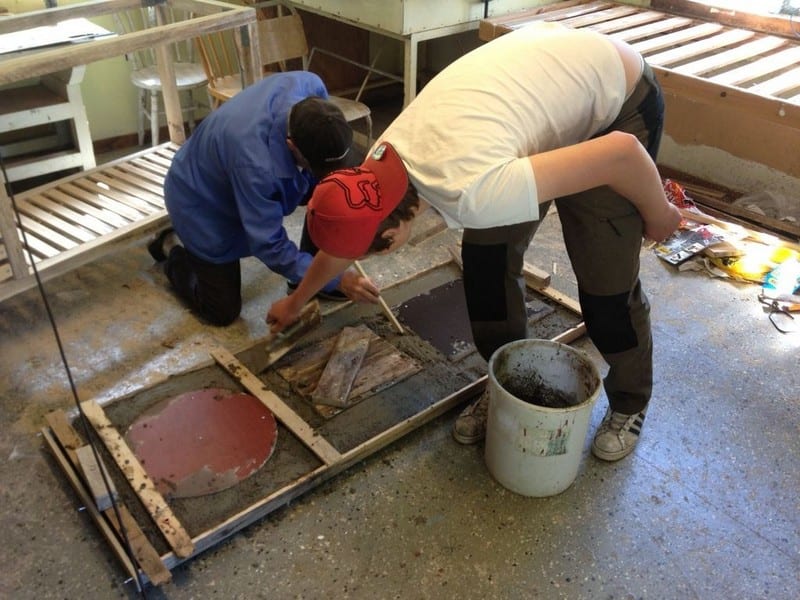
Don’t forget to add a bolt on either side to be able to attach it to the wooden frame.
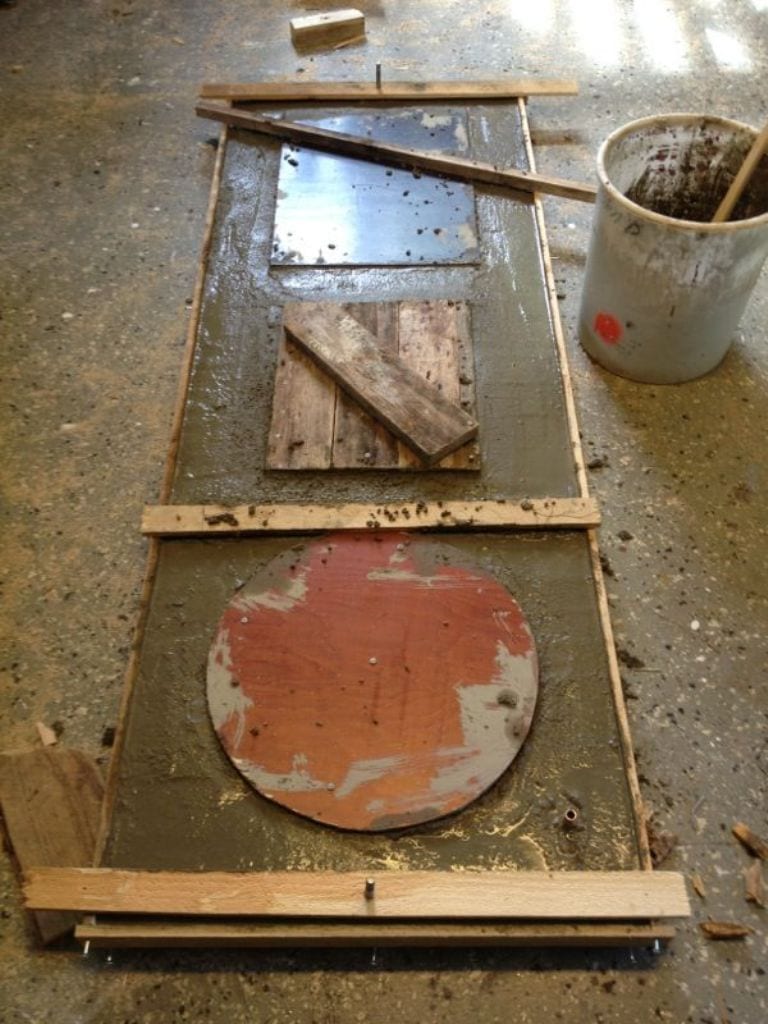
Unfortunately, I didn’t take any photos while attaching the sink to the frame but it’s a bit tricky. Be careful not to get any cracks in the concrete. Add as many hooks, and things as you find necessary.

You don’t need a large backyard. You don’t have to spend extra time and effort to prepare space for a full, dedicated kitchen. And you don’t have to feel bad about your wallet. This simpler and easier outdoor kitchen project will allow you to enjoy your outdoors even more with way less concern.
What changes would you make to make this barbecue more suitable for your needs?
Safety Precautions When Building Your Portable Kitchen
Fire up the grill because we’re about to embark on a journey to build the ultimate portable kitchen! But before we start chopping veggies and flipping burgers, let’s sprinkle in some safety savvy.
In this guide, we’re serving up five critical safety precautions to ensure your cooking adventures are as smooth as butter and as safe as can be. So, let’s lace up our aprons and dive into the world of portable kitchen safety!
1. Solid Foundations: Choose Quality Materials
Just like a chef relies on top-notch ingredients, your portable kitchen needs sturdy materials to stand the heat. Opt for high-quality, fire-resistant materials that can withstand the rigours of outdoor cooking. Cheaping out here could lead to disaster down the line, so invest wisely to keep your kitchen rock-solid and your cooking ambitions on track.
2. Measure Twice, Cut Once: Mind Your Space
Before you start hammering and sawing, take a moment to map out your kitchen’s dimensions. A cramped cooking space is a recipe for accidents, so ensure you have enough room to move around comfortably. Double-check your measurements to avoid any mishaps – a little extra planning now will save you a lot of headaches later on.
3. Reinforce for Stability: Keep It Steady
No one likes a wobbly kitchen – it’s a disaster waiting to happen! Strengthen your portable kitchen’s stability by reinforcing joints, adding support braces, and using heavy-duty fasteners. A sturdy foundation means you can cook with confidence, knowing your kitchen won’t collapse under pressure.
4. Watch Your Step: Mindful Placement
Where you set up your portable kitchen matters just as much as how you build it. Choose a flat, stable surface away from any potential hazards like uneven ground or flammable materials. Keep an eye out for tripping hazards and make sure your kitchen is well-ventilated to prevent any unwanted flare-ups.
5. Clean As You Go: Tidy Kitchen, Safe Cooking
A cluttered kitchen is an accident waiting to happen, so keep things tidy as you cook. Dispose of any food scraps or grease buildup promptly to prevent slips and falls. Don’t forget to clean your cooking surfaces regularly to avoid any cross-contamination or foodborne illnesses.
Safety First, Flavor Always
Congratulations, you’ve just levelled up your portable kitchen game with these essential safety precautions! you can cook up a storm wherever your culinary adventures take you, knowing you’ve got safety on your side.
So, grab your utensils and get ready to whip up some delicious meals – because when it comes to cooking on the go, safety always comes first!
Thanks to Molarin for sharing invaluable tips on how to make a portable kitchen!
Let’s Get Cooking!
There you have it, kitchen enthusiasts – the grand finale of our adventure through the essentials of crafting your portable kitchen! We’ve seasoned our journey with the five must-know ingredients for whipping up a culinary haven that’s practical, budget-friendly, and ready for any adventure. Let’s wrap up our cooking escapade with a dash of excitement and a sprinkle of inspiration.
From selecting top-quality materials to mindful space planning, reinforcing stability, choosing prime locations, and maintaining cleanliness, we’ve covered all the bases to ensure your cooking adventures are nothing short of extraordinary. With safety, convenience, and a whole lot of flavour on your side, the possibilities for culinary creativity are endless.
So, whether you’re grilling under the stars, hosting a picnic in the park, or embarking on a camping cookout, your trusty portable kitchen is your passport to gastronomic greatness wherever you go. It’s time to dust off those aprons, gather your ingredients, and get ready to savour every moment of outdoor cooking bliss.
With your newfound knowledge and a sprinkle of creativity, the culinary world is yours to explore and conquer! So, until our next cooking escapade, let’s keep those aprons tied tight, those utensils polished to perfection, and those taste buds tingling with anticipation.
Remember, every meal is a chance to unleash your creativity and delight in the flavours of your culinary creations. Happy cooking, and bon appétit!
Frequently Asked Questions
Welcome to the ultimate FAQ guide for your portable kitchen! Whether you’re a camping aficionado, a road trip junkie, or just someone who loves to cook up a storm on the fly, we’ve got all the juicy details to satisfy your hunger for knowledge. So, strap on your apron and let’s dive into the delicious world of outdoor cooking!
1. What’s the scoop on portable kitchens, and why should I get in on the action?
A portable kitchen is your culinary sidekick for adventures big and small! It’s like having a mini kitchen you can take anywhere, complete with a stove, cookware, and all the tools you need to whip up gourmet meals on the fly. Whether you’re roughing it in the wilderness or grilling at a tailgate party, a portable kitchen ensures you never have to settle for soggy sandwiches again – it’s all about fresh, flavorful food, wherever your wanderlust takes you!
2. What are the must-haves for a top-notch portable kitchen setup?
Think of your portable kitchen as your secret weapon for culinary conquests! You’ll want a trusty portable stove (propane or butane-powered), a versatile selection of cookware (think pots, pans, and maybe even a sizzling skillet), utensils to tackle any recipe, food storage containers to keep ingredients fresh, and a cooler or mini fridge to chill out with. Oh, and don’t forget the cleaning supplies – because even outdoor chefs need to tidy up after themselves!
3. How do I pick the perfect portable kitchen for my culinary escapades?
Choosing the right portable kitchen is like selecting the perfect spice blend – it’s all about finding that flavorful balance! Consider factors like size, weight, durability, and features. If you’re a solo adventurer, go for something compact and lightweight. Planning a family feast? Opt for a setup with enough sizzle to feed the whole crew. And don’t be afraid to add some flair with extras like built-in grills, coffee makers, or even a portable pizza oven – because who says outdoor cooking can’t be gourmet?
4. Can I bring the kitchen party indoors, or is my portable setup strictly for outdoor shenanigans?
Who says the great indoors can’t be great for cooking too? While portable kitchens are built to brave the elements, there’s no rule against bringing the culinary magic indoors! They’re perfect for cramped kitchens, cozy cabins, or adding some extra pizzazz to your cooking routine. Just be sure to crack a window if you’re using propane or butane – safety first, flavour second!
5. How do I keep my portable kitchen sparkling clean while I’m on the move?
A clean kitchen is a happy kitchen – even when it’s on wheels! After each cooking extravaganza, give your gear a good scrub with soap and water, then dry it off to keep things squeaky clean.
6. Can I cook up more than just basic grub with my portable kitchen?
Absolutely! Your portable kitchen is like a culinary playground, just waiting for you to unleash your inner chef! From simple one-pot wonders to gourmet masterpieces, the possibilities are endless. So get creative, experiment with flavours, and let your taste buds be your guide – because with a portable kitchen by your side, every meal is an adventure waiting to happen!
7. Are there any safety tips I need to keep in mind when cooking in my portable kitchen?
Safety first, flavour second – that’s the golden rule of outdoor cooking! Here are a few tips to keep your kitchen adventures on the safe side:
- Read the manufacturer’s instructions and follow proper assembly and usage guidelines for your equipment.
- Use your portable stove on stable ground, away from flammable materials and in well-ventilated areas.
- Never leave your stove unattended while it’s in use, and always supervise children and pets around cooking areas.
- Keep a fire extinguisher, first aid kit, and emergency contact information handy – just in case.
- And remember to dispose of hot coals, ashes, and unused fuel responsibly – because nobody likes a kitchen fire on their camping trip!
8. Can I customize my portable kitchen with fancy gadgets and gizmos?
Absolutely! Your portable kitchen is like a blank canvas, just waiting for your creative touch. Whether you’re adding a pop of colour with funky accessories or decking it out with high-tech gadgets, the choice is yours! So go ahead, get wild, and make your portable kitchen as unique as your culinary style – because when it comes to cooking on the go, there’s no such thing as too much flavour!