Last Updated on August 27, 2024 by teamobn
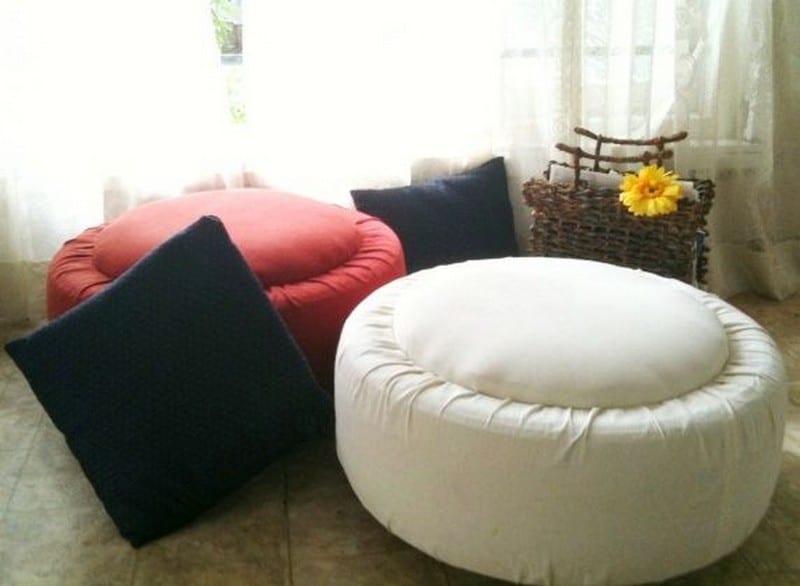
If you’re like most drivers, your car gets new tires every two or three years. Those old tires typically end up in a landfill. Shredded maybe, but landfill nonetheless.

Manufacturers produce more than a billion tires each year. The US generated over 249 million scrap tires in 2017 alone. Many of those are now in landfills.
Here’s a great way to help yourself and the environment… recycle tires by turning them into an ottoman and tire table. You won’t even notice that these ottomans and tables are made from tires. They’re perfect for both indoor and outdoor living spaces.
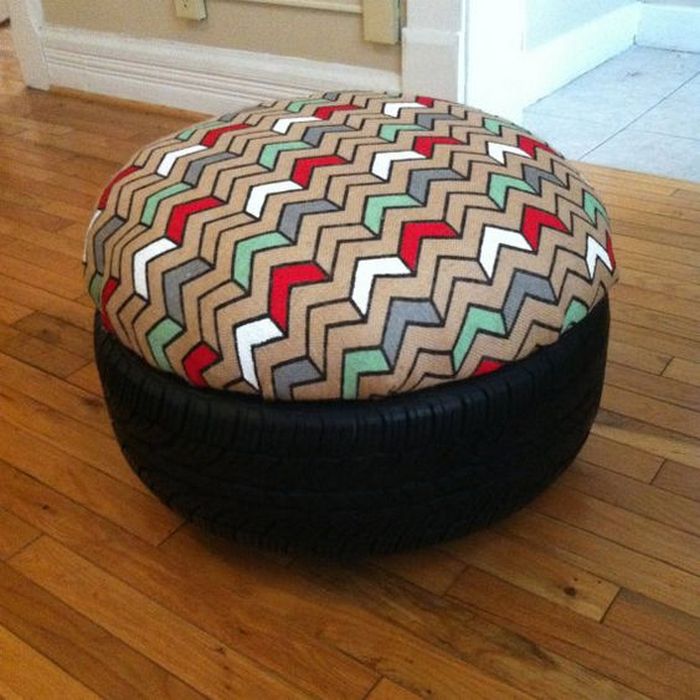

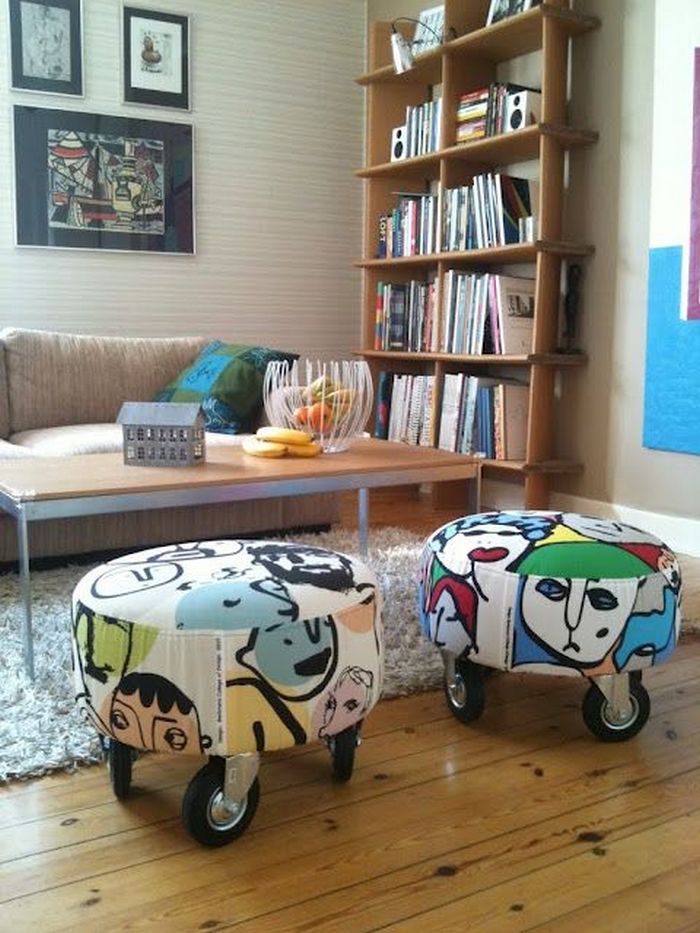
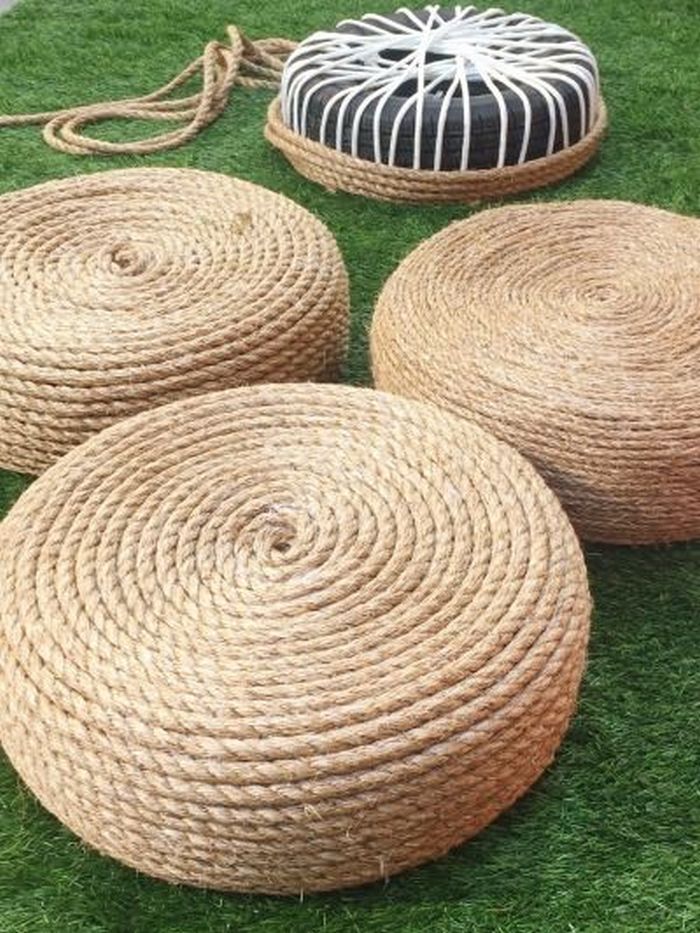

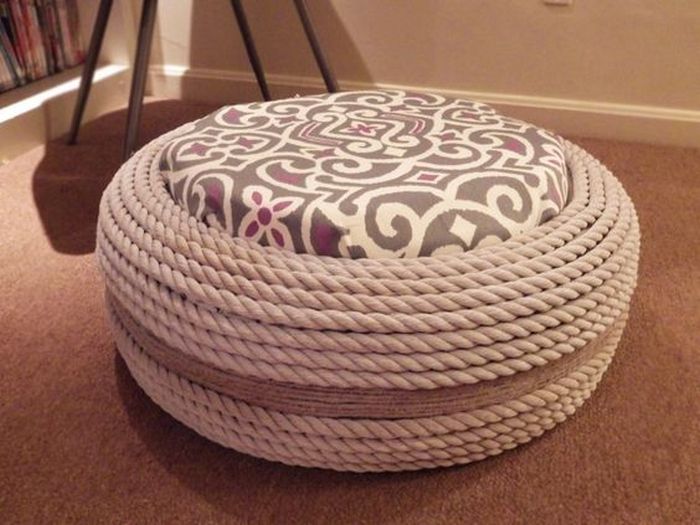
With this project, you get a beautiful and cozy ottoman and tire table as unique as you are. You also get the benefit of knowing you have made a contribution to our environment.
Contents
Building an Ottoman and Tire Table
Tools & Materials:
- Tires
- Sewing Machine
- Drill
- Screws
- Nuts and bolt
- 1/2″ thick plywood.
- Fabric (one just for securing cushion, and the other for a nice cover)
- Rope
- Sponge for the cushions
- Stapler
- Glue
- Epoxy
- Garter/cord
- Casters – 4 per ottoman/ table
Steps
Of course, the very first step is to wash the tires well. 🙂
TABLE
You will need two tires for your ottoman and tire table. Make four holes on each tire. Make sure they are aligned.
Drill holes on one tire first. Then to make accurate holes for the second tire, place the first tire above it facing down. Meaning the holes that you just made should be at the bottom. You might want to lean them on a corner wall to help you keep them aligned.
Mark the second tire by puncturing a nail at the centre of each hole from the first tire. Remove the first tire, and drill away.

Measure the diameter of your tire where the bevel is. Cut your plywood to this size. You will need circles for the top and bottom for your ottoman and tire table.

Now drill holes in the circles and the tire where they will be screwed together. Install bolts on the plywood.

If you want a cover for the plywood now is the time to do it. Lay your cover on a flat surface facing down. Place the plywood on top. Mark and cut the fabric so that you can staple it at the back of the plywood. Apply glue to the plywood. Cut slits where the bolts are.

Now you can attach the circles by doing the bottom circle first. If you want your table to be mobile, this is the time to attach the casters, with one of the holes of the casters also serving as the hole where the plywood and tire are attached.
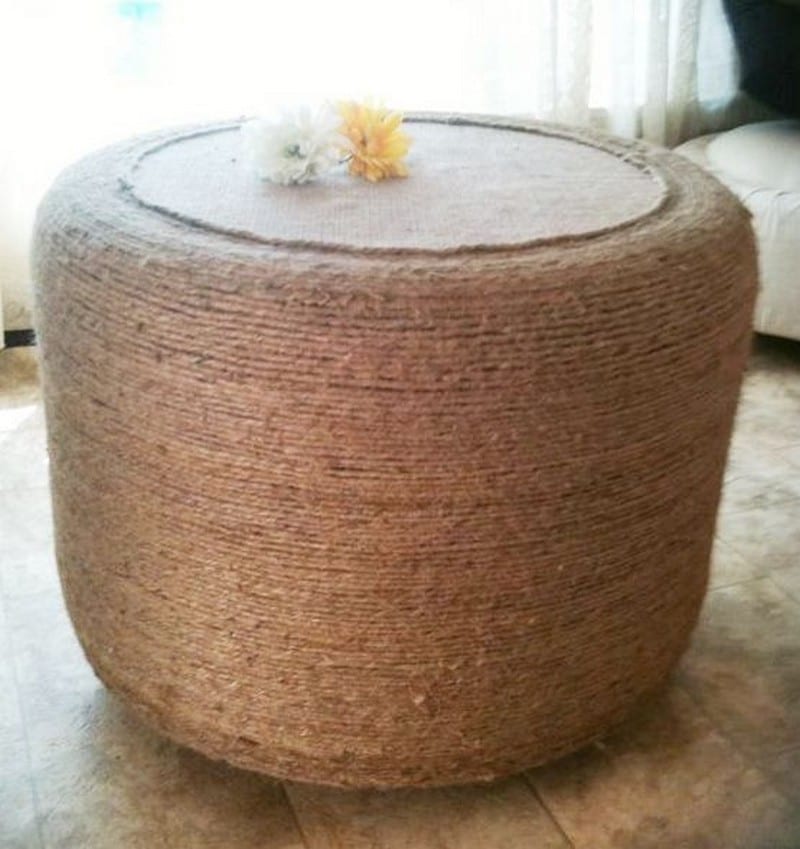
The next step would be to wrap the tires with rope using hot glue. Start with the sides of the tire, from top to bottom.
Then cover the top part of the tire starting from the rim, and around until you reach the edge. See the picture below.

OTTOMAN
Some of the steps here are similar to the steps you’ve done for the ottoman and tire table- clean the tires, measure the diameter for creating the circles, drill holes and install bolts and nuts.
Now since this is an ottoman we would need a cushion for the top circle. Use a sponge that would provide you with about 2 inches of thickness. You would need two fabrics here. The first one is just for creating the cushion and the other will be your cover.
For putting a cushion, lay the first fabric on a flat surface facing down. Place your sponge in the middle, and put the plywood on top. Mark and cut the fabric so that you can staple it at the back of the plywood with the sponge in it.
Staple once on one side (12 o’clock mark) and then pull the fabric on the opposite side where you stapled it (6 o’clock) so that the fabric will be stretched nicely, and staple it. Now staple at the 9 o’clock mark, and pull and staple again at the 3 o’clock mark. Do this until you have stapled around the circle.

That is not the cover yet. Of course, we want something that has a nice print or colour and is washable.
Lay the cover fabric on a surface again, like you did earlier this time marking the fabric a little bigger than the first fabric because this time you will be sewing ahem.
Cut your fabric and sew them around for your ottoman and tire table. Lay it flat again and place the plywood on top and cut slits where the bolts are. Whipstitch is where you cut the fabric to prevent it from fraying.
With the cushioned plywood on top of the fabric, Insert a cord or garter through that hem, and pull it tight. Now you have the seat cover for your ottoman and tire table!

For covering the tire, wrap your fabric around the tire, mark it, and cut it. Again, allow for some hemstitching.
Sew hems on all sides of the fabric. Then insert a cord/garter through the hem on the long sides of the fabric. Wrap it around the tire again and keep that measure by pinning the fabric.

Remove it from the tire again, and permanently secure it by sewing except near the hem.
Try it on the tire again to see if it fits right. If it is nice and tight, you can now tighten the cord/garter.
Now we have to expose the holes that we did on the tires, so mark the fabric and cut making holes. Whipstitch those holes and double-check if it is aligned with the holes of the tire.
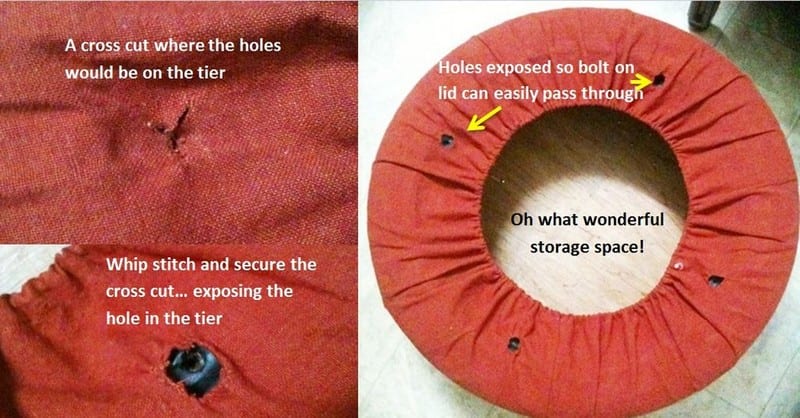
Attach the bottom plywood of your ottoman and tire table. It would be nice to have wheels with them also.

Lastly, put the cushion in place and you are done with your ottoman!

Thanks to shazni for the original idea!
Sourcing and Preparing Tires Safely
When embarking on a DIY project like creating an ottoman and tire table, it’s crucial to start with the right materials. This guide focuses on how to source and prepare tires safely, ensuring your finished ottoman and tire table are both stunning and secure.
Selecting the Right Tires
The first step in creating your ottoman and tire table is choosing the appropriate tires. Not all tires are suitable for indoor use due to the chemicals and wear they may have been subjected to. Look for tires that are relatively new, free of significant wear and damage, and have not been treated with harsh chemical products. Visiting a reputable auto-shop or tire recycling center can provide you with safe options where professionals can help you select the ideal type for your project.
Cleaning Your Tires
Thorough cleaning is crucial before turning your tires into a useful piece of furniture. Start with a stiff brush clearing any dirt and trash. To eliminate oils, leftovers, and any chemicals on the surface, then clean the tires with a warm water and mild soap mixture.
You willwant to sterilize the tires using a diluted bleach and water mixture for a deeper clean, but be sure to rinse them completely following to eliminate any bleach residue.
Checking for Safety
Once cleaned, closely check every tire for any structural flaws including exposed steel belts or severe cracks. These defects might compromise your ottoman and tire table stability. Choosing another tire is safer if one seems compromised. Furthermore make sure the tires smell not too strongly since this could indicate chemical contamination that might be dangerous in an indoor environment.
Carefully choosing and getting ready your tires will help you to guarantee that your ottoman and tire table project is not only original and artistic but also safe for use in your house.

Outdoor Versus Indoor Use
When creating a DIY ottoman and tire table, it’s essential to consider whether the piece will be used indoors or outdoors. This decision influences the materials, finishes, and construction techniques you’ll use to ensure durability and aesthetic appeal suitable for the intended environment.
Material Considerations for Outdoor Use
For an ottoman and tire table destined for outdoor use, material choice is critical to withstand the elements. Choose weather-resistant fabrics for the cover, such as marine vinyl or outdoor polyester, which resist moisture and prevent mildew. When selecting adhesives or finishes, opt for products specifically designed for exterior use, which can handle temperature fluctuations and UV exposure without degrading. Additionally, consider using stainless steel or galvanized hardware to avoid rust.
Preparing for Indoor Use
For indoor use, your ottoman and tire table can incorporate a wider variety of materials and designs. Indoor environments typically require less robust materials, allowing for the use of more decorative fabrics like cotton or linen for a cozier feel. You can also explore more intricate designs with finer details since the ottoman and tire table won’t be exposed to harsh weather. However, it’s still important to ensure the tires are thoroughly cleaned and treated to prevent off-gassing of any residual chemicals.
Adapting Designs to Suit the Environment
Changing the design and functionality of your ottoman and tire table will help you to fit its surroundings. Regarding outdoor versions, think about adding drainage systems in the base to stop water buildup. Emphasize comfort and appearance for indoor versions; add cushioned top for extra seating. Location notwithstanding, make sure the base of your ottoman and tire table is strong and stable enough to support weight without tipping.
Whether it’s a living room or a garden patio, customizing the building and materials of your ottoman and tire table to their intended setting will result in a useful, fashionable, and long-lasting piece that accentuates any living area.
Conclusion
By recycling materials that would otherwise wind up in landfills, an upcycled ottoman and tire table not only offers a distinctive and fashionable accent to any living area but also helps environmental preservation. These projects inspire imagination and can be tailored to suit individual tastes and home décor design. Making an ottoman and tire table provides a useful, reasonably priced approach to improve your house and support environmentally friendly living.
For more upcycled furniture projects, check out our cable spool bench guide!

