Last Updated on November 4, 2022 by teamobn
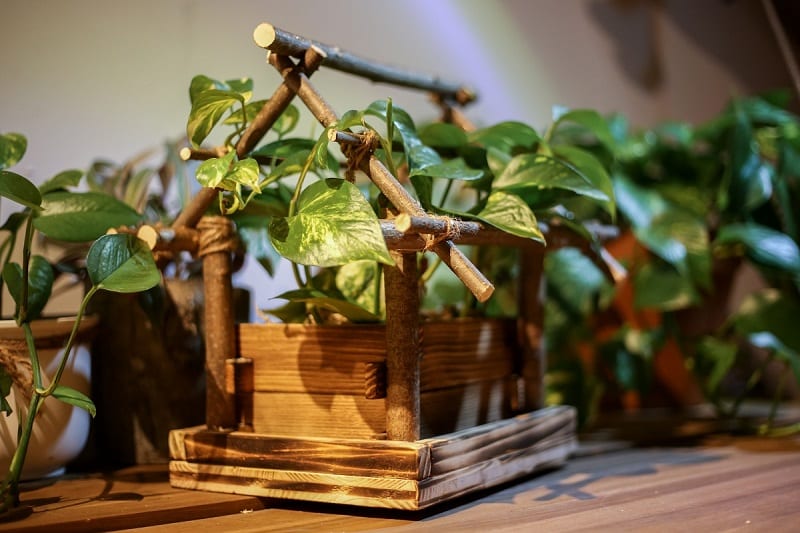
This birdhouse planter project began as a house for birds during the wintertime. But it quickly turned into a cozy, wooden home for indoor plants.
Welcome, DIY enthusiasts, to the cheerfully busy world of gardening. Social distancing measures may have all but halted much of life elsewhere, but not here.
Here there is always more than enough to do for that interesting subset of folks actively looking to get their hands quite literally dirty.
There’s always a full day’s worth of backyard chores that need attention. There are vegetables and raised beds aplenty, not to mention fruiting trees, succulents, trellises, and first-rate blooms. The compost bin needs turning. The rosebushes require watering.
In fact, upon realizing the scope of the work involved in raising a garden, the uninitiated will probably wonder how we find the time. You’ll likely get a different answer each time you ask.
Building a Birdhouse Planter
Plants are a delightful way to bring some colour into your life and home. There’s something about digging in the dirt and growing living plants that helps to quiet the mind, making it fertile ground for innovation and creativity.
For instance, this little project began as a house for birds during the wintertime. But it quickly turned into a cozy, wooden home for indoor plants.
You can get creative with the greenery. We think hanging plants and vines would be a beautiful choice.
Here’s how to build a clever little birdhouse planter for your favourite houseplant.
Materials
- Wood Panels
- Branches (different diameters)
- Sand Paper
- Nails and Screws
- Sawtooth, Screwdriver or Drill
- Plastic Foil
- Potting Soil
- Blow Torch and Yarn
How to Build a Birdhouse Planter
Step 1. Sketch and plan the birdhouse planter you want in a notebook or piece of paper. Consider where you want to put the planter once it’s completed. Will it require a stand? Does it need waterproofing?
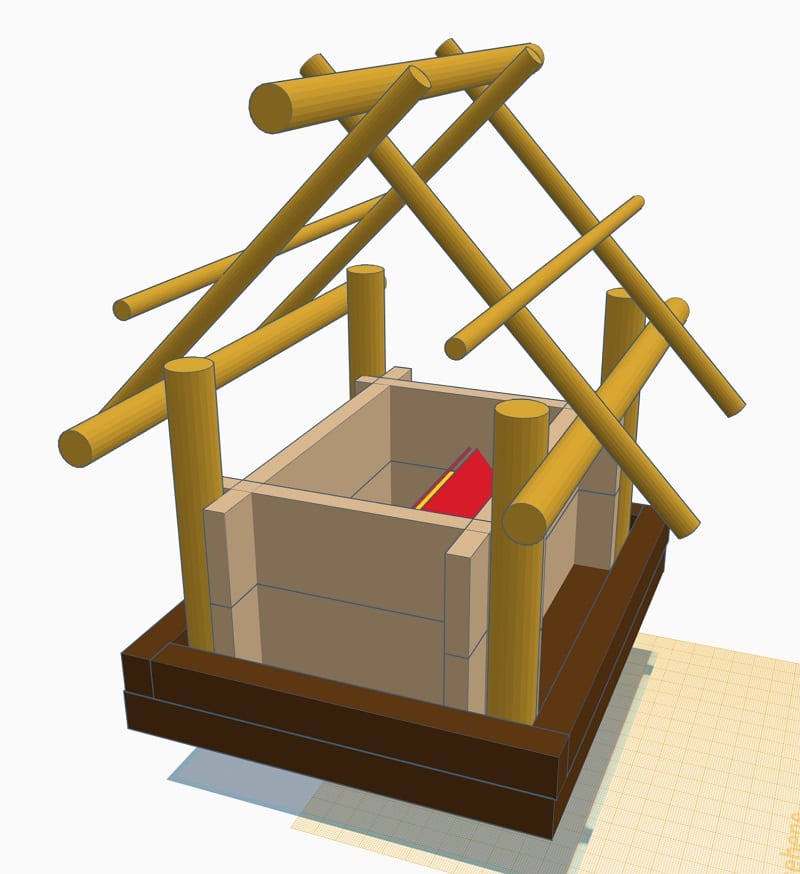
Step 2. Mark the size of the base on a wood panel. Cut the base according to your measurements and markings.
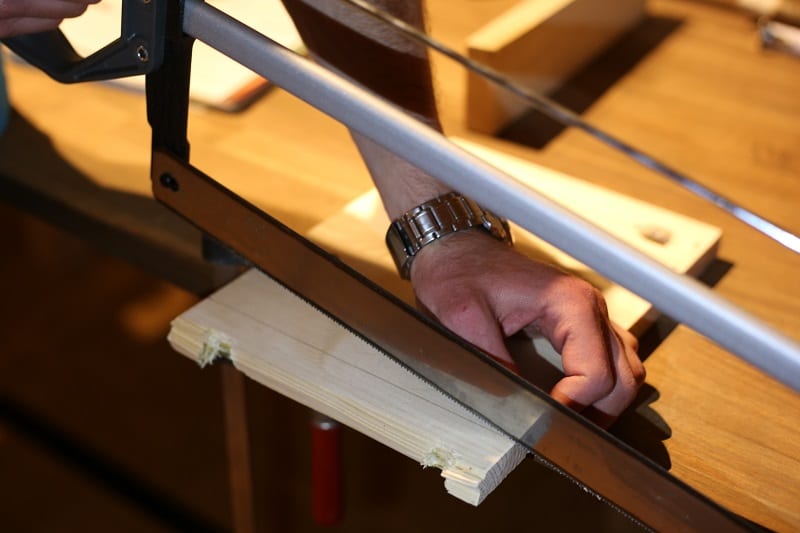
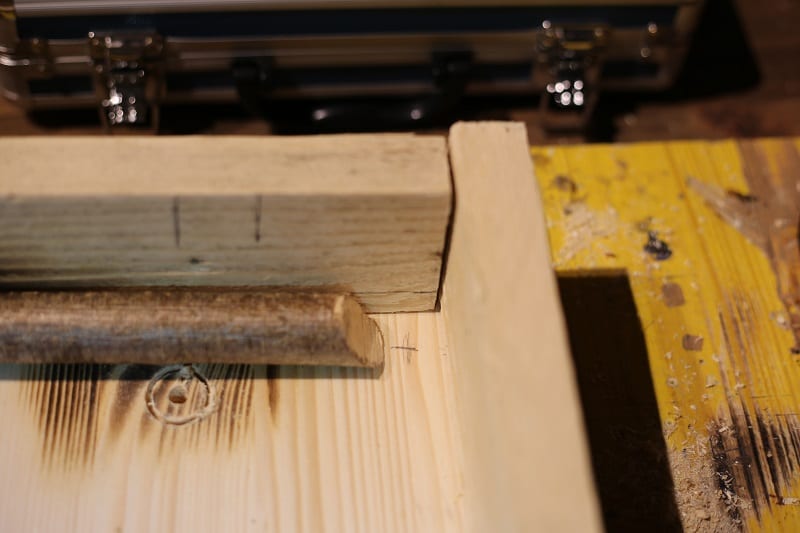
Step 3. Cut 4 panels to build the foundation. Measure the diameter of your screws and drill the panels onto the base, fastening each with the screws. Be careful that you do not split the wood.
Work your way around the entire base panel to build a little fence. This barrier will prevent water from dripping down when you water your plants.
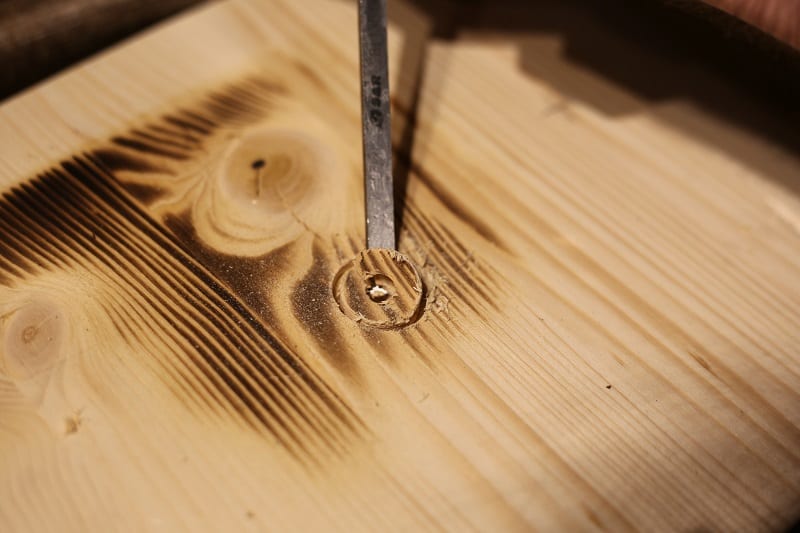
Step 4. This step is optional. If you intend to set your planter outdoors, you might need the house to sit on a stick. If so, carve a hole into the middle of the bottom panel. Be sure the hole is big enough to accommodate the diameter of your standing stick.
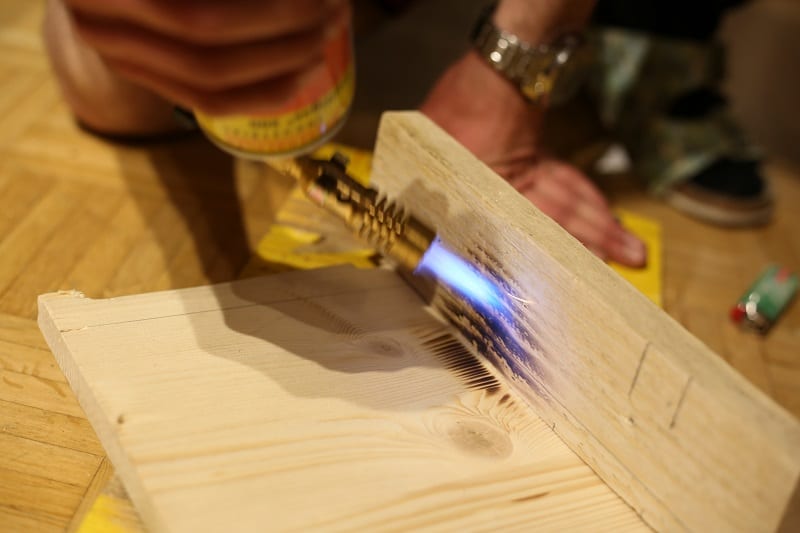
Step 5. Using the blow torch, start “painting” the foundation with the flame. This step can be especially useful if you happen to be using leftover wood panels that are flawed or dull. Once done, sand the wood to prevent unwanted soot stains.
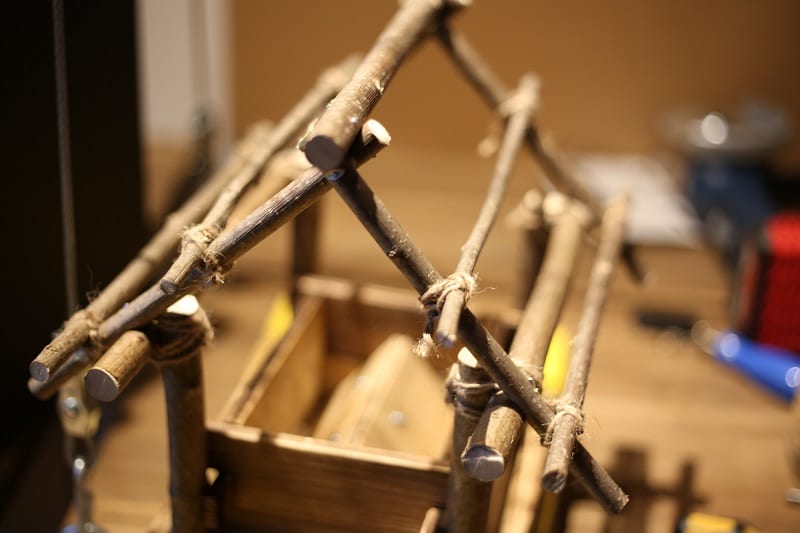
Step 6. Cut 4 thick branches to act as support columns for the roof of the house. Measure the diameter of the branches and carve a hole for each into the base panel. The holes should be deep enough for you to glue the branches into the wood.

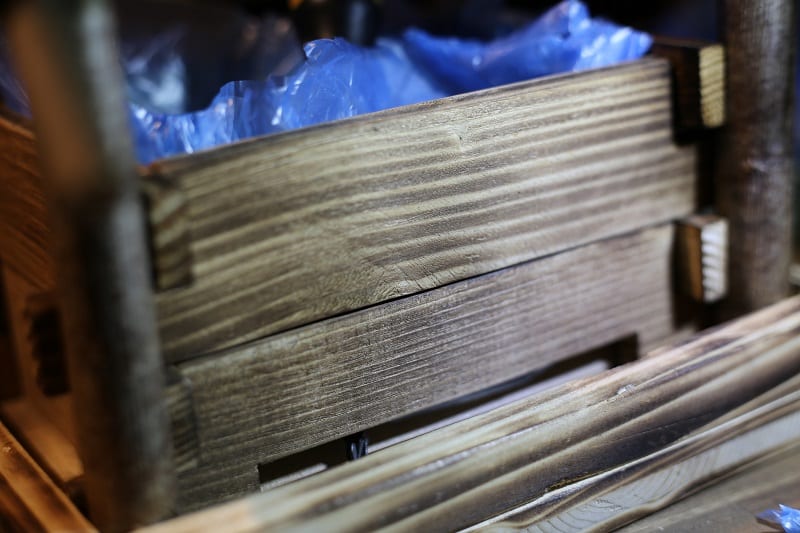
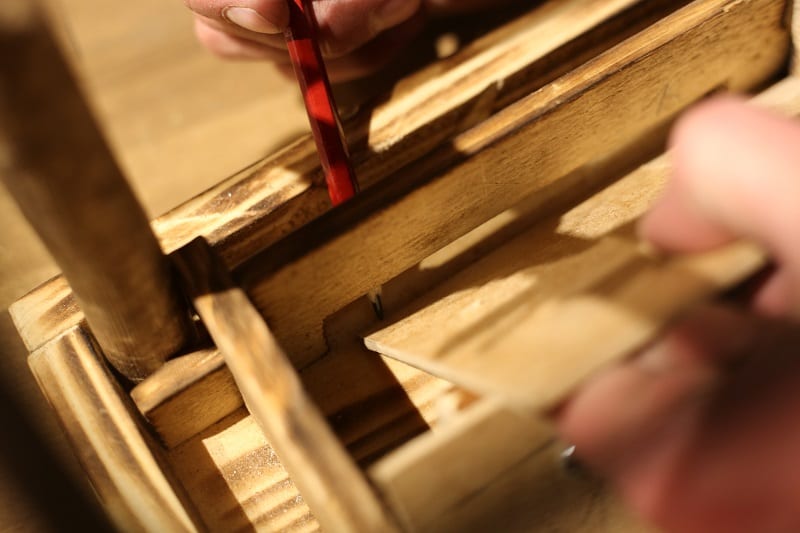
Step 7. This step builds the walls of the house. Measure the space surrounded by the columns and cut 8 pieces of wood to serve as walls. Cut the pieces to allow standard dovetail or notch-and-pass corners.
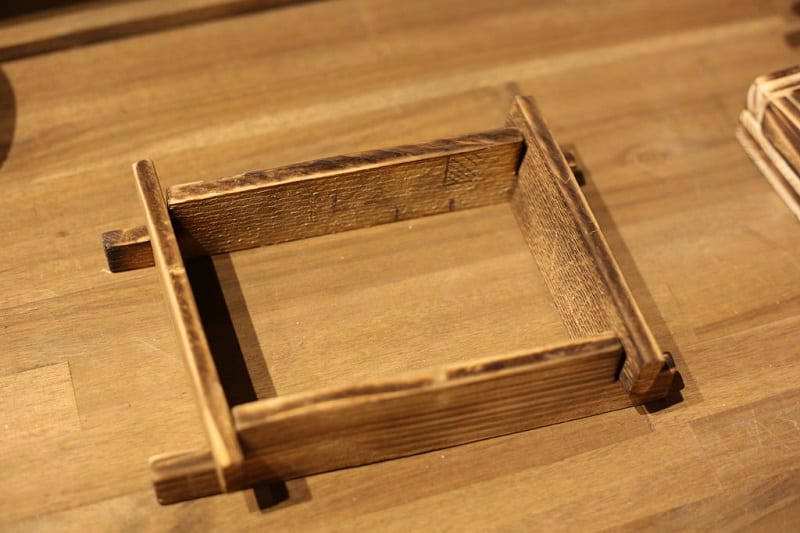
Cut out drainage holes on the sides of the bottom plates and glue the walls together.
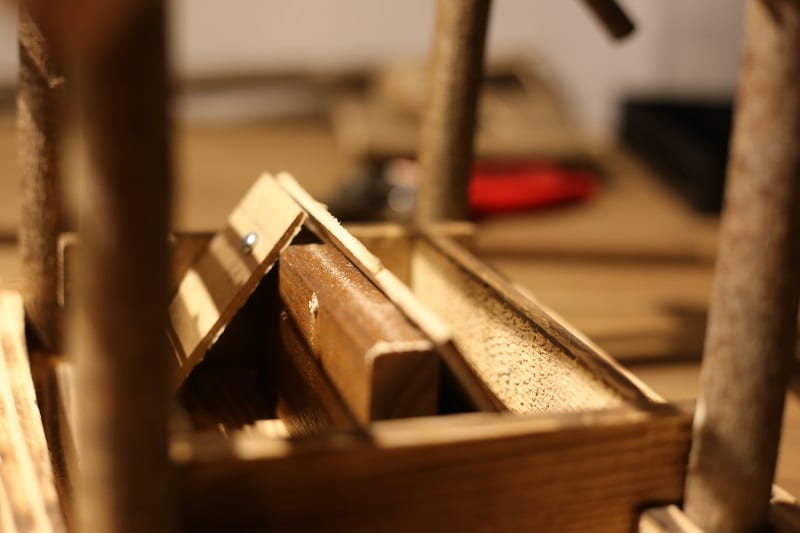
Step 8. You’ll need to build a small A-frame ridge inside the house to facilitate drainage. To do this, drill and screw a wood plate along the middle of the floor of the house. Then, screw thinner pieces of wood onto the sides of the middle plate to create inclines on either side.
Step 9. Now you can begin constructing the roof with the remaining branches. Determine where the branches will meet then carve notches into the joints to ensure a snug-fitting assembly. Use nails to stabilize the branches on one another. Wrap some yarn around the joints for decoration and added stability.
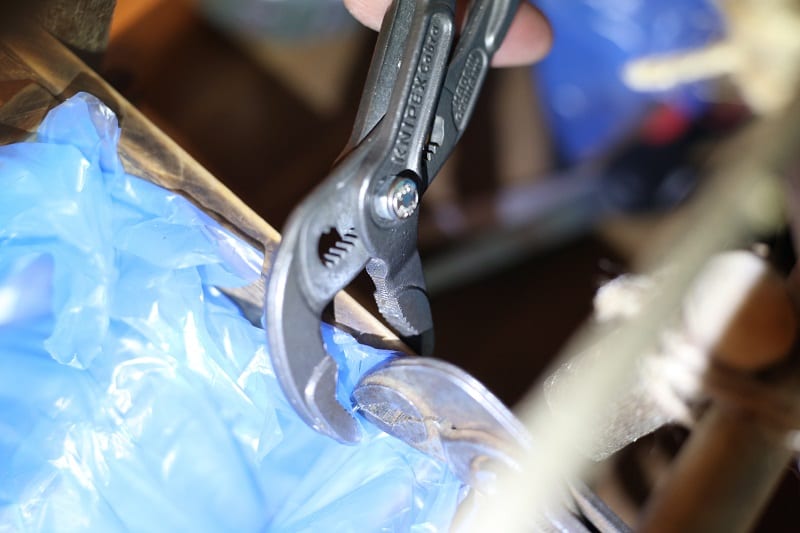
Step 10. Cut out some plastic foil to line the interior of the birdhouse planter. Nail the foil to the wood to prevent slipping. Cut drainage holes adjacent to the drainage apertures in the bottom wall panels.
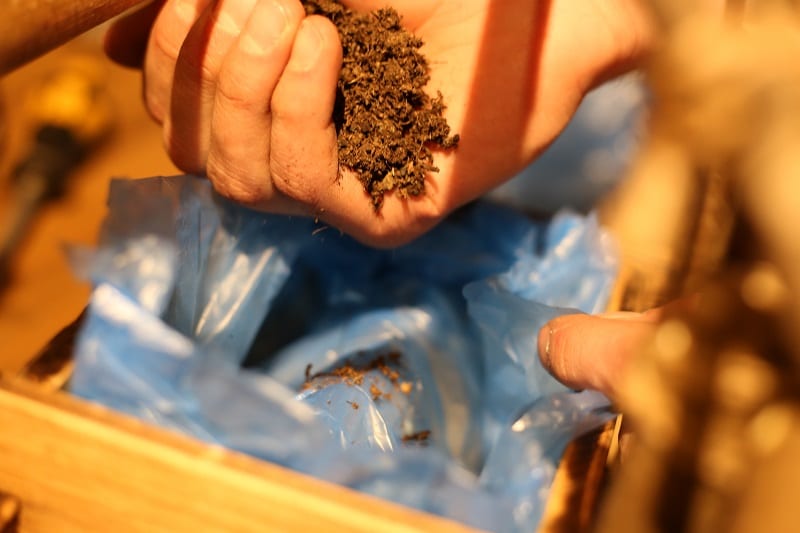
Step 11. Fill the birdhouse planter with potting mix and your plant of choice, using the procedure you normally use to grow plants in containers. Water the plant as necessary.
That’s it. You’re done! Set your birdhouse planter in a sunny spot indoors or out on your front porch.
Thanks to Aminabd for this fabulous project.