Last Updated on March 25, 2024 by teamobn
Is yours a beach-loving family? You’re whole family is going to love a piece of it with their very own seashell table at home. Each time they look at it, you’re all transported back to the time of waves crashing and the smell of the sea.
Who wouldn’t love the beach? Bring in the beach vibe at your home with this seashell table! This seashell table is the perfect way to brighten up the mood of your home! The natural colours and textures of the seashells are sure to give your space a relaxing and inviting feel.
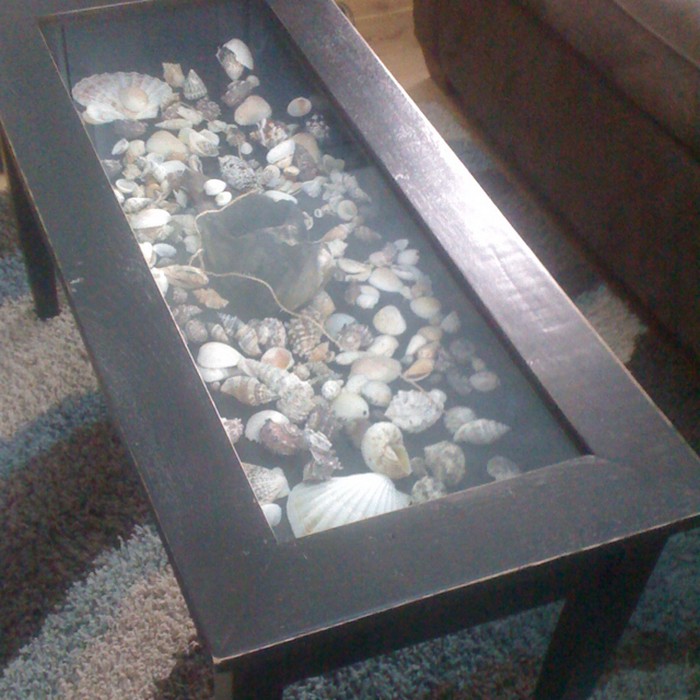
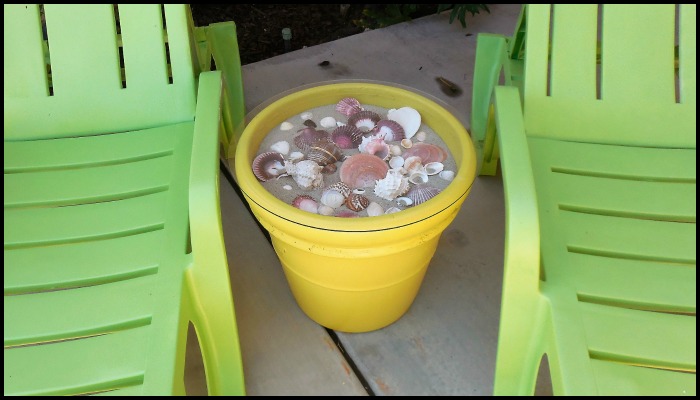
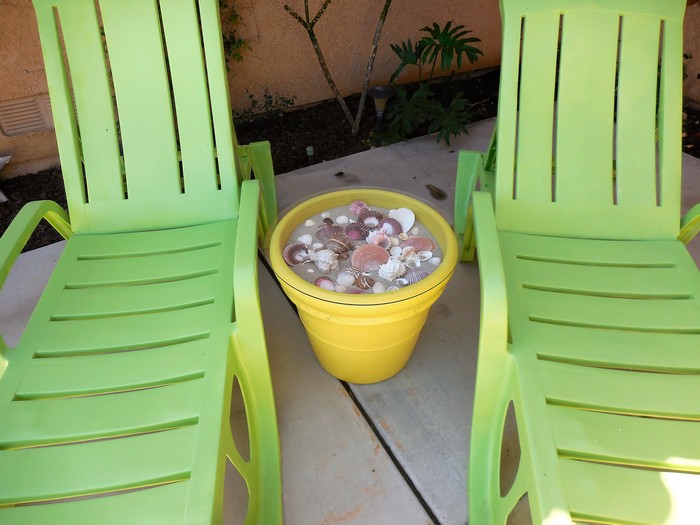
Making a seashell coffee table is a quick and easy project but what makes this really interesting is how creative your custom table can be. Just take a look at this featured seashell table, made with a 20-inch terracotta pot! It’s filled with styrofoam and cardboard so as not to make the table too heavy for moving. It’s definitely perfect for any outdoor area!
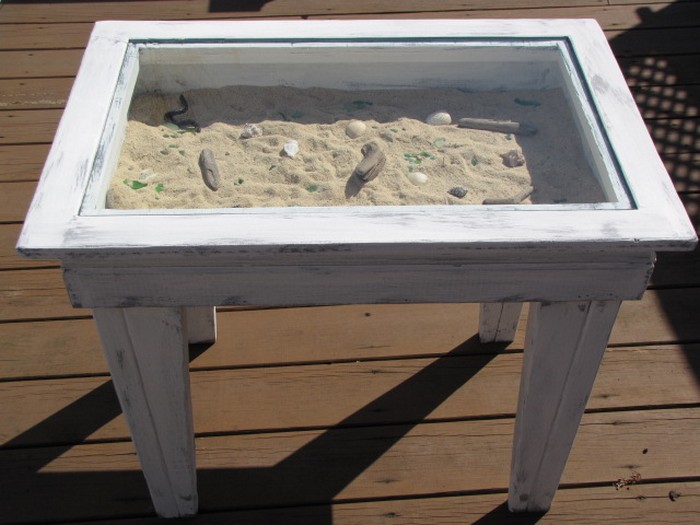
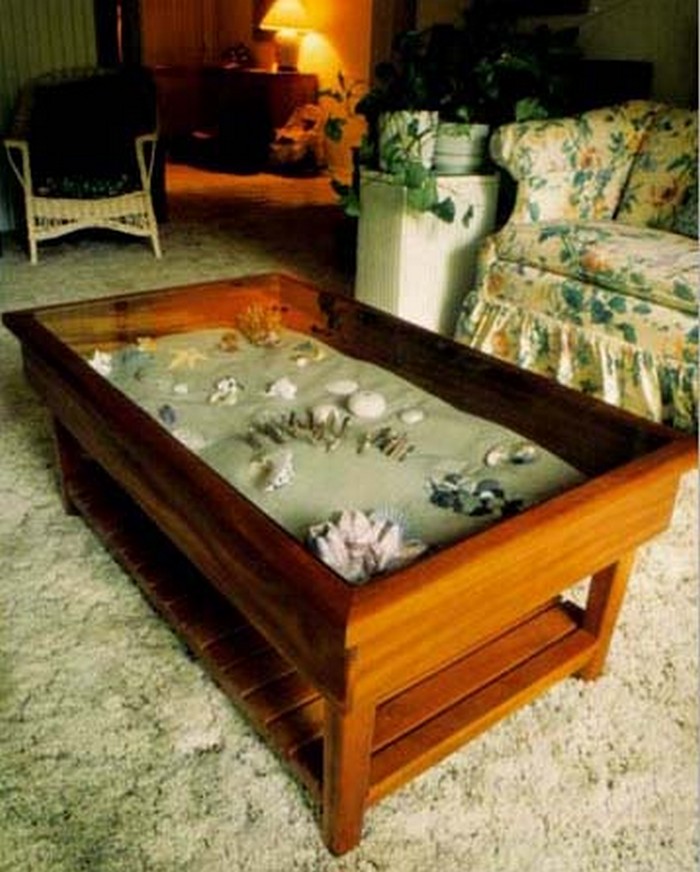
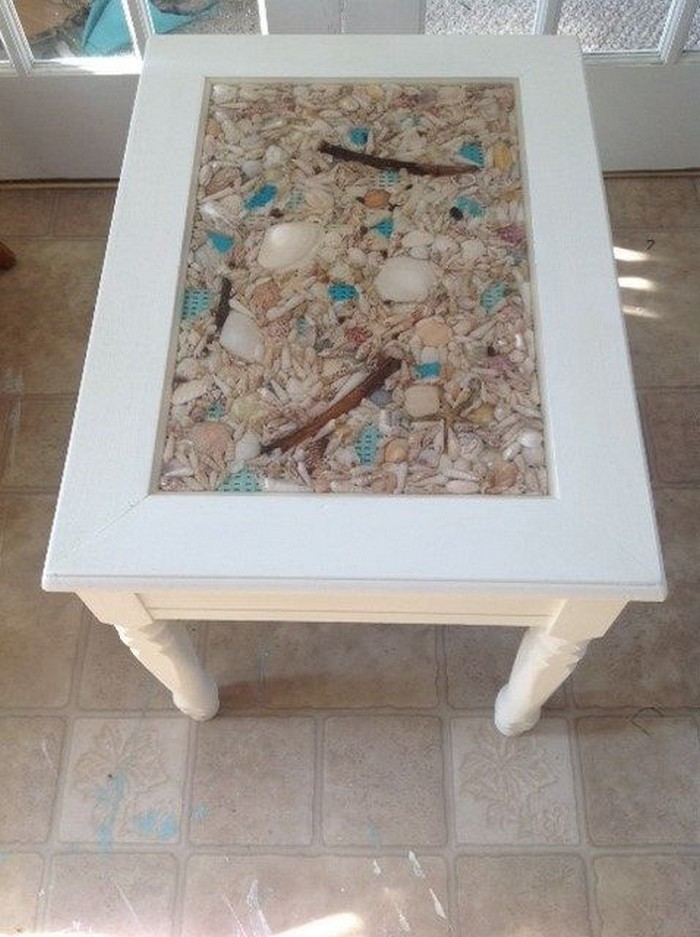
If you want to, you can also build a second, more suitable one for indoor use. Simply get a shadowbox table or modify an old table from a thrift store. By doing this, you can ensure that your family has a nice, sturdy piece of furniture that will last for many years. Aside from a coffee table, it can also be a side table, a display table or even a dining table.
This idea is definitely a cute project and a nice gift for anyone who just loves the beach!
Contents
Building a Seashell Table
Materials
- Shadowbox Table, or Terracotta Pot and Glass Top
- Bag of Sand
- Bag of Shells
- Paint of choice
- Styrofoam
- Cardboard
- Silicone Adhesive
Tools
- Cutter
Instructions
Step 1: Prepare the Base
- For Shadowbox Table: If you’re using a shadowbox table, start by painting the frame in your chosen color. Let it dry completely.
- For Terracotta Pot: If you’re using a terracotta pot, paint the exterior. Once dry, place a piece of cardboard cut to size over the top. This will support the glass top later.
Step 2: Add Styrofoam
Cut the styrofoam to fit inside your shadowbox or on top of the cardboard if using a terracotta pot. This layer will act as the base for your sand and shells, providing a lightweight yet stable structure.
Step 3: Layer Sand
Pour sand over the styrofoam, spreading it evenly. The sand will simulate a beachy foundation for your shells. Shake the table gently to settle the sand in place.
Step 4: Arrange Shells
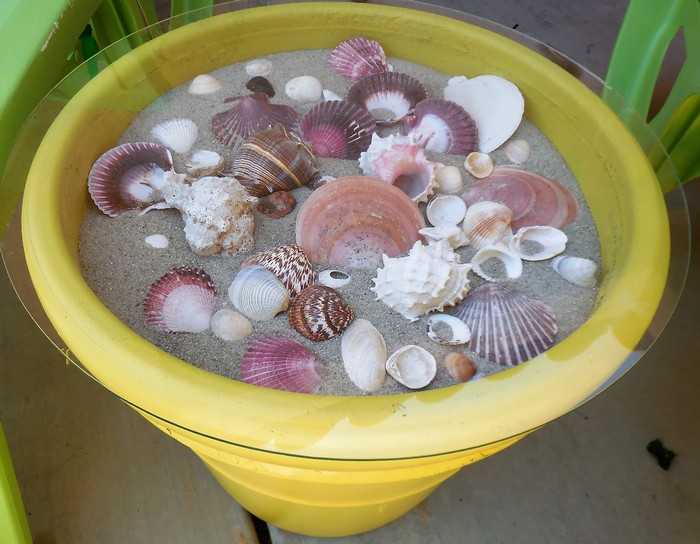
Strategically place your shells on top of the sand. You can create patterns, groupings, or simply scatter them for a natural look. For a more personalized touch, consider incorporating shells you’ve collected yourself.
Step 5: Secure Shells
Once you’re happy with the arrangement, use silicone adhesive to glue the shells in place. Be generous with the adhesive to ensure they’re firmly attached but avoid excess that could overflow onto visible areas. Allow it to dry as per the adhesive’s instructions.
Step 6: Seal with Glass Top
- For Shadowbox Table: Place the glass top back onto the table, securing it in its original fittings. This will protect your seashell arrangement from dust and damage.
- For Terracotta Pot: Carefully place the glass top on the cardboard, ensuring it’s centered and stable.
Step 7: Finishing Touches
If desired, apply a second coat of paint to the table’s legs or pot’s base for a fresh, polished look. Let everything dry completely before moving your new seashell table to its desired location.

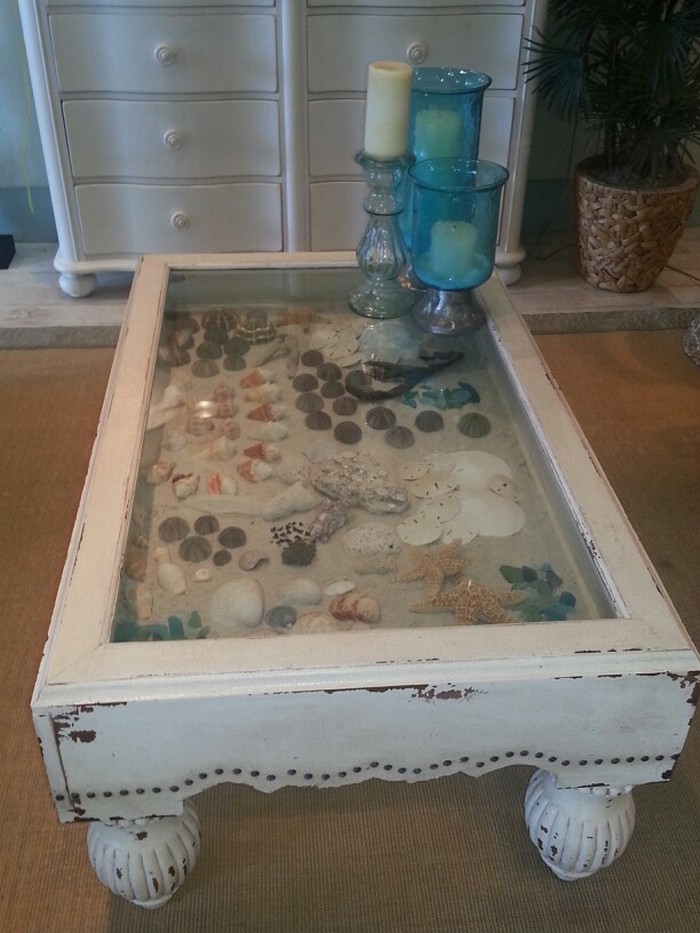
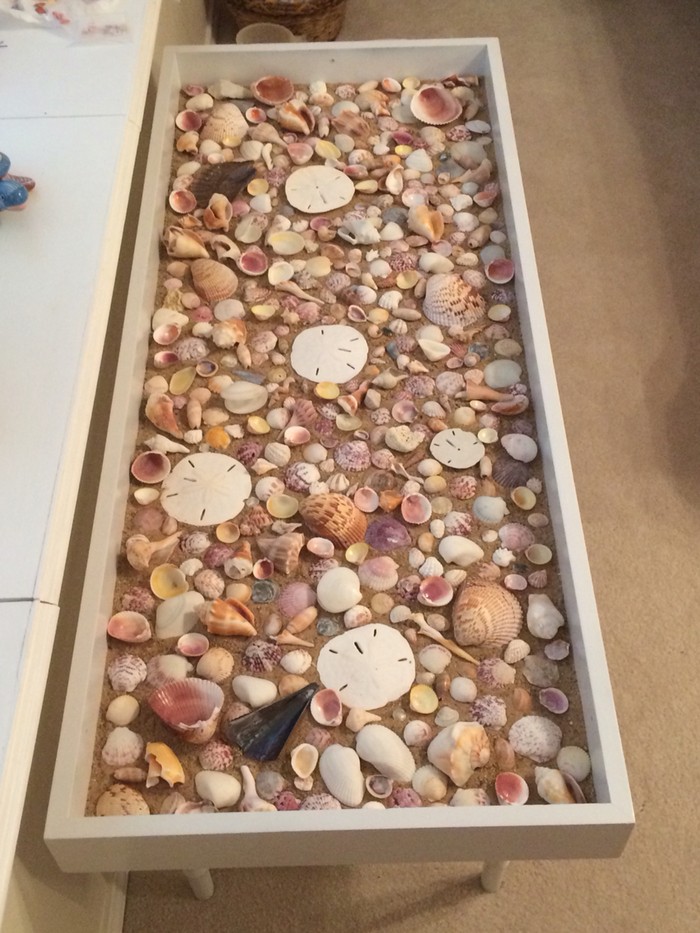
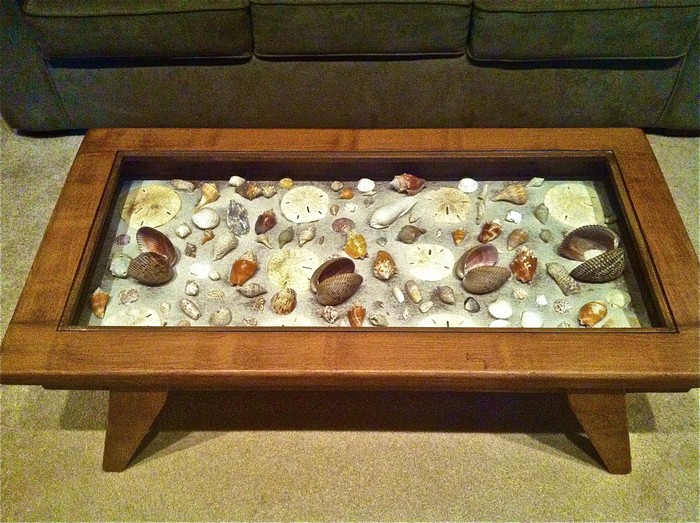
Click on any image to start the lightbox display. Use your Esc key to close the lightbox.![]()

Choosing the Right Seashells for Your Table
Creating your seashell table is not just a craft. It’s an art form since you’re bringing the beauty of a beach to your living room. The choice of seashells plays a crucial role in the overall aesthetic and vibe of the table. Different shapes, sizes, and colors of shells can evoke various feelings and create unique visual effects. Here’s how to choose the right seashells for your table, ensuring it becomes a statement piece that perfectly captures the essence of the ocean.
Understand Your Vision
You’re going to save much trouble coming up with the design of your seashell table if you know what kind of design you’re aiming for. Consider the mood you’re creating. Are you aiming for a tranquil, calming effect, or prefer a vibrant, lively beach scene? Your vision will guide your selection of seashells, influencing their colors, sizes, and types.
Consider Size and Shape
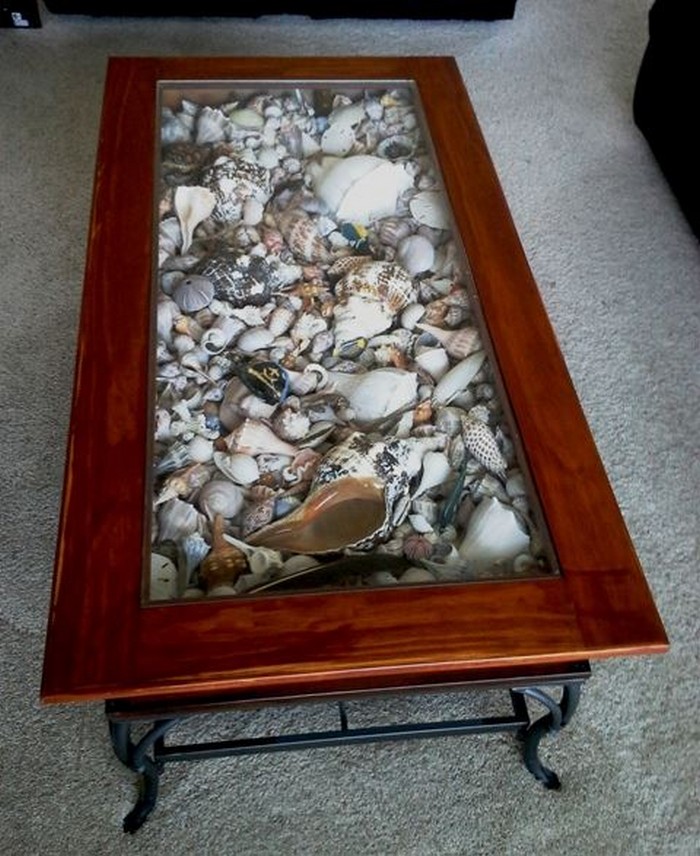
- Mix and Match: Combining large, medium, and small shells adds depth and texture to your table. More giant shells can serve as focal points, while smaller shells fill in gaps, creating a cohesive look.
- Shape Variety: Incorporate a variety of shapes to keep the eye moving and interested. Spiral shells, clamshells, and starfish (if you choose to include them) offer contrasting forms that enhance the table’s appeal.
Color Palette
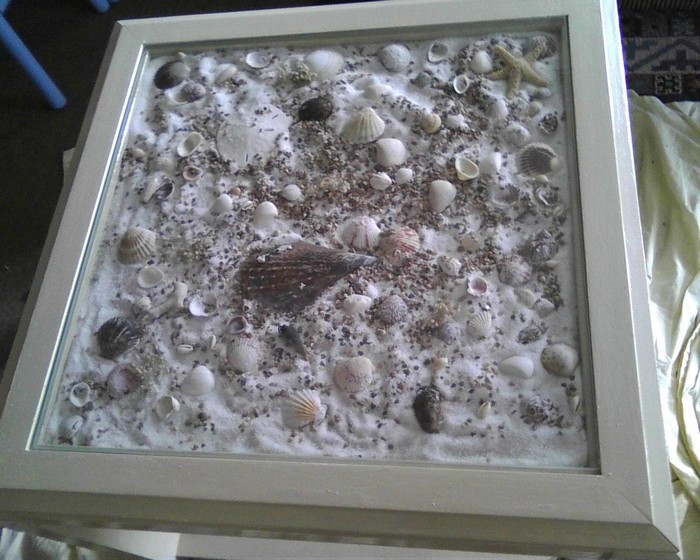
- Natural Hues: Stick to a natural color palette for a subtle, elegant look. Whites, creams, browns, and pinks complement each other beautifully and reflect the true colors of the beach.
- Colorful Accents: For a more playful table, intersperse brightly colored shells among the neutrals. Blue, green, and purple shells can add pops of color that mimic the ocean’s vibrancy.
Texture and Pattern
- Texture Variation: Include shells with different textures to add visual interest. Smooth shells paired with rough, ridged ones create an engaging tactile experience.
- Patterned Shells: Look for shells with exciting patterns or markings. These can become conversation pieces and add a unique touch to your table.
Sourcing Shells
- Ethical Considerations: Always source your shells ethically. Purchase from reputable dealers or collect them yourself, ensuring you’re not harming local ecosystems.
- Beachcombing Tips: If you’re collecting shells, do so responsibly. Take only what you need and leave behind any shells housing living creatures.
Preparing Your Shells
With the seashells picked, you will prepare them for the seashell table project.
- Cleaning: Clean your shells thoroughly to remove sand, dirt, or organic matter. A gentle rinse and a soak in a mild bleach solution can help.
- Drying: Allow your shells to dry completely before proceeding. This ensures the silicone adhesive will bond effectively.
By choosing the right seashells for your table, you’re not just building furniture; you’re crafting a piece of the beach that will add warmth and charm to your space. Whether aiming for a serene retreat or a lively coastal vibe, the perfect combination of seashells can bring your vision to life.
DIY Seashell Crafts to Complement Your Table
Creating a cohesive theme in your home decor can often begin with a single, inspiring piece, like a seashell table. To further accentuate this beachy vibe, engaging in DIY seashell crafts can add layers of charm and uniqueness to your living space. These crafts not only complement your seashell table but also spread the coastal elegance throughout your home.
Here, we explore some enchanting DIY seashell crafts that can beautifully accompany your seashell table.
Seashell Candle Holders
Materials Needed: Small jars or votives, seashells, hot glue gun.
Instructions:
- Select seashells that match the ones on your seashell table to maintain a unified theme.
- Use a hot glue gun to attach the seashells around the outside of the jars or votives.
- Place candles inside the jars. These candle holders can be arranged on or around your seashell table to add a warm, glowing ambiance.
Seashell Picture Frames
Materials Needed: Wooden picture frames, seashells, hot glue gun.
Instructions:
- Paint the picture frames in colors that complement your seashell table.
- Once the paint has dried, arrange seashells around the frame. Use a hot glue gun to secure them in place.
- Display pictures from beach vacations in these frames and place them on your seashell table for a personal touch.
Seashell Mirrors
Materials Needed: Plain mirror, seashells, silicone adhesive.
Instructions:
- Arrange seashells around the edge of the mirror, planning your layout before you begin attaching.
- Use silicone adhesive to attach the seashells securely.
- Once dry, hang the mirror above your seashell table to create a focal point that echoes the table’s coastal theme.
Seashell Wind Chimes
Materials Needed: String, seashells with holes (or drill small holes in them), a stick or driftwood.
Instructions:
- Tie the string to the stick or driftwood. Ensure it’s sturdy enough to hold the weight of the seashells.
- Thread seashells onto the strings at varying lengths. Knot the string below each shell to keep them in place.
- Hang the wind chimes near a window or on a porch where breezes can catch them, creating a serene soundscape reminiscent of the seaside ambiance your seashell table embodies.
Incorporating these DIY seashell crafts into your decor not only enhances the beauty of your seashell table but also spreads the coastal charm throughout your home. Each piece serves as a testament to your creativity and love for the beach, making your space uniquely yours.
Conclusion
Building a seashell table not only adds a unique and personalized touch to your home decor but also brings a piece of the serene beach atmosphere into your living space. It’s a creative project that allows for endless customization, ensuring that each table reflects the maker’s style and connection to the sea. With the right materials, a bit of creativity, and a passion for the beach, anyone can create a beautiful seashell table that serves as a focal point in their home for years to come.
For more fun table ideas, check out our puzzle coffee table project!