Last Updated on May 27, 2024 by teamobn
There’s nothing like a good board game to bring the family together. Whether you’re playing classic games like Monopoly or newer ones like Settlers of Catan, board games are a great way to bond with your loved ones. And don’t forget about card games!
Whether you’re playing a classic like Go Fish or a newer game like Exploding Kittens, card games are a great way to have fun and spend time with your family. So next time you’re looking for a way to bond with your loved ones, break out a board game or a deck of cards and have some fun!
If you love spending time with friends and family, and bonding over board games, then this furniture project is for you! By creating a custom gaming table, you can have the perfect spot for your next game night. Plus, this project is relatively easy to complete, so you can get started on it right away.
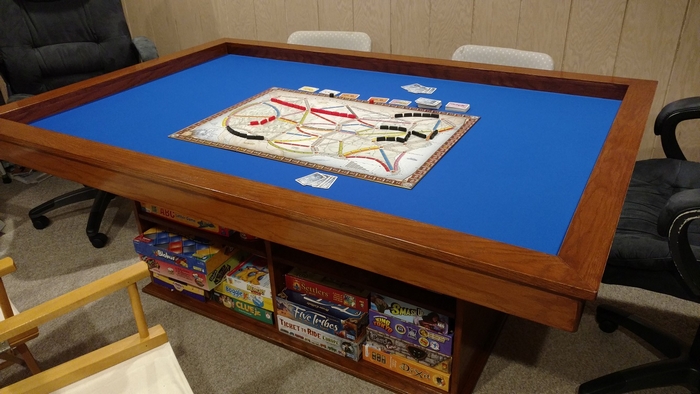
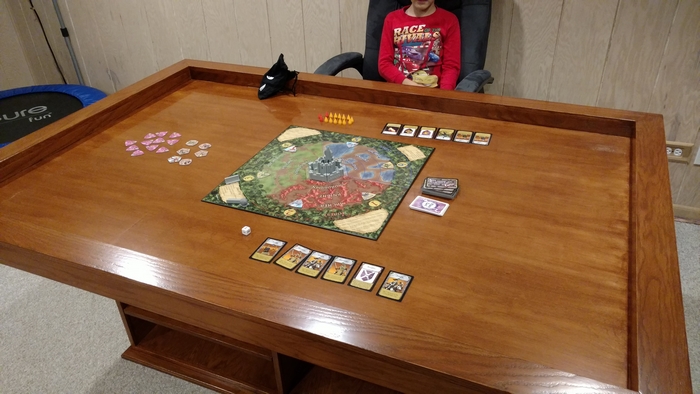
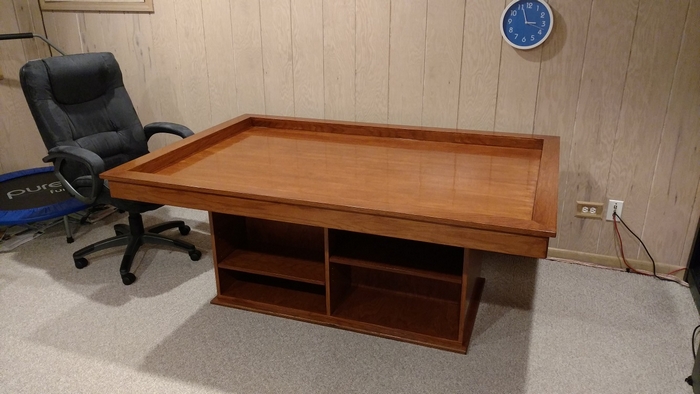
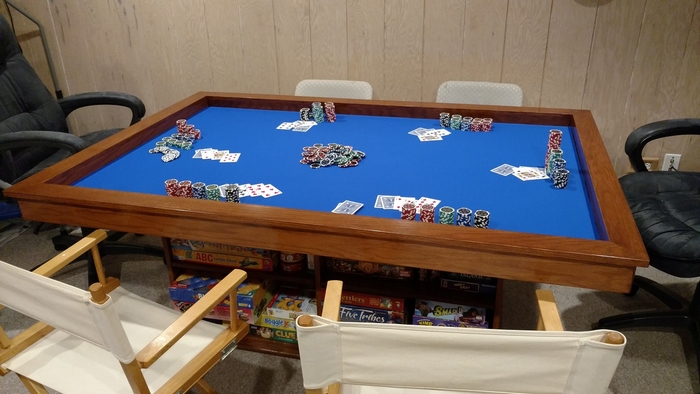
This custom-made gaming table is the perfect solution for board game enthusiasts who want plenty of space for their games, cards, and chips. Measuring 4’x6′, the table offers a spacious surface that can accommodate up to six people. The sturdy construction and smooth finish make it easy to keep the playing surface clean and free of debris, while the raised edges help prevent items from sliding or falling off the table.
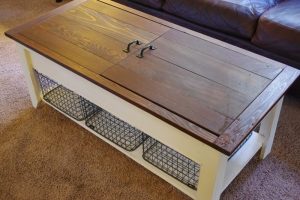
This gaming table with shelves is the perfect way to keep all your board games organized and within easy reach. The shelves provide ample storage space for all your games, while the clear design lets you easily see and access the ones you want to play. This table is a great way to save space and make your gaming experience more enjoyable.
Now it may seem like a professionally made gaming table, very similar to the real ones you can find out there. This DIY gaming table project is easier than it looks! You don’t need a full workshop with a table saw, a planer, a drill press, or what have you. With just simple tools, you can make your gaming table with storage!
This project is perfect for anyone who loves gaming and wants a beautiful, functional piece of furniture. With a little bit of creativity, you can have a stunning table that will be the envy of all your friends. Plus, the added storage is perfect for keeping all your gaming paraphernalia organized and within easy reach.
Contents
Building a Gaming Table
Materials
- 1 sheet – 1/2″ Plywood (4′ x 8′)
- 7 pcs – 2″x4″x8′ Boards; plain wall framing kind
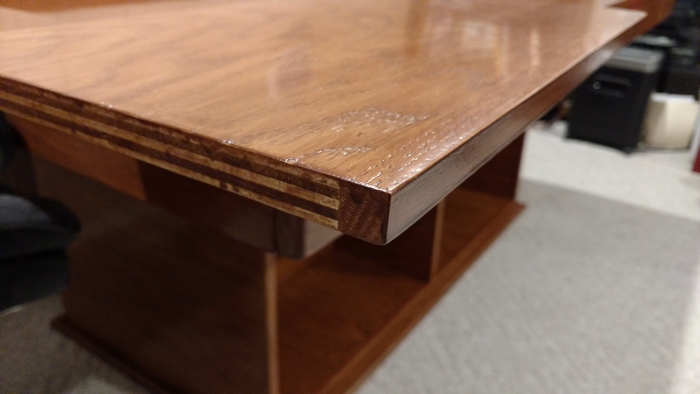
- 2 pcs – 3/4″x2″x4′ Red Oak Lumber
- 2 pcs – 3/4″x2″x4′ Poplar Lumber
- 2 pcs – 3/4″x2″x6′ Red Oak Lumber
- 2 pcs – 3/4″x2″x6′ Poplar Lumber
- 4 pcs – 3/4″x4″x4′ Red Oak Lumber
- 4 pcs – 3/4″x4″x6′ Red Oak Lumber
- Roll of 3mm Neoprene Rubber Mat (with nylon on one side; optional)
- Wood Glue
- Wood Screws (1.25″ and 2.5″)
- Stain
- Urethane
- Brushes
Materials for the Base
- 2 sheets – 3/4″ Red Oak Plywood (4’x8′)
- Shelf Pins
- One 3/4″x4″x6′ Red Oak Lumber for Trim (optional)
Tools
- Circular Saw
- Router
- Random Orbital Sander
- Drill
- Clamps
- Hammer and Brads (Trim Nails)
Instructions
Step 1: Design and Planning
- Sketch out your design, including dimensions and storage spaces. Determine the size of your gaming surface and storage compartments.
Step 2: Cutting Materials
- Using the circular saw, cut the 1/2″ plywood to create the tabletop surface. This will likely be the size of your 4’x8′ sheet, but you can adjust according to your space needs.
- Cut the 2″x4″ boards to form the frame supporting the table. These will create the base structure.
- Cut the red oak and poplar lumber according to the detailed specifications of your design, typically for legs, trim, and additional features.
Step 3: Assemble the Frame
- Assemble the 2″x4″ boards into a frame using wood screws and glue. Ensure it’s sturdy enough to support the tabletop and additional weight.
- Attach the legs, using the larger pieces of red oak lumber. Secure them with screws and ensure they are stable and even.
Step 4: Attaching the Tabletop
- Place the plywood on top of the frame. Ensure it is centered.
- Secure the plywood to the frame using wood screws, evenly spaced to provide adequate support across the surface.
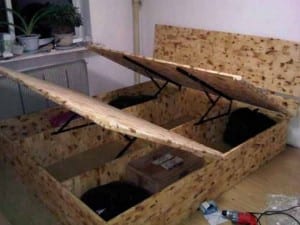
Step 5: Adding the Storage
- Use the additional oak and poplar pieces to create dividers and storage compartments under the tabletop. Install shelf pins for adjustable shelves if desired.
- Secure all pieces with wood glue and screws.
Step 6: Sanding
- Use the random orbital sander to smooth all surfaces, edges, and corners. This prevents splinters and prepares the wood for finishing.
Step 7: Finishing Touches
- Apply wood stain evenly with a brush. Let it dry according to the stain instructions.
- Once dry, apply a coat of urethane to protect the wood and give it a polished look. Allow it to dry completely.
Step 8: Adding the Neoprene Mat
- If using, cut the neoprene rubber mat to fit the tabletop size. Attach it to the plywood surface using glue for a smooth, cushioned playing area.
Step 9: Final Assembly
- If you have additional trim, now is the time to attach it around the edges of the table and any exposed areas for a cleaner, more finished look.
Step 10: Inspection and Cleanup
- Inspect the table for any sharp edges or loose screws. Clean up your workspace and your new gaming table is ready to use!
Click on any image to start the lightbox display. Use your Esc key to close the lightbox. ![]()


Technology Integration
Integrating technology into your gaming table can significantly enhance the gaming experience by adding convenience, functionality, and a modern touch.
Here’s how you can embed various technological features into your gaming table to make it a centerpiece for both gaming and social gatherings.
Built-in Screen Displays
Consider installing a flush-mounted screen within the surface of your gaming table. This can be used for digital board games, displaying game rules, or even keeping score. It transforms your gaming table into a versatile platform for both traditional and digital games. Ensure the screen is durable and protected against spills or scratches with a custom cover when not in use.
Charging Stations
A gaming table with integrated charging stations is perfect for long gaming sessions. Include USB ports and power outlets in discreet areas of the table. This setup allows players to charge smartphones, tablets, or other electronic devices without leaving the game. It keeps the gaming area organized and ensures all devices are powered up at all times.
LED Lighting
Adding LED lighting to your gaming table can create an immersive gaming atmosphere. Install programmable LED strips beneath the table’s edge or around the play area. You can adjust colors and patterns depending on the game or mood. This not only enhances the visual appeal but also improves visibility during low-light conditions.
Sound Systems
Integrate a high-quality sound system within your gaming table. Concealed speakers can be installed underneath the table surface to provide surround sound without disrupting the table’s aesthetics. This feature is great for playing game-themed music, enhancing video game audio, or simply playing background music during a game night.
Each of these technological integrations will make your gaming table not just a piece of furniture, but a central hub for entertainment and enjoyment. Whether you’re rolling dice or charging a device, your gaming table will keep everyone engaged and entertained.
Ergonomics and Comfort
You want the group to be comfortable at all times while playing any game, which is where ergonomics come in. The right design of your gaming table will reduce any strain on a person’s body.
Below are ways on making your table ergonomically designed.
Optimal Table Height
The height of your gaming table should accommodate the average sitting position comfortably. A typical height ranges from 28 to 30 inches, allowing ample legroom and easy access to the table surface without straining. Test different heights to see what works best for your primary users, ensuring a natural posture without the need for excessive reaching or bending.
Adequate Surface Area
Every participant should be able to quickly reach the game components thanks to the gaming table’s large surface area. To prevent pain and a worse game experience, make sure there is ample room around the board or playing area. Larger tables also allow participants to store personal belongings, beverages, and snacks without cramming the game area.
Comfortable Seating
Make an ergonomically designed chair investment to match with your gaming table. Every player should be able to comfortably fit into a chair that offers enough back support and, if at all feasible, is adjustable. For longer sitting sessions, think about armrests and cushioned chairs.
Arm and Wrist Support
Ensure that the edges of the gaming table are designed to comfortably support players’ arms and wrists. Rounded or padded edges can prevent discomfort and potential strain injuries from long hours of gameplay. This small detail can greatly enhance the ergonomic quality of your gaming table.
By focusing on these ergonomic and comfort aspects, your gaming table will not only be a focal point for gaming but also a comfortable and inviting space for players to gather and enjoy long hours of entertainment.
Conclusion
Customizing every aspect of your own gaming table to fit your tastes and favorite game genres is possible. The method not only produces a useful piece of furniture but also gives your gaming sessions a more intimate feel. Your buddies will be envious of your game table if you use the correct supplies, equipment, and a little imagination.
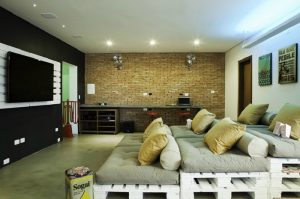
We have more ways to make memorable family night. Check out our movie theater project next!