Last Updated on May 1, 2024 by teamobn
Steps on how to build a dry stack wood-fired pizza oven comfortably in one day!
Step 1: Build your base

As with any construction, your dry stack wood-fired pizza oven base (or foundation) is the most critical element. Ensure your stacks are on firm ground and that they are level or your oven will not be! The centre column of blocks is needed to ensure there is no sag in your oven floor.

Your chosen height will be dependent on both your block size and also personal preference. Being tall, I like a working surface of 90 – 95 centimetres.
Step 2: The cooking base
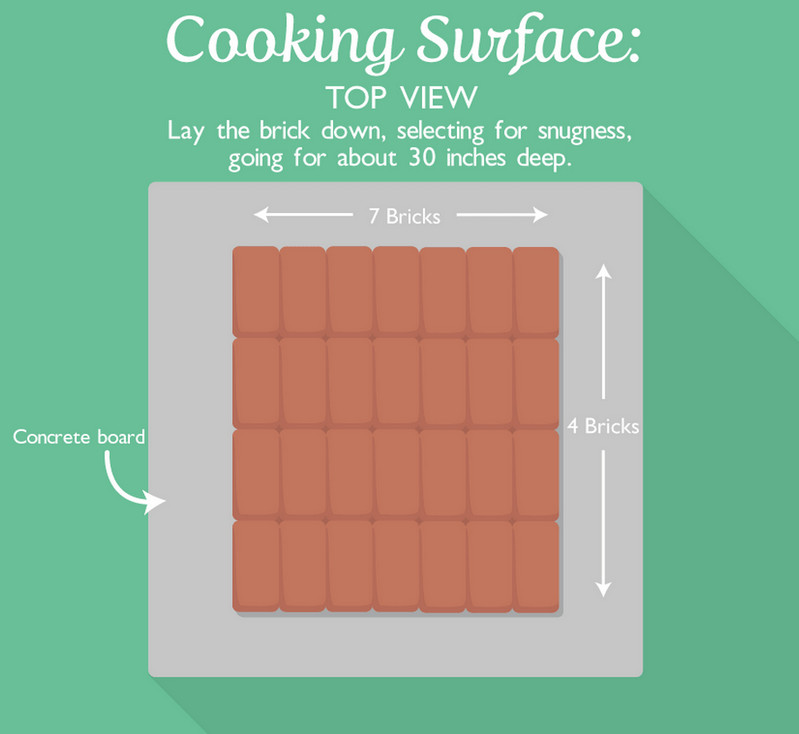
This layer of bricks allows air to circulate beneath the dry stack wood-fired pizza oven’s flames and also is essential in building and retaining the heat needed for great pizza and bread.
Step 3: Constructing the oven walls
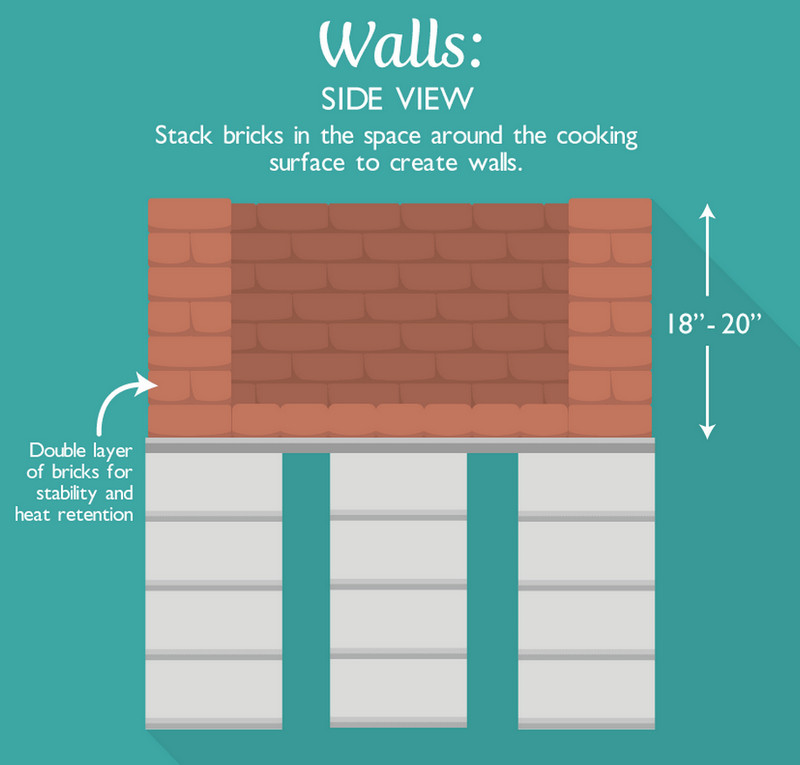
Ensure you use a running bond pattern for your bricks or your walls will lack stability. The double layer is also a stability factor as well as a much better retainer of heat.
Step 4: Adding the dry-stacked brick roof
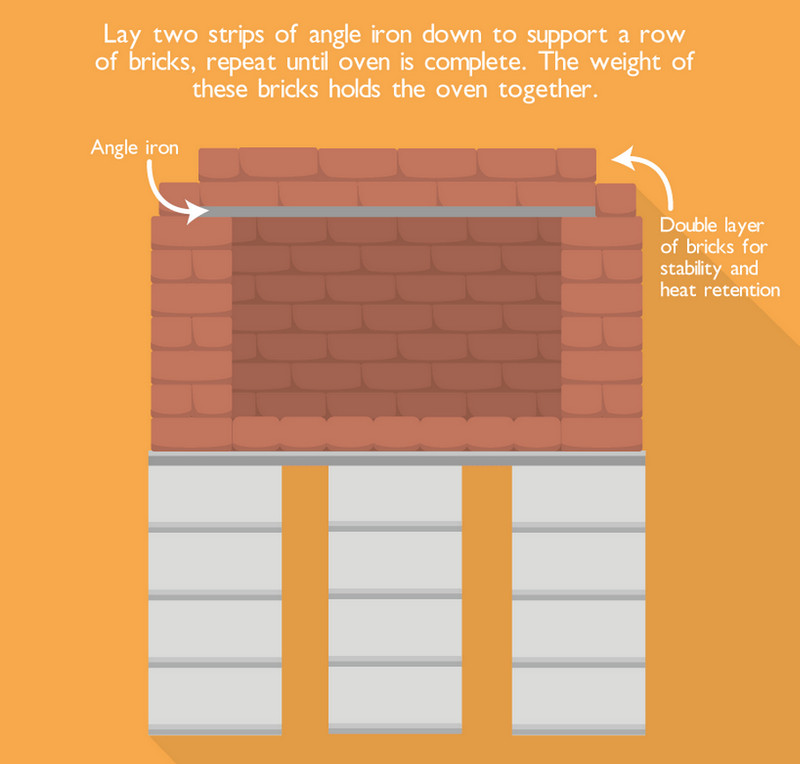
Your dry stack wood-fired pizza oven won’t get hot without a way to trap the heat. Since heat rises, you need sufficient mass above the flames to trap and retain the heat. That mass is heavy, hence the need to use angle iron to support each layer of bricks.
Step 5: Find your favourite pizza and bread recipes and start cooking!
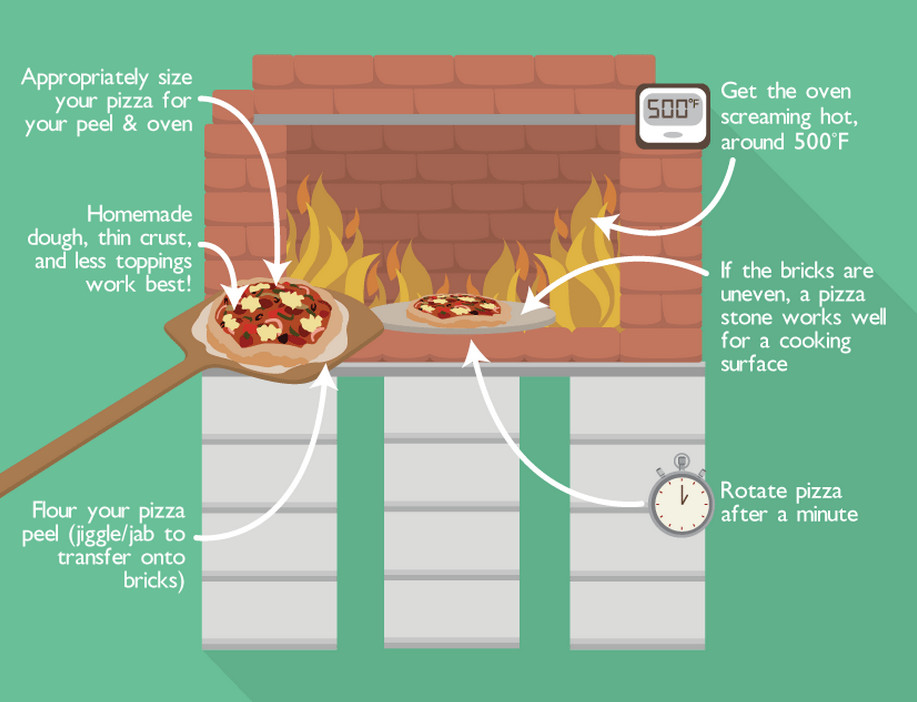
A quick search is going to find lots of great recipes you can cook in a wood-fired pizza oven. Pieces of bread and pizzas are just the start. Try roasting your vegetables and meats in an oven like this and you’ll be hooked! Check out a few of the recipe ideas in our food blog called Food, glorious food!
Because there is no thermostat to regulate the heat in your new dry stack wood-fired pizza oven, expect to go through an initial ‘trial and error’ period until you work out the right combination of time and heat. It won’t take long and then you have years of gastronomic enjoyment ahead of you 🙂
Thanks to our friends at Fix.Com for allowing us to share this great project.
Paul Corsetti is a landscape designer and design consultant. Paul holds a Bachelor’s Degree in Architectural Science, a diploma in Landscape Architecture, and years of experience in the landscape construction field. He is an avid gardener and outdoor enthusiast and believes keeping close to nature will sharpen his skills as a designer.
DIY Challenges and Common Mistakes to Avoid
Building your own dry stack wood-fired pizza oven can be a rewarding DIY project that adds a unique feature to your backyard. However, it’s important to approach this task with careful planning and awareness of common pitfalls.
Below, we explore some typical challenges and mistakes to avoid, ensuring your oven is both functional and durable.
Improper Foundation
- Challenge: One of the most critical steps in building a dry stack wood-fired pizza oven is ensuring a stable and level foundation.
- Mistake to Avoid: Skimping on this step can lead to structural issues later, as an uneven base might cause your oven to settle improperly, potentially leading to cracks or uneven cooking surfaces.
- Solution: Always start with a solid foundation. Clear the ground of any debris and use a level to ensure the base is perfectly flat. Consider laying a concrete foundation if you’re not confident in the stability of the ground.
Inadequate Materials
- Challenge: Choosing the right materials is crucial for the efficiency and longevity of your dry stack wood-fired pizza oven.
- Mistake to Avoid: Using the wrong type of bricks or mortar can result in an oven that doesn’t retain heat well or, worse, deteriorates quickly under high temperatures.
- Solution: Opt for high-quality fire bricks and refractory mortar specifically designed to withstand high temperatures. Avoid using regular clay bricks or standard mortar, as these can crack and degrade quickly.
Incorrect Oven Dimensions
- Challenge: The size and shape of your oven are essential for optimal airflow and heat retention.
- Mistake to Avoid: Making the oven too small can limit the cooking space, while too large an oven may take longer to heat up and require more wood.
- Solution: Follow a tested design or template for your dry stack wood-fired pizza oven. Ensure the dimensions allow for efficient air circulation and heat distribution.
Poor Insulation
- Challenge: Insulation is key to maintaining high temperatures needed for that perfect crispy pizza crust.
- Mistake to Avoid: Neglecting to insulate your oven properly can lead to heat loss, which means longer cooking times and higher wood consumption.
- Solution: Use layers of insulating materials such as ceramic fiber blankets or vermiculite around the oven chamber. This setup helps in retaining the heat where it’s needed the most.
Ignoring Safety Measures
- Challenge: The construction and use of a dry stack wood-fired pizza oven involve high temperatures and heavy materials.
- Mistake to Avoid: Overlooking safety can lead to accidents during both the building and cooking processes.
- Solution: Wear protective gear when constructing and operating your oven. This includes work gloves, safety glasses, and sturdy footwear. Ensure your working area is well-organized and free of hazards.
By being aware of these challenges and taking steps to avoid common mistakes, you can successfully build a dry stack wood-fired pizza oven that will be a source of pride and delicious meals for years to come.
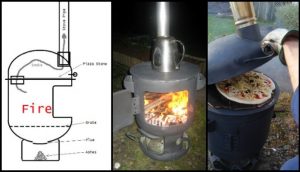
If you have any suggestions or comments, just scroll down to the comments box below. We also have more pizza oven projects. Check out our propane tank pizza oven guide!