Last Updated on March 14, 2024 by teamobn
Do you need an affordable and easy-to-build trellis solution? Check out this great DIY option – a Hoop House Trellis. This trellis is perfect for those who want a functional and attractive option without spending a lot of money.
This hoop house trellis is made from materials that can withstand outdoor conditions for a good number of years, this trellis gives you great value for your money. This is ideal for growing tomatoes, sweet peas, cucumbers, and many more.
Contents
Crafting Durable Hoop House Trellises for Long-lasting Garden Enjoyment
In the pursuit of creating thriving garden spaces, the choice of materials for structures like hoop house trellises plays a pivotal role. These trellises not only provide support for climbing plants but also serve as enduring features that contribute to the overall aesthetic appeal of the garden.
Constructed from robust materials capable of withstanding outdoor conditions, hoop house trellises offer exceptional value for gardeners seeking reliable, long-lasting solutions. Specifically designed to accommodate a variety of plants, including tomatoes, sweet peas, cucumbers, and more, these trellises serve as versatile assets in the garden landscape.
Selecting Durable Materials
The foundation of a sturdy hoop house trellis lies in the choice of materials. Opting for weather-resistant materials such as galvanized steel, pressure-treated wood, or UV-stabilized plastics ensures longevity and durability.
These materials are capable of withstanding exposure to sunlight, moisture, and fluctuating temperatures without succumbing to degradation or structural compromise.
By investing in high-quality materials, gardeners can rest assured that their hoop house trellises will stand the test of time, providing enduring support for years to come.
Construction Techniques for Longevity
In addition to selecting durable materials, employing sound construction techniques is essential for maximizing the lifespan of hoop house trellises.
Utilizing corrosion-resistant fasteners such as stainless steel screws or galvanized nails ensures secure attachment of structural components, preventing loosening or detachment over time.
Reinforcing critical junctions and stress points with additional bracing or support structures enhances the overall stability and resilience of the trellis, minimizing the risk of damage or failure.
Resistance to Outdoor Elements
Hoop house trellises are exposed to a wide range of outdoor conditions, including sunlight, rain, wind, and temperature fluctuations.
Choosing materials with inherent resistance to these elements is crucial for ensuring the long-term performance and integrity of the trellis.
UV-resistant plastics, treated lumber, and corrosion-resistant metals are all excellent choices for withstanding prolonged exposure to sunlight and moisture without deteriorating or warping.
Versatility for Growing a Variety of Plants
The robust construction of hoop house trellises makes them well-suited for supporting a diverse range of climbing plants, including tomatoes, sweet peas, cucumbers, and more.
The vertical orientation of the trellis maximizes growing space, allowing gardeners to cultivate multiple varieties of plants in a compact footprint.
By training plants to climb the trellis, gardeners can promote healthy growth, improve air circulation, and optimize sunlight exposure, resulting in higher yields and superior plant performance.
Maximizing Value for Gardeners
Hoop house trellises constructed from durable materials offer exceptional value for gardeners, providing a reliable and long-lasting solution for supporting climbing plants.
Unlike flimsy or temporary structures that require frequent maintenance or replacement, these trellises offer peace of mind and enduring performance, making them a worthwhile investment for garden enthusiasts.
By choosing materials that can withstand outdoor conditions for a good number of years, gardeners can enjoy the benefits of their hoop house trellises season after season, maximizing the return on their investment.
A well-constructed hoop house trellis crafted from durable materials is an invaluable asset in any garden space. Designed to withstand outdoor conditions for years to come, these trellises offer exceptional value for gardeners seeking reliable support for a variety of climbing plants. From tomatoes and sweet peas to cucumbers and beyond, the versatility of hoop house trellises makes them indispensable features in the garden landscape.
By investing in quality materials and sound construction techniques, gardeners can create trellises that not only enhance the beauty of their gardens but also provide enduring support and enjoyment for years to come.
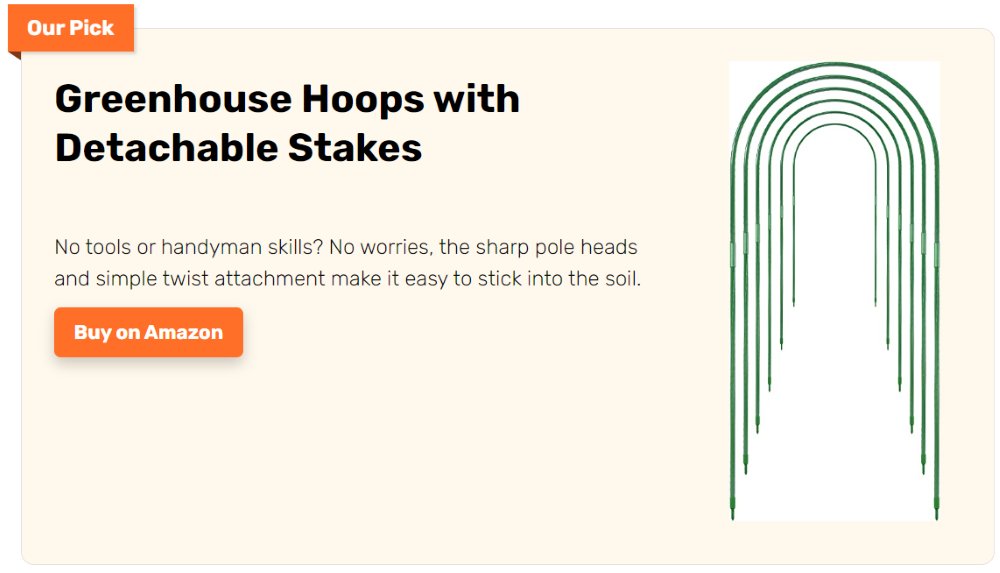
Thinking of adding a hoop house trellis to your garden? Then this project might be for you!
Click on any image to start the lightbox display. Use your Esc key to close the lightbox.![]()


You’ll need these materials:
- 3 pieces 1 1/4″x10′ UV Resistant Electrical Pvc Pipe
- 10 pieces 3/4″x10′ UV Resistant Electrical Pvc Pipe with connectable ends
- PVC Plumbing Adhesive
- 2 3’x50′ Galvanized welded wire fence
- Pack of Rebar Ties
And these tools:
- Measuring Tape
- String
- Saw
- Wire Cutters
- Gloves
- Sledge Hammer
- 2×4 Scrap piece
Steps:
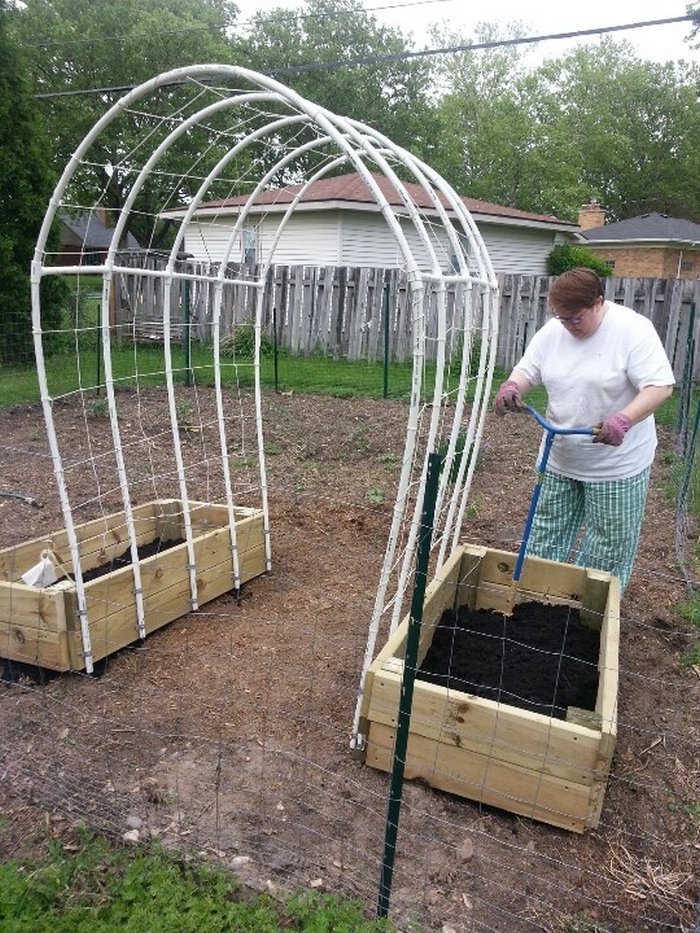
Prep the soil for growing your crop. Preparing the soil for growing your crop is an important step in ensuring a successful harvest. The first step is to remove any large rocks or debris that could impede plant growth. Next, till the soil to a depth of about 8 inches to loosen it and help roots penetrate more easily. Finally, add organic matter such as compost or manure to help improve the soil’s nutrient content and drainage. By taking the time to properly prepare the soil, you will be rewarded with a bountiful harvest come harvest time.
Glue 2 lengths of the 3/4″ pipe together (repeat 4 more times to get five 20′ long pipes) and allow to cure for 24 hours. Cut the 1 1/4″ pipe to 2 1/2′ lengths.
Measure a 10′ by 7′ area and create line guides making sure to square the corners.
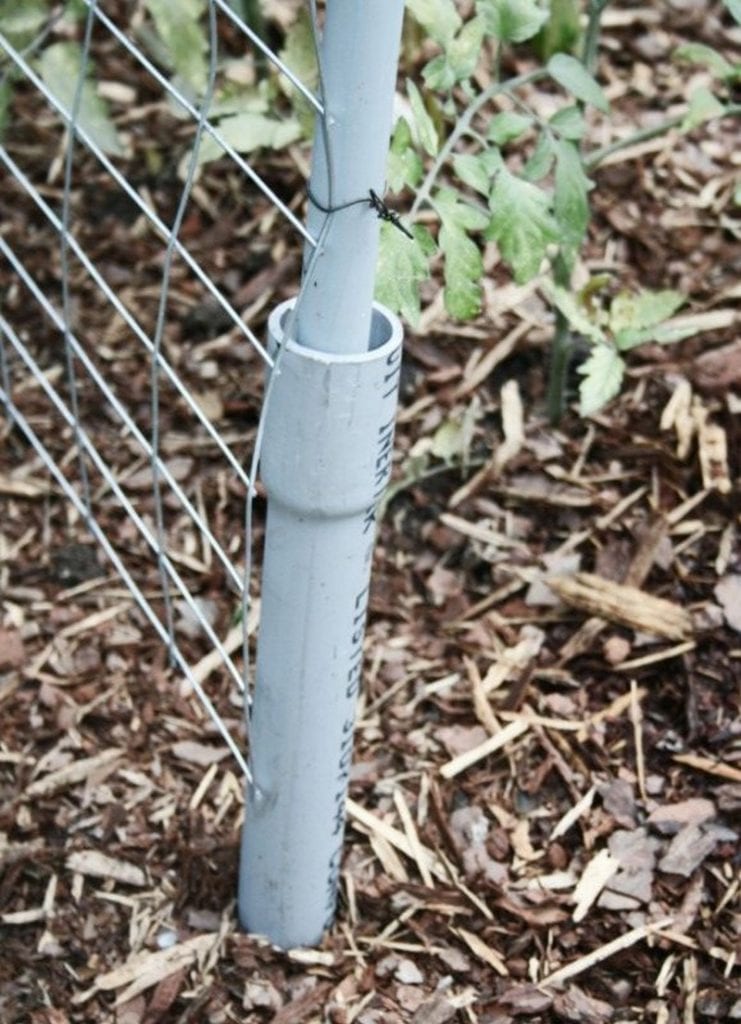
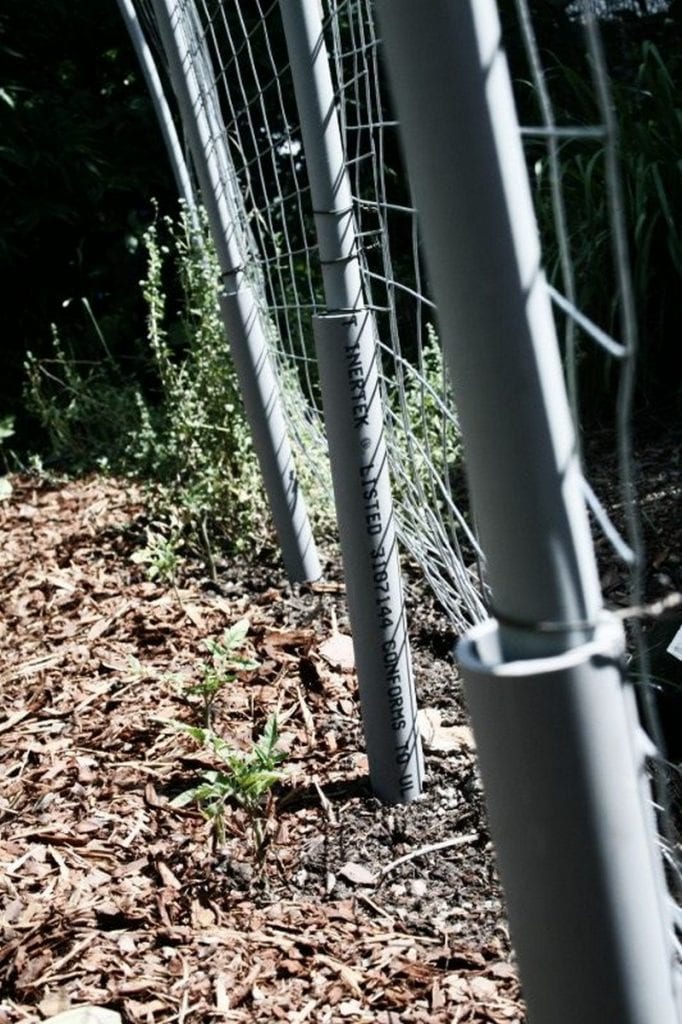
At 2′ intervals along the long side of the measured area, pound the 1 1/4″ pipe into the ground using a piece of 2×4 for cushioning so as not to damage the pipe.
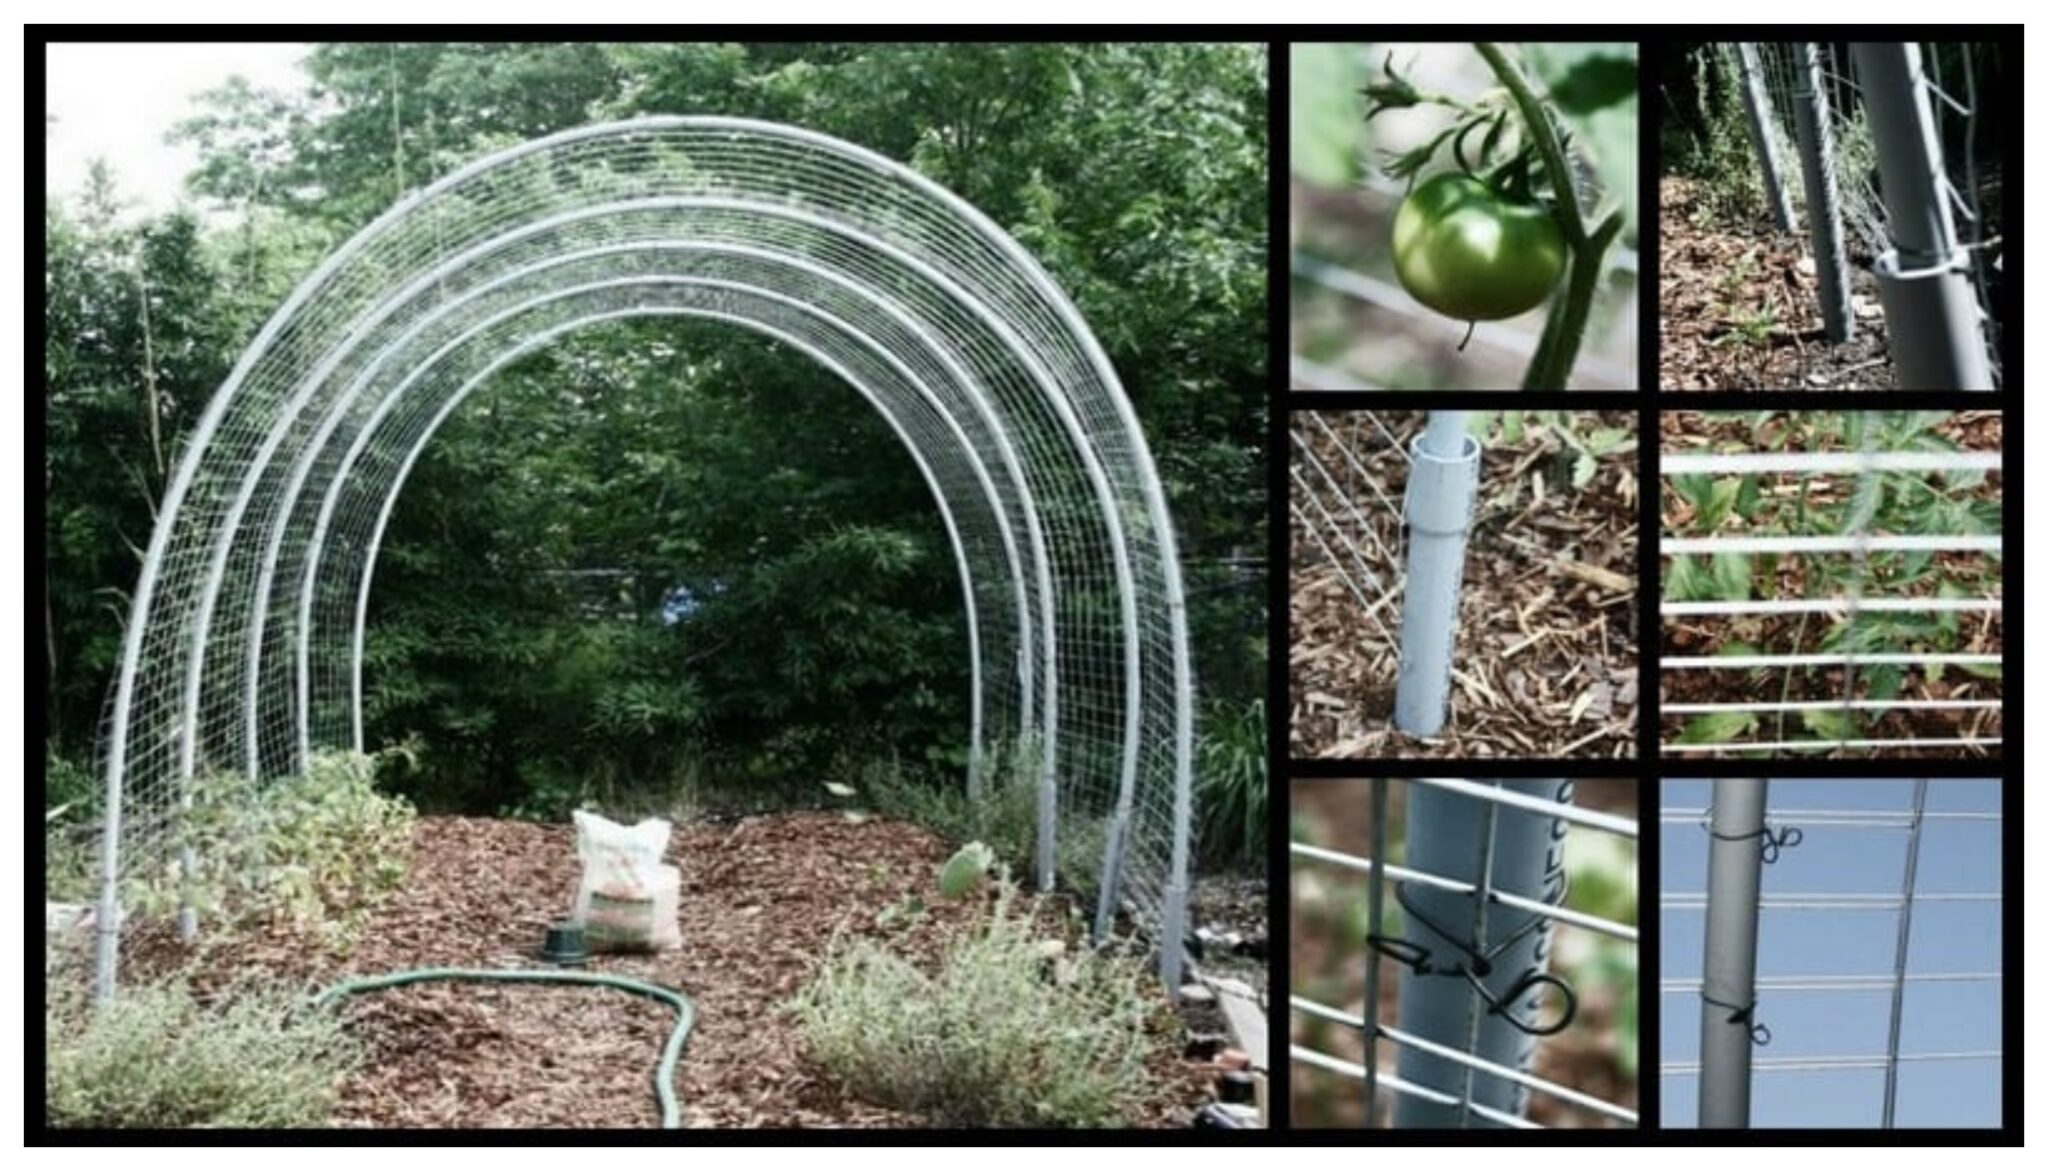
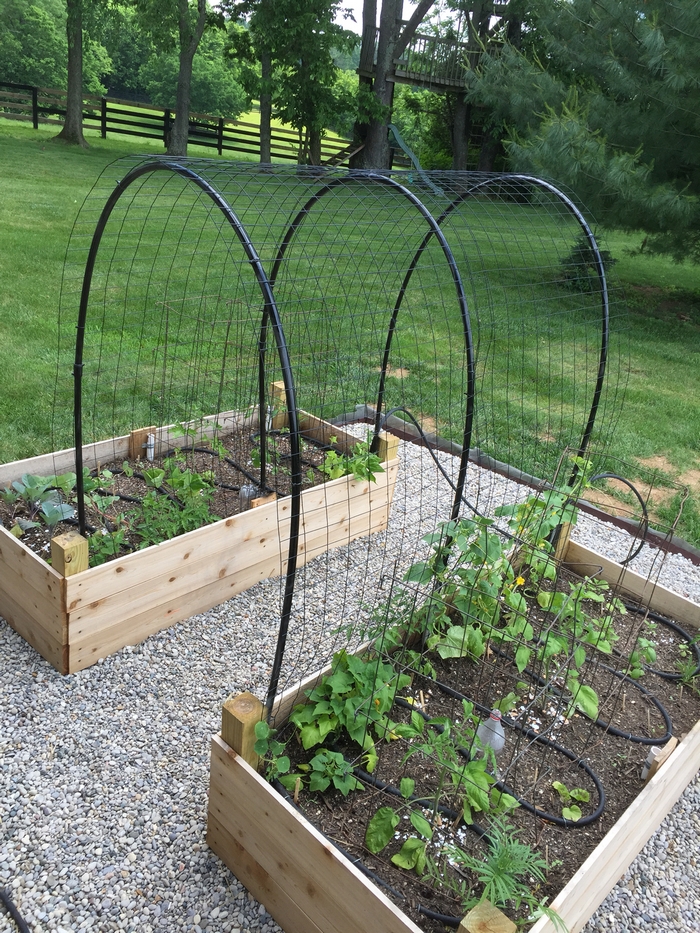
Insert the 3/4″ pipe into the 1 1/4″ pipes creating the hoop.
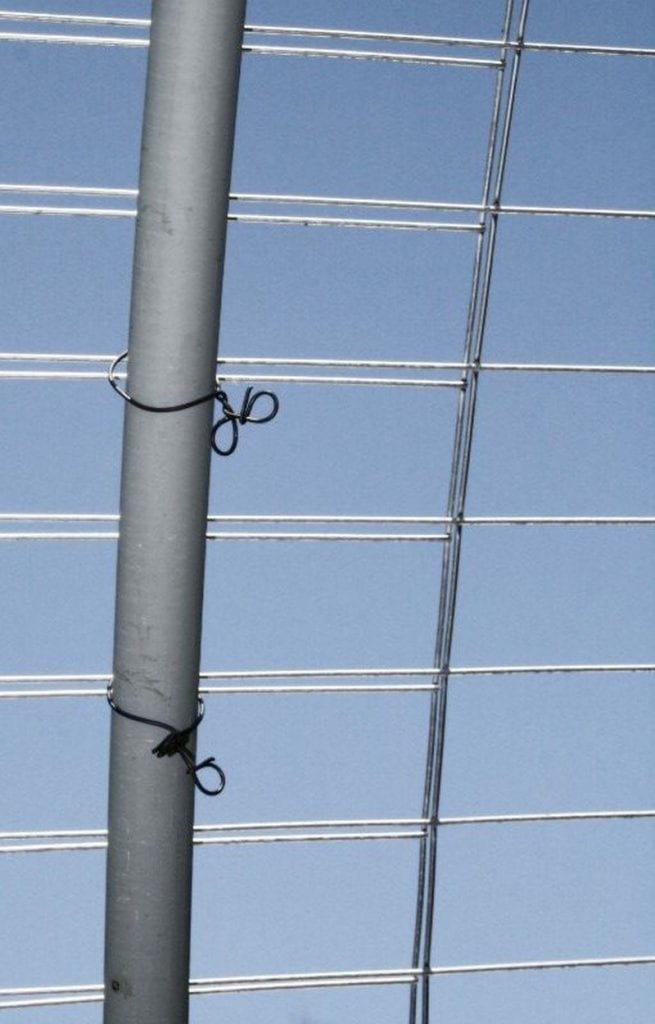
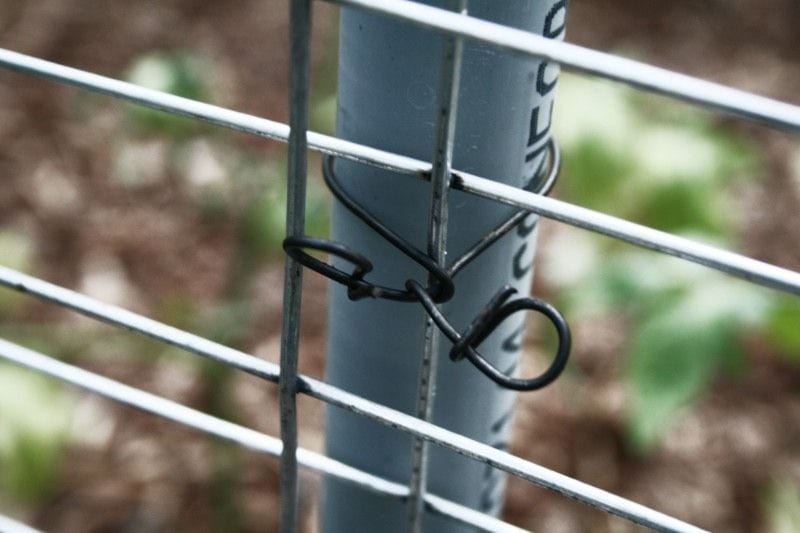
To secure the wire fence to the hoops, first span the fence over the hoops. Then, use rebar ties to attach the fence to the pipe. This will create a secure and reliable structure.


With this hoop house trellis, you can plant your vegetables or ornamentals or whatever! Not only will you enjoy the process of caring for your plants, but you’ll also get to enjoy the fruits (or vegetables) of your labour. Plus, gardening can be a great way to get some exercise and fresh air. Have fun and enjoy it!
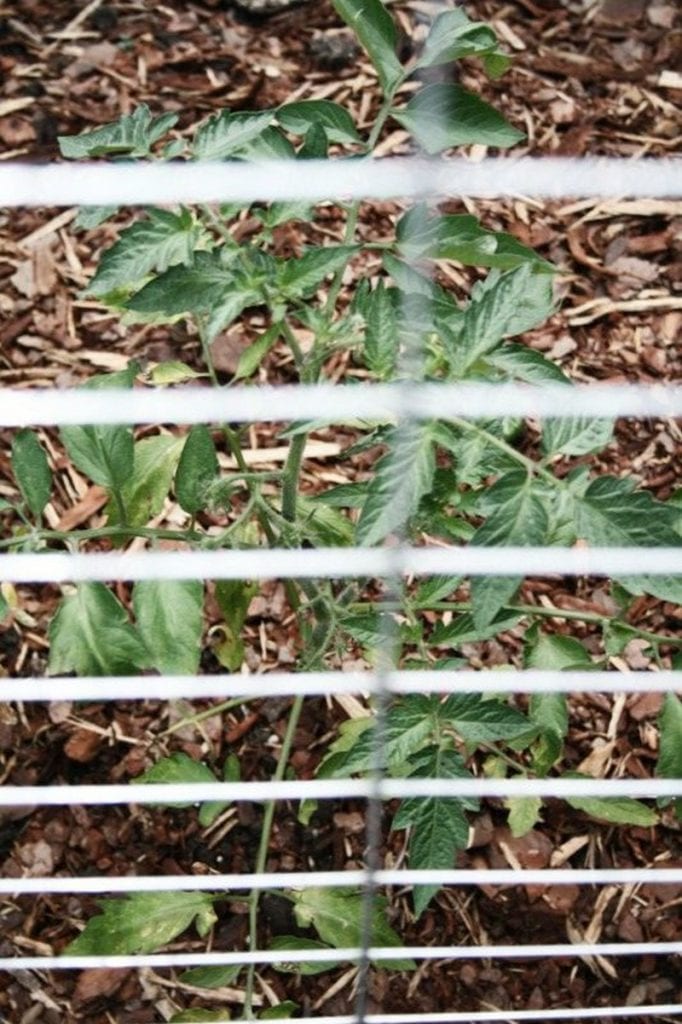
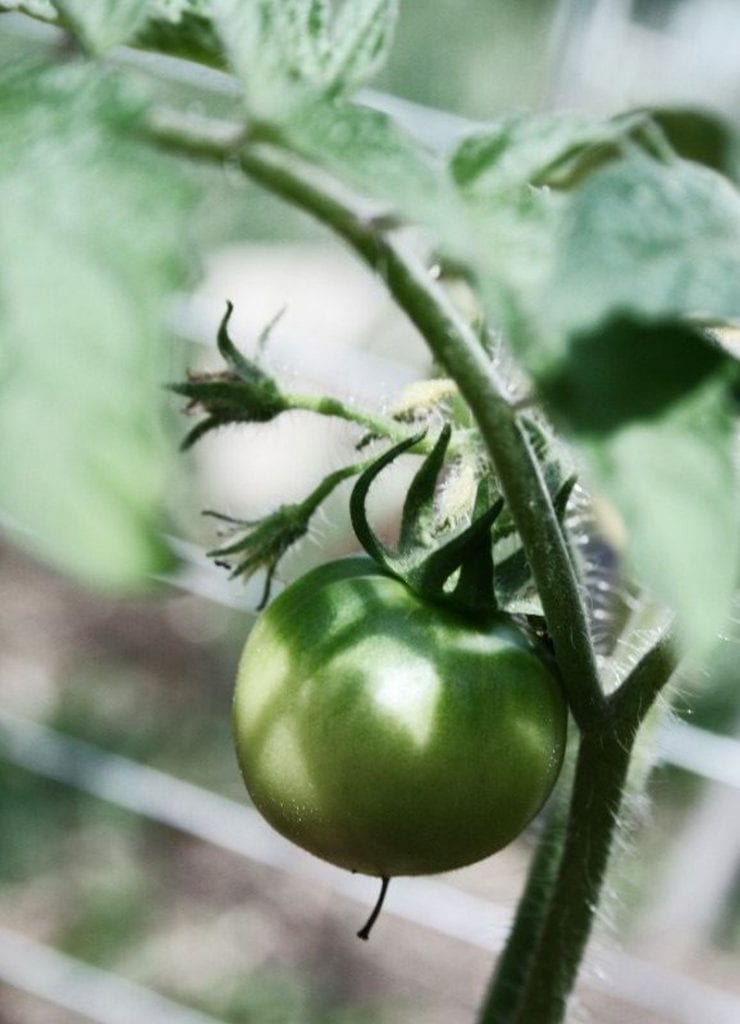
You can weave the vines through the wire fence of the hoop house trellis or attach them with pantyhose, gardening tape, etc. I’d recommend attaching the vines (with whatever product/material you want) on the inside of the hoop house trellis, so the tomatoes can hang and not get stuck in the fence gaps.
This hoop house trellis costs a total of $100 in materials, which certainly seems like a lot for this kind of trellis, but this thing is BIG! It’s about 7′ wide, 10′ long, and 7′ high.
Being weather-resistant, UV-resistant, and rust-resistant, the trellis can be left in place for years, and the fencing material allows a great deal of light to hit the ground allowing for ground crops if vines aren’t desired one season or another.
Additionally, shade cloth can be attached to the hoops to prevent burning for any crops that don’t particularly love the full sun in certain climates. 🙂
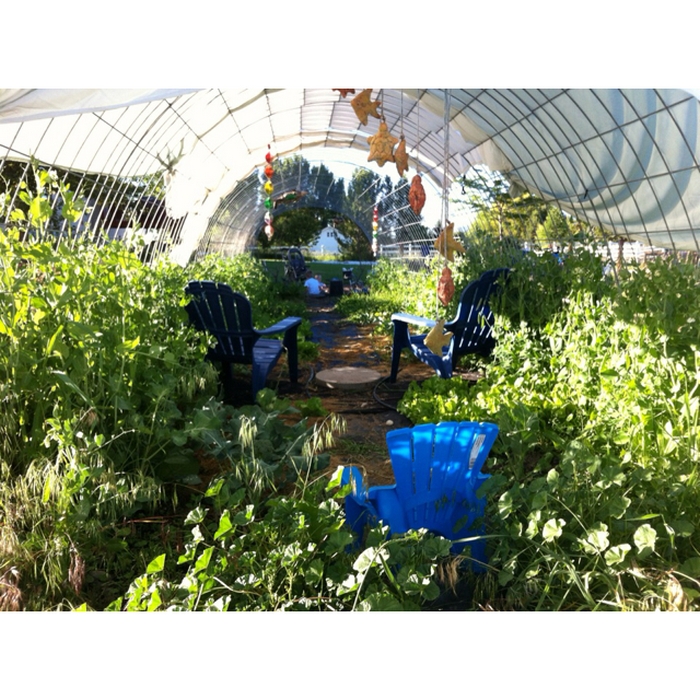
It also makes a great covered entry, or outdoor dining area, or adds some depth to your garden. If you have some shade-loving plants, you could plant them underneath the trellis canopy once it has grown.
Thanks to AngryRedhead for this great project.
Other Diverse Ideas for Your House Hoop Trellis
A house hoop trellis presents an innovative and space-efficient solution for supporting climbing plants, extending growing areas, and adding aesthetic appeal to garden spaces. In this comprehensive exploration, we delve into various designs that cater to different needs, preferences, and garden layouts.
From simple structures to elaborate architectural features, discover how diverse designs can transform your garden into a flourishing and visually captivating oasis.
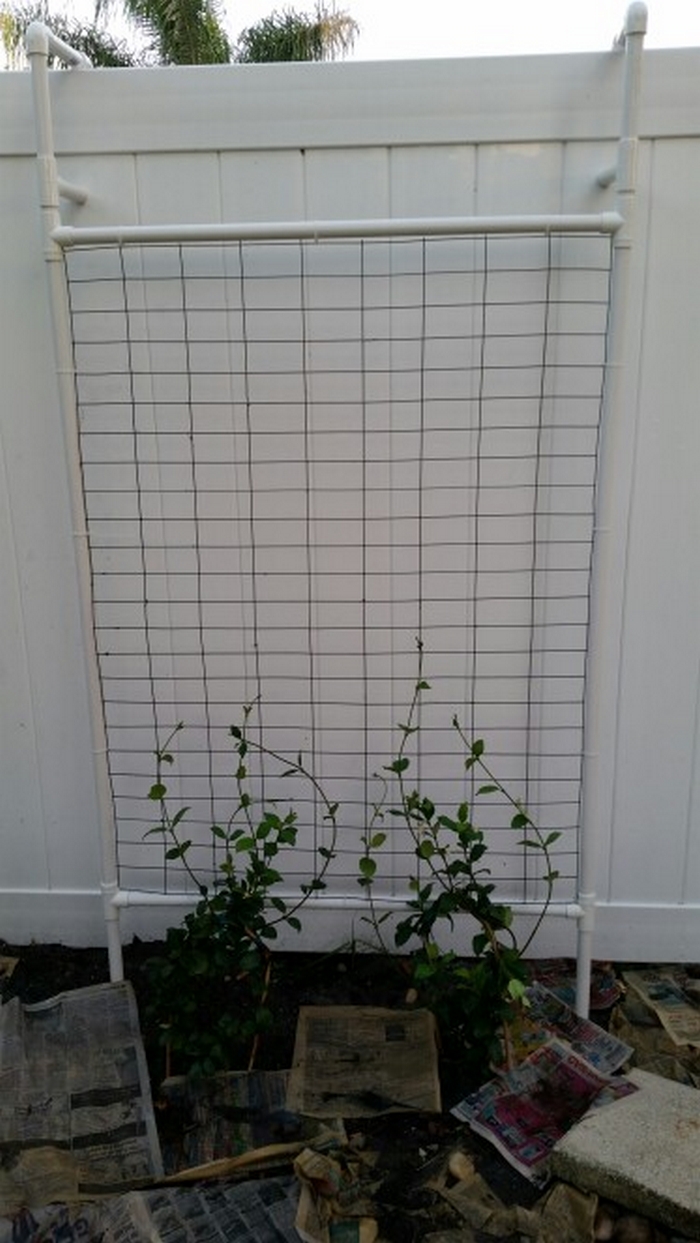
1. Basic House Hoop Trellis Design
This design features a straightforward hoop structure attached to the side of a house or other vertical surface. Utilizes PVC pipes or metal rods bent into hoops and secured to the wall with brackets or hooks.
Ideal for small gardens or limited spaces where vertical growing is essential.
2. Extended House Hoop Trellis
Expands on the basic design by extending the hoop structure horizontally along the length of the house. Provides additional growing space and allows for the cultivation of a wider variety of climbing plants.
Requires sturdy support brackets or frames to bear the weight of the extended structure.
3. Multi-Level House Hoop Trellis
Incorporates multiple tiers or levels of hoop structures arranged vertically or diagonally along the house facade. Creates an eye-catching vertical garden display with layers of lush foliage and colourful blooms.
Requires careful planning and structural reinforcement to ensure stability and support for each level.
4. Curved House Hoop Trellis
Features gently curved or arched hoop structures attached to the house, adding architectural interest and elegance to the garden. Mimics the shape of traditional arbours or pergolas, creating a charming and inviting atmosphere.
Requires flexible materials such as bendable metal rods or PVC pipes and custom brackets for mounting.
5. Freestanding House Hoop Trellis
Detached from the house, this design stands independently in the garden, offering versatility and mobility. Allows for placement in any desired location without being constrained by the house structure.
Can be designed as a standalone feature or integrated into existing garden beds or pathways.
6. Combined House Hoop Trellis and Greenhouse
Integrates a hoop trellis structure with a greenhouse enclosure, providing both vertical growing space and protected growing conditions. Ideal for extending the growing season, starting seedlings, and cultivating heat-loving plants year-round.
Requires careful attention to ventilation, insulation, and climate control to maintain optimal growing conditions inside the greenhouse.
7. Decorative House Hoop Trellis
Emphasizes aesthetic appeal and ornamental design elements, transforming the hoop trellis into a focal point of the garden. Incorporates decorative motifs, patterns, or embellishments inspired by architectural styles, nature, or cultural themes. Enhances the visual appeal of the garden while still providing functional support for climbing plants.
8. Sustainable House Hoop Trellis
Utilizes eco-friendly materials such as reclaimed wood, bamboo, or recycled metal for construction. Incorporates green building practices such as rainwater harvesting, solar power, and native plantings to promote sustainability.
Aligns with principles of environmental stewardship and responsible gardening practices.
From basic structures to elaborate designs, the versatility of house hoop trellises offers endless possibilities for enhancing garden spaces with creativity and functionality.
Whether you prefer a simple vertical support or an elaborate architectural feature, there’s a design suited to your needs, preferences, and gardening goals. By exploring diverse designs and embracing innovation, you can transform your garden into a thriving oasis of beauty and productivity.
Wrapping It Up
Crafting a sturdy hoop house trellis proves to be a feasible and rewarding endeavour for gardeners seeking practicality, efficiency, and durability. The simplicity of this design belies its effectiveness, as the hoop structure provides ample support for a variety of crops, including tomatoes, cucumbers, sweet peas, and more. Additionally, the minimalist approach to materials ensures that the trellis remains affordable and accessible to gardeners of all levels of expertise and resources.
Beyond its practical utility, the hoop house trellis offers additional benefits to both plants and gardeners alike. By training plants to climb the trellis, gardeners can maximize vertical growing space, optimize sunlight exposure, and improve air circulation, leading to healthier plants and increased yields. The trellis serves as a protective barrier against adverse weather conditions, extending the growing season and providing a conducive environment for plant growth and development.
In terms of longevity and value, the hoop house trellis constructed from durable materials offers exceptional return on investment. Unlike flimsy or temporary structures that require frequent maintenance or replacement, this trellis is built to withstand the test of time, providing reliable support and enjoyment for seasons to come.
In essence, the construction of a sturdy hoop house trellis embodies the principles of simplicity, efficiency, and sustainability in gardening. By harnessing the power of minimalism and resourcefulness, gardeners can create a functional and enduring structure that enhances their gardening experience while maximizing the potential of their outdoor spaces.
Whether used to support climbing plants, extend the growing season, or protect delicate crops, the hoop house trellis stands as a testament to the ingenuity and creativity of gardeners in cultivating flourishing and bountiful gardens.
Frequently Asked Questions
1. What are the benefits of using a hoop house trellis in the garden?
Hoop house trellises offer numerous benefits to gardeners. They provide structural support for climbing plants, maximize vertical growing space, protect delicate crops from adverse weather conditions, and extend the growing season. Additionally, they promote better air circulation and sunlight exposure, leading to healthier plants and increased yields.
2. Can I customize the size and shape of the hoop house trellis?
Yes, one of the advantages of constructing a hoop house trellis is its flexibility and adaptability to different garden spaces and plant requirements. You can adjust the dimensions of the trellis to fit your specific needs and preferences, whether you’re working with a small urban garden or a large rural plot.
Additionally, you can experiment with different shapes, such as curved or multi-level structures, to create visual interest and accommodate a variety of climbing plants.
3. How long does it take to build a hoop house trellis?
The time required to build a hoop house trellis depends on factors such as the size of the trellis, the complexity of the design, and the skill level of the gardener. However, with just five materials, the construction process can be completed relatively quickly, typically within a day or two. Simple designs may require less time, while more elaborate structures may take longer to build.
4. Are hoop house trellises suitable for all types of climbing plants?
Yes, hoop house trellises are versatile structures that can accommodate a wide range of climbing plants, including tomatoes, cucumbers, sweet peas, beans, squash, and more. The key is to ensure that the trellis is sturdy enough to support the weight of the plants and that the spacing between the hoops allows for proper growth and development.
Additionally, you may need to adjust the height and spacing of the trellis to accommodate the specific requirements of different plant varieties.
5. How do you maintain and care for a hoop house trellis?
Maintaining a hoop house trellis is relatively straightforward and requires regular inspection and upkeep to ensure its long-term performance and durability. You should periodically check the trellis for signs of damage, such as bent or broken pipes, loose fasteners, or tears in the covering material, and make any necessary repairs promptly.
Additionally, you may need to clean the trellis occasionally to remove debris, algae, or other buildup that can accumulate over time and affect its appearance and functionality.
6. Can I reuse the materials from my hoop house trellis for other projects?
Yes, one of the advantages of constructing a hoop house trellis with simple and readily available materials is that they can be easily repurposed for other gardening projects or recycled when they reach the end of their lifespan. PVC pipes can be reused for building new trellises, raised beds, or garden structures.
7. Are there any additional tips or recommendations for building a hoop house trellis?
When constructing a hoop house trellis, it’s essential to consider factors such as the orientation and location of the trellis, the spacing between the hoops, and the choice of covering material. You should also ensure that the trellis is securely anchored to the ground to prevent displacement, especially in windy conditions.
It’s a good idea to monitor the growth of the plants regularly and adjust the trellis as needed to provide adequate support and space for their development. By following these tips and recommendations, you can build a sturdy and functional hoop house trellis that will enhance your garden for years to come.