Last Updated on April 26, 2024 by teamobn
Making DIY projects is so much fun and rewarding especially when you can’t stop looking at your beautiful work after. There are times that the project is so perfect we want to put our signature on it.
If you are like me who loves making beautiful things out of wood (or leather for some), then you will love this branding iron project. A year ago I made a box for my shirt business which was perfect, except for the name on it. Since I didn’t want to spend anymore for spray paint just for that small detail I used markers. It was ugly. 🙁
Though “real” branding irons can be custom-ordered, some might not be up for spending quite a big amount of money for it – like me. Which is why I got excited when I came across this DIY project. Read on to see how earz_cd made his cool branding iron!
Contents
Crafting Your Branding Iron
Materials
- Spray Adhesive
- Paper
- Brass Cabinet Knob
Tools
- Dremel Style Tool with small carving/engraving bits
- File/Sandpaper
- Locking Pliers
- Vise
- Computer and Printer
- Scissors, Utility Knife, X-acto Knife, etc
- Source of heat (camp fire, stove burner, propane torch)
Instructions
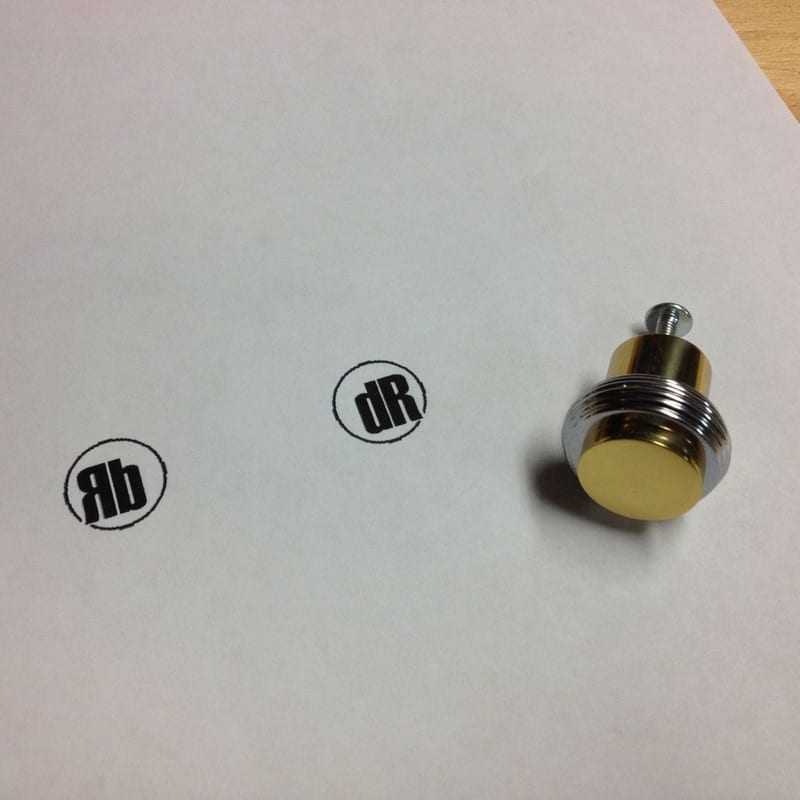
I wanted a fairly small brand with my initials. I laid it out on the computer using a photo editing software. I made a mirror image of my design and printed it out.

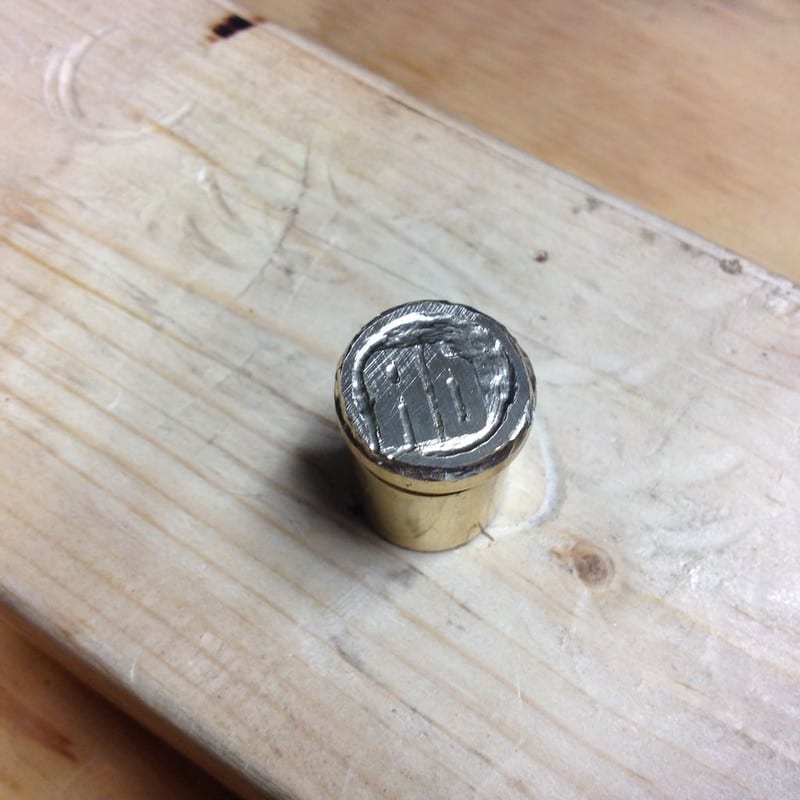
I found this little brass knob in the clearance bin at the hardware store. I wasn’t sure if it was solid brass or just brass plated, but I bought it because it was flat and round. It also had some threads cut into one end so I can eventually mount this on the end of a handle.
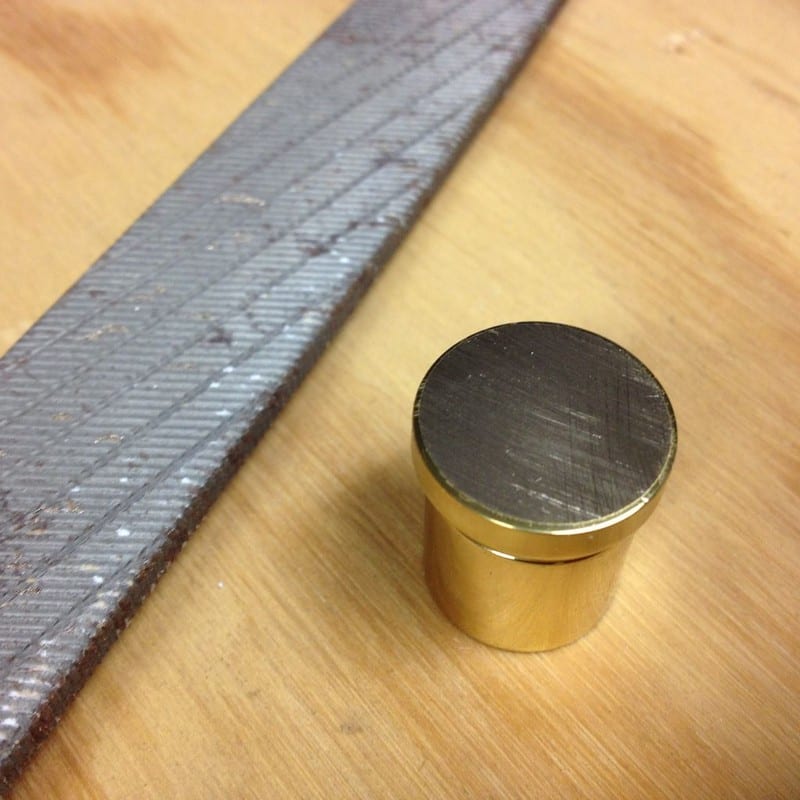
The flat end was slightly rounded, and to get an even brand mark, the brand needs to be perfectly flat. I used a flat file and flattened the top surface of the brass.
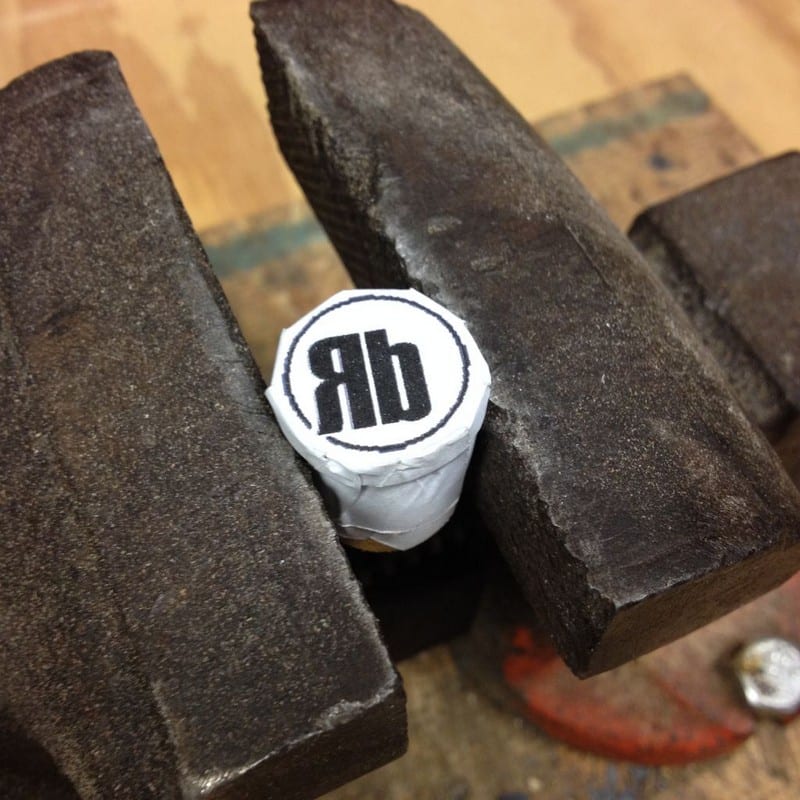
I flipped my paper template face down and placed the brass piece on top, marking around the brass. I then used a spray adhesive and glued the brass to the template. I cut around the template leaving a little extra length and just folded the excess around the brass. I clamped the brass in a vise and used a dremel with a flex shaft to engrave out all the white sections of the template.

I used a pointed cutter and a round cutter.
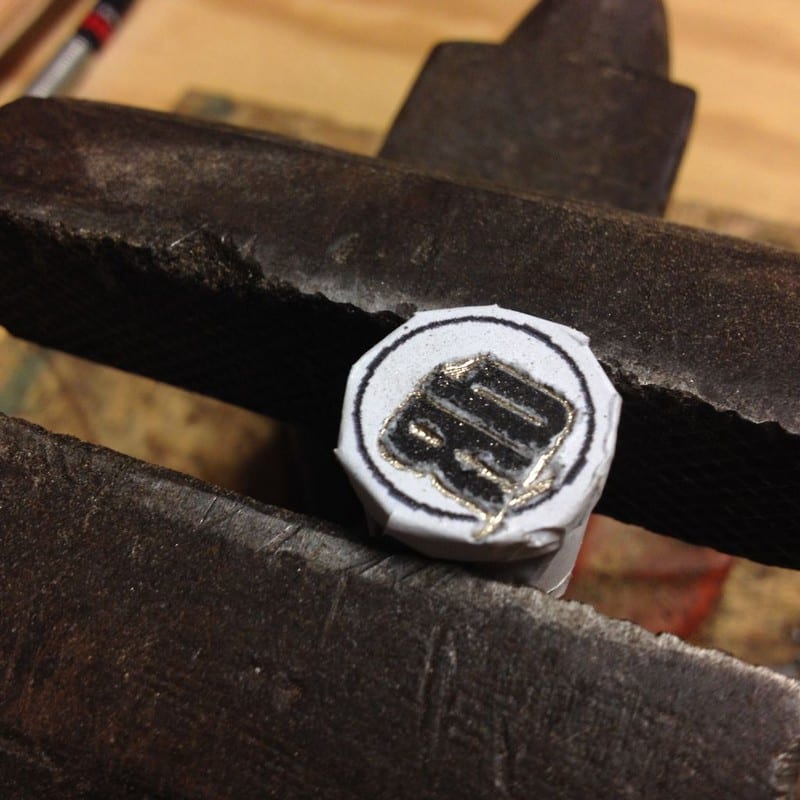
Go slow because once you remove material, it’s really hard to add it back.
This photo shows how deep I engraved it before the first burn test.
To test it out, I just clamped it in some vise-grips.
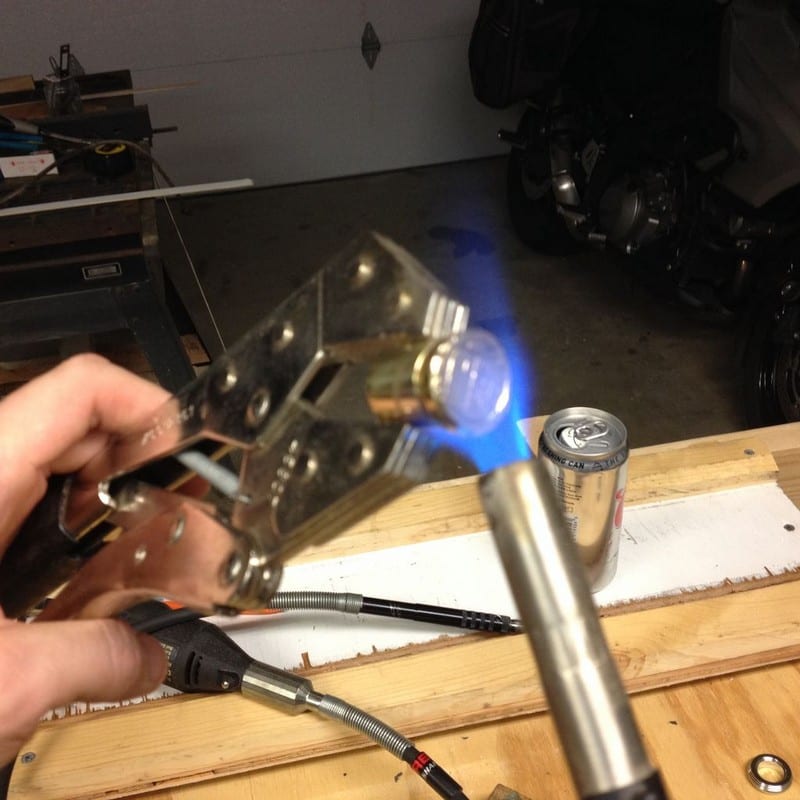
I used my propane torch to heat it up and tested it out on some scrap pine. You’ll have to practice getting the iron hot enough and putting the iron onto the piece evenly to get a good burn.
Here’s a breakdown of the first attempts:
- Not hot enough
- Uneven pressure
- Really uneven pressure & too hot/left on too long
- Slightly uneven
- Great burn – but the brand needs deeper cuts

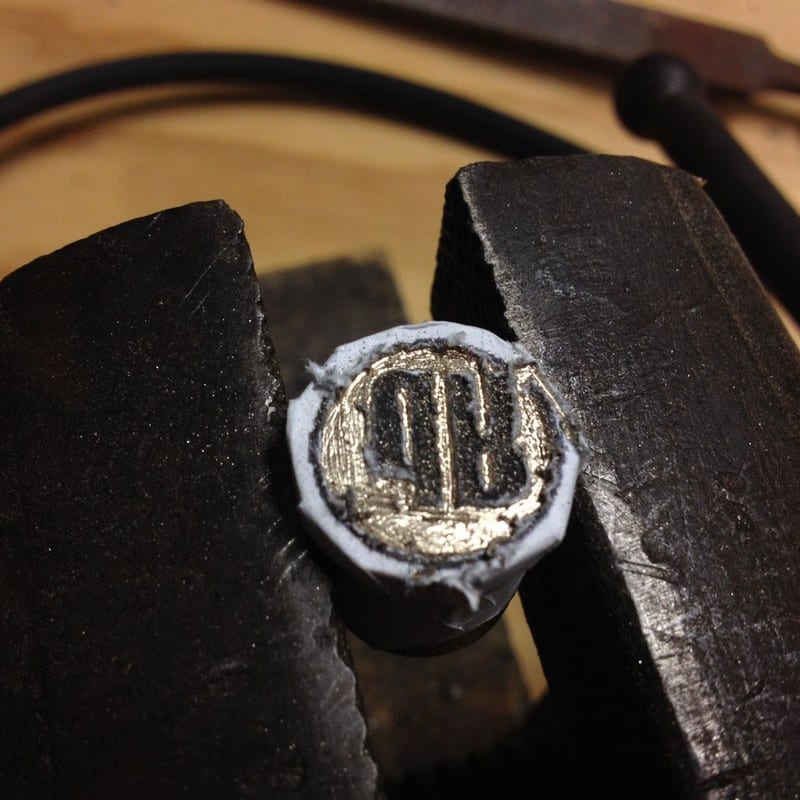
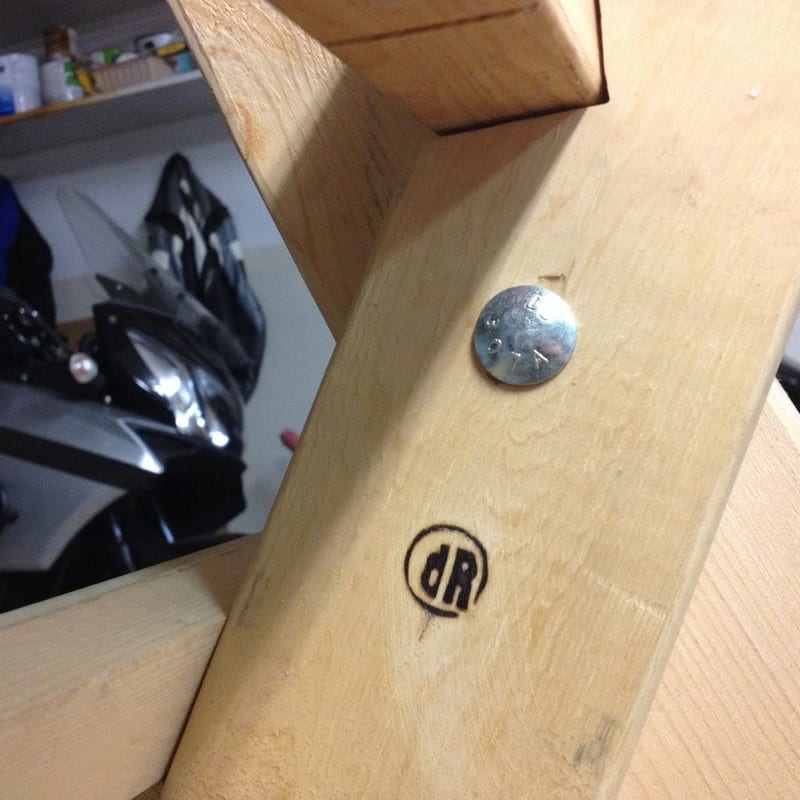
I let the brand cool down and clamped it back in the vise and made deeper cuts through out. In the process, I also ended up making the letters narrower that I had originally wanted, but it still looks ok.
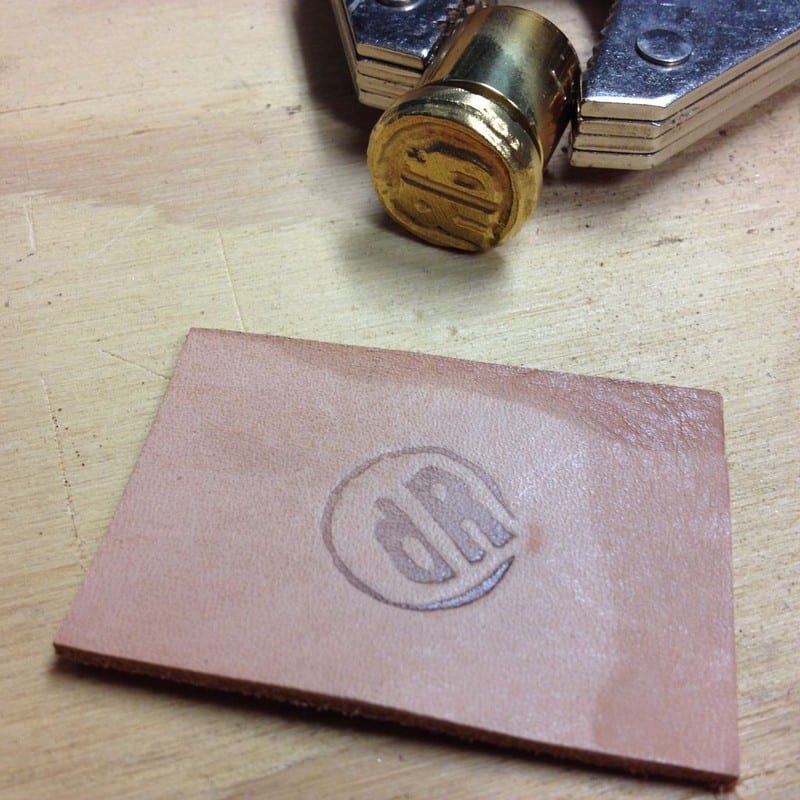
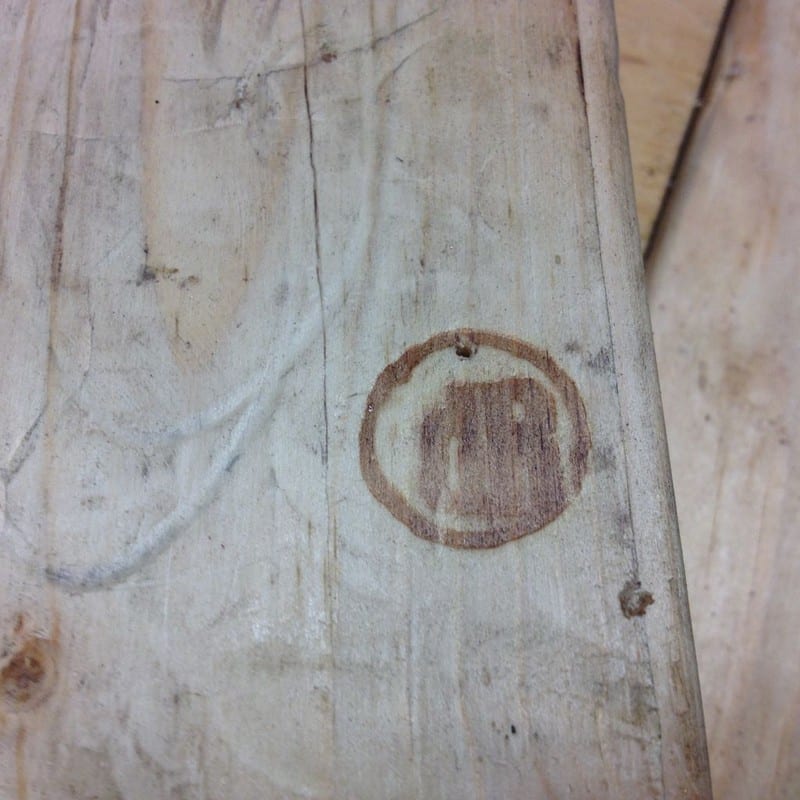
I tested the finished brand out on a scrap of oak flooring. The smoke from burning stains the surrounding wood on some of the darker burns. This staining can be removed by gently sanding it off with some sandpaper. Don’t sand too aggressively because you could end up sanding off your brand.
All said and done – design to final burn took me about 3 hours working at a leisurely pace. If someone would clean my garage so I could find my tools, these projects would probably take less time.
Now with just a relatively inexpensive door knob and a maximum of three hours, you can now beautifully “sign” your wood and leather projects! I can’t wait to have my DIY branding iron. How about you?
Material Considerations for Branding Irons
Using a branding iron allows you to leave a personal touch on a variety of materials. However, the effectiveness of the branding process depends heavily on understanding the characteristics of the material you’re working with.
Below, we explore how to use a branding iron on different types of materials, offering tips for achieving the best results every time.
Wood Branding
Wood is a popular choice for branding because it chars nicely, creating clear, durable marks. Softwoods like pine heat quickly and require a lower temperature, while hardwoods like oak or maple need a hotter iron to achieve a similar effect. It’s important to test the heat on a scrap piece of wood to ensure you don’t burn too deeply or too lightly.
Leather Branding
Leather branding requires precision as it’s easy to overburn. Preheat your branding iron to a medium heat and practice on scrap pieces to find the perfect balance. The branding iron should touch the leather briefly to avoid unwanted burns and achieve a crisp, clear impression. Conditioning the leather before branding can also help prevent the edges from burning.
Food Branding
Branding food like steaks or buns can add a unique touch to culinary creations. Use a clean branding iron and ensure it is only moderately hot; too much heat can cause the food to burn or smoke excessively. Quick, even presses will give the best visual effect without affecting the food’s taste or texture.
Fabric Branding
Branding on fabric, such as canvas or heavy cotton, can be done with a branding iron set at a low temperature. Always test on a similar fabric to ensure that the heat does not scorch or burn through. Fabric branding often results in a subtle, rustic effect, enhancing the product’s aesthetic without overpowering it.
By understanding these material-specific considerations, you can ensure that your branding iron projects turn out beautifully, regardless of the medium. Whether you’re working with wood, leather, food, or fabric, the right approach will make all the difference.
Safety Tips for Using Branding Irons
Working with a branding iron involves significant heat, so it’s crucial to prioritize safety to prevent accidents and injuries. Here are essential safety tips to keep in mind when using a branding iron, ensuring a safe and enjoyable crafting experience.
Wear Protective Gear
Always wear protective gear when handling a hot branding iron. Heat-resistant gloves are a must to protect your hands from burns. Safety glasses or goggles should also be worn to shield your eyes from any sparks or debris that may occur during the branding process.
Prepare Your Workspace
Make sure your workspace is well-organized and free of any flammable materials. Work in a well-ventilated area, especially if you’re using a propane torch as your heat source, to avoid inhaling any harmful fumes. Keep a fire extinguisher or a bucket of sand nearby for emergency situations.
Handle with Care
Always handle the branding iron with care, especially when it is heated. Use locking pliers or a sturdy handle to secure the branding iron and maintain a safe distance from the heated metal. Never leave a hot branding iron unattended and ensure it has cooled down completely before storing it away.
Heat Source Safety
Be cautious with the heat source used to warm up your branding iron. If using open flames like a campfire or a stove, maintain a clear area around the source to prevent accidental fires. Always follow the manufacturer’s instructions if you’re using an electric branding iron.
Practice First
Before applying the branding iron to your final project, practice on scrap materials. This not only helps you get a feel for the necessary pressure and heat but also minimizes the risk of mistakes that could lead to injury due to unexpected reactions from the material.
By following these safety tips, you can safely enjoy the creative process of using a branding iron, ensuring both your safety and the quality of your work are maintained.
Legal Considerations of Branding
Using a branding iron to mark your products or artwork adds a professional touch and can serve as a signature of authenticity. However, it’s important to know branding legality.
This is true when it involves logos, text, or symbols that could be subject to copyright and trademark laws.
Understanding Copyright and Trademarks
Make sure you have the right to use an image. Copyright laws protect the creative works of individuals from being used without permission. Similarly, trademarks protect logos, symbols, and phrases used in commerce to identify a product’s source. Using copyrighted logos without consent can land you in legal trouble.
Securing Permission and Licenses
If you wish to use a design that someone else owns, it’s necessary to obtain permission or a license. This usually involves contacting the copyright or trademark holder and paying a fee. In some cases, the terms of use might also dictate how and where you can use the design.
Creating Your Designs
To avoid legal complications, consider creating your unique designs for branding. This not only keeps you clear of infringement issues but also helps in establishing a distinctive identity for your brand or products. Once you create a design, consider registering it as a trademark to protect your rights and prevent others from using it without permission.
Use and Misuse
Be cautious about where and how you apply your branding. Using your branding iron on items not intended for sale or that misrepresent the product’s origin could mislead consumers and violate trade description acts. Always ensure that your branding accurately represents the product and its origins.
Documenting Your Work
Keep detailed records of your design process, any permissions or licenses obtained, and where your branded products are distributed. This documentation can be vital in defending your rights in case of legal challenges.
Understanding these legal considerations is crucial for anyone using a branding iron in their projects. It ensures that your creative expressions remain within legal boundaries while protecting your work and brand identity.
Conclusion
Making your own branding iron is a rewarding DIY project that lets you personalize your creations and establish a unique brand identity. With the right tools and materials, you can craft a durable and effective branding tool that leaves a lasting impression. Always consider the legal aspects and safety guidelines to ensure your branding endeavors are both successful and responsible.
We have more creative projects. Check out our craft paper memo board next!