Last Updated on September 19, 2022 by teamobn

You should never wear wet boots. When water seeps through your footwear, your skin absorbs the water. This can cause your feet to become waterlogged, cold, and wrinkly. The longer your feet are wet, the greater the damage to your skin.
This can lead to a number of problems, including blisters, Athlete’s foot, and even trench foot. The painful consequences can include the formation of blisters and deep cracks. So, if you’re out on a hike and your boots start to get wet, make sure to take a break and dry them off. It could save you a lot of discomfort in the long run.
So how do we solve the problem of wet boots before a hike? Well, have you got some leftover PVC pipes from your previous project? Here’s an idea to put them to good use – an all-seasons boot dryer!
Wet boots are a nuisance in summer where they can lead to fungal infections. In winter, they probably just lead to misery but either way, this clever boot dryer project will get them dry in almost no time! And the best part is that it’s easy and inexpensive to build.
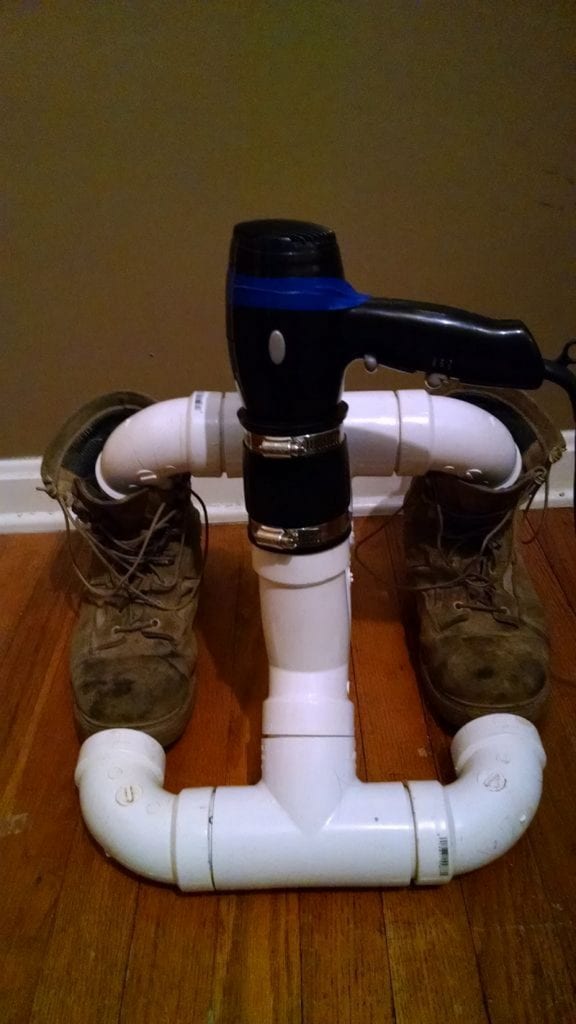
You could also use it for your wet gloves, hats or bags. Just put your stuff in position, turn the hair dryer on, leave it and wait a few minutes for your things to dry!
When not in use, you can disassemble the boot dryer to save storage space. Read this tutorial to learn how to build your own.
Click on any image to start the lightbox display. Use your Esc key to close the lightbox. You can also view the images as a slideshow if you prefer 😎

You’ll need these materials:
- 4 pcs – 2″ Elbows
- 2 pcs – 2″ T
- 1 pc – 2″ Y
- 1 pc – 2″ Fernco ci/plastic/copper/steel to ci/plastic/copper/steel
- 3 ft – 2″ PVC Pipe
- Glue
- Hair Dryer
And this tool:
- Hacksaw
Steps:
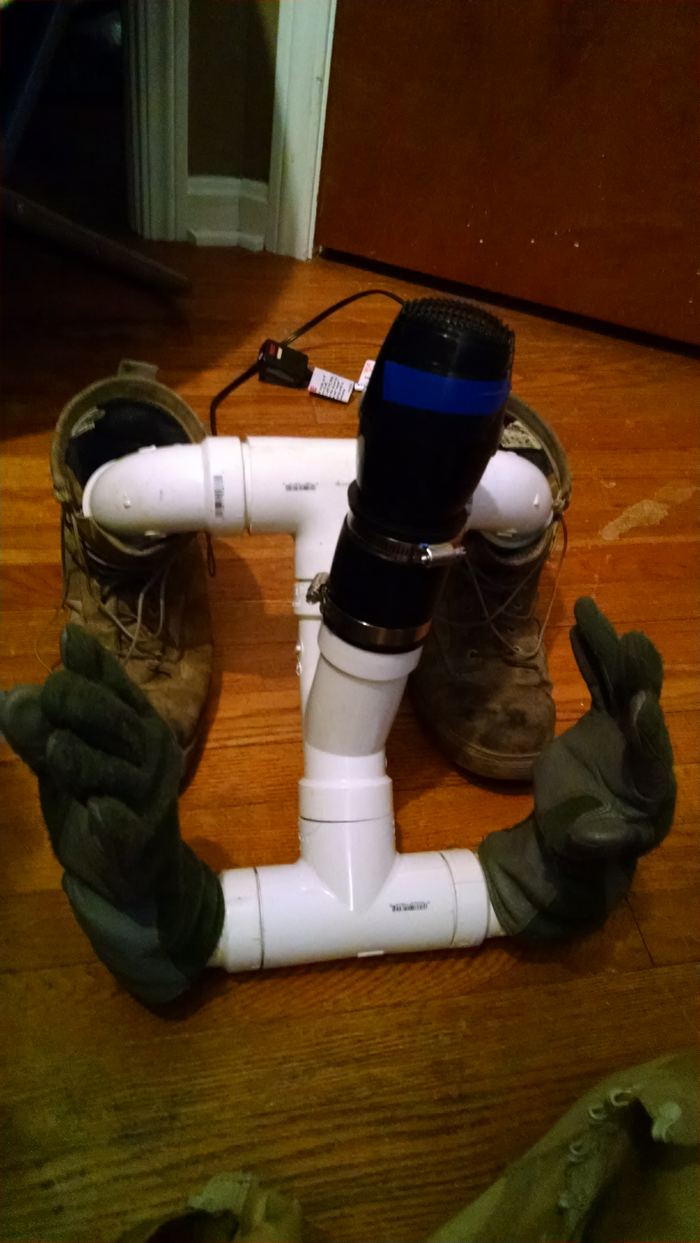
Steps to build yourself a boot dryer!
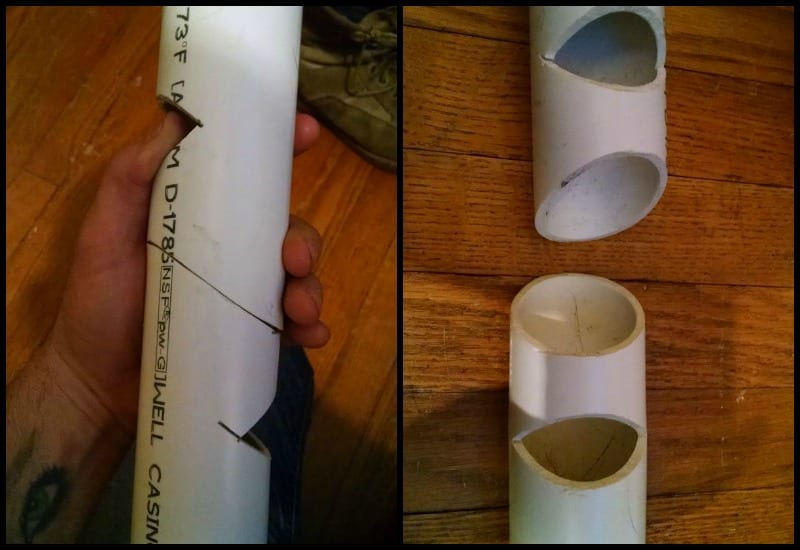
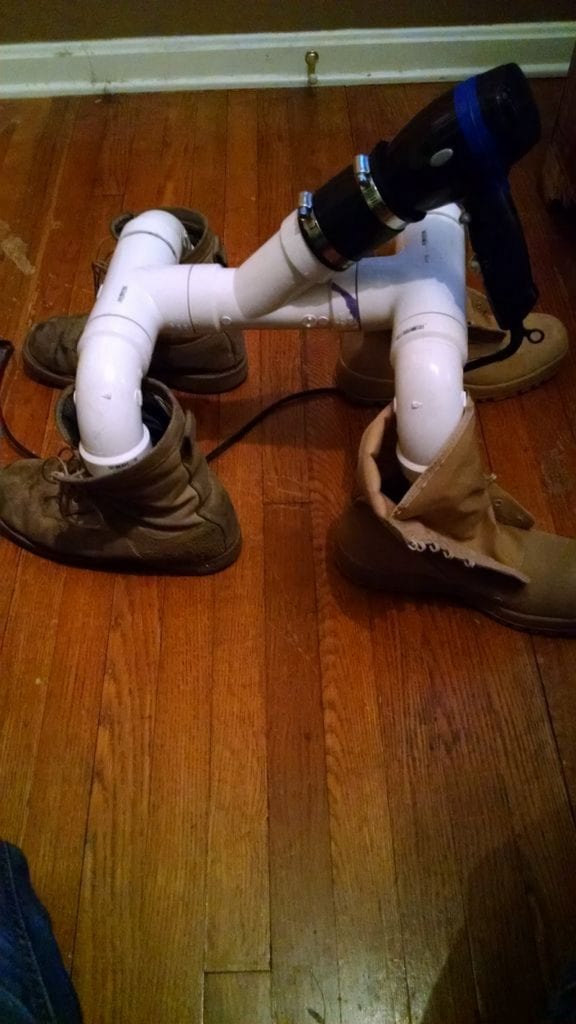
Cut one length of PVC pipe 16 inches long, then cut the 16 pieces in half at a 40° angle as shown on the left. Then cut wedges about an inch above the angled cut like in the right image. This will help unrestrict airflow when inside the boots.

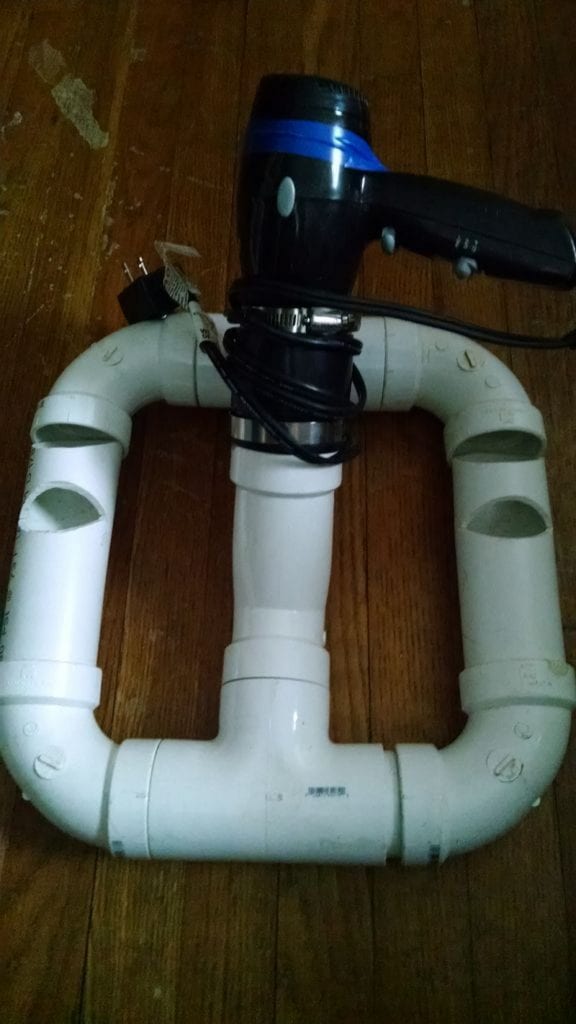
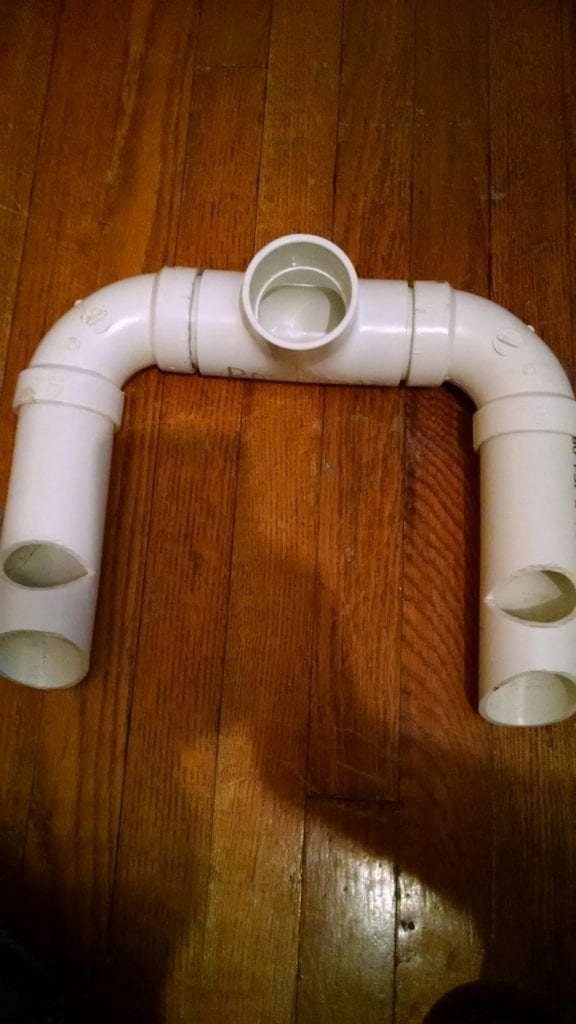
Cut seven 2-inch PVC sleeves, 2 inches long, and connect everything together. Glue them in place as seen in the picture above.

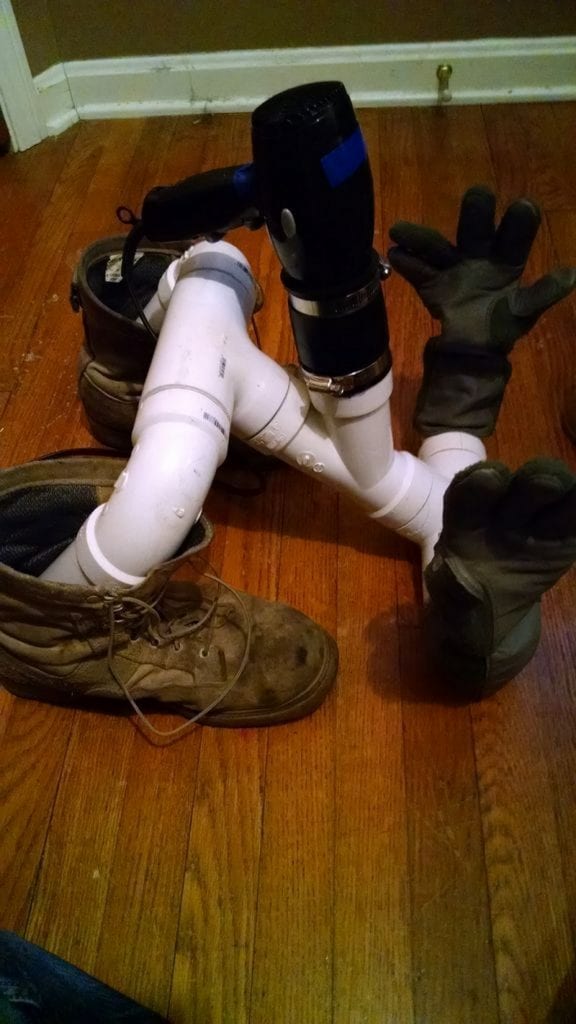
Important: Do NOT glue your 8-inch angle cut lengths together. Just shove them in you’re 90° elbows as seen below. You will understand why later.
NOTE: Nothing else will be glued. Put the glue away so you don’t get overzealous and get ahead of yourself.
Shove the 2 arms into one of the T’s. No glue! 🙂

Next shove the remaining 2 elbows into the last remaining T. No glue!

Continued Page 2…