Last Updated on September 2, 2024 by teamobn
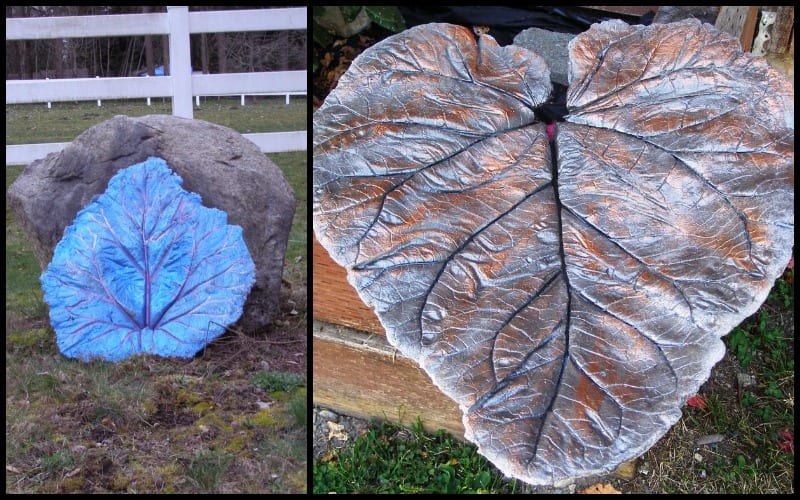
Have you ever had the thrill of venturing through an award-winning garden? Each twist and turn reveals a world of hidden gems, just waiting for you to uncover. From perfectly shaped rocks to charming statues and even bird feeders, every corner is brimming with enchantment.
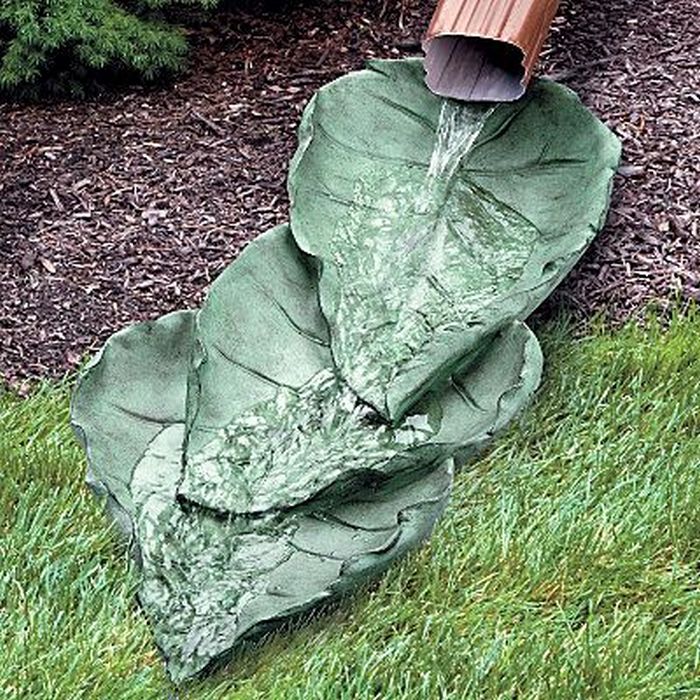
If you’d like to create that same feeling in your garden, here’s a great way to do it. These concrete leaves can be used in many different situations including birdbaths or feeders.
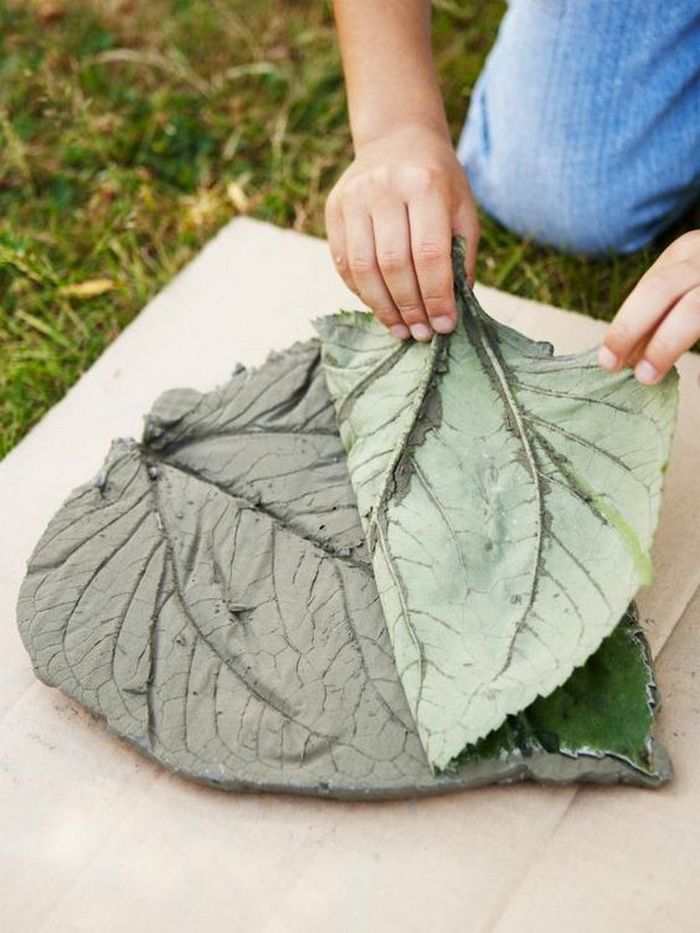
Create a captivating addition to your yard with this simple and easy DIY concrete leaves project. What makes it even more remarkable is how these leaves seamlessly blend into your garden, as they are made using real leaves as moulds, resulting in stunning, lifelike creations.
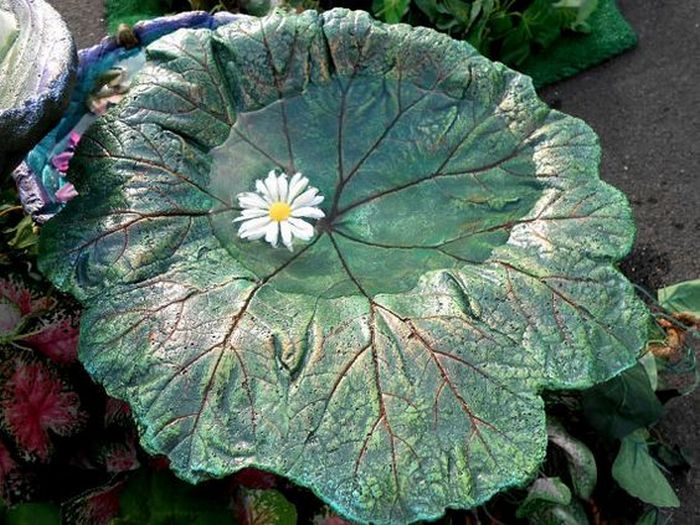
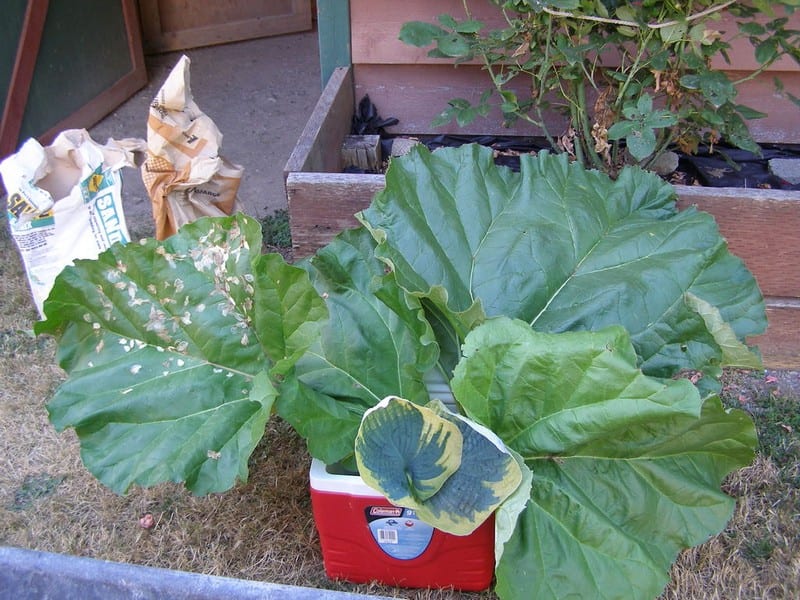
All you need is to look for the biggest, large veined leaves you can find. Some examples of good leaves are rhubarb, Monstera deliciosa, philodendron, and hosta.
Paint them after the concrete has dried and people will surely notice your beautiful decoration! Then you can turn it into a birdbath which makes a great centrepiece in your garden.

Click on any image to start the lightbox display. Use your Esc key to close the lightbox.



Contents
How to Craft Beautiful DIY Concrete Leaves
The DIY concrete leaves project is a total game-changer and the perfect way to flex your creative muscles. All you need are some basic materials and a sprinkle of patience, and voila! You’ll have beautiful and robust concrete masterpieces that will take your garden to the next level.
This step-by-step guide walks you through the process of creating these unique and eye-catching pieces of art. Ready to bring nature-inspired beauty to your garden? Get started!
Materials
- Leaves (large ones)
- Play Sand – 50 lbs for forming
- Plastic Wrap – like the one for food storage
- Bag of Concrete (sand aggregate only)
- Portland Cement (optional)
- Nitrile Gloves
- Spray Paint/Paint
- Chicken Wire – for adding strength (optional)
Tools
- Paint Brush (if needed)
- Wheelbarrow
- Shovel/Trowel – for mixing concrete
Steps
Here’s how to make your own DIY concrete leaves:
1. Store your leaves in water until you’re ready to use them, but be mindful not to exceed a few days.
2. Press the leaf on a pile of sand to the desired shape, mounding or flattening. Remove the leaf, then cover the sand with plastic wrap. Return the leaf to its original spot. Prep all leaves to be cast before the next step.
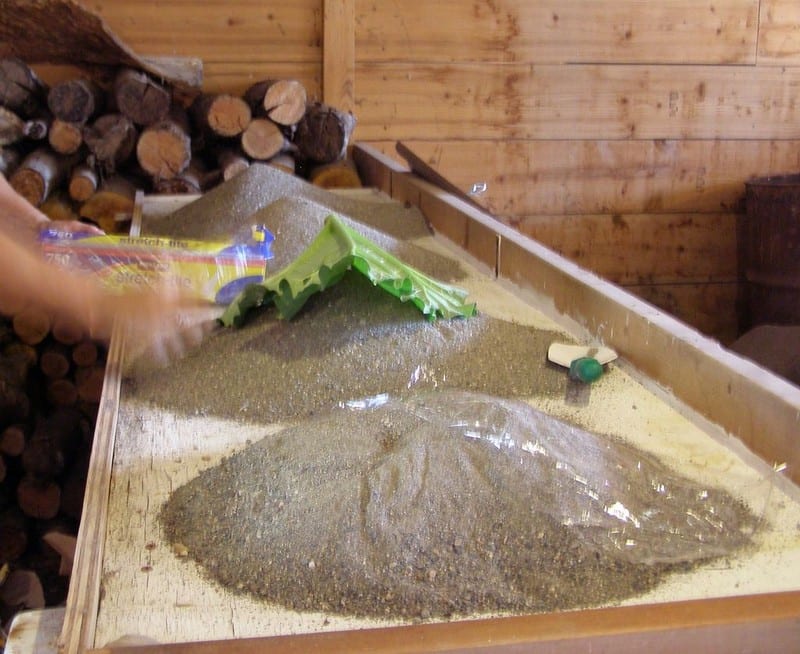
We discovered that incorporating Portland cement, up to a coffee can per 40 lbs., enhances the strength of the concrete leaves. It also serves as a convenient solution if you add water, as it helps achieve the desired pasty consistency.
And in our classification system, leaves that measure around 18 inches at the widest point are considered “medium” in size, while those measuring 12 inches and 24 inches would fall into the “small” and “large” categories, respectively. Medium-sized leaves, typically have a thickness ranging from 3/4 to 1 inch along the rib, gradually tapering to approximately 3/8 inch at the edges.
3. To craft a set of approximately five medium-sized leaves, you’ll need a half bag of concrete, which typically weighs around 40 lbs. Add cement to the concrete mixture to enhance its strength and durability.
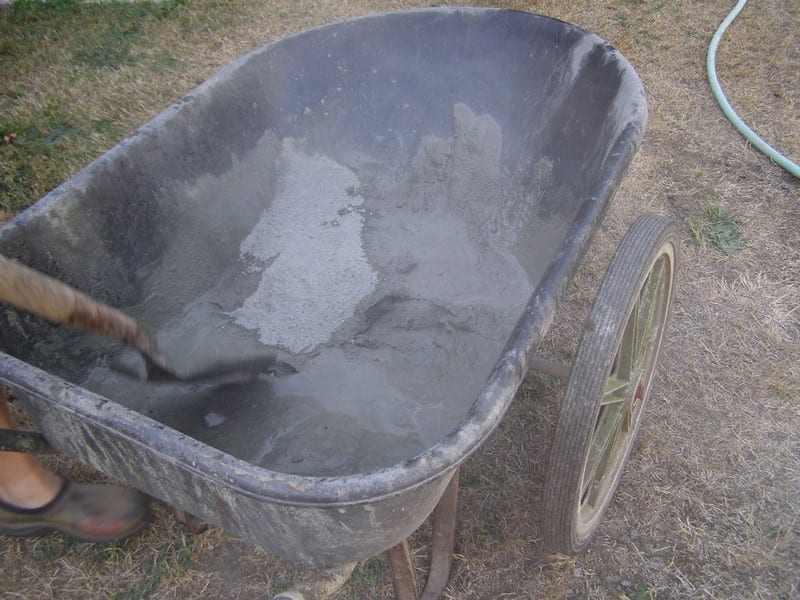
4. To achieve clean and tidy edges on your concrete leaves, carefully roll the wrap around the leaf shape. This technique helps to smoothen and refine the edges, giving your leaves a polished appearance.
If you plan to incorporate a hanging wire or use mesh tape/chicken wire for additional support, it’s best to adjust the thickness. This method is especially recommended when working with larger-sized leaves, as they require additional reinforcement to withstand their weight.
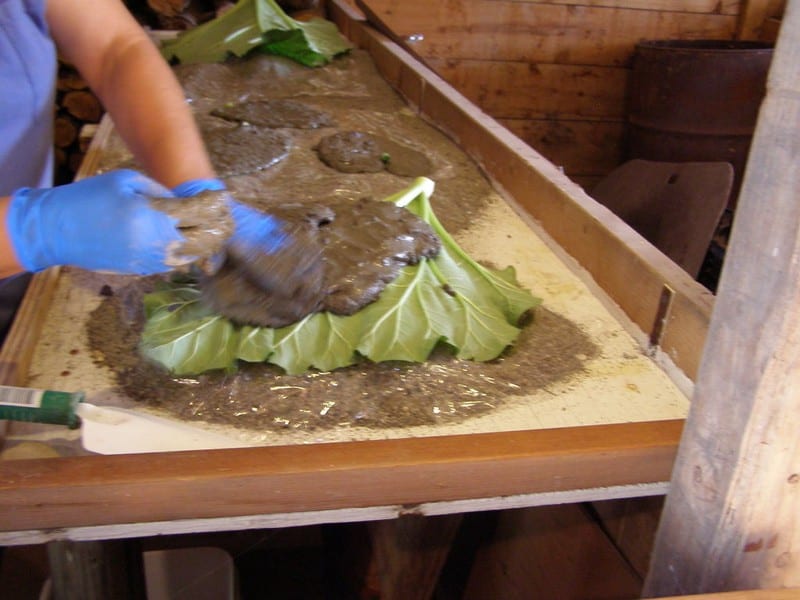
5. After completing the concrete leaf, it’s important to let it cure and harden properly. Leave the leaf undisturbed for a minimum of one day to allow the concrete to set and gain strength. However, if you have the time, it’s recommended to let it sit for two days for optimal curing.
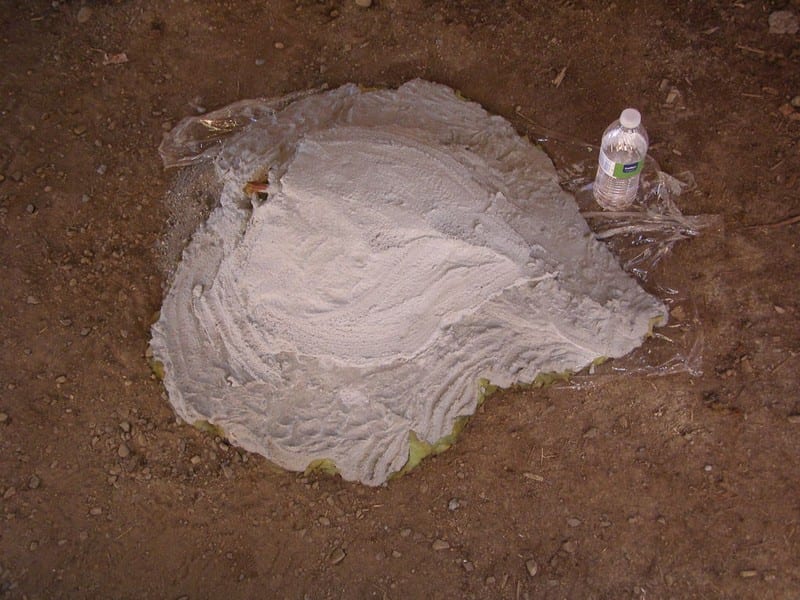
6. Now it’s time for the peeling process, which can be the most time-consuming. We’ve tried different techniques, such as using compressed air and high-pressure water jets. Patience is the secret to success! Take your time and utilize tools like needle nose pliers, picks, and stiff brushes to assist with the peeling, guaranteeing optimal results.
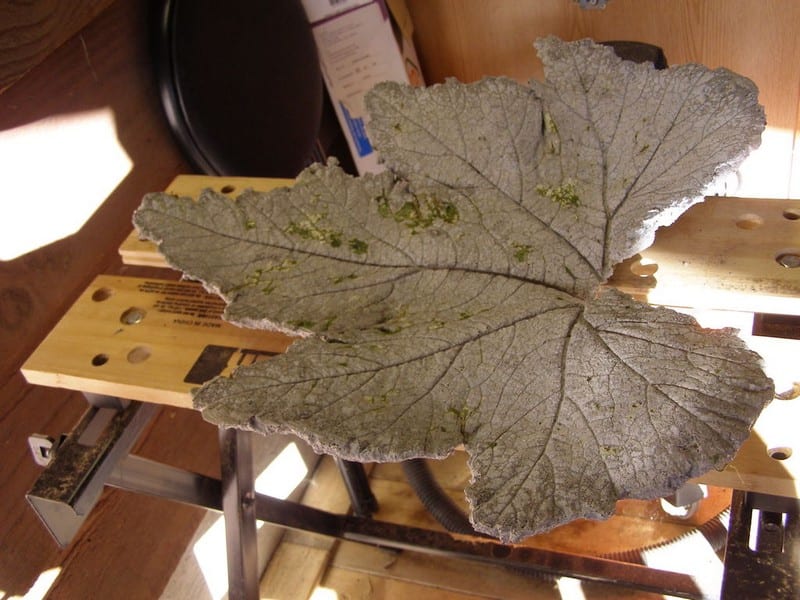
7. Next, it’s time to proceed with the painting process. Choose your favourite colours and paint each leaf with precision and care. You can opt for natural shades to mimic the look of real leaves or go bold with vibrant hues to create a unique and eye-catching garden element.
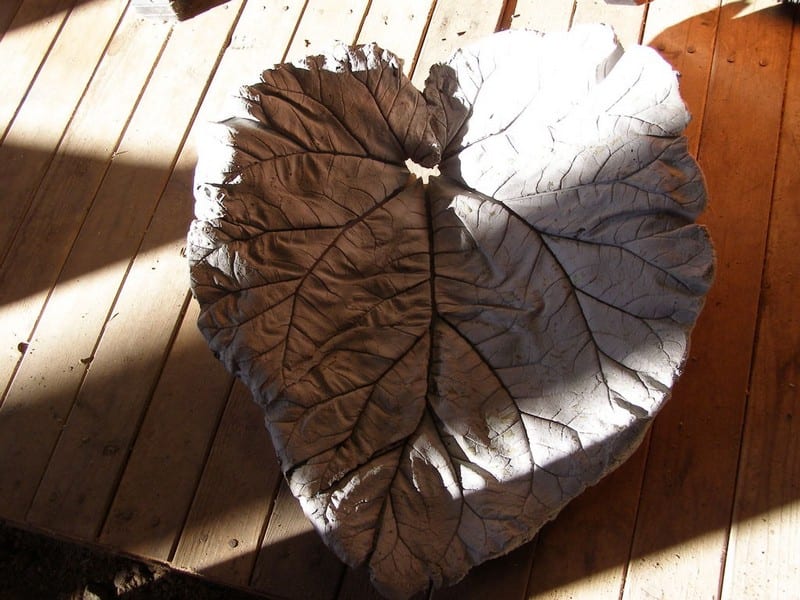
No holds barred here, whatever you want goes. We’ve been liking the metallic look lately, with some accent colour in the veins. A sponge for blending also works nicely. Apply multiple coats if needed to achieve the desired coverage and depth.
8. Once the paint on your DIY concrete leaves has dried, it’s important to apply a water seal to protect them from the elements. Use a suitable water sealant and apply it to both the front and back of the leaves. This step helps to prevent moisture damage and prolong the lifespan of your beautiful creations. Remember to reseal the leaves annually to maintain their integrity and durability.
However, be prepared for the enthusiastic response your concrete leaves will receive. Their unique beauty and charm may have everyone requesting their own, and you might find yourself happily making more to share with others!
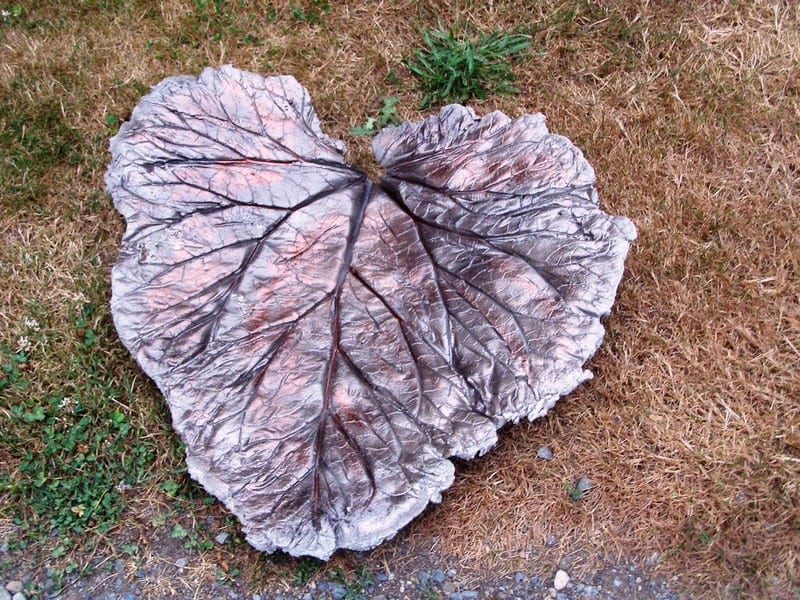
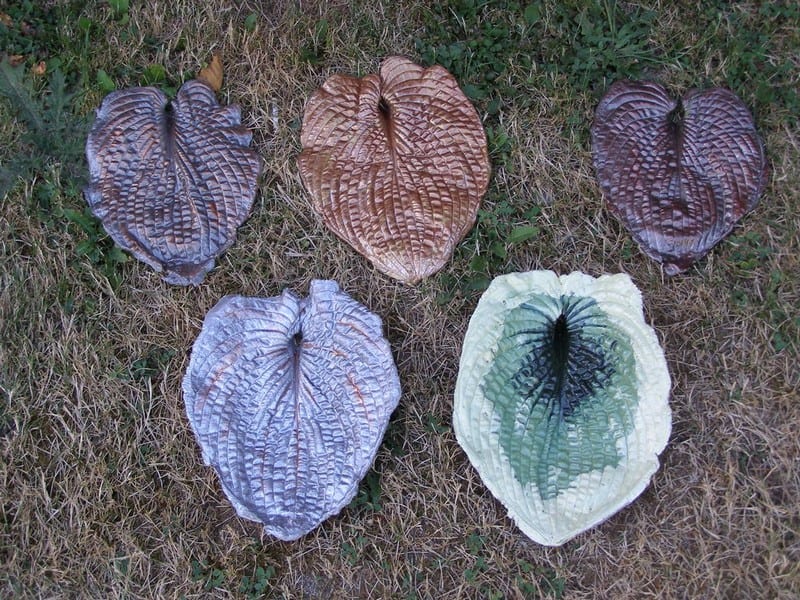
You could use these leaves as a bird feeder. To do this, simply put your leaf (mould) on a higher pile of sand so that you’ll have a better concave. What bird could possibly resist the allure of such a beautiful leaf?
Hang your leaf bird feeders in your garden or on a tree branch, and watch as the feathered visitors flock to enjoy the food in such a beautiful and inviting setting. It’s a delightful way to attract and nurture the avian wildlife in your area while adding an artistic touch to your outdoor space.
Thanks to sharonnah59 for this beautiful project.
Installation Tips and Ideas
Concrete leaves are versatile additions to any garden, providing both aesthetic appeal and practical functionality. Whether nestled among flower beds or used as standout pieces on patios, these durable decorations can enhance the beauty of outdoor spaces. Here are some tips and ideas for installing your DIY concrete leaves in various garden settings to ensure they not only look stunning but also complement your existing landscape.
Choose the Right Location
Selecting the appropriate spot for your concrete leaves is crucial. Consider placing them in areas where they can catch the eye, like along garden pathways or within a flower bed as eye-catching ground cover. The location should also expose the leaves to the right environmental conditions; for example, if painted with UV-sensitive colors, ensure they are partially shaded to prevent fading.
Integration with Water Features
Concrete leaves can be transformed into beautiful and functional parts of water features. Place them near or in your garden’s pond to serve as whimsical lily pads, or use them to create cascading water effects. Ensure that the concrete is sealed properly to withstand constant moisture and that it’s stable enough to handle water flow without tipping over.
Create Focal Points
Use your concrete leaves to create focal points within your garden. This can be achieved by grouping several leaves of different sizes and shapes in a central area, surrounded by low-lying plants or pebbles. Highlight these areas further with strategic lighting to enhance their visibility and impact during the evening hours.
Enhance Pathways and Walkways
Lining pathways and walkways with concrete leaves not only adds a decorative touch but also guides visitors through your garden. Place the leaves at regular intervals along the sides of paths, or use them as stepping stones, embedding them slightly into the ground for stability. Choose leaves of sufficient size and thickness to handle foot traffic if they are used as steps.
Complement with Garden Furniture
Positioning concrete leaves near garden benches or seats can create harmonious seating areas. These leaves can serve as side tables or decorative ground elements that complement the rustic or naturalistic style of wooden garden furniture. Painting the leaves in colors that match or contrast with your furniture can integrate them smoothly into the setting.
Mix with Natural Elements
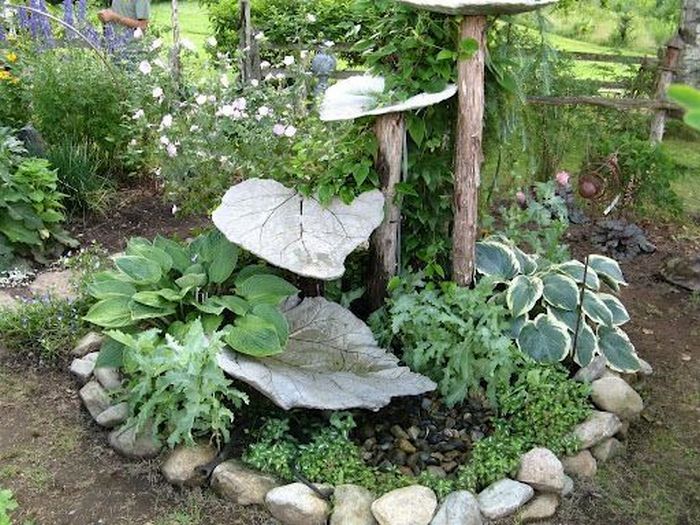
Integrate concrete leaves with other natural elements such as wood, stones, or metal to enhance their organic appeal. For instance, placing them near a wooden trellis or alongside a rock garden can amplify the natural textures in your garden, making the concrete leaves feel like an intrinsic part of the landscape rather than additions.
Vertical Garden Enhancements
For those with limited space or who prefer vertical gardens, concrete leaves can be mounted on garden walls or fences as ornamental features. They can also be used to create green walls by attaching small containers to the back of the leaves, allowing for small plants or succulents to grow outwards.
Utilize as Functional Decor
Beyond their beauty, concrete leaves can serve functional purposes in the garden. Use them as birdbaths or feeders by positioning them on taller piles of stones or specially designed stands. Their broad, shallow shapes are perfect for holding water or bird feed, attracting wildlife to your garden.
Concrete leaves offer endless possibilities for enhancing garden spaces. With the right placement and integration, they can transform ordinary gardens into magical landscapes that captivate and delight all who visit.
Garden Delights: Exquisite DIY Concrete Leaves
Unleash your creativity and enhance your garden with stunning DIY concrete leaves. Follow these 8 simple steps to create unique and eye-catching garden elements that will leave everyone in awe.
From gathering materials to adding the finishing touches, this guide walked you through the process of crafting beautiful concrete leaves.
Bring nature-inspired artistry to your garden and enjoy the beauty and durability of these handmade creations!
For more ways on improving the look of your outdoor space, check out our garden rocking chair guide!

