Last Updated on March 5, 2024 by teamobn
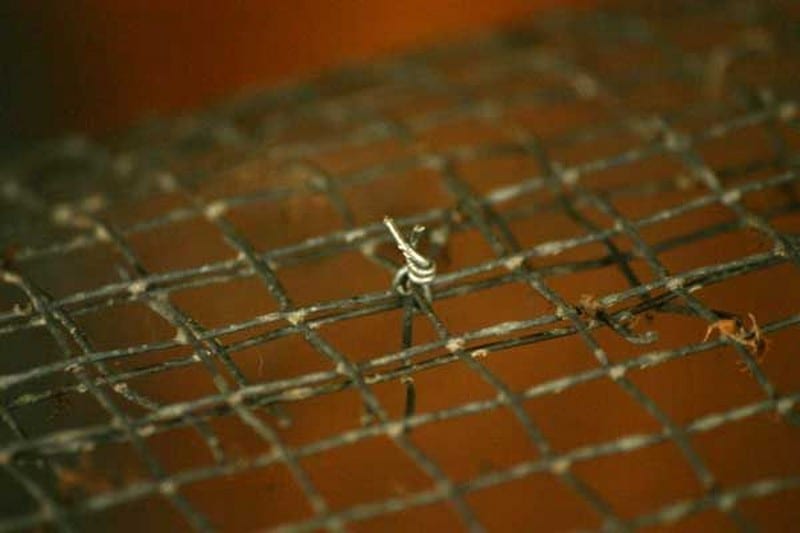
To fasten the seam of the tube I used #18 wire. (Be careful not to over-tighten the wire or the wire will break.)
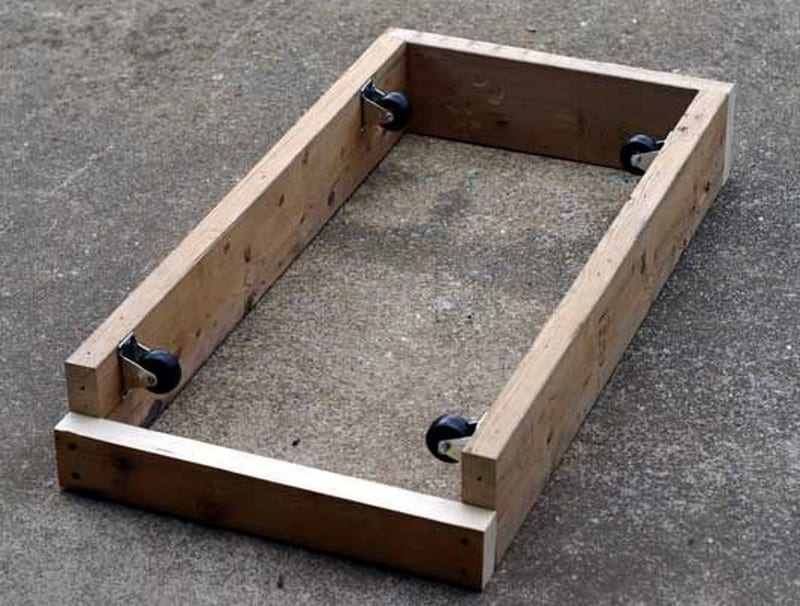
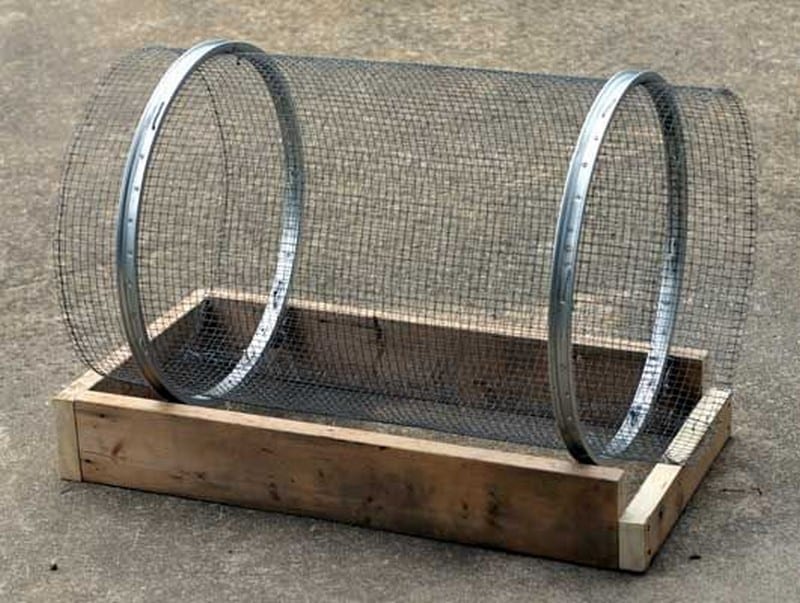
This is a pretty simple structure so I won’t go into a lot of detail. I used 2×6 lumber because I happened to have several short pieces on hand that were just the right size, but 2x4s should work fine too and would be a little lighter.
My side pieces are 34 inches long and the ends are 19 inches long which leaves a gap of 16 inches in the middle. Note that one end needs to be ripped down 2.5 inches lower than the other because the drum needs to overrun the box slightly so that the coarse materials spill out of the drum.
Since I used 2x6s (1.5 x 5.5) my spillway end piece was 3 inches wide. If you are using 2x4s (1.5×3.5) Then your end piece would need to be one inch wide.
Note that these dimensions assume that you are using the same diameter rims that I used. If you use different size rims then obviously you will need to modify the dimensions to accommodate your particular arc.
To align your rollers place the finished drum onto the roller box and then mark your roller positions. You may want to attach the rollers first with simple drywall screws (as I did) to test their positioning and then drill and bolt them later once you are happy with the alignment.
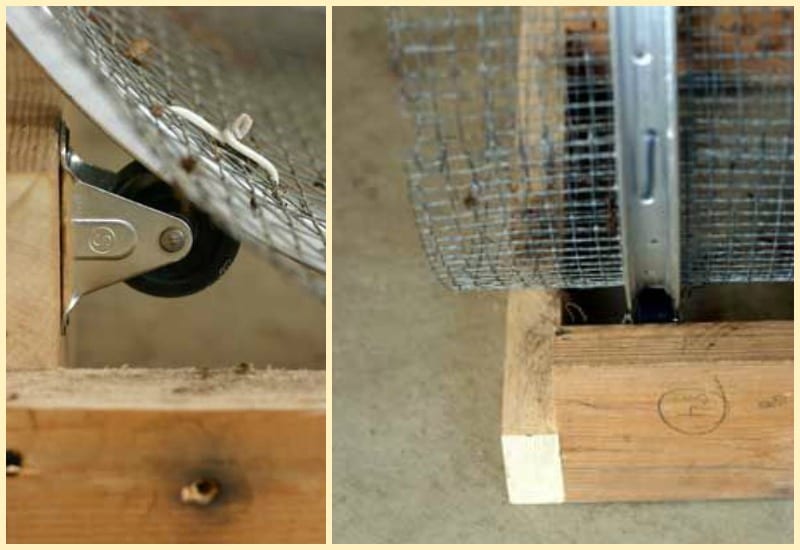
Once the roller box is complete you are ready to try the trommel out. Mine fits perfectly on top of my wheelbarrow which is handy so you may want to take your wheelbarrow size into account when planning your dimensions. You could also place the trommel on sawhorses or make permanent legs if you prefer. Just make sure the output side of the trommel is slightly downhill from the input side.
If you have a large quantity of material to screen you may want to find a buddy who will keep turning the drum while you continue shovelling material.
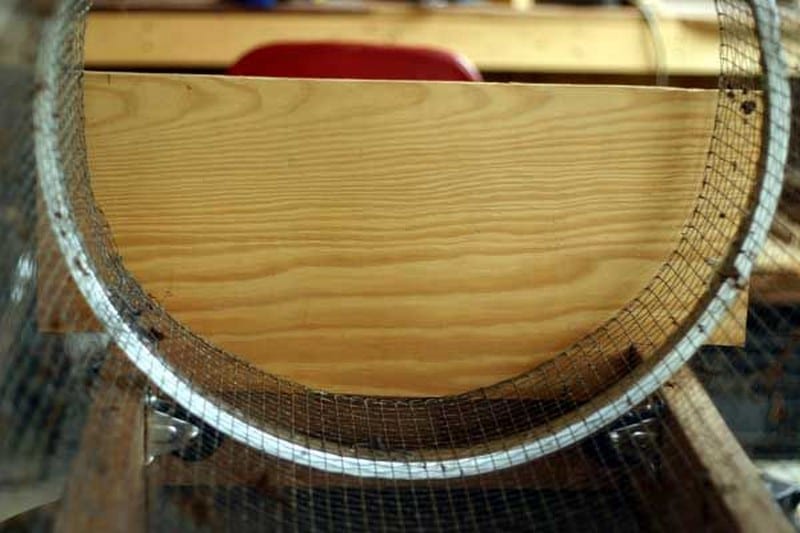
Once I tried the trommel out I discovered that if you pile a couple of shovelfuls of material in the uphill end of the drum and then turn it yourself some of the coarse material tends to spill uphill and out of the drum.
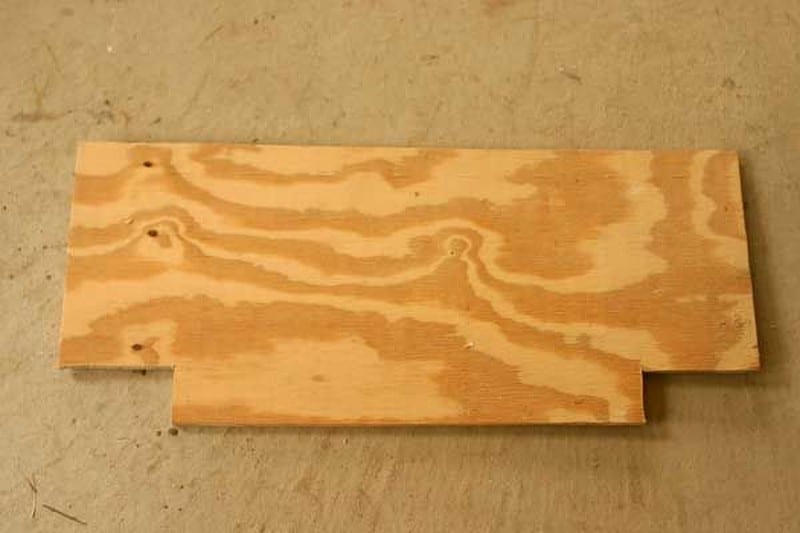
To solve this problem I made a simple partition out of plywood to prevent this from happening. I don’t think this would be a problem when operating the trommel with a buddy since the material wouldn’t build up into such a large pile as you have when working alone.
This is indeed very simple equipment that would help an average gardener make compost. You could copy this project as it is or you can use it as inspiration. Be creative, look around you. What do you have in your garage or storage you think you could use to make compost? How would you build your own compost sifter?
Thanks to SteveGerber for this great project.
Advantages of a DIY Compost Sifter
Composting is a simple yet powerful practice that transforms organic waste into nutrient-rich soil, providing a sustainable solution to waste management while enhancing soil fertility and promoting plant growth. Central to the composting process is the use of compost sifters, which help refine compost by removing large debris and producing a fine, uniform material ready for use in gardens, landscaping, and agriculture.
While commercial compost sifters are available, crafting your own DIY version offers numerous benefits. In this article, we’ll explore 8 compelling reasons why DIY compost sifters are worth the effort and investment.
1. Cost-Effectiveness: One of the primary advantages of DIY compost sifters is their cost-effectiveness. Constructing your own sifter allows you to utilize affordable or reclaimed materials, significantly reducing the overall cost compared to purchasing a pre-made one.
Materials such as wood, wire mesh, and hardware cloth are readily available and inexpensive, making DIY compost sifters accessible to a wide range of budget-conscious individuals.
2. Customization: DIY compost sifters offer unparalleled customization options, allowing you to tailor the design and specifications to meet your specific needs and preferences. Whether you have limited space on a balcony or manage a large-scale composting operation, you can adjust the size, shape, and features of your sifter accordingly.
This flexibility empowers you to optimize your composting process for maximum efficiency and effectiveness.
3. Environmental Sustainability: Building your own compost sifter aligns with principles of environmental sustainability by reducing reliance on new manufacturing processes and minimizing waste. By repurposing reclaimed materials or using sustainably sourced resources, you can minimize your ecological footprint and contribute to resource conservation.
Additionally, composting organic waste diverts it from landfills, where it would otherwise generate harmful greenhouse gas emissions.
4. Educational Value: Constructing a DIY compost sifter provides valuable learning opportunities and fosters a deeper understanding of composting principles and sustainable practices. Whether you’re a seasoned DIY enthusiast or new to composting, the process of designing, building, and operating a sifter offers practical insights into mechanics, carpentry, and environmental stewardship.
Involving children or community members in the project can also promote awareness and appreciation for sustainable living.
5. Improved Compost Quality: A well-designed compost sifter ensures that your finished compost is free of large debris, resulting in a higher-quality end product. By removing sticks, rocks, and clumps, the sifter produces a fine, uniform compost that is easier to handle, spread, and incorporate into the soil.
This refined compost provides optimal nutrients for plant growth and soil health, contributing to vibrant and productive gardens.
6. Reduction of Waste: DIY compost sifters play a crucial role in reducing waste by efficiently processing organic materials into valuable soil amendments. By screening out undesirable elements and refining compost to its purest form, sifters minimize the amount of material that would otherwise be discarded or underutilized.
This waste reduction not only conserves resources but also mitigates environmental pollution and degradation.
7. Long-Term Savings: While there may be initial investments of time and resources involved in building a DIY compost sifter, the long-term savings can be substantial. By creating a durable, well-crafted sifter using quality materials and construction techniques, you can enjoy years of reliable performance without the need for frequent replacements or repairs.
This longevity translates into cost savings over time, making DIY compost sifters a wise investment in sustainable gardening practices.
8. Empowerment and Self-Reliance: DIY compost sifters empower individuals and communities to take control of their own food production and environmental impact. By building and utilizing homemade sifters, you become less reliant on external suppliers and commercial products, gaining a sense of self-sufficiency and resilience.
This empowerment fosters a deeper connection to the natural world and instills a sense of pride in contributing to positive change.
From waste to wealth, DIY compost sifters offer a multitude of benefits that make them a worthwhile investment for individuals and communities committed to sustainability and self-reliance. Through cost-effectiveness, customization, environmental sustainability, educational value, improved compost quality, waste reduction, long-term savings, and empowerment, DIY compost sifters contribute to a more resilient and eco-friendly future.
By embracing the journey of composting and investing in DIY solutions, we can turn organic waste into valuable resources and cultivate healthier soils, thriving gardens, and a more sustainable world.
The Wrap Up
DIY compost sifters offer a compelling array of benefits that make them a valuable addition to any composting operation. From their cost-effectiveness and customization options to their environmental sustainability and educational value, DIY compost sifters provide a wealth of advantages for individuals and communities committed to sustainable living. By investing time and effort into constructing your own sifter, you can not only save money but also tailor the design to meet your specific needs and preferences.
Moreover, DIY compost sifters contribute to environmental sustainability by reducing waste and minimizing reliance on new manufacturing processes. By repurposing reclaimed materials or using sustainably sourced resources, DIY enthusiasts can minimize their ecological footprint and promote resource conservation. Additionally, composting organic waste diverts it from landfills, reducing greenhouse gas emissions and environmental degradation.
The educational value of DIY compost sifters cannot be overstated. Engaging in the design, construction, and operation of a sifter provides practical insights into mechanics, carpentry, and environmental stewardship. Whether undertaken as a solo project or as a collaborative effort with family or community members, building a compost sifter offers valuable learning opportunities and fosters a deeper connection to the natural world.
Furthermore, DIY compost sifters contribute to improved compost quality by refining compost to its purest form. By removing large debris and producing a fine, uniform material, sifters create compost that is easier to handle, spread, and incorporate into the soil. This high-quality compost provides optimal nutrients for plant growth and soil health, resulting in vibrant and productive gardens.
Additionally, DIY compost sifters play a crucial role in waste reduction by efficiently processing organic materials into valuable soil amendments. By screening out undesirable elements and minimizing waste, sifters help conserve resources and mitigate environmental pollution. This waste reduction aligns with principles of sustainability and environmental stewardship, promoting a more resilient and eco-friendly future.
In terms of long-term savings, DIY compost sifters offer significant advantages over their commercial counterparts. While there may be initial investments of time and resources involved in building a sifter, the long-term benefits far outweigh the costs. By creating a durable, well-crafted sifter using quality materials and construction techniques, DIY enthusiasts can enjoy years of reliable performance without the need for frequent replacements or repairs.
Finally, DIY compost sifters empower individuals and communities to take control of their own food production and environmental impact. By building and utilizing homemade sifters, individuals become less reliant on external suppliers and commercial products, gaining a sense of self-sufficiency and resilience. This empowerment fosters a deeper connection to the natural world and instills a sense of pride in contributing to positive change.
In conclusion, DIY compost sifters are a worthwhile investment for anyone interested in composting, gardening, and sustainable living. By embracing the benefits of cost-effectiveness, customization, environmental sustainability, educational value, improved compost quality, waste reduction, long-term savings, and empowerment, DIY enthusiasts can contribute to a more resilient and eco-friendly future.
Frequently Asked Questions
1. What is a DIY compost sifter, and why should Iyou consider building one?
A DIY compost sifter is a homemade tool used to refine compost by separating larger debris, such as sticks and rocks, from finer compost particles. It typically consists of a frame with a mesh or screen bottom. You should consider building one to improve the quality of your compost, making it easier to spread and use in your garden.
2. How does a DIY compost sifter work?
To use a DIY compost sifter, you pour your compost onto the screen surface and gently shake or agitate the sifter. The finer compost particles fall through the mesh or screen, while larger debris remains on top. This process separates the compost into usable material and leftover waste, creating a more refined end product.
3. What materials do you need to build a DIY compost sifter?
DIY compost sifters can be constructed using a variety of materials, such as wood for the frame and wire mesh or hardware cloth for the sifting surface. Additional materials may include screws or nails for assembly, depending on the design. You can repurpose materials like old window screens or wire baskets for the sifting surface if desired.
4. Do you need any specialized tools or skills to build a compost sifter?
Building a DIY compost sifter typically requires basic woodworking tools like a saw, drill, hammer, and screwdriver. While some designs may involve more advanced techniques, many can be constructed with minimal skills and tools. Instructions and tutorials are widely available online to guide you through the process.
5. How long does it take to build a DIY compost sifter?
The time required to build a DIY compost sifter varies depending on factors such as the complexity of the design and your experience level. Simple designs may be completed in a few hours, while more intricate ones may take longer. It’s essential to take your time and follow instructions carefully to ensure a sturdy and functional sifter.
6. Can you customize the size and design of your DIY compost sifter?
Yes, one of the advantages of building your own compost sifter is the ability to customize it to fit your needs. You can adjust the size, shape, and features of the sifter based on factors like the volume of compost you need to process and the space available for the sifter. This customization ensures the sifter meets your specific requirements.
8. How do you maintain a DIY compost sifter?
Maintaining a DIY compost sifter is relatively simple. After each use, clean the sifter to remove any remaining compost or debris. Periodically inspect the sifter for signs of wear or damage, such as loose screws or torn mesh, and repair or replace any damaged components as needed. Proper maintenance ensures the sifter remains functional and efficient over time.
9. Are there any safety precautions you should take when using a compost sifter?
While using a compost sifter is generally safe, it’s essential to take precautions to avoid injury. Wear gloves to protect your hands from splinters or sharp edges, and be cautious when handling heavy or bulky materials. Ensure the sifter is stable and securely positioned to prevent tipping or accidents during use.


