Last Updated on September 20, 2022 by teamobn
Thinking of selling your home? It’s best that you invest your time and a little money in improving your kitchen and bathroom. They are the big sellers that can increase the value of your home. The bathroom in particular is where you get the most return for your investment.
Let there be no confusion, however: a bathroom redo is going to cost you some time and money – maybe even a few grey hairs. The price can range from a few thousand dollars to spruce up an existing bathroom to six figures for a high-end master bath. But if you’re smart and willing, you can cut down on expenses by renovating your bathroom the DIY way.
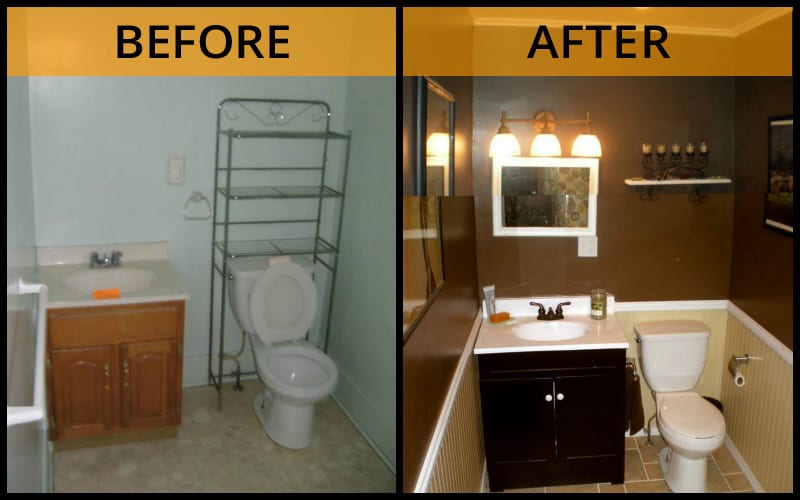
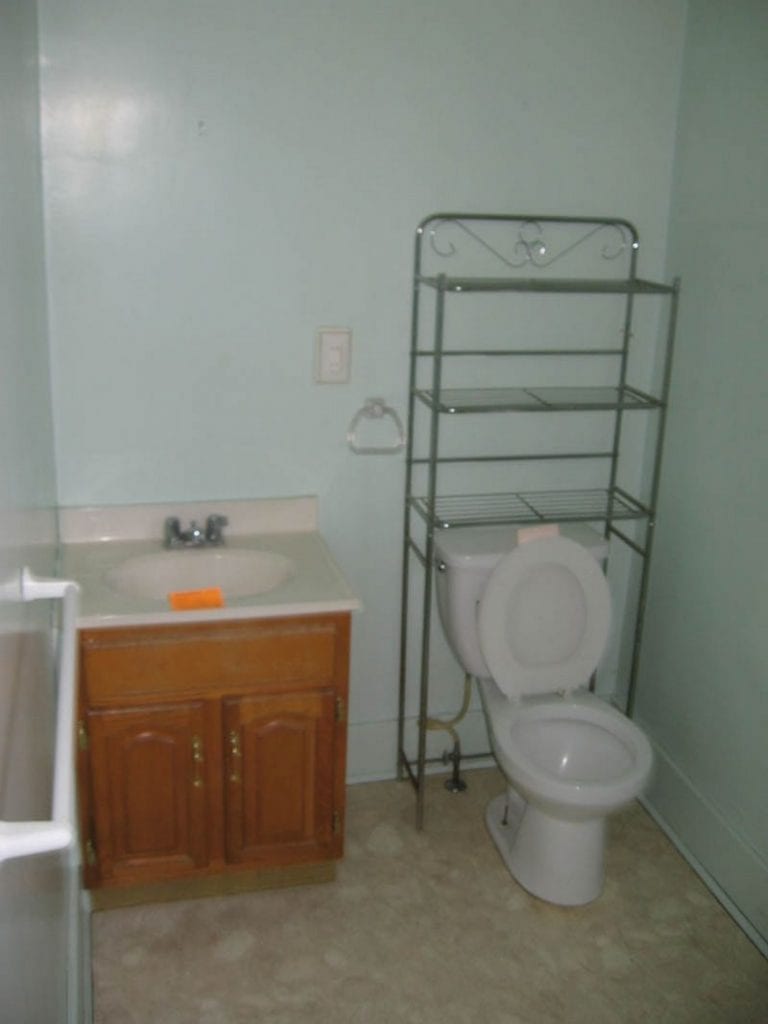
This DIYer bought a home that had a rather large but very bland half bathroom. The bathroom was poorly designed and a lot of space was wasted. So the DIYer decided to give it a complete makeover.
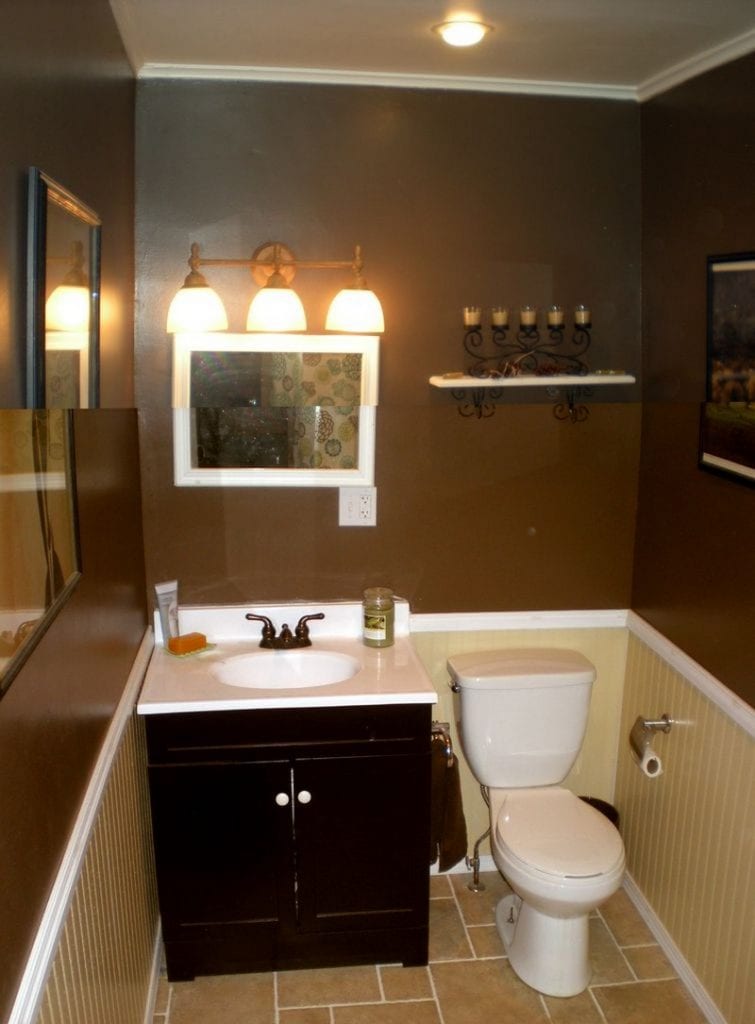
The bathroom renovation included recessed lighting, vanity lighting, an exhaust vent, shower plumbing, tiled shower walls, tiled floors, wainscoting, a bi-fold door, and painting. All of these were done by the owner himself, except for the plumbing. But he was lucky to find a plumber who was willing to explain how everything was done.
This successful bathroom renovation project proves that a DIY renovation is always possible for a minimum cost!
Click on any image to start the lightbox display. Use your Esc key to close the lightbox.![]()

Materials:
- Long Hex Bolt
- Door Knobs
- Bifold Door
- Basic Slider Lock
- Tiles
- Paint
- 2 Buckets
- Rags
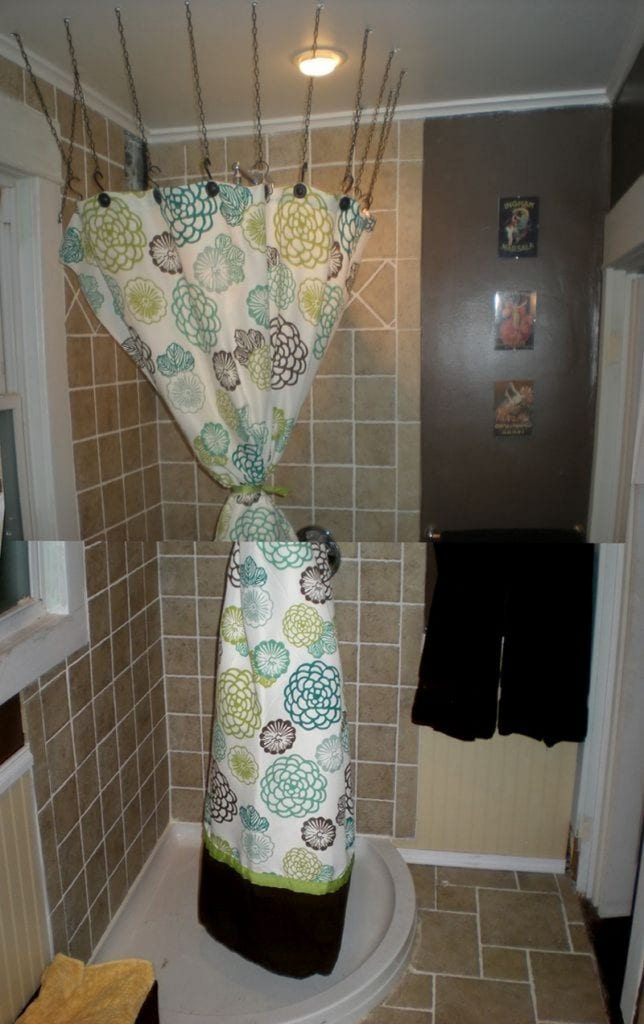
- Decorative Rail
- Liquid Nails
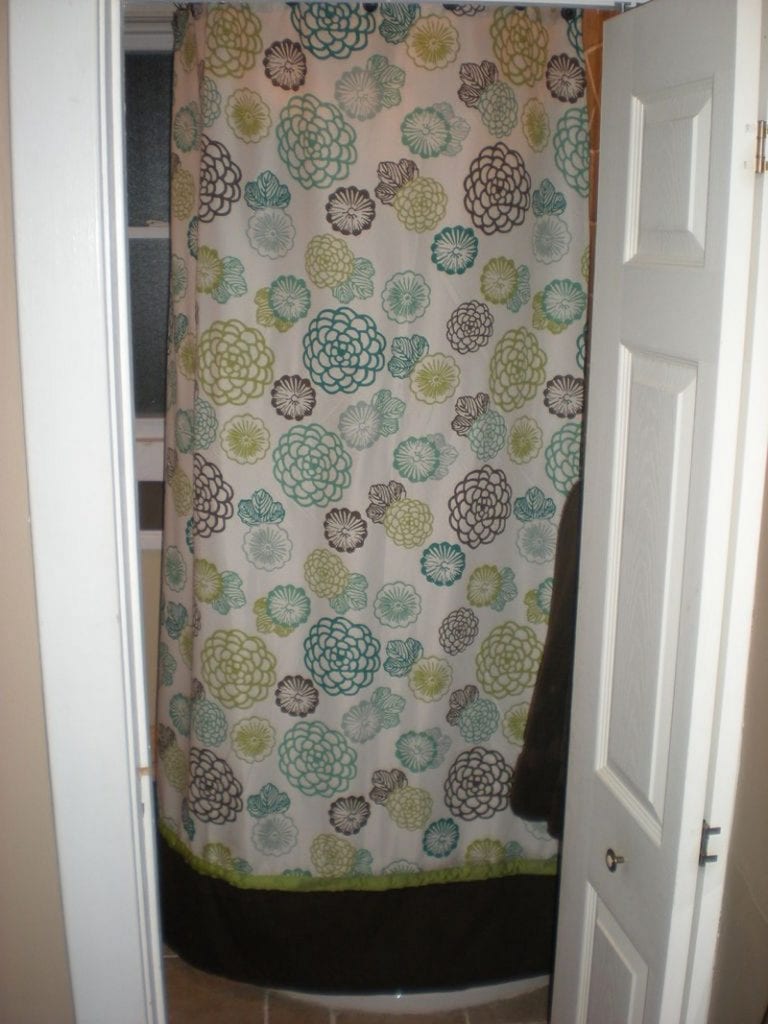
- Shower Curtain
- Chains
- Powder Coated Hooks
- Cardboard
- Hardibacker Cement Board
- Fibre Tape
Tools:
- Drill
- Dremel Tool
- Diamond Tipped Score Tool
- Tile Nipper/Tile Saw
- Sealer
- Caulking Gun
Step-by-step DIY Bathroom Renovation
I was originally unsure about how I wanted to set up the bathroom. I knew I wanted to add a shower and that a corner shower was probably the best route to go. I originally considered moving the sink near the door and putting the shower in its place.
The problem was that (a) the shower drain would involve cutting through a supporting joist (doable but more complex) and the quote for the plumbing was about $800 since it involved moving two fixtures.
A few months later I had the revelation that if I changed the style of the door to either a bifold or pocket door, I would have enough room in the adjacent corner. Although the wall wasn’t a load-bearing wall, I was not super excited to tear it open enough to install a pocket door. I settled on a bifold door as a reasonable compromise.

By purchasing a bifold door for the bathroom that is the same size as my current door, installation required only screwing on a bracket in the lower left and a sliding tract along the top of the frame–literally a 15-minute job.
I wanted to have a small door knob on both sides of the door, but the only knobs I could find were attached to the end of machined screws and thus the head of a screw would be visible on both sides.
My solution was to take a hex bolt long enough to stick out both sides of the door and use a Dremel tool to cut off the bolt head. This left me with threading to which I could attach a knob on each side with no extra holes.

Bifold doors also don’t traditionally have lock mechanisms, something pretty much required for a bathroom. For this, I got a basic slider lock and attached it to the top of the door near the outside of the door.

The biggest pain for this bathroom renovation project was breaking out the plaster where the shower would go.

Recessed lighting seems to be all the rage now and is an attractive option that is pretty reasonably priced (basic lights run about $10-15 each).


Since my upstairs bathroom is on a different circuit, I was free to tie in the exhaust fan, recessed lighting, and vanity light into the same circuit that served the outlet next to the sink. As long as everything else is connected downstream from the GFCI outlet, they are all protected.

Pigtail lights give you a temporary source of light during the construction process.
I had a licensed plumber help me with the installation of the shower plumber. The last thing I need is a slow leak hidden inside the wall to rot my house from the inside out.

Greenboard is a type of gypsum-free drywall suitable for use in moist places such as bathrooms and that’s what I’ve used here.
You might as well go ahead and completely finish the ceiling including the paint before proceeding to the rest of the bathroom renovation, as the mess only falls down.

The particular shower base I used did not require setting in a mortar bed, others might. You should consult the instructions or dealer for your specific shower base. I kept pillows and a sheet over the base during the construction process to prevent damage from accidentally dropped tools.
Insulation was added where needed because you can never have too much. I also wired an exhaust fan directly above the shower to help keep moister generated under control.
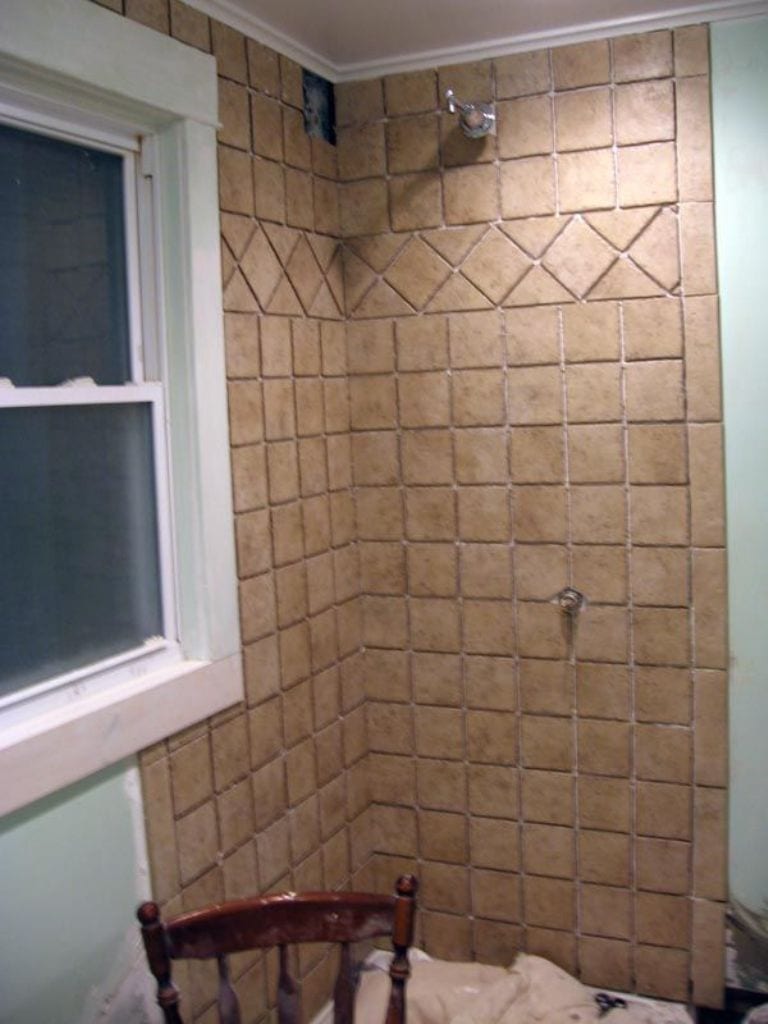
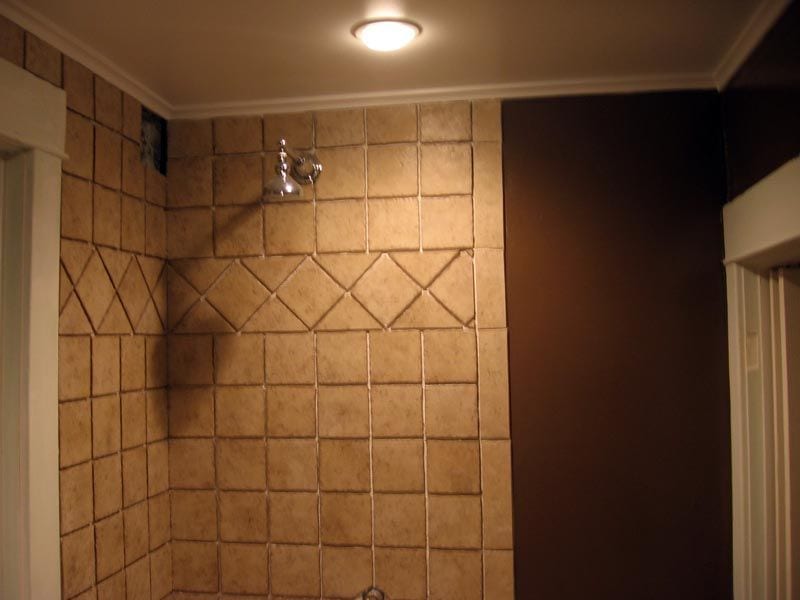
The nice thing about building your own shower is you have the freedom to customize it as needed. I’m 6’8″ and I mounted this high enough I can stand comfortably underneath, something I’ve never done before. To prepare for tiling I mounted Hardibacker to the studs.
The Hardback can be cut using a diamond-tipped score tool and joints between sheets should be sealed with silicone and then spanned with fibre tape. Leave a small gap of maybe 1/4-1/2″ between the tile board and the base of the shower. With that set, it’s time to tile.

This was my first tiling job and I learned the hard way that you want to use organic mastic, not thin-set on walls. When planning your pattern don’t be afraid to mix things up. I didn’t want a basic boring grid so by adding a row of diagonal tiles I was able to create an interesting architectural element.
The outer perimeter was done using bull nose tiles. This style of tile was the “Tuscan bone” porcelain tile available from Lowes.
Continued Page 2…