Last Updated on October 13, 2022 by teamobn

Most garage doors are now made from aluminium or composites as they’re lightweight, and last longer compared to their older timber counterparts.
As homes get refurbished and modernised, that old timber garage door is usually one of the casualties. Most will end up in a landfill. But here’s a much better solution.

Instead of taking the garage doors to the dump, why not turn them into something useful for your home? This makes sense as most of these garage doors were made to last in all types of conditions and weather. Garage doors are made from quality timber that has beautiful grain, they’re still durable, and they’re free!
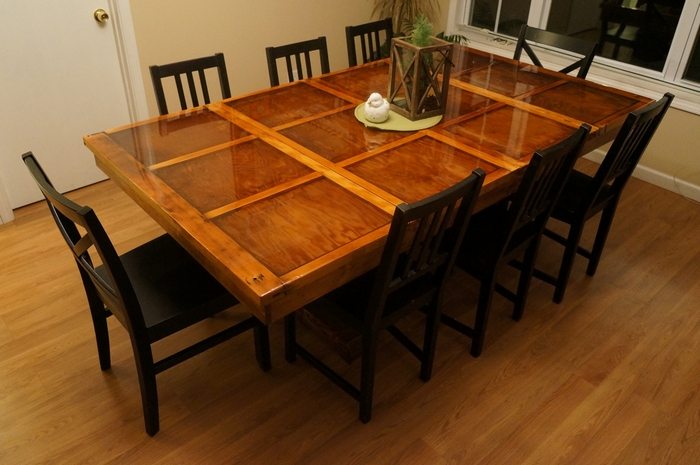
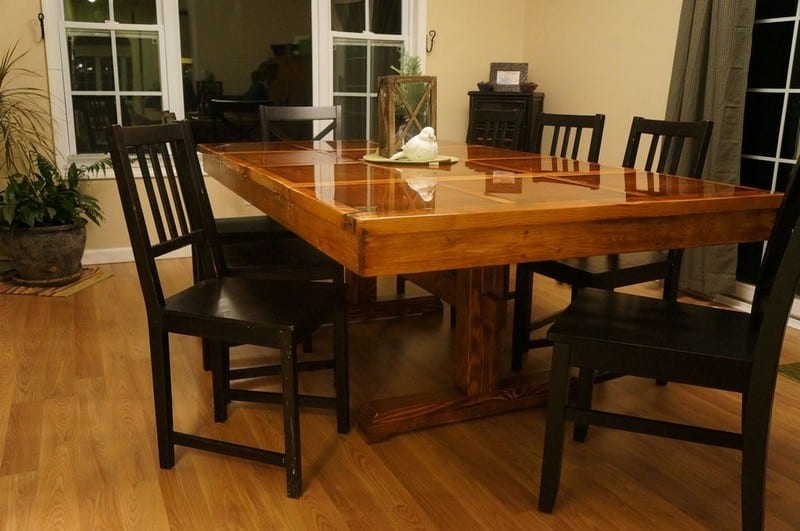
This project is a perfect example of how you can repurpose old timber garage doors. The owner decided to turn his garage door into an awesome dining table! The build turned out very well that you won’t even notice that it’s made from an old garage door that would otherwise end up in the trash.
What do you think? Would you also do this if you had an old garage door?
Click on any image to start the lightbox display. Use your Esc key to close the lightbox.
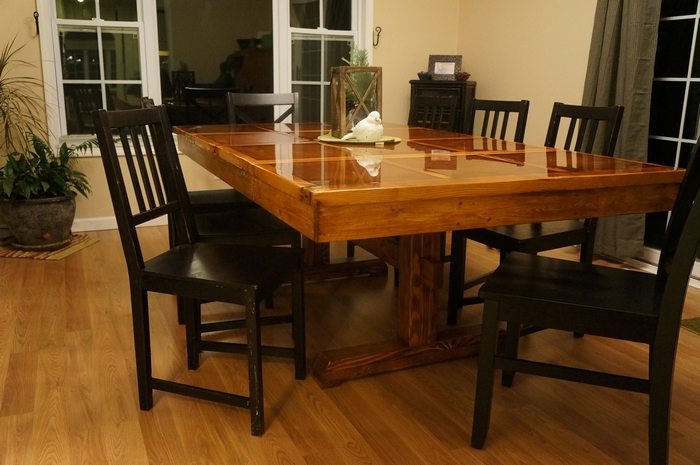

Materials:
- Clear Epoxy
- Wooden Garage Door
- 2×4 Timber
- 1×4 Timber
- Polyurethane
- Wood Stain
Tools:
- Sander
- Circular Saw
- Power Drill/Driver
- Scraper
- Paint Brush
- Torch
Steps:
I actually used the CAD model to calculate the exact amount of Epoxy I would need.

DISCLAIMER: I started by attempting to scrape the peeling paint off the doors. This proved to be very difficult as there was approximately 60 years’ worth of paint stuck to the door. Since I wasn’t using the painted side of the door for the top, I didn’t spend a lot of time trying to remove the paint. I basically wanted to make sure I didn’t have loose paint chips coming off the bottom of the table.

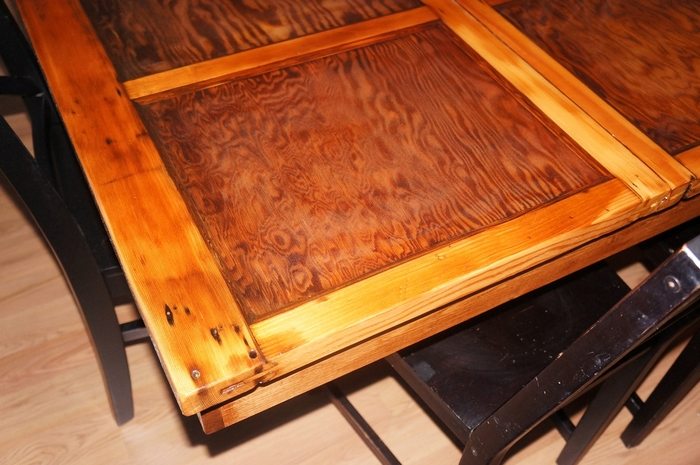
I sanded the upper surfaces of the ribs with an orbital sander and finished them by hand.

Use a metal grill brush for the surfaces of the pockets. It would easily take the loose materials off and would do a sort of sanding action as well. I wasn’t too worried about getting the surfaces of the pockets smooth since they were going to be filled with 1/2″ of epoxy in the end. Please note when sanding, it is highly advisable to use a respirator or at the very least, a dust mask.
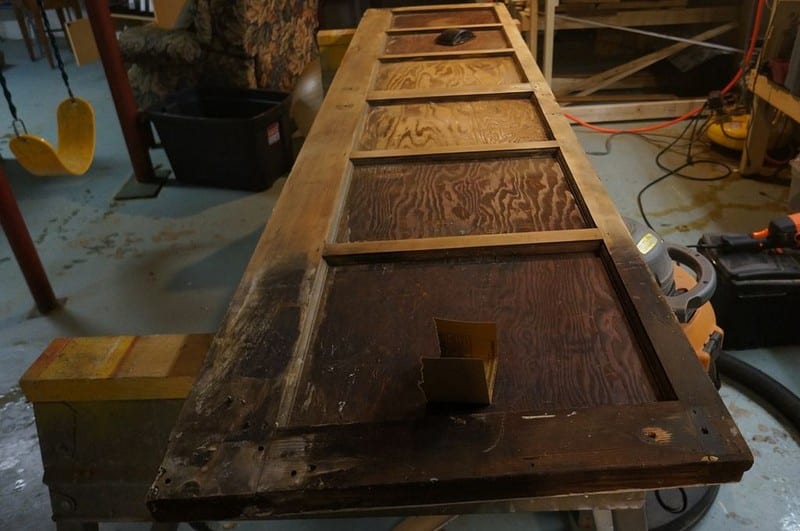
After the cutting and sanding, I tried to round off the sharp edges created by the cuts. I wasn’t very particular with this either since it was a worn, rustic, industrial look I was going for.


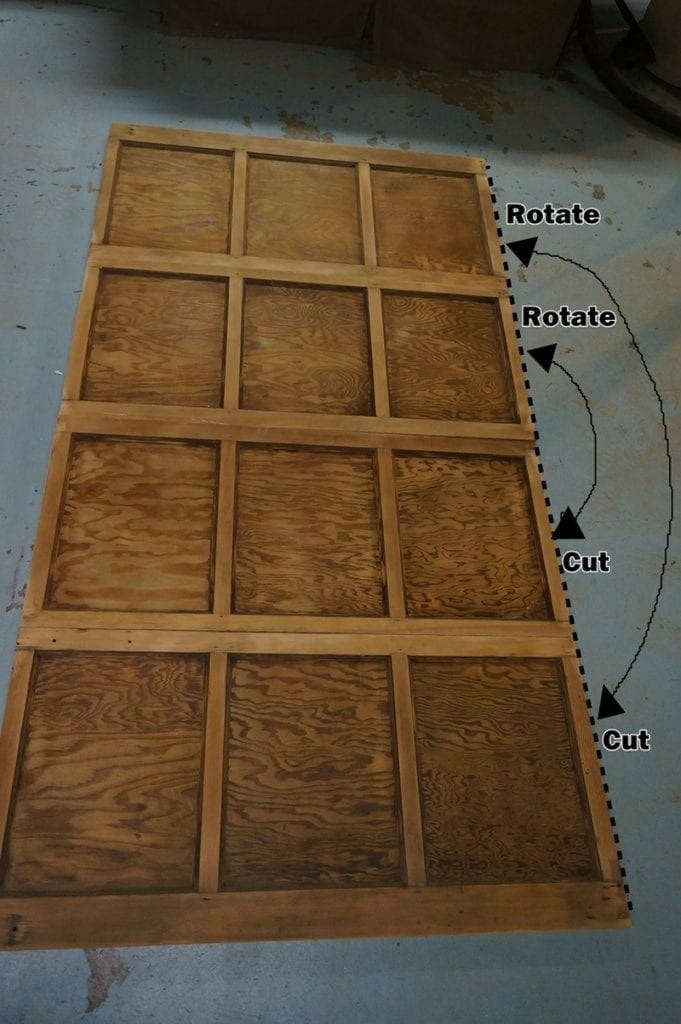
CLEAN UP THE ROT: The bottom section had some areas that were starting to rot, so I cut about an inch and a half off the bottom section.

Then I cut each section in half.

Once I cut the sections in half, I had to cut about an inch off what used to be each edge of the sections so the width of the edges would be the same.

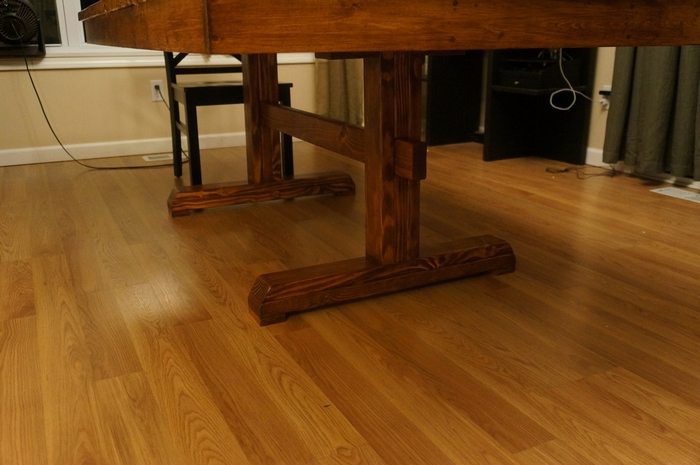
Figuring out which style of legs to make was the next step. I thought about regular post legs, angled legs, pedestal legs, and even tensegrity legs. Finally, my wife showed me a wonderful how-to on making a farmhouse table.

TORCH IT! NOTE: The following instructions are dangerous if proper caution is not exercised! I will not be held responsible for the improper use of a blow torch!
The 2x4s I bought were red pine so they would match the aged red pine of the garage door. I made all the cuts, and glued and screwed them together. Once they were set, I torched them!
CAREFULLY sweep a torch over the wood allowing the flame to scorch the wood. You don’t want to burn the wood to ashes, just char the outer grains to a nice dark brown/black. I varied the amount of charring over the wood to give it some variety.

Once you have a level of blackening you are happy with, take a wire brush and scour off the charred wood. The more you burn it the more material you will remove. The flame burns the softer part of the grain and hardly touches the harder parts.
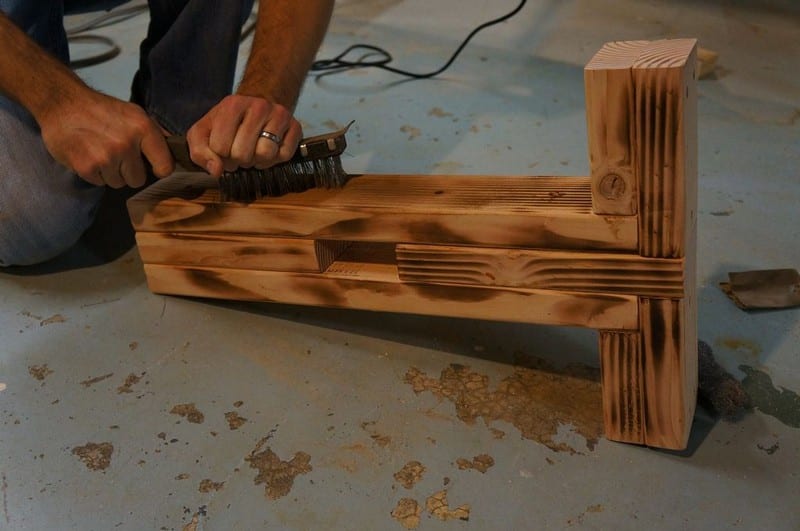
After you have removed most of the blackened grains, go over it with fine-grit sandpaper to smooth out the top grains. You should end up with a very textured wood with beautiful darker colour variations.
I applied stain to the wood per the manufacturer’s instructions, then applied 3 coats of polyurethane. This gave a wonderful look that complimented the tabletop. I wasn’t going for an exact match, but a complimentary look to make a pleasing flow of colours and textures.

I attached all the boards to the top with screws and glue. In the seams where the door panels met and where the 2×4’s laid on the panels, I applied Liquid Nails.


I cut the bevel AFTER I glued the pieces together so the cut is seamless.

I didn’t want the slightest bit of sag, which is a problem with many tables over time. I built the frame of dimensional lumber first and then added it to the panels.
- I placed 2×4’s over each seam where the panels joined together.
- I added notched 1×4’s perpendicular to those 2×4’s. These ran along the ribs of the door.
- I then added a box of 1×4’s around the whole outside of the substructure.
I cut both boards together so the frame would be straight and square.

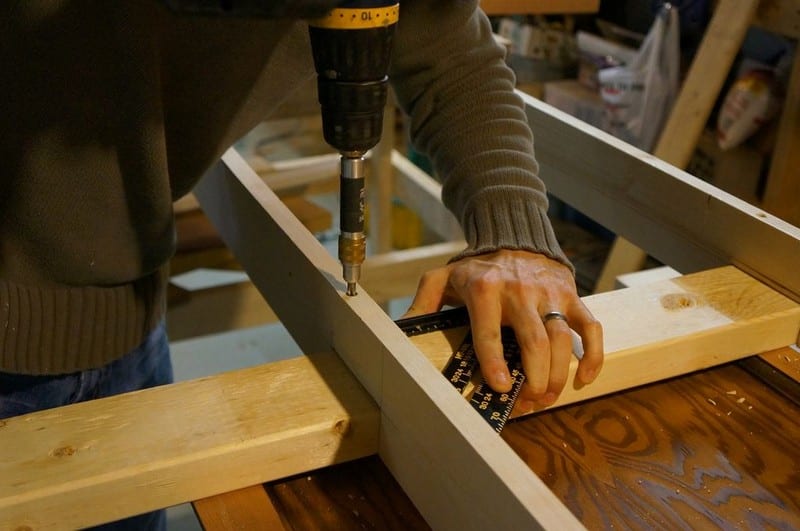
Finally, after the frame was attached and the adhesives dried, I took the whole thing outside for a final levelling sand.


Plain and simple: Pre-drill and counterbore the holes to get a nice tight connection and screw directly into the 2×4. Use lag bolts or other strong types of fasteners with a wide head or shoulder. You could also add regular washers and lock washers to prevent any loosening of the screws. I wanted the legs to be removable so the table can be disassembled for easier moving, therefore I did not use any adhesive.

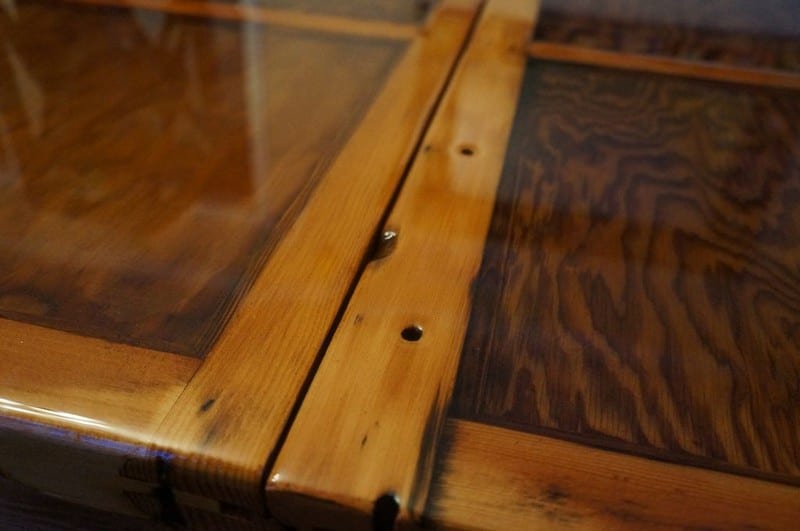
The next thing I did was to apply 3 layers of Satin Polyurethane to the ribs. I also applied – what I thought was sufficient – one layer inside the pockets.

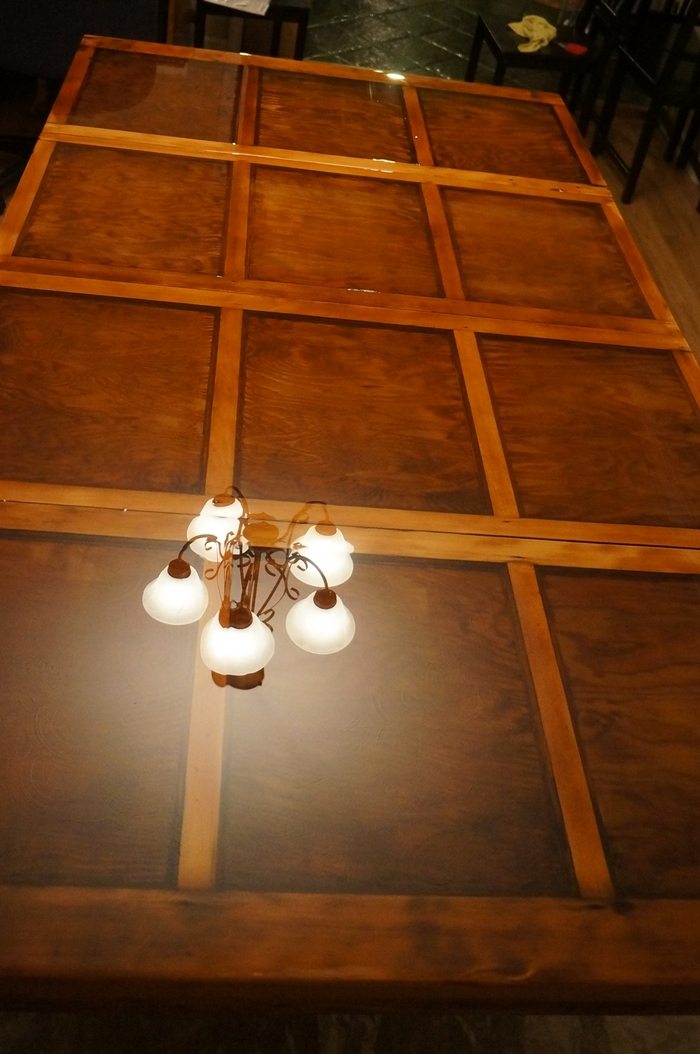
So my decision to pour epoxy into the pockets had my anxiety levels elevated! My goal was to only fill the pockets and leave the sealed wood exposed to create a nice contrast of finishes.

In order to pour the epoxy to 1/2″ thickness, I had to do 4 pours in each pocket. Each pocket pour required 3/4 of a gallon of each of the resin and hardener! Doing the math equals 6 gallons total of resin and hardener.
Follow the directions – there’s a reason they include them with their products, and they are found on several pages on their website.
Don’t rush it.

Use a blow torch to remove air bubbles and when you think you have them all removed, use your blow torch again. I wouldn’t recommend a heat gun or hair dryer since those are using forced air and can stir up a lot of dust – which you do not want in your epoxy.

Once all pockets had been completely filled, I noticed that when I had sanded the ribs, I had dipped the belt sander a little on some of the sides and the epoxy was flowing into those low edges, thus erasing any crisp clean edges from epoxy to rib. My solution!? Pour more epoxy over the whole table top making it all one level. It worked, but it was a L O N G day and I was bordering on insanity trying to ensure all bubbles were removed and all surfaces were level.

Overall it turned out beautifully in my opinion even though it didn’t have the look I was going for initially. I hope it inspired you to go out and use, reuse and upcycle items to make beautiful furniture yourself! The less we throw away the better it is for everyone!



Thanks to jmitch77 for this great project.


