Last Updated on March 11, 2024 by teamobn
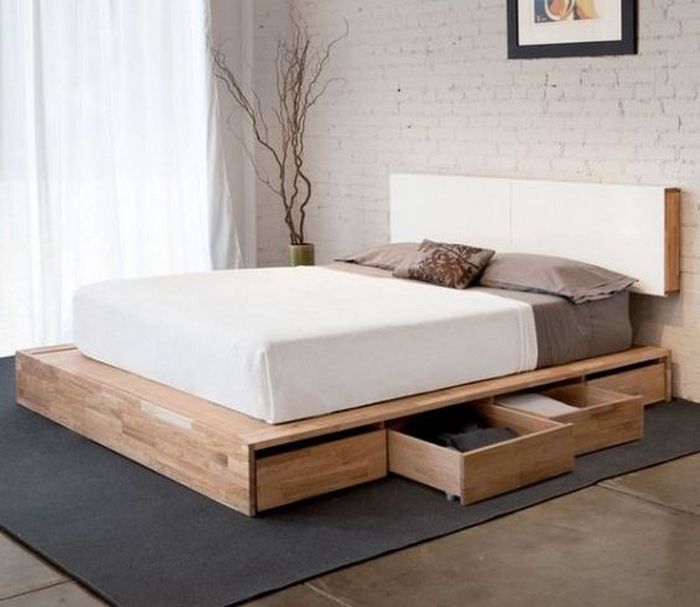
In every room of your house, there is always a better way to maximize the space. For some rooms, it may be as simple as decluttering and tidying up here and there. But that’s not always the case with the bedroom. The bed is not an easy obstacle to work around, after all. A great solution is a bed with drawers.
The space under the bed is great for extra storage; just be careful, as the dust bunnies can get annoying. This system will give you heaps of organized storage without the dust.
It’s completely DIY, and unlike store-bought beds with drawers, this one won’t cost you a fortune. Building it yourself is a better option, especially if you have limited bedroom space. You can customize the measurements of the bed with drawers to easily fit it in your bedroom.
It is very important to understand not only the size and space available in your room for the bed but also the mattress itself. When building a DIY bed, the starting point where you develop your beginning measurements is the mattress. Depending on the size of a mattress, you might need to change certain aspects of your DIY bed build. A small, narrower mattress, such as a twin, might bring extra space on the sides for more drawers, while a queen or king mattress might fill out the room more, leaving less room for a wider design.
Along with the dimensions and size of the mattress, another aspect of the build that is important to consider is the depth or thickness of your mattress. This will tie into the size of drawers you might need, how high the mattress must sit, and how much the mattress might move within the bed frame. A thicker mattress would need a deeper bay for the mattress to sit in, while a much thinner mattress might even need extra support to avoid having the mattress slide or adjust on you while you sleep.
While it might seem clear and obvious, the shape, size, and thickness of your mattress are of the utmost importance when preparing for your DIY construction and when making decisions on materials needed for the build. Making a wrong calculation or purchasing the wrong material might result in the mattress not fitting in the bed frame or an uncomfortable sleeping experience.
Click on any image to start the lightbox display. Use your Esc key to close the lightbox. You can also view the images as a slideshow if you prefer.

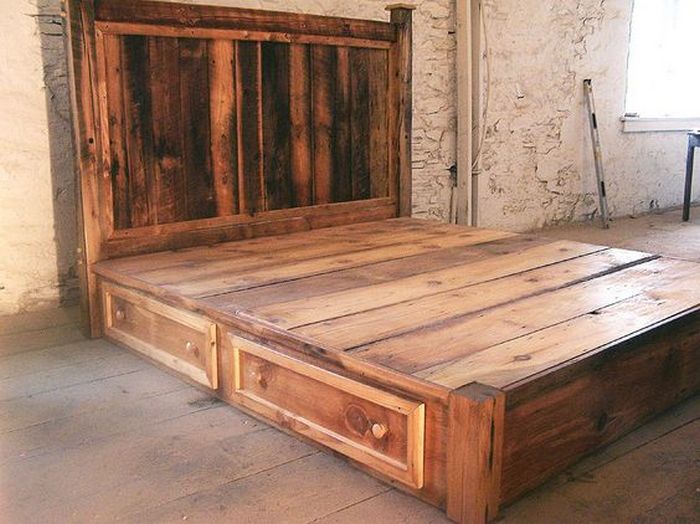
You also have the option of how many drawers and how wide or deep they will be. You have a free choice of materials depending on what style or cost you’re after. Learn how this DIY platform bed with drawers is made, and maximize the space in your bedroom!
Contents
How to Make Your DIY Bed With Drawers
Imagine the satisfaction of crafting a piece of furniture that not only meets your storage needs but also showcases your unique style. Whether you’re a seasoned DIY enthusiast or just dipping your toes into the world of handmade furniture, this bed with drawers is your ticket to a bedroom transformation.
So, pick up the essential materials and tools, and discover the art of making a DIY bed with drawers – a practical and stylish addition to your living space.
Materials
- Wood Shims
- ¾” Plywood
- 3/8″ Plywood
- ½” Plywood
- ¼” Luan Plywood
- 1/4″ Oak Plywood
- 3/4″ Maple Veneered Plywood
- 2×4 Lumber
- Wood Glue
- Screws
- 1 1/4″ Finish Nails
- Extension Drawer Slides
- Birch Veneer Edging
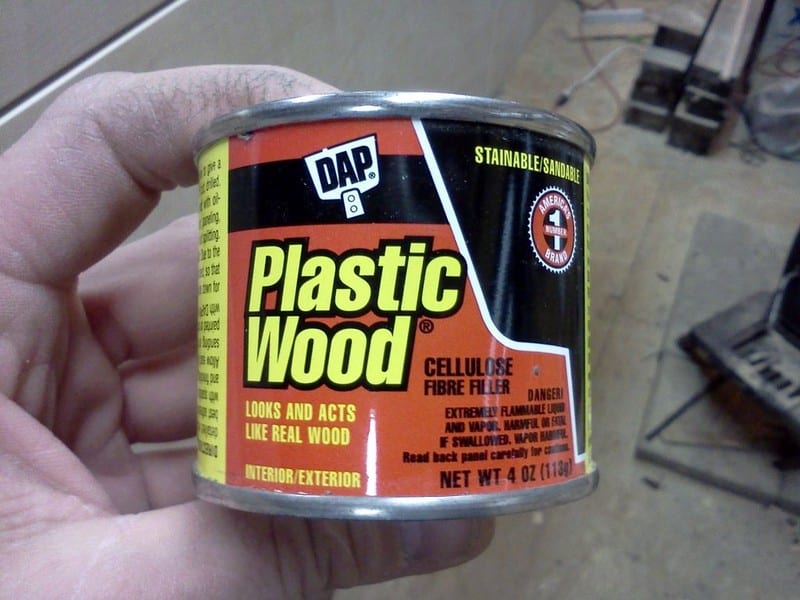
- Plastic Wood Filler
- Ebony Wood Stain
- Water Based Polyurethane
- Black Paint
- 220 and 300 Grit Sandpaper
Tools
- Table Saw
- Hammer
- Chisel
- Drill
- Mitre Saw
- Circular Saw
- Sander
- Pneumatic Nailer
- Foam Brush
- Iron
- Clamps
- Carpenters Square
Steps
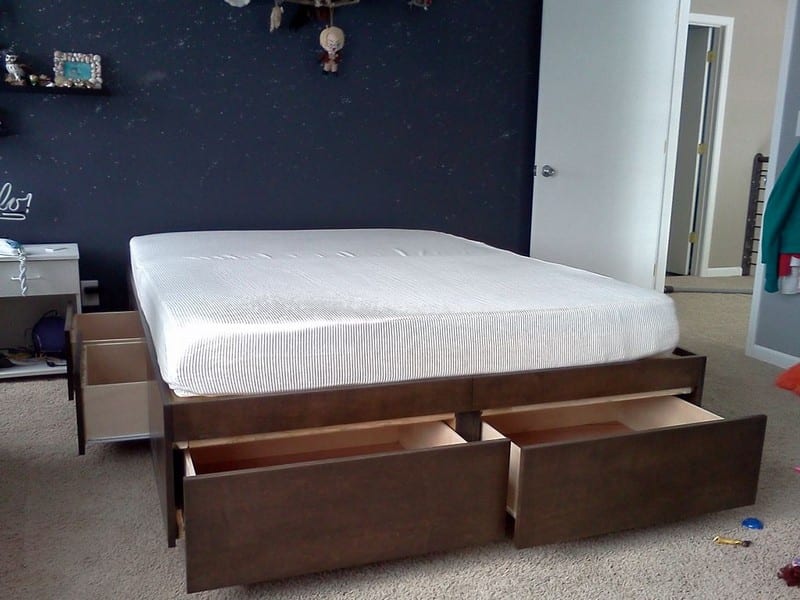
1. The construction of the bed with drawers begins with the building of the base. Make the main body of the bed with drawers sit on a smaller base to let the side and end edges overhang. I built this bed for a Queen size mattress which has dimensions of 60″ wide by 80″ in length.
I chose to have a 5″ overhang on the sides and end of the bed. To achieve this, I built the frame 75″ long by 50″ wide. I used 2″ x 4″ the laid-on edge which resulted in a base that is 3-1/2″ tall.
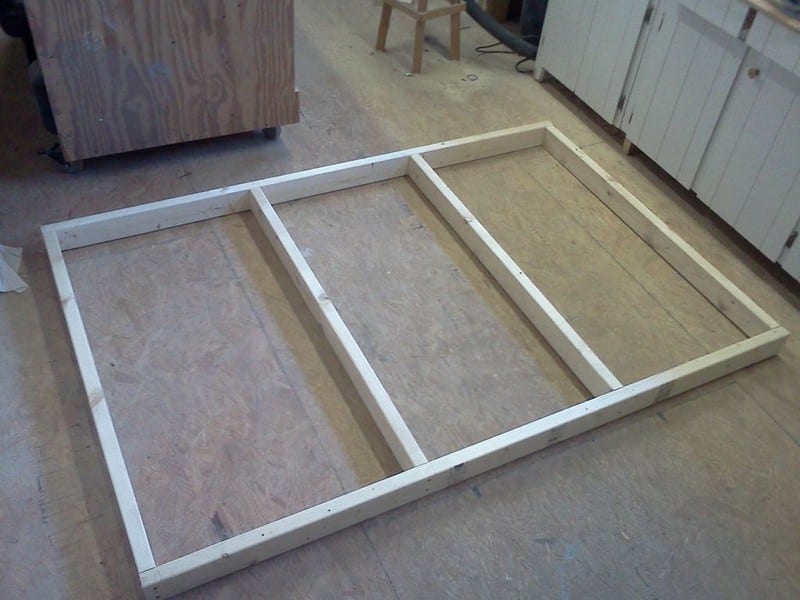
I leveled and squared the frame on the table using wood shims where needed. Then, I clamped it down to my work surface to keep it in place during construction.
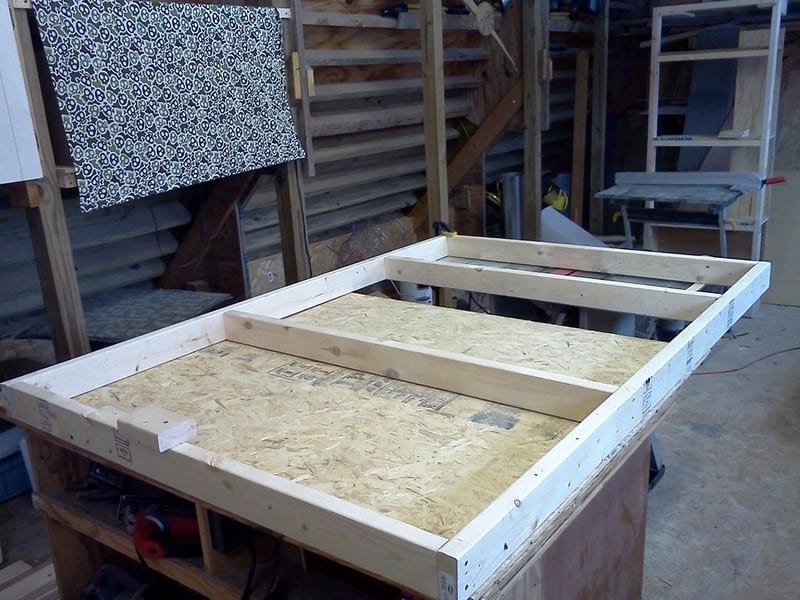
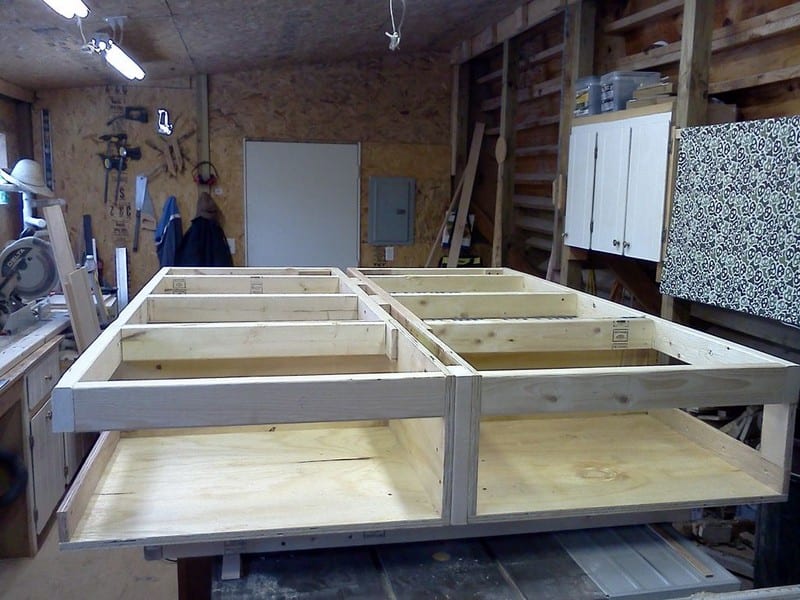
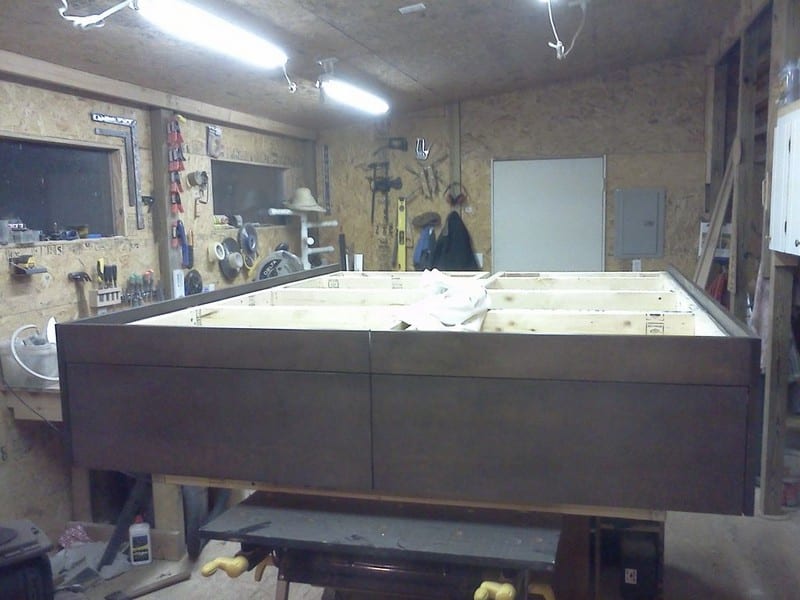
2. Build the bed frame in two halves. This is for easier transportation afterward. I constructed them out of 2 x 4 lumber and 3/4″ plywood, thus making the finished bed with drawers substantial and quite heavy. I chose to have two large drawers at the foot of the bed and two smaller drawers on each side of the bed.

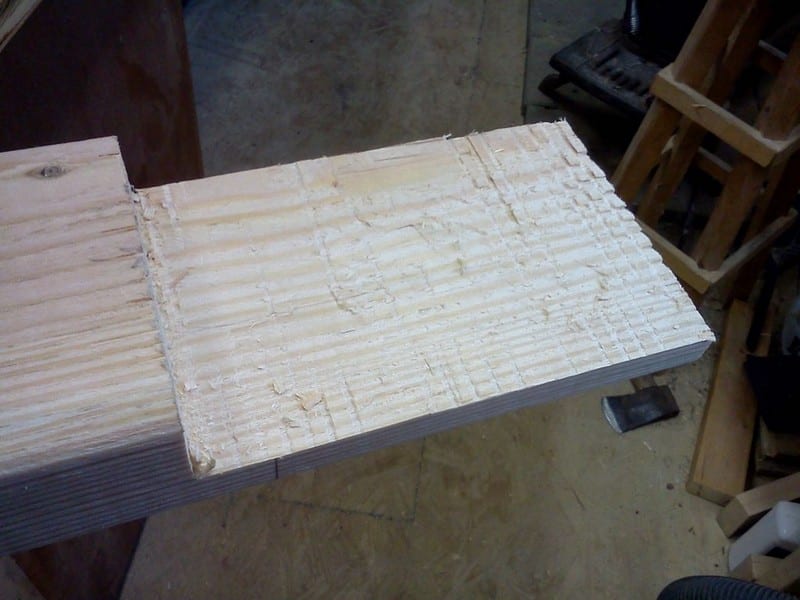
3. Then, start laying out and cutting the top rails of the frame out of 2 x 4’s.

The piece towards the inside of the bed with drawers is cut shorter and has a half-lap joint cut out of its end.


The half-lap is to accept a plywood panel that will continue the remaining length of your bed with drawers.
4. Next, cut the plywood panels to size. Use a table saw to easily rip the plywood to size.

I cut one floor piece 30″ ( half the total bed width) by 25″, which is the depth of the end drawers. I cut three vertical pieces 14″ high by 28 1/2″ for side drawer dividers and one piece 14′ by 25″ for the center-end wall piece.

5. Glue and screw the end wall piece to the floor piece. Then, cut notches out of the side wall pieces to accept the 2×4 top rails. Fasten a side wall/drawer divider to the floor piece. Once secured, position the floor section on the base frame of the bed with drawers and screw it in place temporarily with two screws. The inside top rail should be next; glue and screw the half-lap joint to the corresponding plywood panel.
Support the opposite end of the top rail with a chunk of 2×4. Then, install a 2×4 cross member adjacent to the plywood sidewall. Use screws to fasten the cross member to the sidewall as well as the top rails. Position the outer top rail and fasten it to the cross member. Attach a 2×4 cross member to the rails at the head end of the bed.
Instead of a plywood panel at the head of the bed, use a 2×4 frame secured with scrap pieces of plywood for gussets. Next, drill pilot holes in the ends of the top rails where the cross members are fastened to prevent the boards from splitting. Attach a 2-1/2″ strip of plywood to the side edge of the plywood floor piece. This piece provides a surface to which the lower edge of the finished panel can be fastened.

6. Next, install a plywood floor piece running the remaining length of the bed frame, using 3/4″ plywood ripped to 12″ wide. I really just need the plywood along the outer edges of the bed to support the lower edges of the drawer dividers.
Fasten a scrap of plywood to the underside of the floor piece to help secure it to the floor section already in place. Then, install the remaining 2×4 cross members between the top rails. Position them adjacent to the locations of the drawer divider panels.

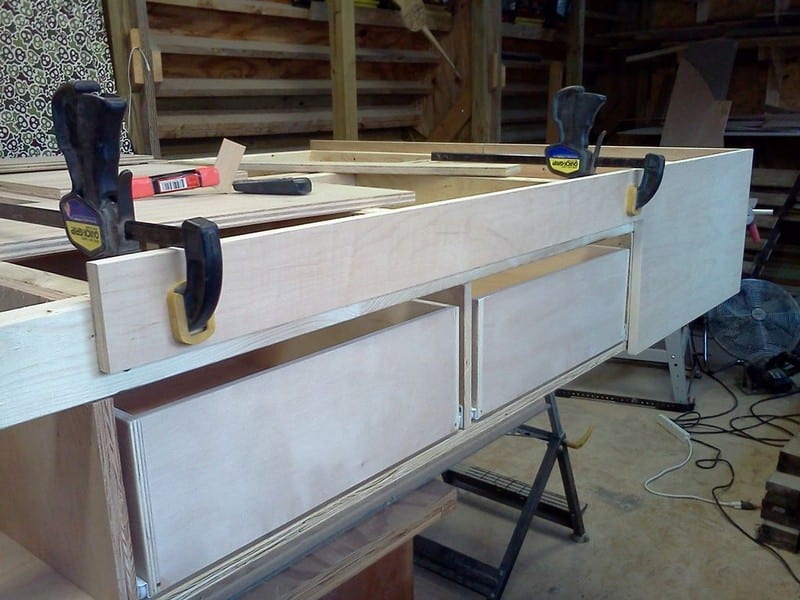
7. Install the drawer dividers, which also need to have notches cut out to accept the outer top rails. Screw the panels to the cross members and also through the floor panel. Space the drawer dividers to provide room for two, 20″ wide drawers. About 13″ of space is remaining at the head of the bed to make room for a nightstand. Build a headboard next, which will be 6″-8″ deep, which will result in about 20″ of nightstand space.

This side of the bed with drawers is done for now.

8. Repeat the process and build the opposite half of the bed frame.
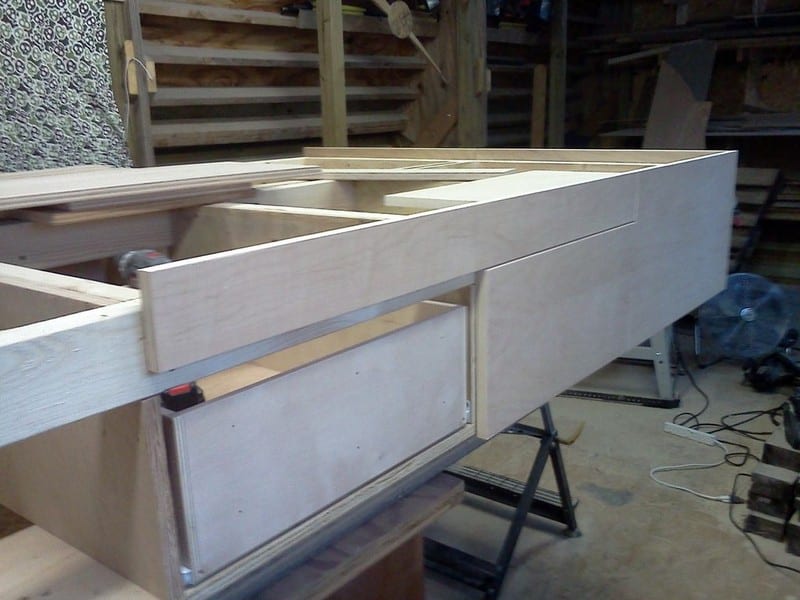
I built very basic drawers for this project using butt joints instead of dovetail joints. The width of the drawer box should be 1″ less than the width of the opening for drawer slide clearance.
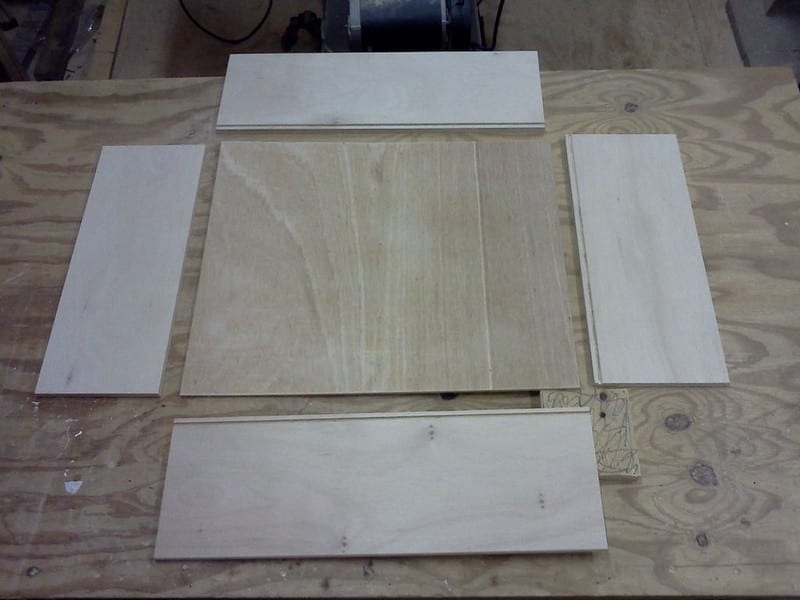
I made the front and rear drawer pieces fit inside the side pieces. Before assembling the drawers I finish sanded all off the sides of the pieces that would be inside the drawer once assembled. It’s much easier to do it beforehand than to try and do it after the drawer is assembled. I used glue and a pneumatic nailer with 1 1/4″ finish nails.

Each pair of drawer slides comes with two pieces, one to be mounted on the drawer and one to fasten to the drawer divider on the bed frame. First I installed the drawer portion of the slides using the screws provided with the slides. I kept the front edge of the slide 1/16″ back from the front edge of the drawer.
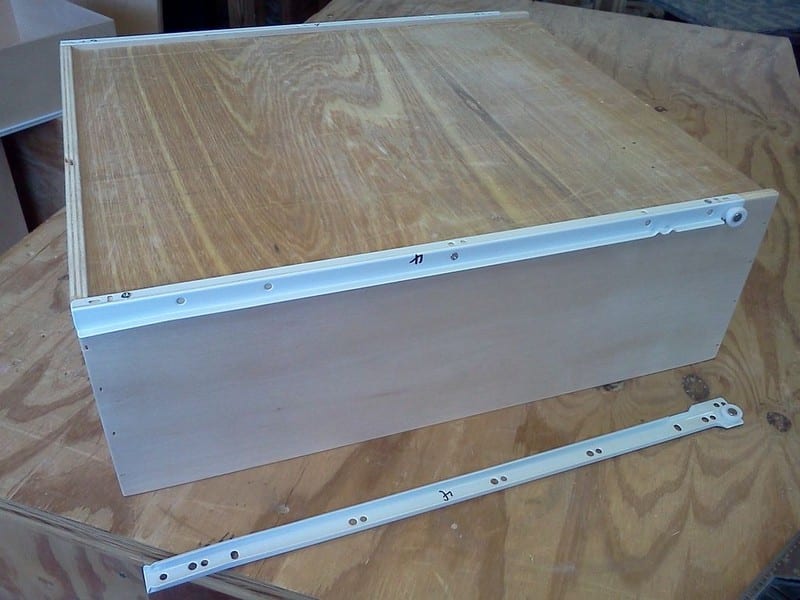
Next, I installed the piece of the drawer slide that attaches to the drawer divider panel. I also kept the front edge of the drawer slide 1/16″ back from the front edge of the divider panel. The bottom of the slides sits on the bottom of the divider panel at the front of the slide. I ripped a piece of wood to 1/4″ in thickness to use as a shim to hold the drawer slides level while they are screwed in place. After installing the slides, I numbered each drawer and its matching location on the bed.

I ripped the plywood to a width of 14-1/2″ on the table saw. I then cut the pieces to length. I clamped a straight edge to the plywood to use as a cutting guide. I used a carpenter’s square to align the straight edge and ensure a perfectly square cut. I used a circular saw to make the cuts.

I covered the exposed end grain of the plywood with an iron-on Birch veneer.
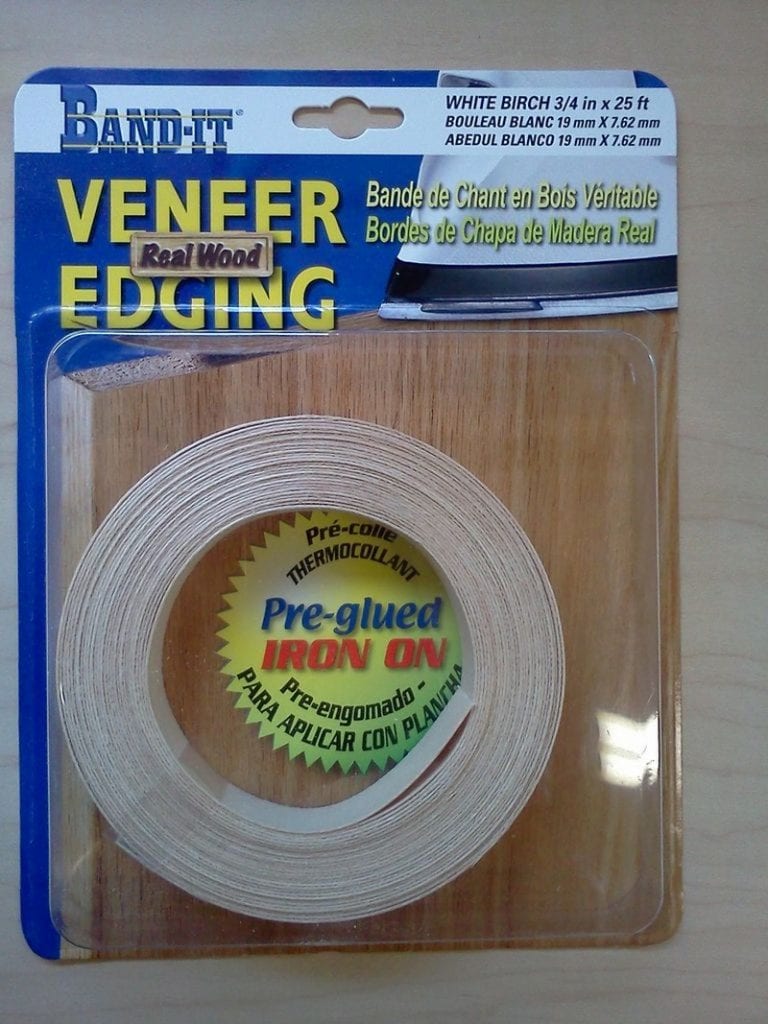
Application of the veneer is fairly easy. It has a heat-activated glue on the underside of it. Use an old household iron to apply the veneer. If the veneer needs to be re-positioned, simply reheat the area and adjust as desired.

9. Temporarily clamp the board into position on the bed frame. Let the top edge of the panel stick up 1-1/2″ above the top surface of the bed frame to conceal the bottom of the mattress when completed.
When satisfied with its position, fasten the panel in place by screwing it to the bed frame from the inside.

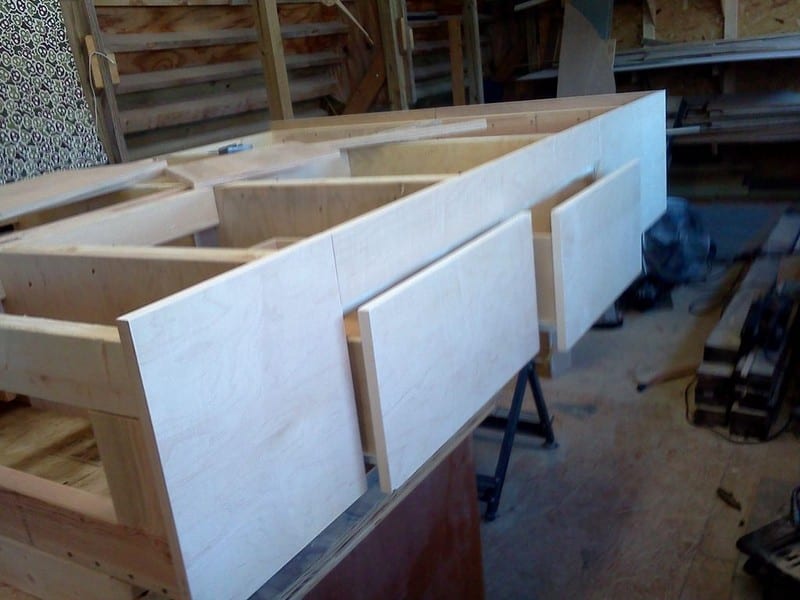
With the drawer boxes installed in place in the drawer slides, I positioned the drawer fronts in place. the drawer front panels extend about 5/8″ below the bottom surface of the bed frame to be able to open the drawer without the use of drawer pull hardware.
I used 1/8″ thick spacer sticks, placed between the top and side edges of the drawer front panel, to maintain even gap spacing.
No matter how hard I tried, I still ended up having a few minor blemishes that needed filler. I used Dap brand plastic wood filler, mixed with a little of the stain I will be using, to fill the imperfections.
Once the filler dried, I sanded the entire exterior of the bed with 220-grit sandpaper to prepare the surface for finishing. I used an Ebony stain on the exterior of the bed.
What do you think of this DIY bed with drawers? Are there any areas for changes to better fit your needs? 🙂
Thank you VertDude for sharing insights into this DIY bed with drawers project.
Lighting Solutions for Bed with Drawers
Integrating lighting into a bed with drawers not only enhances the functionality of your bedroom but also adds an element of style and ambiance. Whether you’re looking to create a cozy reading nook, illuminate storage spaces, or simply add a warm glow to your room, lighting solutions can transform the practicality and aesthetic appeal of your bed with drawers.
Let’s explore various lighting ideas that can be seamlessly incorporated into your bed design.
Under-Bed Lighting
Adding LED strip lights underneath your bed with drawers can create a floating effect and provide soft, ambient lighting that enhances the room’s atmosphere without overwhelming it. This solution is particularly useful for nighttime navigation without the need for harsh overhead lights. It also highlights the bed’s design, emphasizing the drawers and the smart use of space underneath.
Drawer Illumination
For those who appreciate organization and ease of access, installing small LED lights inside the drawers of your bed can be a game-changer. This lighting solution makes it easier to find items stored in the drawers without turning on the main room lights, perfect for late-night searches. Motion sensor LED lights that turn on when the drawer is opened are both practical and energy-efficient.
Headboard Lighting
Incorporating lighting into the headboard of your bed with drawers can provide focused illumination for reading or browsing on your tablet before sleep. Consider adjustable LED reading lights that can be directed as needed or soft backlighting to create a relaxing ambiance that helps wind down before bedtime.
Integrated Nightstand Lamps
If your bed with drawers includes a built-in nightstand or shelving, integrating lamps or lighting fixtures into these areas can offer convenience and style. This approach keeps the nightstand surface clutter-free and provides direct, adjustable lighting for reading or relaxing in bed. Choose designs that complement the overall style of your bed and bedroom for a cohesive look.
Decorative Lighting
Beyond purely functional lighting, decorative lights can add character and charm to your bed with drawers. Fairy lights draped around the headboard, small pendant lights hanging on either side, or a string of LED lights placed along the drawer edges can turn your bed into a focal point of the room. This type of lighting is especially suited for creating a personalized and inviting bedroom ambiance.
By thoughtfully incorporating these lighting solutions, your bed with drawers can serve not only as a comfortable place to rest but also as a beautifully illuminated centerpiece of your bedroom. Lighting can transform the practicality of the storage bed into an enchanting design element, making your bedroom a more functional and inviting space.
The Wrap Up
In a world where practicality meets elegance, your journey begins. Picture a bed that seamlessly combines the grace of refined design with the convenience of ample storage, all created by your own hands. In this article, you’ve explored the art of crafting your very own bed with drawers in just nine simple steps.
This is more than a DIY project; it’s an opportunity to infuse your unique style into your bedroom. Whether you’re a seasoned craftsman or a beginner eager to explore your creative side, these nine steps will lead you to a masterpiece of practical elegance.
Transform a humble bed into a functional work of art that will not only elevate your bedroom but also inspire a sense of accomplishment. It’s time to embark on the journey of creating a bed that blends form and function seamlessly, one step at a time.
For more beds that will give you storage space with minimum space requirements, check out our DIY bed under platform guide!