Last Updated on August 5, 2024 by teamobn
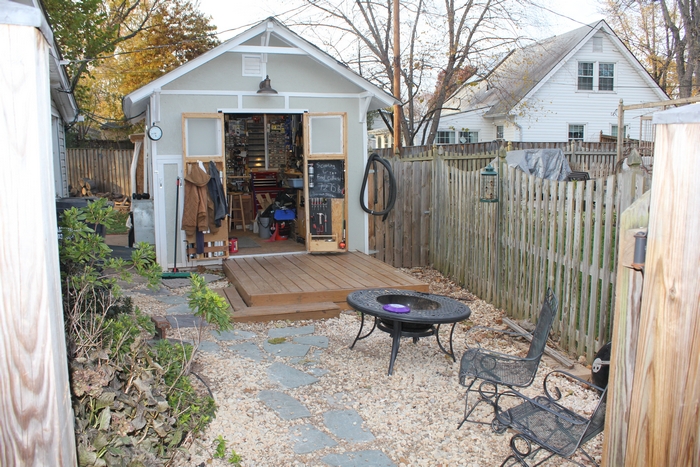
Are you a persistent DIYer? Woodworking in all its forms is an enormously popular hobby among DIY enthusiasts. Most people, regardless of their abilities, just like to tinker with a bit of wood and create something. Starting out is easy. But there is a common misconception that woodworking requires a considerable amount of space. The fact is that many people create versatile workshops in the smallest of spaces. A tiny workshop can help solve that need.
In order to achieve your best, all you really need is a dedicated space where you can work freely, with all the materials and tools you need within arm’s reach.
This little workshop is a great example. The owner needed a workshop to work undisturbed on his projects, to store his materials and tools, and all other hardware. He was able to build this workshop for less than $2000 including a deck that cost him just $65!
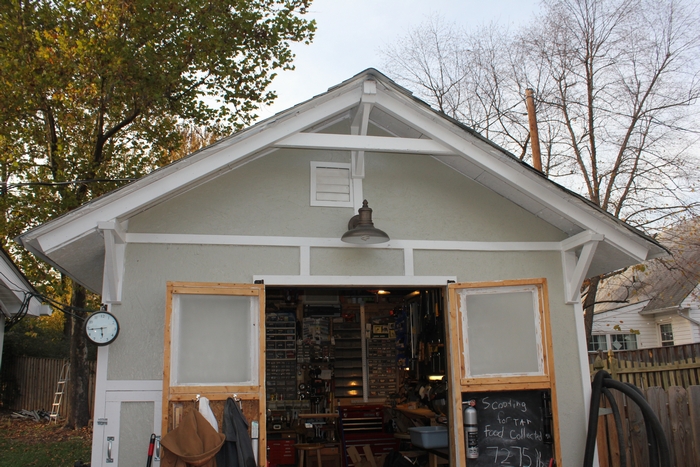
Before beginning a project like this, it’s essential that you consider how you’ll be using your workshop and what materials and method of building you’ll be using. Make use of repurposed materials from your previous projects to lower the cost.
Another important aspect you need to consider is the use of space. Utilize every bit of space to make your workshop efficient. And before you start building do a quick check of your local building codes.
Click on any image to start the lightbox display. Use your Esc key to close the lightbox. You can also view the images as a slideshow if you prefer 



Contents [show]
Building a Tiny Workshop
Materials
- Lumber
– 100 pieces 2x4x8′
– 4 pieces 2x4x12′
– 8 pieces 2x6x10′
– 2 pieces 2x6x12′
- 35 sheets of 4×8 Oriented Strand Board
- 20 pieces 1×4 trim
- 10 pieces 1×6 trim
- 1 roll of Roof Felt
- Shingles
- 3 sheets of Plexiglass – for windows
- Clear Plastic Roll – vapour barrier
- Metal Hurricane Straps
- Primer
- Exterior Paint
- Exhaust Fan
- Window and Door Hinges
- Bolt Locks
- Weather-proof Outdoor Switch
- Lighting
For the Deck
- 4 Old Pallets
- Blocks
- 20 Contractors Grade Deck Boards
Tools
- Framing Nailer
- Clamps
- Cordless Drill
- Table Saw
Instructions

I spent a full week grading, compacting the soil, and levelling each block before laying the floor joist of my tiny workshop. The last thing you want is to finish your new workshop and have a corner start sinking into the ground.

You can see that I had a drop of about 12 inches on the low side. During heavy rainstorms, water can flow like a stream next to the fence. I wanted to make sure my workshop was high enough off the ground to avoid any flooding issues.

I framed and sheathed each wall individually and then stood them up with the help of long 2×4 braces.

I added a second cap of 2×4 on the top to make the tiny workshop walls a little more rigid. I then laminated 4 2×4’s to construct a ridge board. I nailed in some temporary 2×4 supports and had a friend help lift it into the final position. Once all of the rafters are cut and nailed into place, the supports were removed.
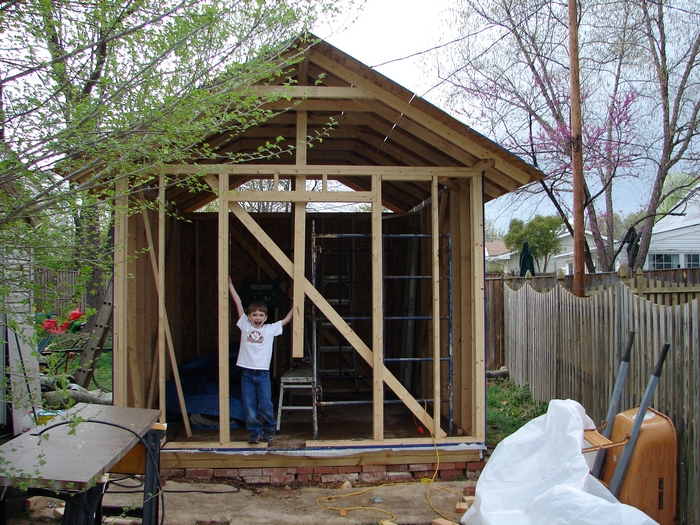
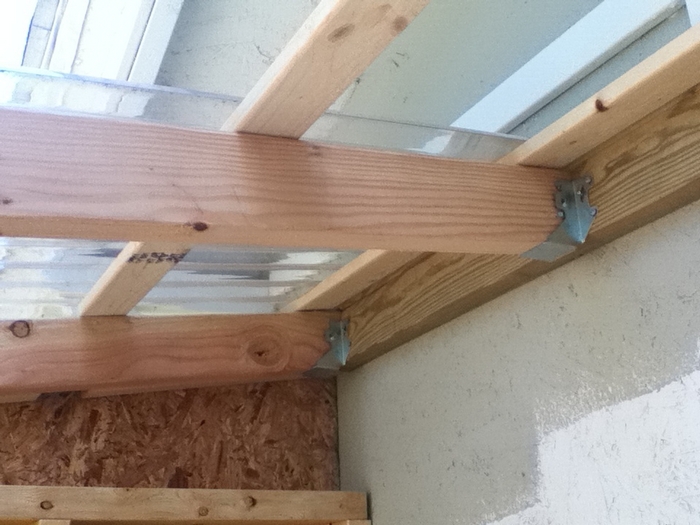
You can see in this step how I notched each rafter to fit more securely to the tiny workshop walls. I also used a metal hurricane strap to secure each rafter to the wall. Even though this was not required by code, I felt my tools were far too valuable to be left to chance over such an inexpensive solution.

The walls are a simple board and batten system. The 1×3 trim covers the joints of the 4×8 OSB. They make much more high-quality sheet goods to use as siding.

I sealed the OSB and painted it with tiny workshop’s exterior paint. If I run into problems in the future, I can just add a second layer of more durable material or simply have siding installed. It has held up very well over the past couple of years and I see no need to spend more money on it now.
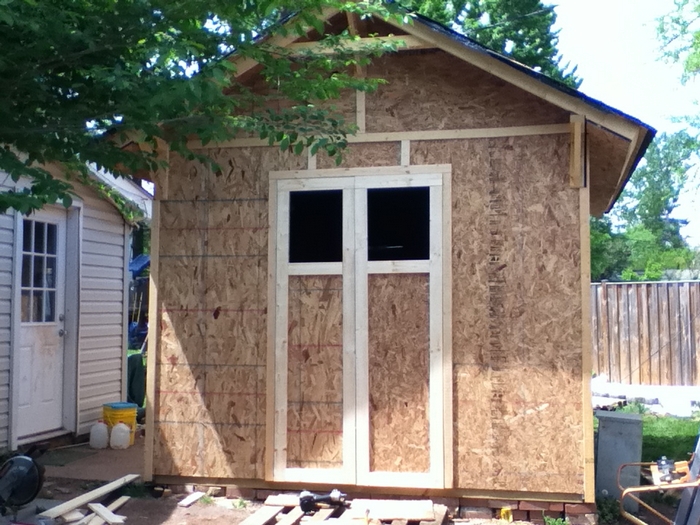
Once I had the walls completely filled in and trimmed out, I built my doors. I clamped them in place each day until after I painted. Then I installed the hinges and hardware.

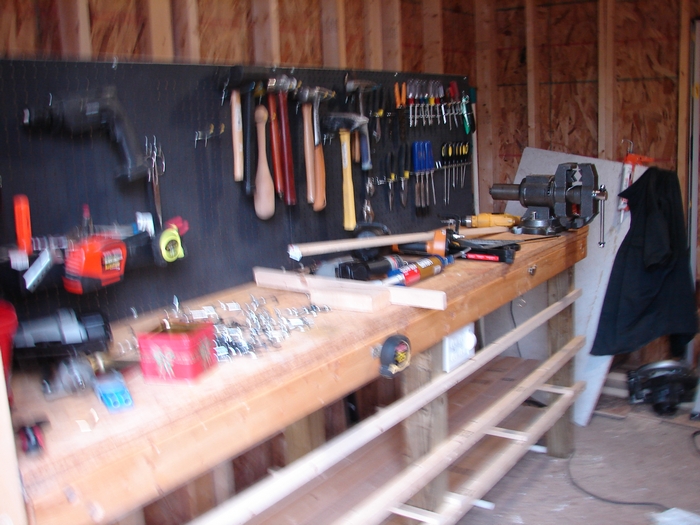
This is where I started thinking about how I was going to store all of my lumber. I decided to cut access doors in the front and build my storage into my tiny workshop’s workbench area. This has been the single best idea that has come out of my shop. I can’t express enough how easy it is for me to get straight to a board I need with no hassles. I just remove the doors and pull out what I need.

I can store a surprising amount of lumber in this area. I do have a secondary area for some cutoff sheet goods and a scrap bin next to my table saw in the garage. But this area stores most of my lumber.
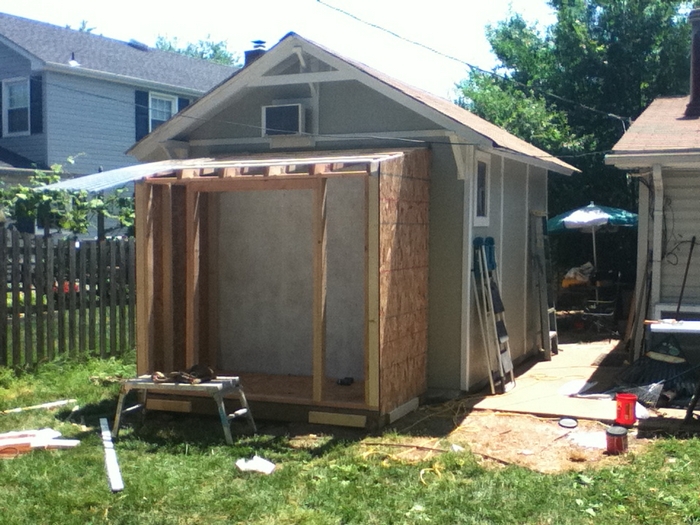
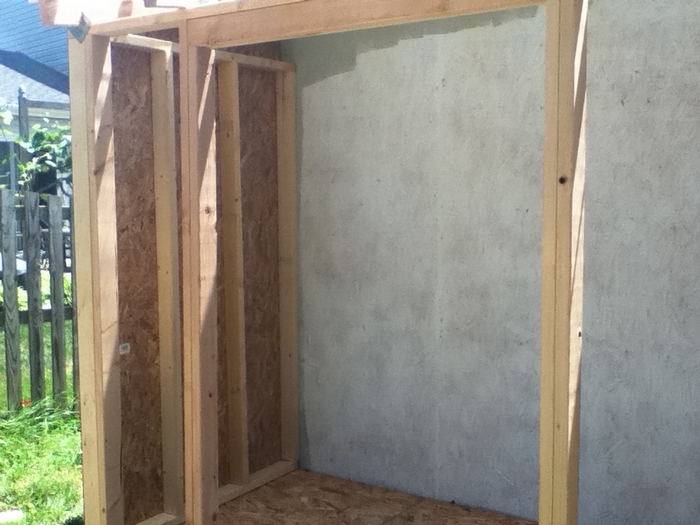
After I finished priming and painting I moved on to building the attached structures on the back. I framed it in a 4×8 Garden Shed on the back. I didn’t want it so deep that stuff would get buried in it.
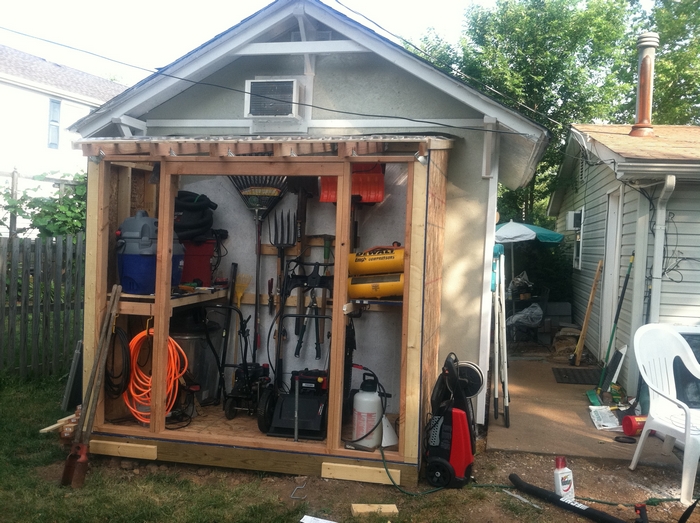
Having your separate workshop is a must if you are a serious DIY-er. It not only helps you organize your tools and work efficiently, but it also keeps the entire home a safer place for the family, especially for the kids.
Want a dedicated place for your projects? Then start planning your workshop!
Thanks to bizydad for this great project.
Maximizing Vertical Space
In a tiny workshop, every inch counts. Utilizing vertical space is crucial for keeping tools and materials organized without sacrificing valuable floor area. This approach not only enhances the functionality of your workspace but also makes it appear larger and more open. Here’s how you can elevate your tiny workshop’s storage capabilities by looking up rather than out.
Install Wall-Mounted Shelves and Cabinets
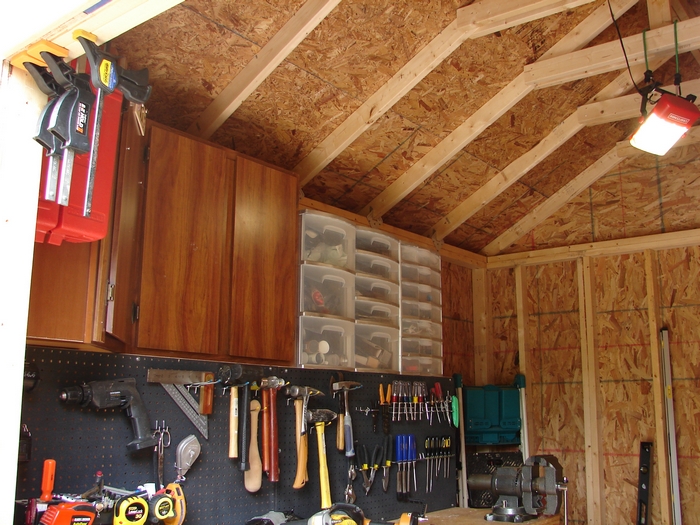
Wall-mounted shelves and cabinets make excellent use of vertical space. By installing these storage solutions, you can keep essential tools and materials within easy reach. Opt for adjustable shelving to accommodate items of various sizes, ensuring that everything from paint cans to power tools has a designated spot.
Use Pegboards for Flexible Tool Storage
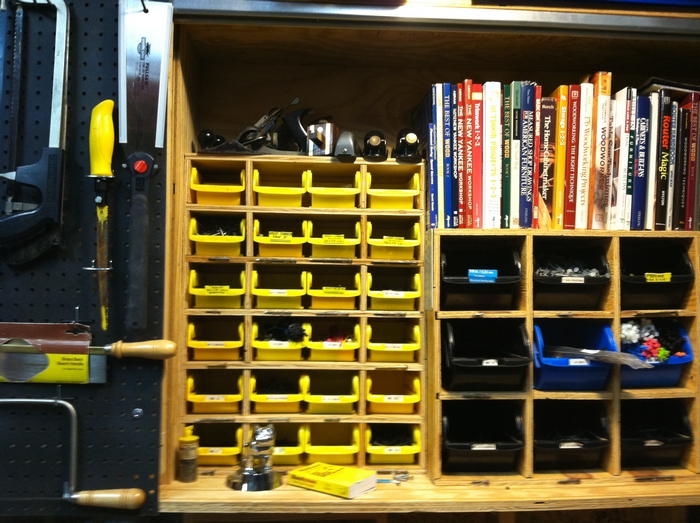
Pegboards are a must-have in any tiny workshop. They allow you to customize tool storage to fit your specific needs. Attach hooks, bins, and shelves to the pegboard to hold different tools and accessories. The flexibility to rearrange components as your tool collection evolves is a major advantage.
Incorporate Overhead Storage Bins
For rarely used items or seasonal gear, overhead storage bins are ideal. These can be installed on the ceiling or high up on the walls of your tiny workshop. Ensure that the bins are securely fastened and easily accessible via a sturdy step ladder or a pulley system to prevent any accidents.
Utilize Vertical Panels for Modular Storage
Empty walls can be converted by vertical panels into a flexible storage space. These panels support tiny cabinets, hooks, and racks among other attachments. They work especially well for visually appealing and space-efficiently storing hand tools and smaller hardware goods.
Maximising vertical space can help your small workshop to hold all the tools and materials you need without feeling crowded or messy. This deliberate use of space improves not only output but also your whole working experience, therefore facilitating your attention on your projects and enjoyment of your trade.
Lighting Solutions for Small Workshops
Proper lighting is essential in any workshop, but it becomes particularly critical in a tiny workshop where limited space can easily become dim and shadowed. Effective lighting solutions enhance visibility, accuracy, and safety, making your small workspace feel brighter and more spacious. Here are several lighting strategies to illuminate your tiny workshop efficiently.
Opt for Bright, Overhead LED Lights
LED lights are a top choice for tiny workshops due to their efficiency and brightness. Install overhead LED fixtures to provide a blanket of light that covers the entire area. This type of lighting reduces shadows and blind spots, making it easier to work on detailed projects.
Incorporate Task Lighting
In a tiny workshop, task lighting is invaluable. Use adjustable desk lamps or mountable work lights to direct light exactly where you need it. This is particularly useful for intricate tasks like soldering, cutting, or when working with small components.
Utilize Natural Light
If your tiny workshop has windows, make the most of natural light. Position your workbench near a window to benefit from daylight during working hours. Sheer curtains can help diffuse light evenly, preventing glare while keeping the space bright.
Install Under-Cabinet Lighting
For workshops with cabinets or shelves, under-cabinet lighting can illuminate specific areas without taking up valuable workspace. This type of lighting is perfect for tiny workshops where every inch of space matters. It lights up the countertop and work areas directly beneath cabinets, ensuring that no area is left in the shadows.
Reflective Surfaces to Enhance Light
In a tiny workshop, using reflective surfaces can help amplify light. Paint walls and ceilings in light colors to reflect artificial and natural light throughout the space. Additionally, installing mirrors or using glossy finishes on work surfaces can also increase the overall light level by bouncing light around the room.
By integrating these lighting solutions, your tiny workshop will not only be more functional but also appear larger and more welcoming. Adequate lighting is a key component in creating a safe and enjoyable work environment, even in the smallest of spaces.
Conclusion
Establishing a small workshop calls for careful design and effective space use to produce an interesting and useful workspace. Carefully choosing storage options, lighting, and layout can help you to maximise every square inch of your workspace. These ideas help even the smallest space to become a creative powerhouse for do-it-yourself projects.
Boost your tiny workshop with a great tool organizer. Check out our post on the eight best organizers!


