Last Updated on July 2, 2024 by teamobn
This is a simple mini steam boat project that you can make with your kids.
Do you remember playing with paper boats when you were younger? They were always so much fun to race on a stream. I’m sure you have fond memories of playing with them. Even young girls would love to race a leaf boat on a stream. Paper boats are classic childhood toys that can be enjoyed by kids of all ages. Whether you’re racing them on a stream or just playing with them in the bathtub, they’re always a blast.
Before our kids are sent off to school, the home is their first place of learning. This is why, when they were toddlers, I made sure that there were lots of educational toys in the house. By providing them with opportunities to learn and grow at home, I set them up for success in school and in life.
As they get older, it’s important to continue to provide them with opportunities to learn and grow. This can be done by incorporating learning into everyday activities, such as reading together, doing puzzles, or even going on hikes and observing nature. By making learning a part of everyday life, we can help our kids develop into well-rounded, lifelong learners.
Today, my youngest is fascinated with boats. His grandparents encourage his interest by buying him anything boat-related – toys, books, and room decor. I think it’s great that they are encouraging his interests, and I know that he will enjoy playing with his new toys.
My husband and I had a discussion about his fascination with a particular topic. He was interested in turning this into a learning activity, and I was supportive of his idea. Fortunately, he was able to find a way to learn more about his interests. This is great for his cognitive development, as playing with boats can help him learn about physics and engineering concepts. Plus, it’s just a lot of fun!
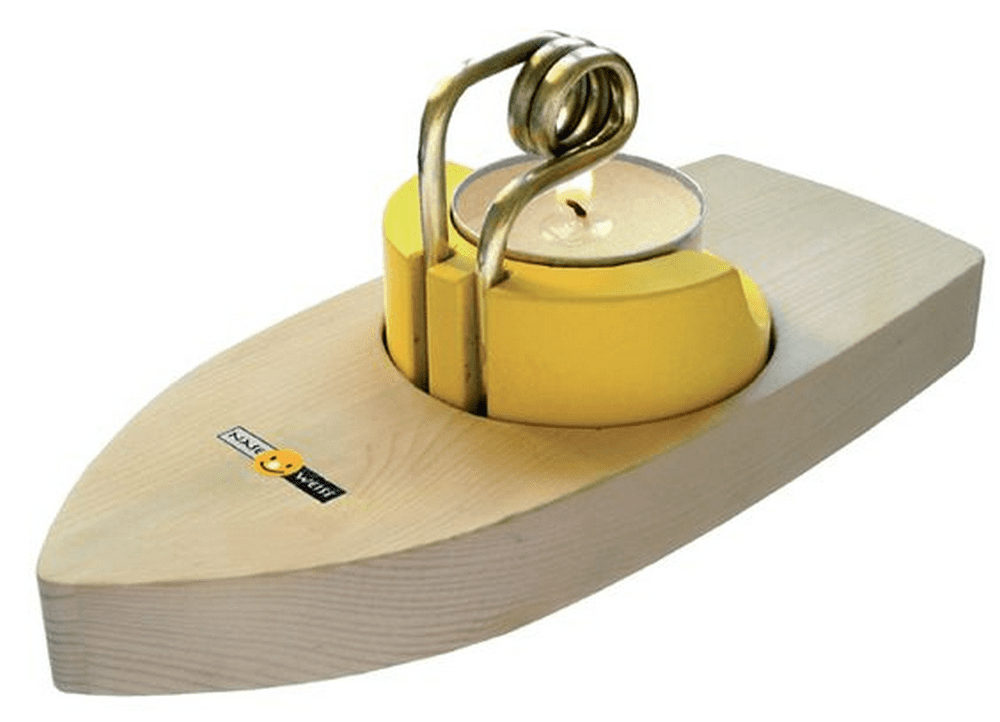
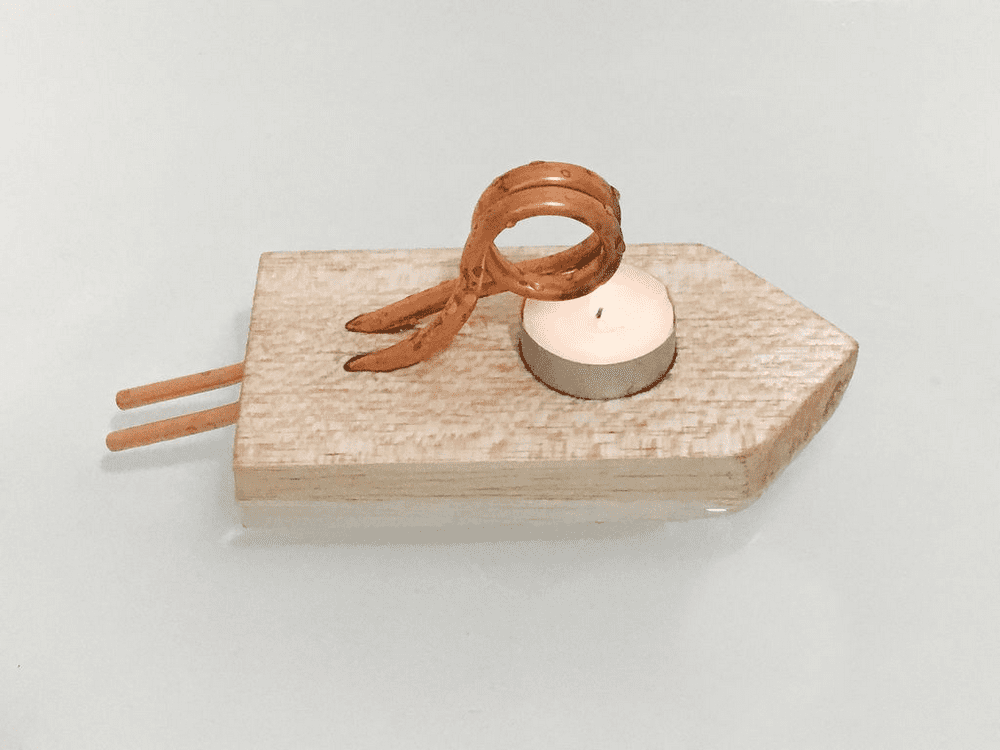
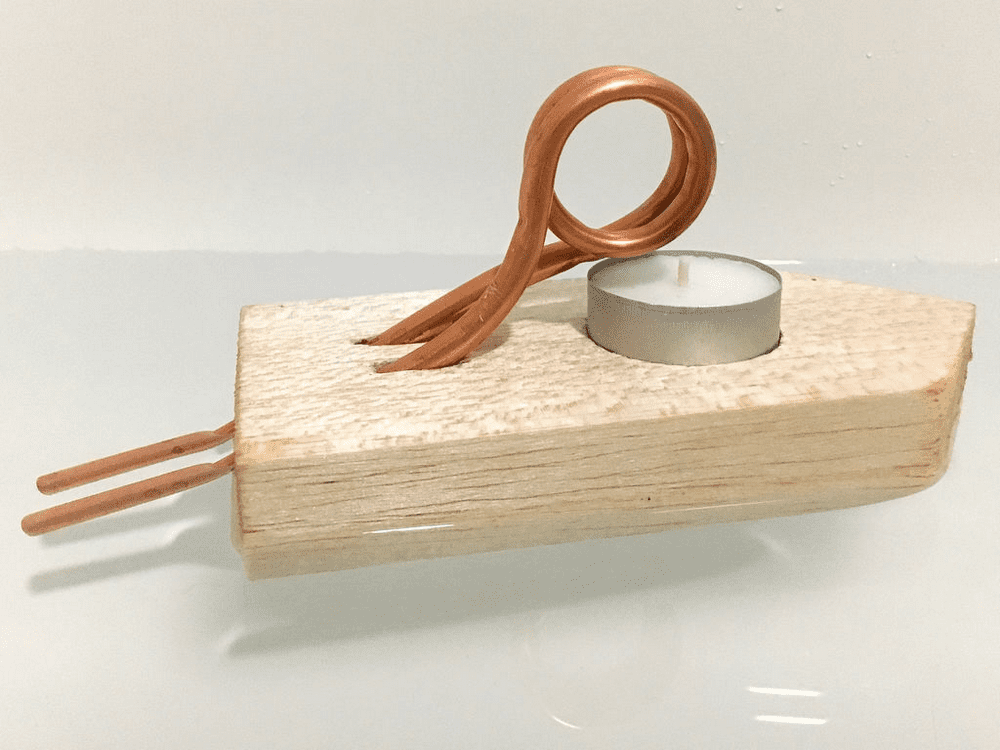
This Do-It-Yourself project is for a mini steam boat powered by a candle. The heat from the candle’s flame turns out to be the perfect source of propulsion for the boat, by heating the pipe that contains the water. This simple project is a great way to teach the basic principles of how a steamboat works. Plus, it’s just plain fun to see the candle-powered boat in action!
This mini steam boat project was a very meaningful learning experience for my youngest son and he loved it! It’s a simple project that you can do with your kids. It was great to see him so engaged and excited about learning something new. I’m sure this experience of playing a mini steam boat will stick with him for a long time.
As you watch your child engage with the mini steam boat, maintaining vigilance is essential to ensure their safety and prevent any potential injuries. Since the operation of the mini steam boat involves an open flame, there’s an inherent risk of burns, making close supervision critical.
It’s important to instruct your child on safe handling practices and keep all flammable materials well away from the heat source. Constant attention is necessary; by keeping a watchful eye on your child as they explore and learn with the mini steam boat, you can help them enjoy this educational activity safely and avoid any accidents.
Contents
Making a Mini Steam Boat
Materials
- Small wooden brick
- Tea light candle
- Small metal pipe
Tools
- Pencil
- Wood-cutting tool
- Drill with drill bits
Instructions
Step 1: Marking the Wooden Brick
- Start by setting the little wooden brick on a level ground.
- To mark where the metal pipe will be placed on top of the block, sketch a little rectangle with the pencil. This should be simply wide enough for a snug fit and roughly the length of the metal pipe.
Step 2: Cutting and Shaping the Wood
- Carefully shape the designated region on the wooden brick with the wood-cutting tool. Make sure the depth is sufficient to accommodate the metal pipe without it too much showing.
- Sandpaper or a smaller cutting tool will help you smooth any sharp edges to avoid splinters and guarantee a clean appearance.
Step 3: Drilling a Hole for the Candle
- Turn the wooden brick to the side facing the pipe opposite your scooped out area.
- Choose a drill bit whose diameter fits your tea light candle.
- About midway into the wooden brick, carefully drill a hole. This will be the candle holder; thus, make sure it is deep enough to keep the candle but not too deep to cause lack of oxygen and so extinguish the flame.
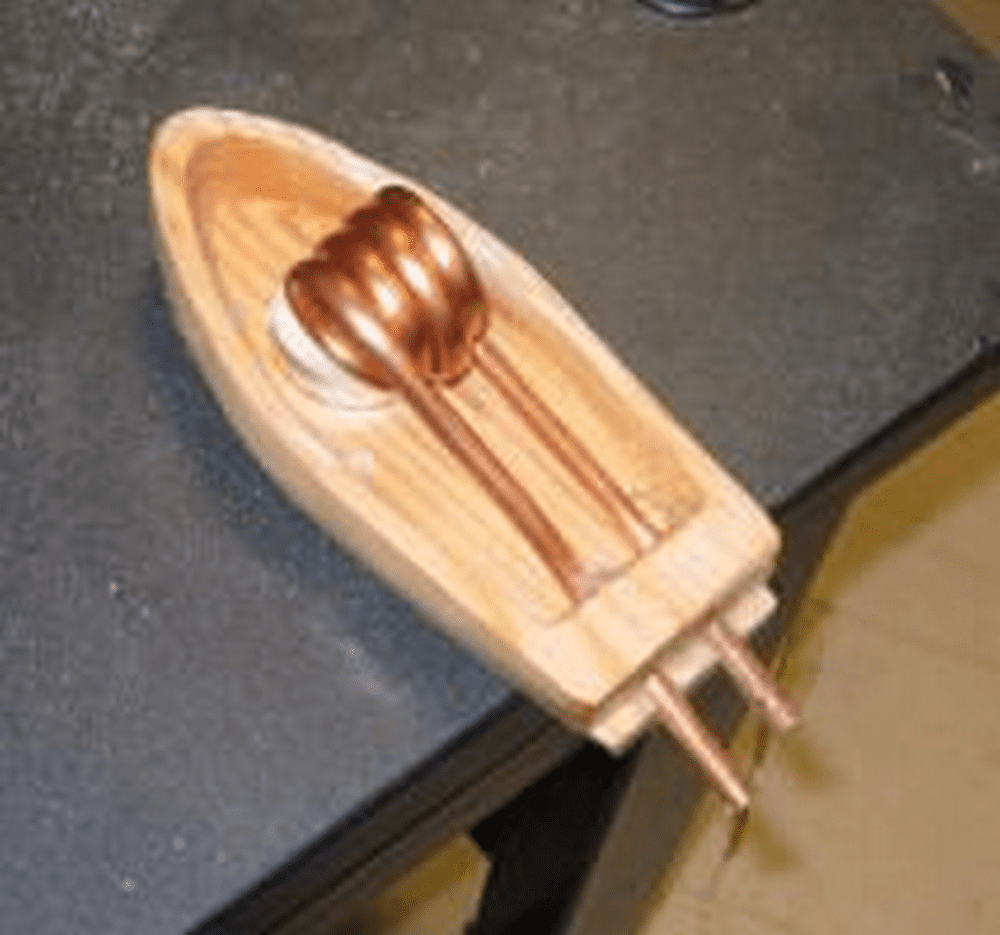
Step 4: Inserting the Metal Pipe
- Put the metal pipe in the top carved slot of the wooden brick. It should fit tightly; if it is too loose, you could wrap the pipe with a tiny bit of tape to somewhat widen it.
- Make the pipe lean somewhat upward at the open end. When the boat is running, this will enable proper steam direction.
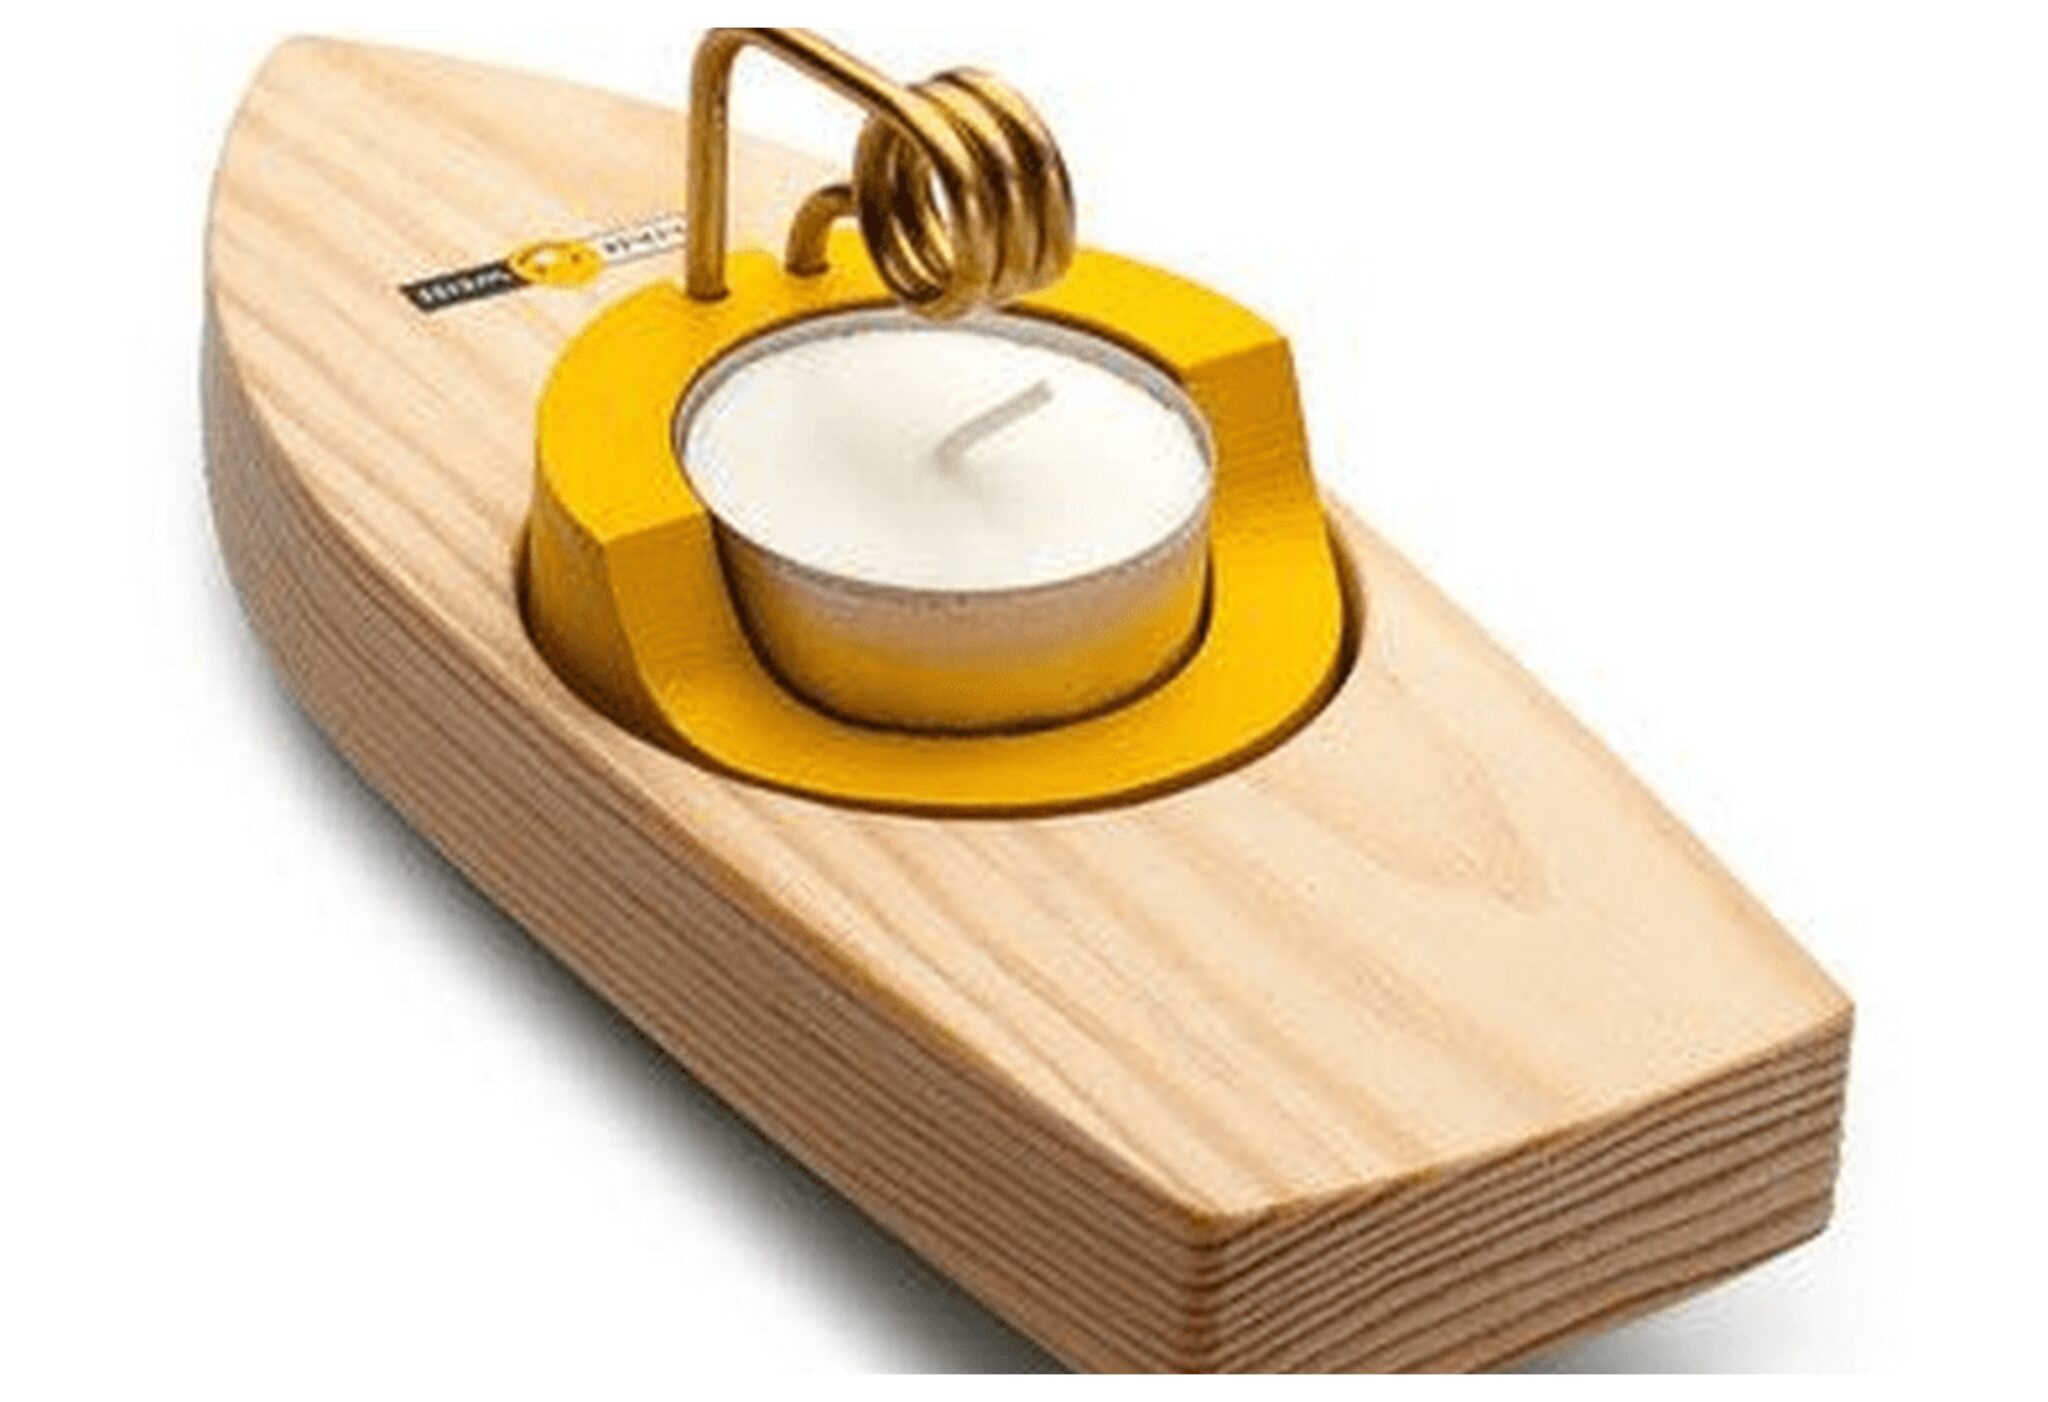
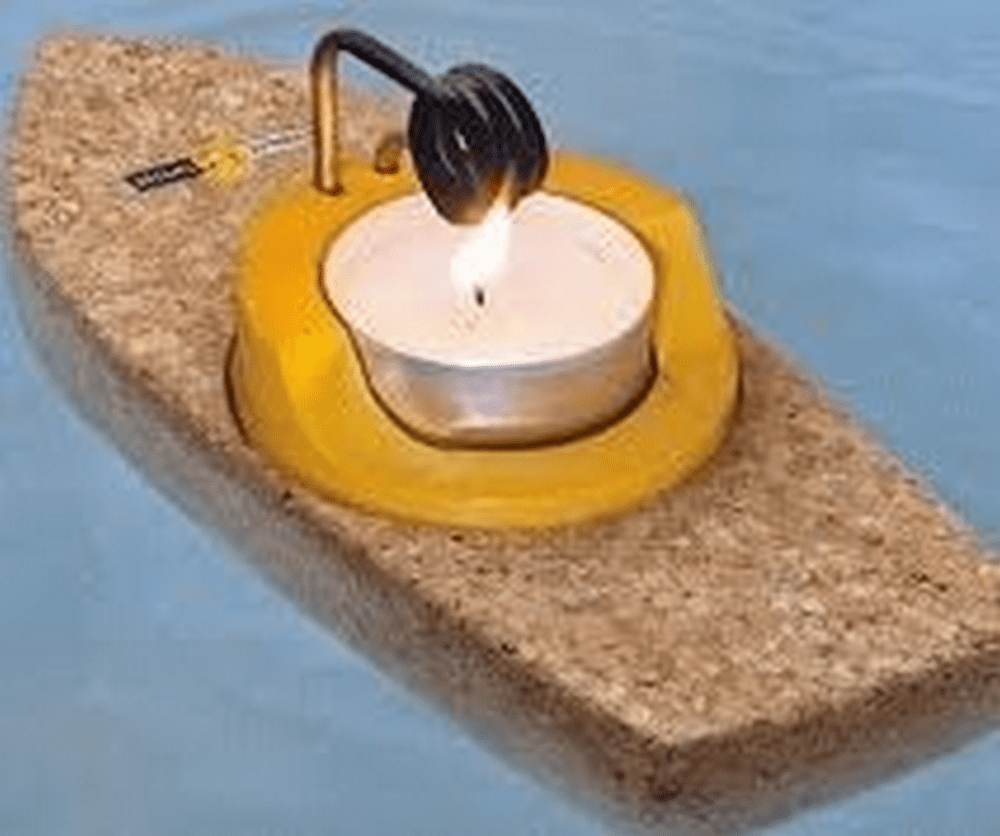
Step 5: Setting the Candle
- On the side of the wooden brick, drill a hole and slide the tea light candle into. Make sure the candle is steady and straight-forward.
- Extra space surrounding the candle can be cushioned with little wood bits or aluminum foil to ensure the candle stays firmly in place.
Step 6: Testing Your Mini Steam Boat
- Wet the metal pipe completely. Just enough water should let steam develop without overflowing as the boat tilts.
- To begin heating the water within the metal pipe, light the candle.
- Put your little steam boat on a water surface in a bathtub, basin, or small pond as steam begins to build and watch it move.
Click on any image to start the lightbox display. Use your Esc key to close the lightbox.


A special thanks to Crazy Experimenter for this project. His tutorial video was extremely helpful in getting this project done. Without his help, this project would not have been possible. What are you waiting for? Go grab your materials and make a mini steam boat for your young ones!
Advanced Modifications and Experimentation
Explore new dimensions with your mini steam boat project by trying out these advanced modifications and experiments. These enhancements can optimize performance, illustrate various scientific principles, and provide an even more engaging building experience. Whether you’re a hobbyist looking to push the limits or a parent aiming to introduce more complex concepts to your child, these modifications can make your mini steam boat project even more exciting.
Increase Steam Production
To boost the efficiency of your mini steam boat, consider using a larger or dual candle setup. By increasing the heat source, you can produce more steam, which may improve the boat’s speed and power. Test different configurations, such as arranging two tea light candles side by side or using a larger, more robust candle. Observe how changes in the heat source affect the boat’s propulsion and discuss the results in terms of energy input and output.
Experiment with Pipe Materials
The material of the pipe can significantly impact the mini steam boat’s performance. Experiment with pipes made from different materials such as copper, brass, or aluminum. Each material has different thermal conductivity properties, affecting how quickly they heat up and transfer heat to the water. Record observations on how the change in material influences the time it takes for the boat to start moving and its overall speed.
Add Control Features
Adding rudders or keels to your mini steam boat can enhance its navigability and stability in water. Construct a small rudder from a thin piece of plastic or metal and attach it to the stern of the boat. Experiment with the rudder’s size and angle to see how it affects steering and stability. This modification not only improves the functionality of the mini steam boat but also introduces basic concepts of marine engineering.
Adjust the Water Capacity
The amount of water in the pipe is crucial for optimal steam production. Experiment with different levels of water in the pipe to find the ideal balance that produces enough steam for propulsion without extinguishing the candle. This experiment can help illustrate the principles of phase change and energy efficiency in a very tangible way.
By experimenting with these modifications, you can turn the mini steam boat project into a more comprehensive educational experience. Each modification introduces new variables and concepts, allowing for a deeper understanding of physics, engineering, and thermodynamics. Plus, it’s just fun to see how far you can push the limits of your mini steam boat.
Conclusion
Building a mini steam boat is a fantastic project that combines fun with education, teaching basic principles of physics and engineering through hands-on activity. Each step, from crafting the body to modifying for better performance, offers valuable lessons and a sense of accomplishment. Safety is crucial, so always supervise closely when children are involved, especially with elements like candles and cutting tools. Ultimately, this DIY project not only sparks creativity but also ignites a passion for learning and experimenting in young minds.