Last Updated on May 24, 2024 by teamobn
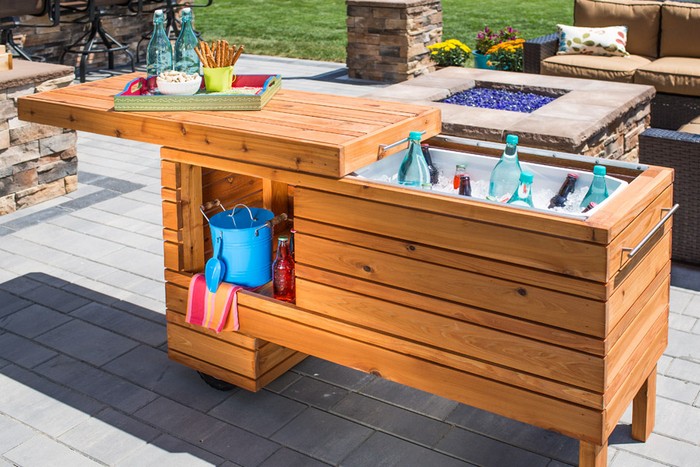
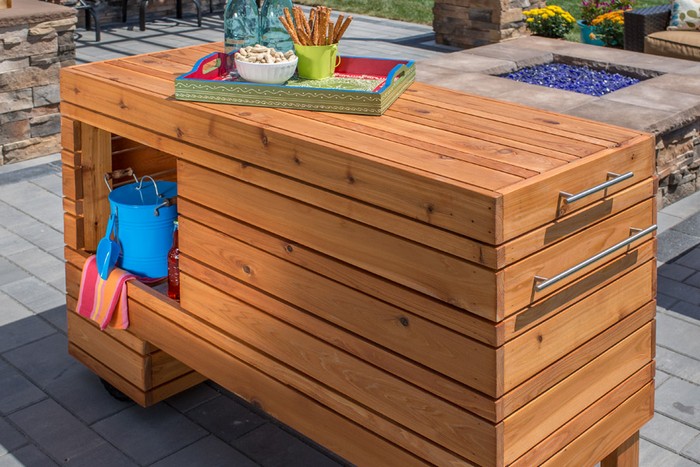
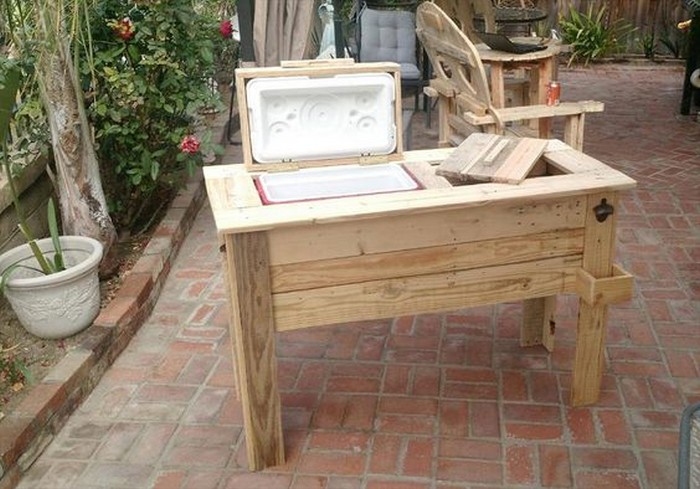
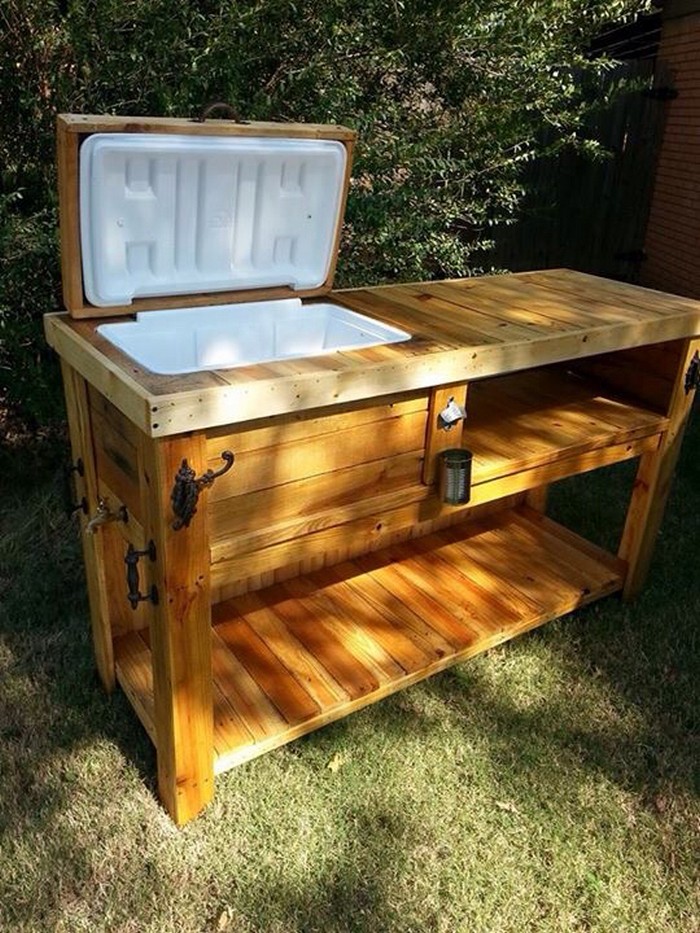
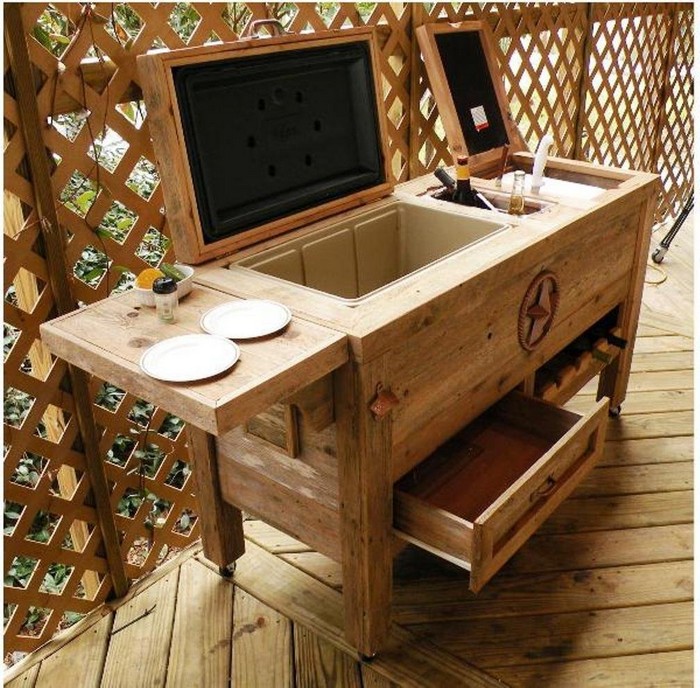
What’s outdoor entertaining without a bar? If you don’t have one in your backyard or patio, then this DIY outdoor sliding serving center with a built-in cooler is perfect for you! This easy-to-build bar is the perfect addition to any outdoor entertaining space, and it’s sure to keep your guests happy all party long.
Plus, the built-in cooler means you can keep your drinks cold and close at hand. So why not build your own outdoor bar today?
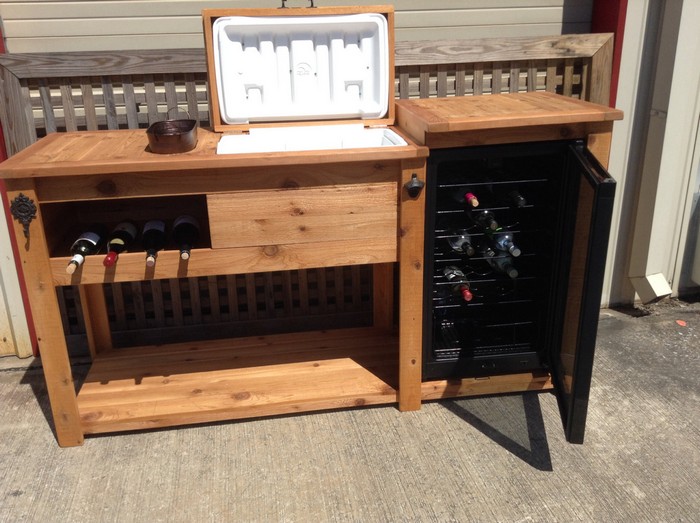
The sliding serving center is a great addition to any backyard. It is fully functional and mobile, so you can move it around wherever you need it. It also has a sleek design that will look great in any setting.
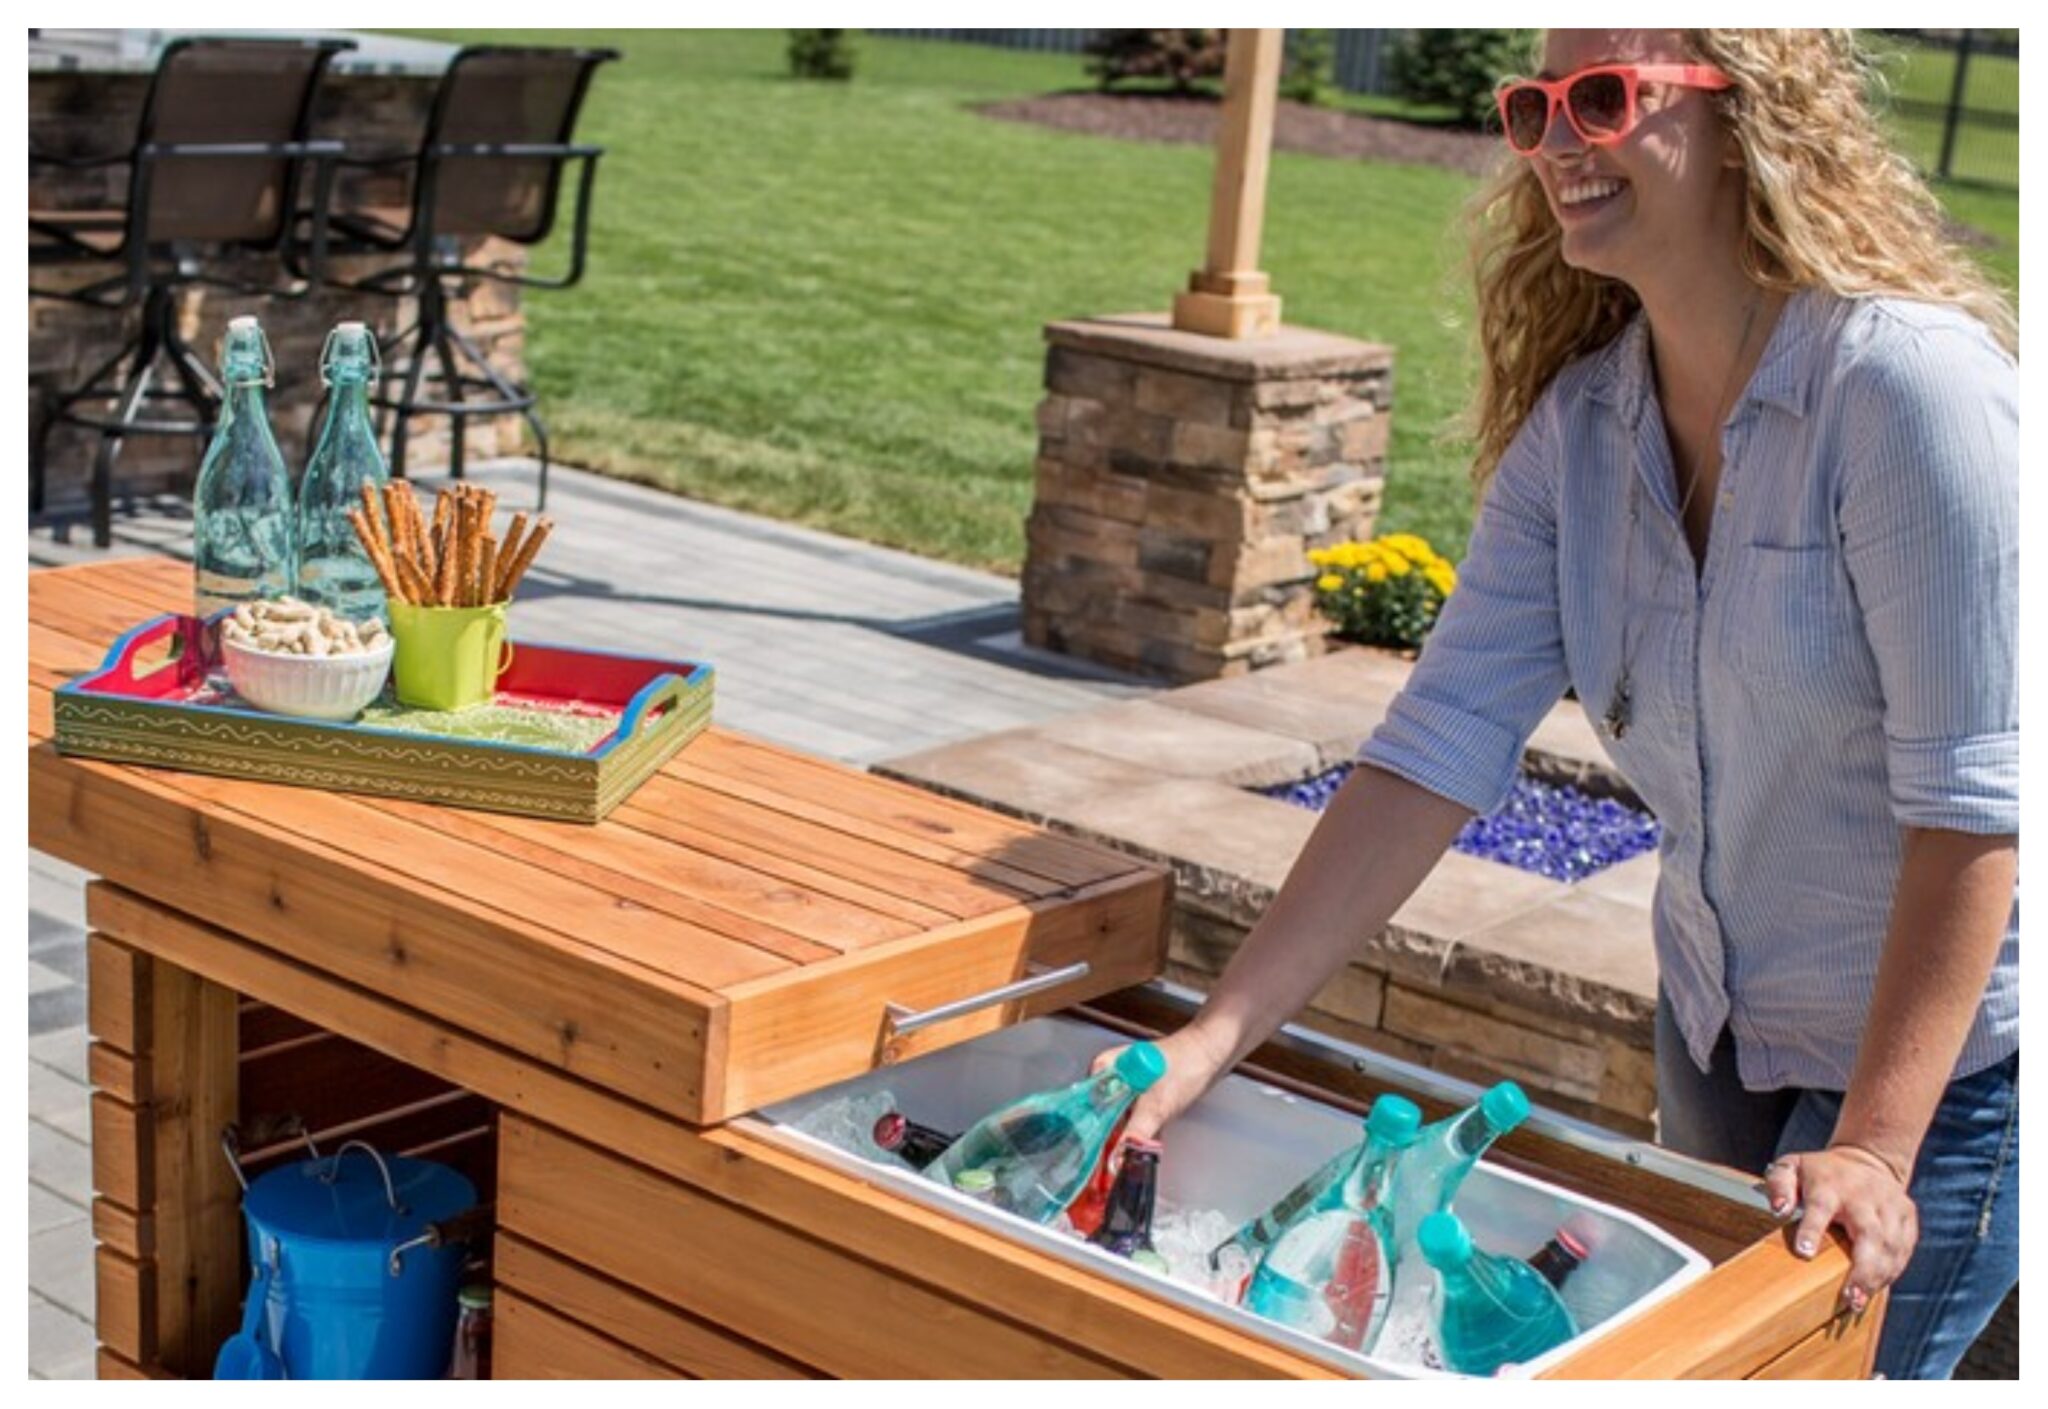
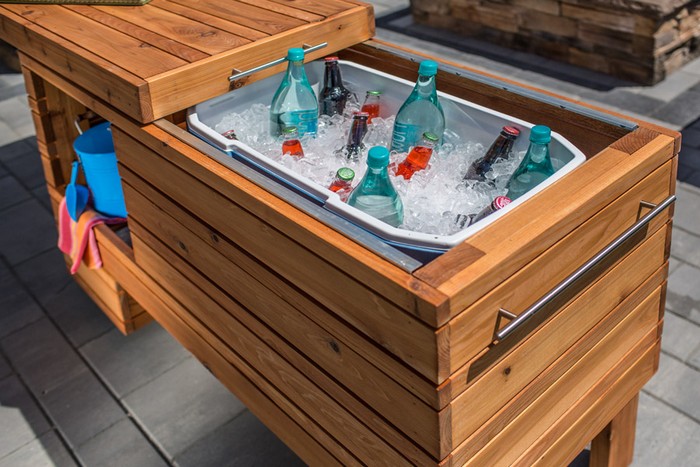
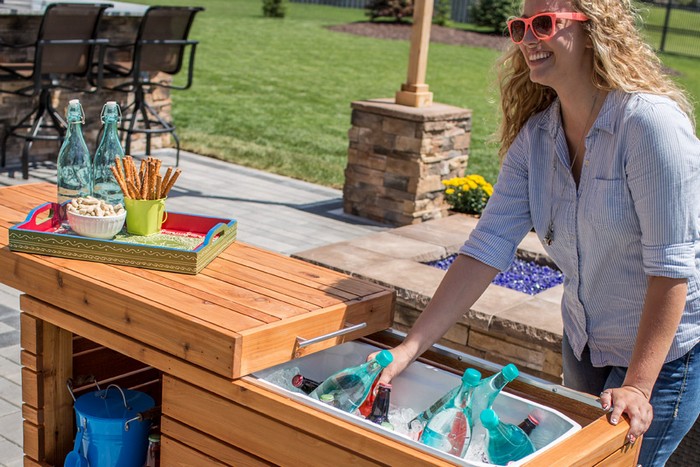
It’s cleverly designed and makes entertaining guests a breeze. The built-in cooler ensures that your drinks are always cold, while the sliding top makes it easy to serve.To open the cooler, simply slide the cover over. The cover can also be used as a work surface, making this a versatile and practical cooler for any event.
It’s perfect for those who lack counter space in their outdoor area. It has a shelf for storing other items and wheels so you can move your serving center anywhere you want to. Plus, the sleek design is sure to impress your guests.
If you are looking for wood that will last for years, cedar is a great option. Cedar is a durable wood that wears well over time, making it ideal for outdoor projects like this sliding service center. Cedar is also naturally resistant to rot and insects, making it a low-maintenance option for your home. It is also a beautiful wood, with a natural red hue that can add a touch of elegance to any space.
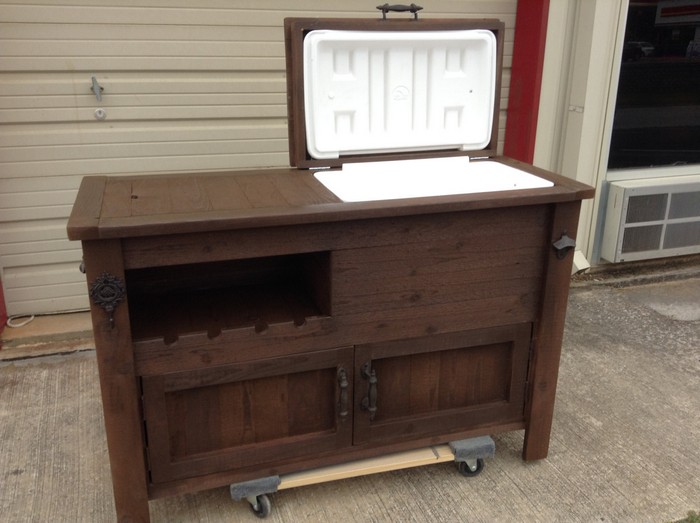
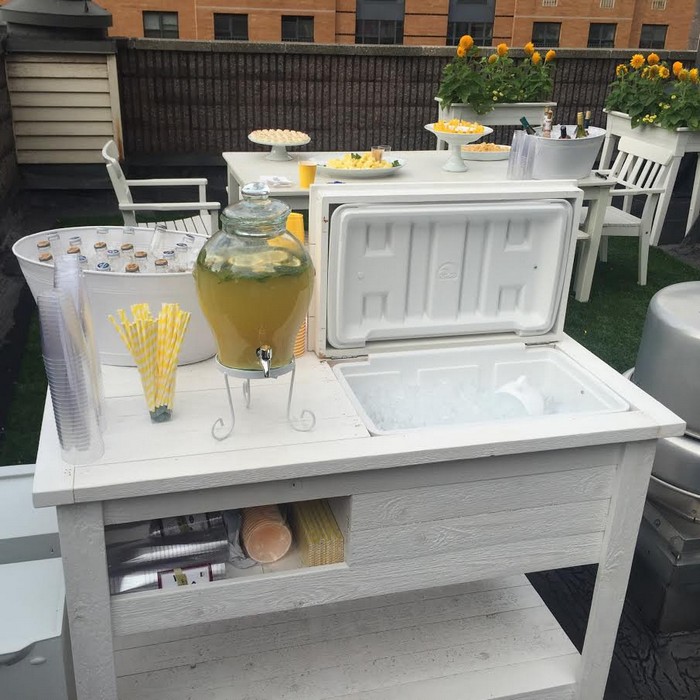
If you’re looking for a way to add extra counter space and cooler to your backyard parties, then this sliding serving center is a great option. It’s easy to build and will provide you with the extra space you need to keep your guests fed and hydrated.
Contents
Building a Sliding Serving Center
Materials
- 19 pcs 1×2, 96″ long Cedar
- 18 pcs 1×4, 96″ long Cedar
- 5 pcs 2×4, 96″ long Cedar
- 1-1/4″ Coarse Exterior Pocket Screws
- 2-1/2″ Coarse Exterior Pocket Screws
- 1/16″x3/4″x72″ Aluminum Angle
- #8×5/8″ Sheet Metal/Lath Screws
- #8×1-1/2″ Sheet Metal/Lath Screws
- 1/2″x24″ Threaded Rod
- #18×1-1/4″ Brad Nails
- 2 pcs 8″ Replacement Lawnmower Wheels
- 1 50-70 quart Chest Cooler
- 1 pc 6-1/4″ Brushed-Nickel Bar Pull
- 1 pc 10″ Brushed-Nickel Bar Pull
Tools
- Porter-Cable Air Compressor
- Wood Clamps
- Cordless Drill
- Hack Saw
- Hammer
- Miter Saw
- Nail Gun
- Pocket-Hole Jig
- Sander
- Speed Square
Instructions
Step 1: Prepare the Materials
- Cut the Wood: Use the miter saw to cut the cedar wood into the required lengths. You’ll need to adjust the sizes based on the specific dimensions of your serving center.
- Frame and Legs: Use 2×4s for the frame and legs.
- Slats and Panels: Use 1×2s and 1×4s for the side panels, top, and sliding mechanisms.
Step 2: Assemble the Frame
- Construct the Base Frame: Using the 2×4s, form the rectangular base of the serving center. Secure the joints with 2-1/2″ pocket screws using the pocket-hole jig.
- Add Vertical Supports: Attach vertical 2×4s at each corner for additional support. Use wood clamps to hold pieces in place while drilling.
Step 3: Build the Top and Sliding Mechanism
- Create the Top Frame: Construct a frame with 1×2s that will hold the cooler and allow the top to slide open.
- Install the Sliding Mechanism: Attach the aluminum angle to the edges of the top frame to act as tracks for the sliding top. Use the hack saw to cut the aluminum to length and secure with metal screws.
Step 4: Attach the Panels
- Side Panels: Use 1×4 cedar boards for the side panels. Attach them to the frame using the brad nails and nail gun.
- Sliding Top: Construct the sliding top using 1×4s and 1×2s. Ensure it fits within the aluminum tracks smoothly.
Step 5: Install the Cooler
- Position the Cooler: Place the chest cooler inside the frame. Ensure it’s snug and secure.
- Attach the Pulls: Install the bar pulls on the sliding top to help in opening and closing.
Step 6: Add Mobility and Stability
- Attach Wheels: Screw the lawnmower wheels to the base at one end to make the serving center easy to move.
- Threaded Rod for Stability: Use the threaded rod to add stability and as a handle to move the serving center. Cut it to length with the hack saw and attach using metal screws.
Step 7: Finishing Touches
- Sand and Finish: Sand the entire serving center to smooth out rough edges and surfaces. Apply a protective outdoor finish to protect the wood from the elements.
- Decorative Elements: Optionally, you can add additional decorative elements or paint as desired.
Step 8: Final Setup
- Place in Desired Location: Move the sliding serving center to your chosen outdoor location.
- Stock with Supplies: Fill the cooler with drinks and set up the top for serving.
Click on any image to start the lightbox display. Use your Esc key to close the lightbox.![]()


You can get more step-by-step instructions here…
Customization Options for Your Sliding Serving Center
Creating a sliding serving center for your backyard gatherings offers a fantastic blend of functionality and style. To make it uniquely yours, consider various customization options. Tailoring the design, materials, and accessories of your sliding serving center can significantly enhance the aesthetics and practicality of your outdoor entertaining space.
Material Choices
- Wood Varieties: While cedar is popular for its durability and natural resistance to rot, other woods like teak, bamboo, or pressure-treated pine can also be excellent choices for a sliding serving center. Each wood type offers unique colors and grain patterns, allowing you to match the aesthetic of your outdoor décor.
- Metal Accents: Incorporating metal elements such as stainless steel, copper, or wrought iron can add a modern touch to your sliding serving center. Metal accents are not only stylish but also enhance durability and stability.
Color and Finish
- Stain and Paint Options: Customize the color of your sliding serving center with stains or paints. Choose a color that complements your outdoor furniture or opt for bright hues to make it a focal point. Weather-resistant paints or stains will help protect the wood and keep the serving center looking new for years.
- Protective Coatings: Applying a UV-resistant sealant or a waterproof varnish can protect the wood from weathering. These coatings help maintain the appearance and integrity of your sliding serving center over time.
Design Modifications
- Adjustable Dimensions: Tailor the size of your sliding serving center to fit your space. Whether you need a more compact design or a larger one for big gatherings, adjusting the dimensions ensures that it fits perfectly in your designated area.
- Innovative Layouts: Consider adding tiers or levels to the sliding serving center. Multiple levels can provide additional space for storage and display, making the serving center more versatile and accommodating.
Functional Additions
- Built-In Features: Enhance the utility of your sliding serving center by integrating a built-in ice bucket, glass holders, or a bottle opener. These features increase convenience and make the center a comprehensive solution for serving drinks.
- Lighting: Install LED strip lights or solar-powered lamps to illuminate your sliding serving center. Lighting not only increases the functionality by making it easier to serve in the evening but also adds a charming ambiance to your gatherings.
Mobility Enhancements
- Wheel Options: Adding high-quality caster wheels can make your sliding serving center easily movable. Lockable wheels ensure it stays in place when needed, providing flexibility in arranging your outdoor space.
- Handles: Equip the sliding serving center with sturdy handles to facilitate easy movement. Choose handles that complement the overall design and enhance the aesthetic appeal.
By customizing your sliding serving center, you not only get a piece that perfectly fits your needs but also one that reflects your personal style. These modifications can transform a simple serving center into the highlight of your backyard gatherings.
Advanced DIY Tips and Techniques
Building a sliding serving center involves more than just basic construction; it’s an opportunity to hone your craftsmanship and add sophisticated features that elevate the entire project.
Below, we provide advanced DIY tips and techniques that can help you enhance the functionality and durability of your sliding serving center, ensuring it becomes a standout feature in your backyard for years to come.
Precision Cutting and Joinery
- Accurate Measurements: Ensuring precise cuts is crucial for the overall stability and appearance of your sliding serving center. Use a digital angle finder and a laser measure to enhance accuracy beyond traditional tools.
- Advanced Joinery: Explore joinery techniques such as dovetails or mortise and tenon for assembling parts of the sliding serving center. These methods not only increase the strength of the structure but also add a touch of craftsmanship that can be a real talking point.
Weatherproofing Techniques
- Sealing and Finishing: To protect your sliding serving center from the elements, apply marine-grade varnish or a polyurethane coat. These finishes provide a durable barrier against moisture, UV rays, and temperature changes.
- Waterproof Glues: Use waterproof adhesives for assembling any wooden parts. These glues ensure that joints do not weaken over time due to moisture exposure, preserving the integrity of your sliding serving center.
Sliding Mechanism Optimization
- Smooth Sliding Function: For the sliding top of your serving center, invest in high-quality slides or create a custom track system. Use nylon bearings or Teflon strips to reduce friction and ensure a smooth, effortless slide.
- Alignment Checks: Regularly check the alignment of the sliding mechanism during and after construction. Misalignment can lead to uneven wear and tear or difficulty in operation, which can detract from the user experience.
Implementing these advanced DIY tips and techniques will not only improve the build quality of your sliding serving center but also enhance its usability and longevity. By taking the time to focus on detailed craftsmanship and high-quality finishes, you’ll create a functional, durable, and aesthetically pleasing centerpiece for your outdoor gatherings.
Conclusion
Building a sliding serving center offers a rewarding project that enhances any backyard gathering with both functionality and style. As you apply detailed craftsmanship and choose durable materials, your creation will provide lasting enjoyment and convenience. Embark on this DIY adventure, and enjoy the satisfaction of customizing your own outdoor entertaining space.
We have more incredible cooler ideas for your next Sunday barbecue. Check out our cooler from an old fridge guide!