Last Updated on March 4, 2024 by teamobn
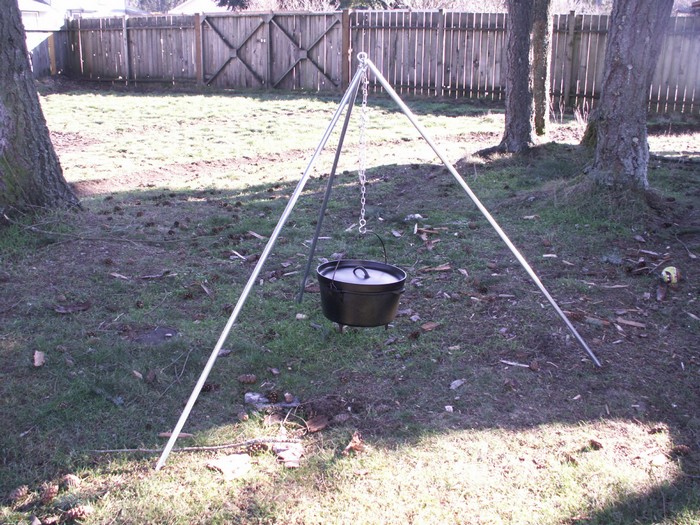
If you love camping and need a piece of convenient campfire equipment that you can easily cook with and take with you, then a campfire tripod is a must-have for you!
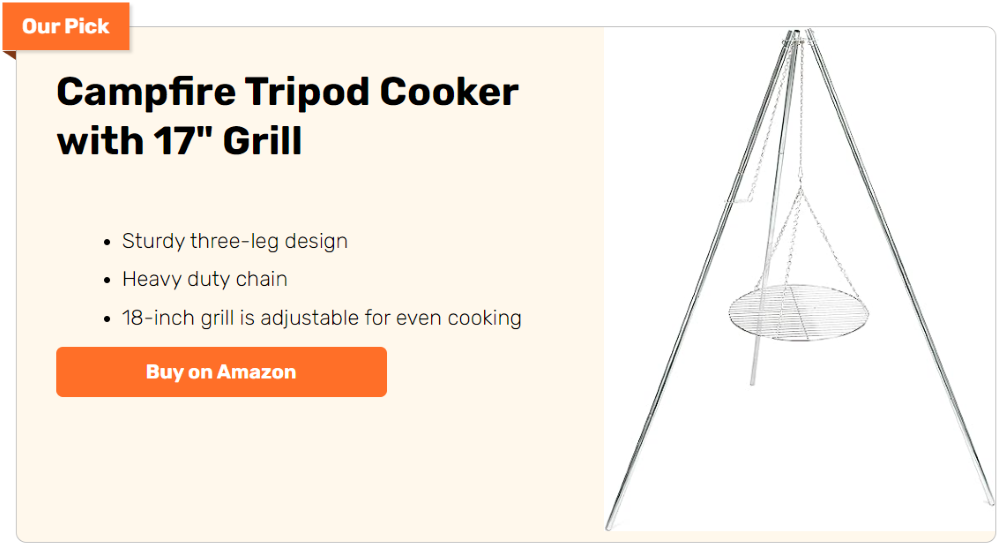
Campfire tripods are sold in stores but sometimes they just don’t have the exact features that you’re looking for. The cheapest ones are usually short, while the longer ones are too heavy to bring around and more expensive too.
The good news is you can DIY one and customize it to meet your requirements for the perfect campfire tripod for you! This DIY campfire tripod will only cost you anywhere between $20 to $25 even if you buy brand-new materials for it. You can cut it to whatever height you need it to be, which is great if you’re looking at using it for a big campfire or fitting it inside your vehicle. It’s also more lightweight compared to the wrought-iron version of it, which makes it more delightful to take with you on your camping trips.
It’s as good as the commercial campfire tripods, maybe even better if you build it right and well. You can hang your dutch oven or pots weighing 30 to a maximum of around 90 lbs on them. You can enjoy the convenience of the campfire tripod even when you’re roughing it outdoors!
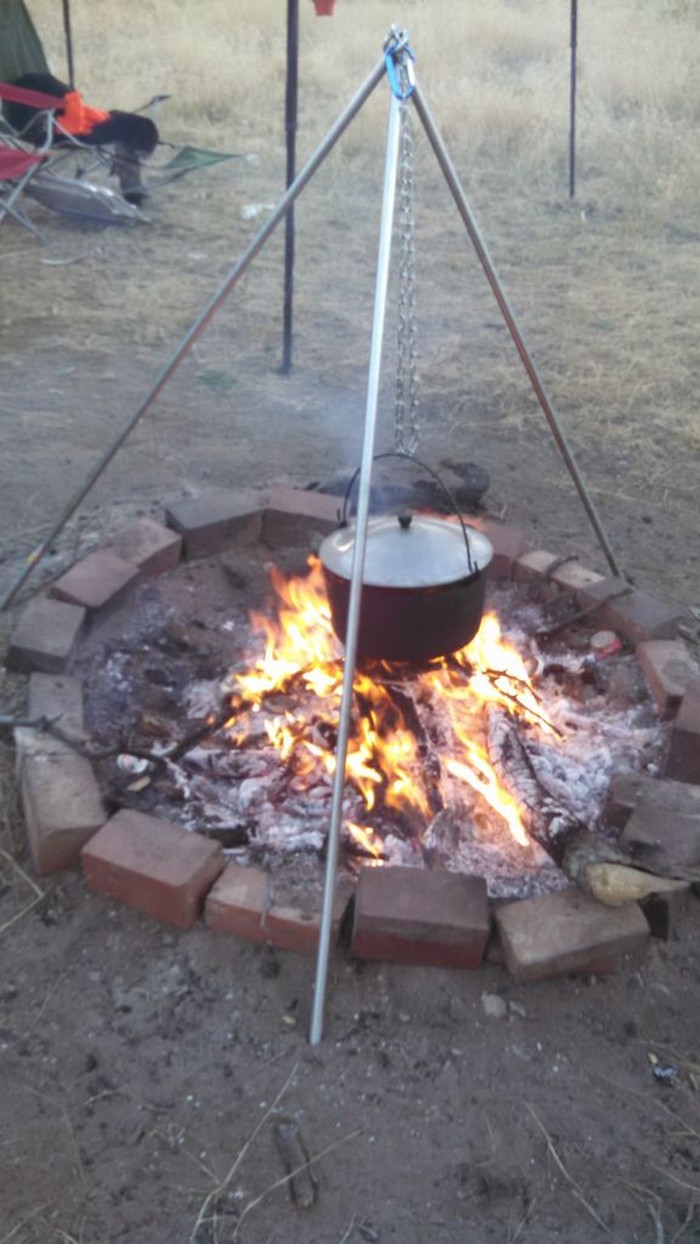
Learn how to build your own campfire tripod and get ideas on how you can customize it to fit your cooking needs by following the step-by-step tutorial below!
Contents [show]
Building a Campfire Tripod
Materials
- 1/2″ Conduit (4′ long or longer; 3 sections)
- 3 Heavy-duty Eye Bolts
- 2 S-Hooks
- 4′ Chain (the kind with the wire links is great)
Tools
- Hammer
- Tubing Cutter or Hacksaw
- Pliers
- Wire Cutter
Steps in building your own campfire tripod:
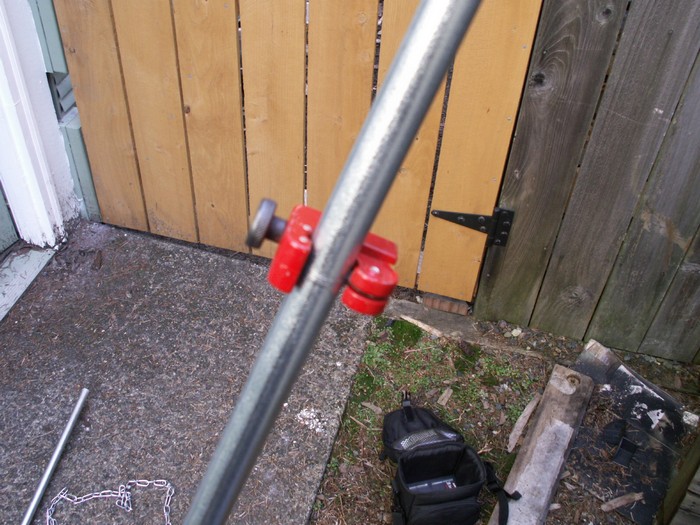
Cut the legs: First, cut the conduit to the desired length. I made mine 4’8″, but you can make them any length you like.
The tubing cutter has little rollers and a cutting wheel on a clamp. Tighten the clamp onto the conduit where you want the cut then tighten it down, turn, and repeat until the conduit is cut all the way through.
A hacksaw may also be used to do the job.
If you don’t have a way to cut the conduit, the hardware store may cut it for you when you buy it.
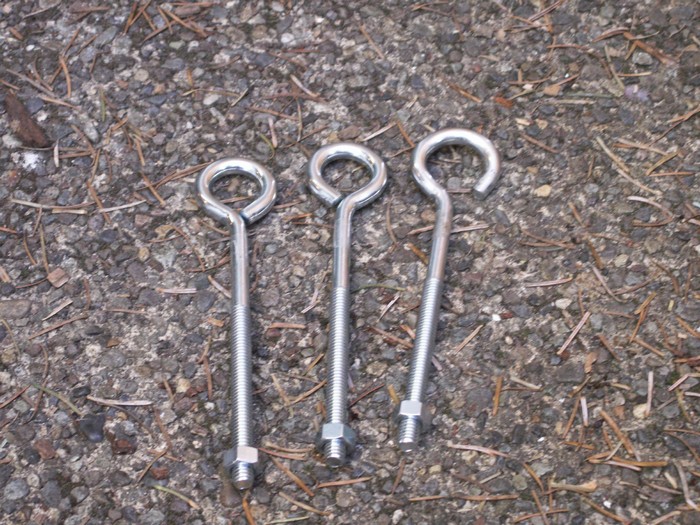
Open one eye bolt: Open one eye of one eye bolt using pliers, or lever it open with pliers and a scrap of tubing. This is the hardest part if you bought beefy eye bolts like these. It was probably overkilled.
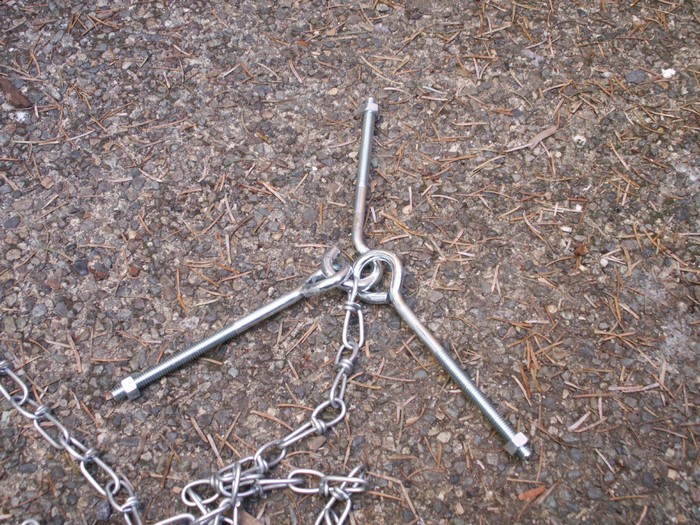
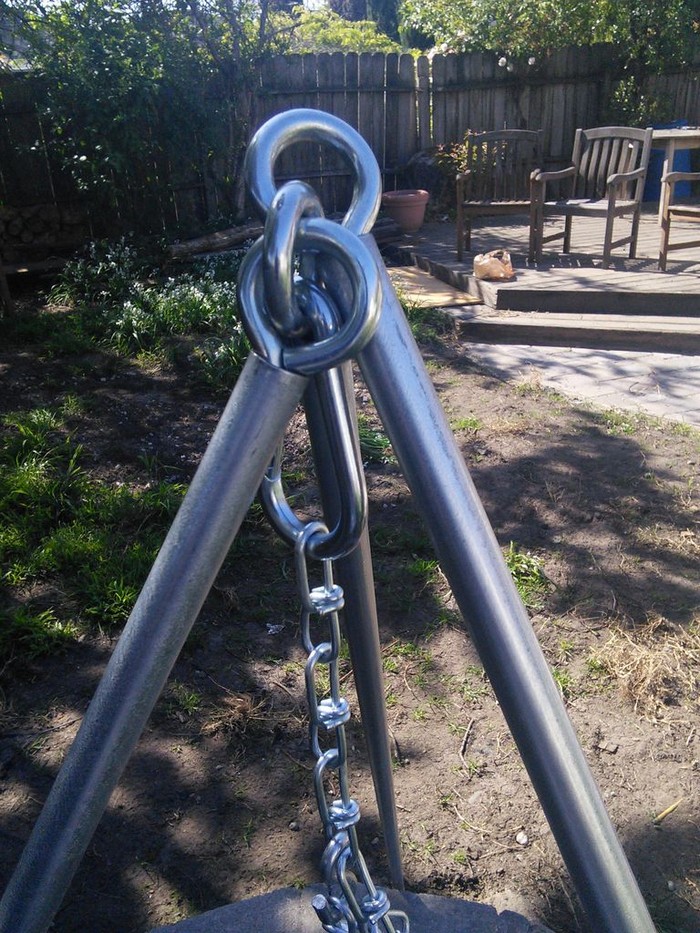
Assemble the eye bolts and chain: Now put the other two eyes and one end of the chain onto the open eye bolt. Use a hammer to reclose the open eye securely so it all stays together.
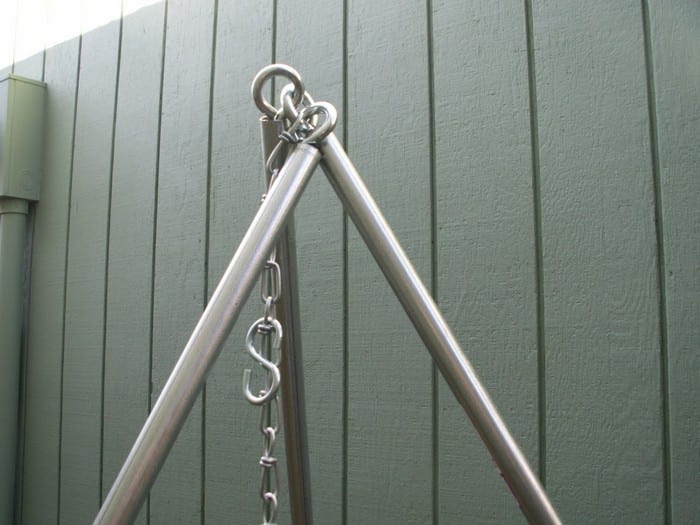
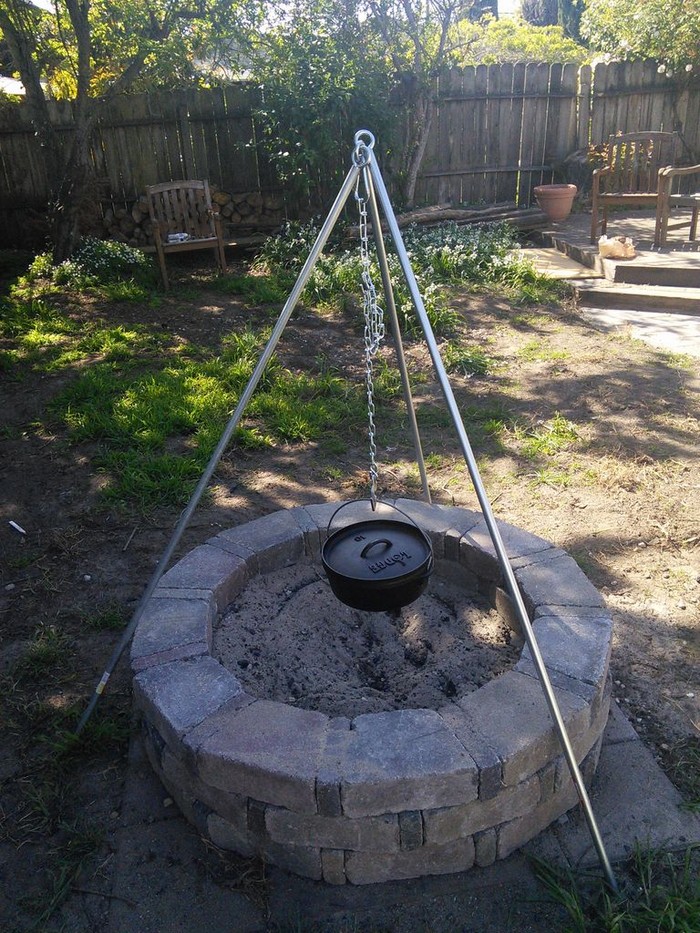
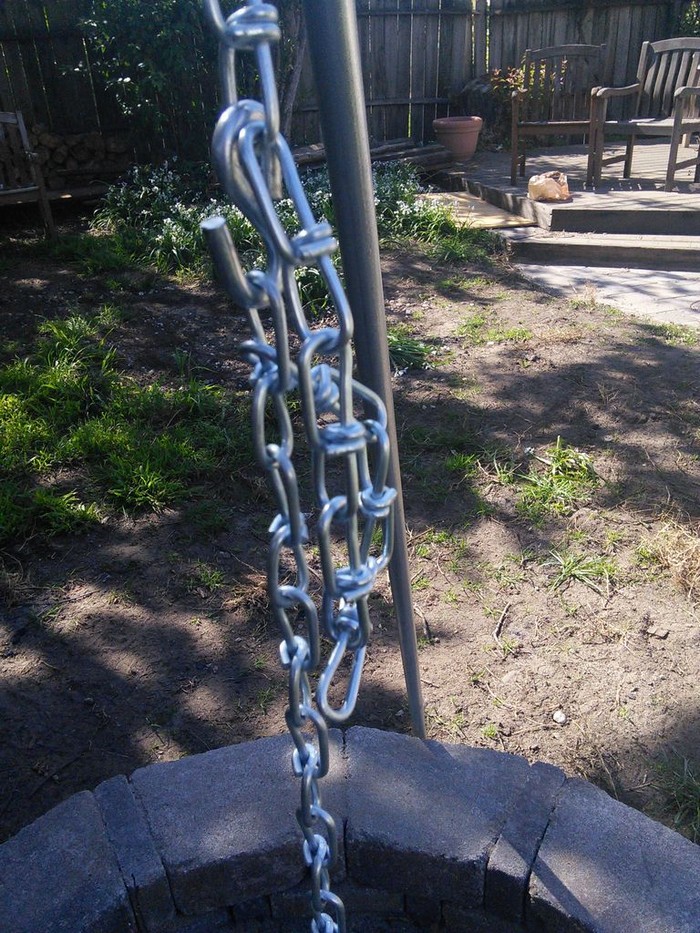
Connect the legs: Put the shafts of the eye bolts into the ends of the legs and stand it up with the legs equidistant, as it will look over a campfire. Put one of the S-hooks on the chain near the top and use the pliers to close it tight. This will be the adjuster for the cookpot height.
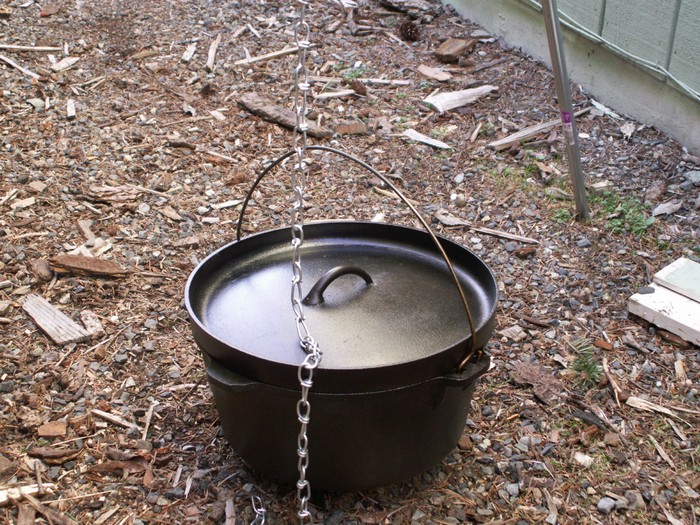
Cut the chain to a length: Cut the chain to the desired length, using your cookware to measure the longest possible chain length desired.
It is long enough if the pot can sit on the ground and remain on the chain.
Put another S-hook onto the end of the chain and close it with pliers.
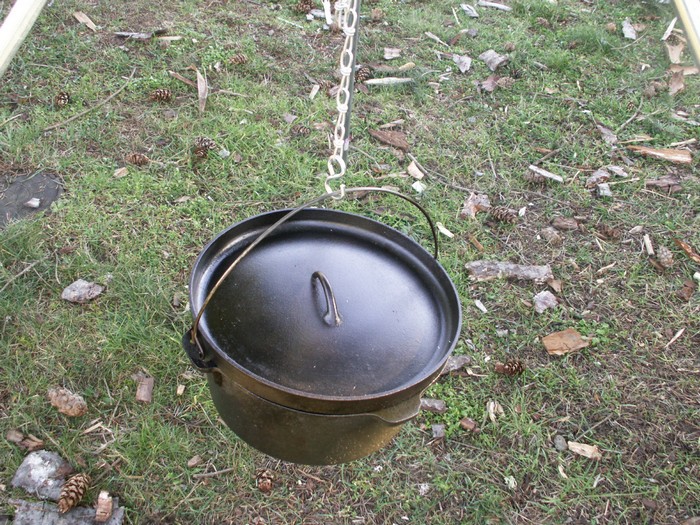
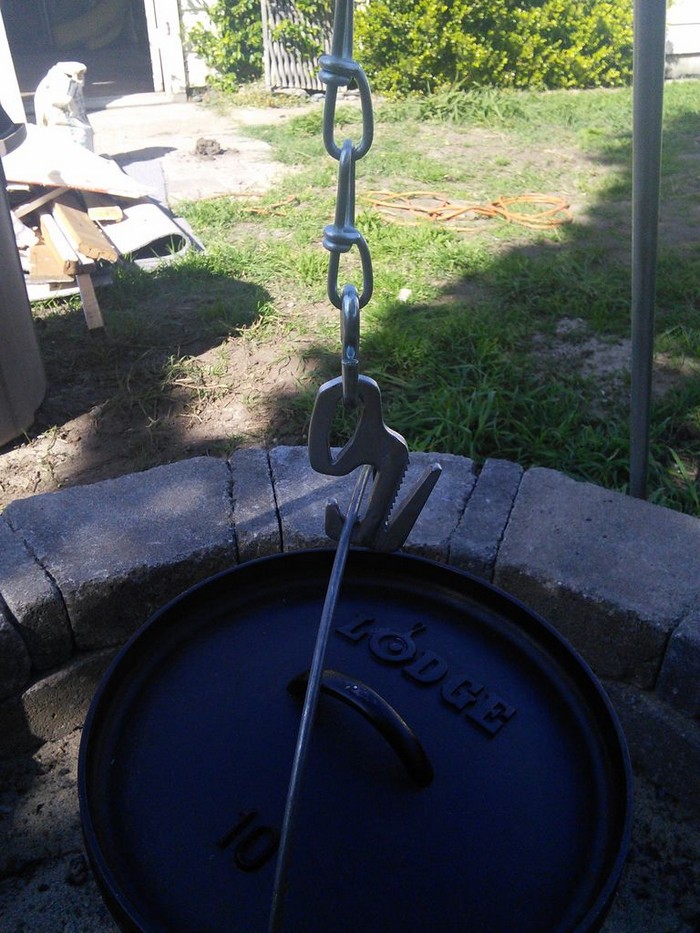
Hang cookware: Hang your dutch oven, coffee pot, or whatever on the chain and make sure it will support its weight. Ensure the adjuster hook will get the cookware to the level you want.
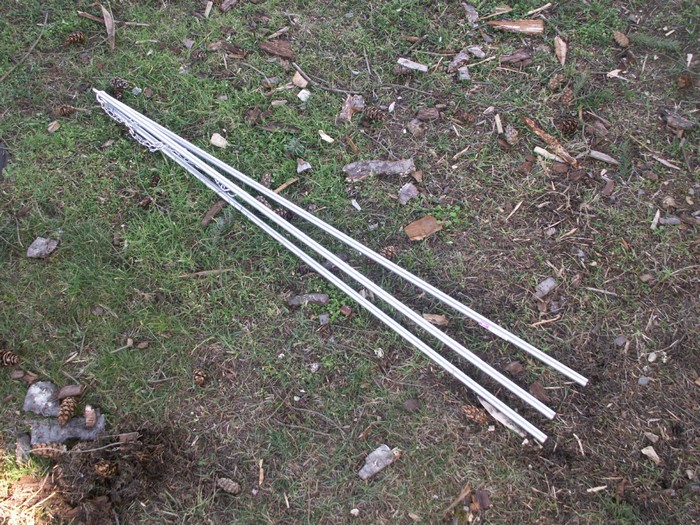
Fold it up: The beauty of this design is that it can collapse easily for storage and transport.

Customize and enjoy: You can add lots of different useful features to this basic design. Add an extra hook to hang utensils, paint it with stove paint, and make a mechanism to permanently connect the legs to the head, or whatever you want.
Later on, I am going to drill holes in two legs and add eye bolts to hold an additional piece of conduit from which I can hang more chains and hooks for more pots, or to hang boots for drying. (My brother-in-law has burned up two pairs of boots in as many hunting seasons because he puts them too close to the fire.)
The lower ends of the tripod should remain cool enough that you can pick up one leg at a time bare-handed to move it around a little bit. If you want to raise or lower the chain while it is hot, you might need oven mitts or a dutch oven lid lifter.
Thanks to pearsonry for this great project!
Gallery of Campfire Tripod
Would you want this campfire tripod for your next camping trip?
Click on any image to start the lightbox display. Use your Esc key to close the lightbox.![]()


Safety Tips for Using a Campfire Tripod
Safety is paramount when enjoying the great outdoors, especially when it involves cooking over an open flame with a campfire tripod. A campfire tripod offers a versatile and convenient way to cook delicious meals while camping, but it’s essential to use it safely to prevent accidents and ensure a pleasant outdoor experience.
Here are some crucial safety tips for using a campfire tripod:
Choose a Safe Location
- Clear the Area: Before setting up your campfire tripod, ensure the ground is flat and clear of dry leaves, twigs, and other flammable materials. A clear area prevents the spread of fire.
- Wind Direction: Consider the wind direction to avoid smoke and potential fire spread. Set up your tripod so that the wind will not blow sparks towards your tent or other flammable items.
- Distance from Shelter: Set up your campfire tripod at least 15 feet away from tents, trees, shrubs, and other structures to minimize the risk of fire spreading.
- Ground Conditions: Select a location where the ground is not only flat but also free of roots. Underground roots can catch fire and smolder unnoticed, leading to potential hazards.
Proper Setup of the Tripod
- Stable Positioning: Ensure the tripod legs are firmly planted on the ground to prevent it from tipping over. A stable tripod is crucial for safely supporting heavy pots or pans.
- Adjustable Height: Use the adjustable features of your campfire tripod to keep the cookware at a safe distance from the flames. This minimizes the risk of overheating or tipping.
- Leg Spread: Ensure the tripod legs are spread out sufficiently to maximize stability, especially when cooking with heavy pots or in windy conditions.
- Material Check: Use a tripod made from materials suited for high heat. Metal tripods are preferable as they are less likely to degrade over time with heat exposure compared to wooden or plastic components.
Fire Management
- Controlled Fire Size: Keep the fire size manageable and appropriate for cooking. A smaller, controlled fire is safer and easier to manage under a tripod.
- Extinguishing the Fire: Always have water or a fire extinguisher nearby in case you need to extinguish the fire quickly. Never leave the fire unattended.
- Firebreak: Create a firebreak around your campfire area by digging a small ditch or clearing a perimeter to prevent the fire from spreading.
- Fuel Size: Use smaller pieces of wood that fit within your fire pit or designated area. Smaller pieces are easier to control and extinguish than larger logs.
- Emergency Plan: Always have a plan for quickly extinguishing the fire in case of emergency, including a shovel for covering the fire with dirt and a bucket of water or sand at arm’s reach.
Handling Cookware
- Heat-Resistant Gloves: Use heat-resistant gloves when handling the cookware or adjusting its position on the tripod to protect against burns.
- Secure Hanging: Make sure the cookware is securely attached to the tripod’s hook to prevent it from falling. A stable setup ensures that your food cooks evenly without accidents.
- Balanced Loading: When using pots or pans on the tripod, distribute the weight evenly to prevent tipping. Uneven loads can cause spills or accidents.
- Use Long-Handled Utensils: Employ cooking utensils with long handles to maintain a safe distance from the heat, minimizing the risk of burns.
- Avoid Overfilling: Keep cookware from being overfilled with food or liquid. This reduces the risk of spillage, which could extinguish the fire or cause burns.
After Use
- Cool Down: Allow the tripod and cookware to cool down completely before handling them. This prevents burns and makes it safer to clean and store your equipment.
- Clean Up: Remove all traces of the fire and dispose of ashes properly. Leave the site as you found it, adhering to Leave No Trace principles.
- Disassembly: Once cooled, carefully disassemble the tripod for cleaning. Doing this ensures that no part is overlooked during maintenance.
- Site Restoration: After the fire is completely extinguished and the area cooled, restore the site. Spread out any remaining ash over a wide area away from the campsite, assuming it’s cold and fully extinguished, to minimize environmental impact.
- Waste Disposal: Properly dispose of any trash or leftover food. Animals are attracted to campfires, so leaving no trace helps protect wildlife.
Regular Inspection and Maintenance
- Check for Damage: Before and after each use, inspect your campfire tripod for any signs of wear, damage, or weakness. Regular maintenance ensures the tripod remains safe and functional for future use.
- Rust Prevention: After cleaning, dry the tripod thoroughly to prevent rust. If possible, apply a thin layer of cooking oil to metal parts to protect them from moisture.
- Tighten Connections: Check and tighten any bolts or connections on the tripod. Loose parts can lead to instability or collapse under weight.
- Storage: Store the tripod in a dry, cool place. If it can be disassembled, consider keeping it in a dedicated bag or container to avoid losing parts and to protect it from the elements.
Following these safety tips can significantly enhance your camping experience, making it safer and more enjoyable for everyone involved. Remember, the key to a successful campfire cooking experience lies in preparation, awareness, and respect for the environment and fire safety practices.
Comparative Analysis: DIY vs. Store-Bought Campfire Tripods
Choosing the right campfire tripod can significantly enhance your outdoor cooking experience, whether you’re a seasoned camper or a novice adventurer. The debate between DIY and store-bought campfire tripods is ongoing, with each option offering distinct advantages and disadvantages.
This comparative analysis aims to shed light on these differences to help you make an informed decision based on your needs, skills, and budget.
Cost Efficiency
DIY Campfire Tripod:
- The cost of materials for a DIY tripod can be significantly lower than purchasing a pre-made one, especially if you have some materials already available.
- The overall expense may vary depending on the quality of materials chosen but typically ranges from $20 to $25.
- Beyond the initial material costs, a DIY approach can also incur additional expenses for tools if you don’t already own them. However, these tools can be used for future projects, spreading the cost over several activities.
- For those who enjoy scavenging or repurposing materials, the cost can be further minimized. Finding materials that can be repurposed into a campfire tripod not only saves money but also contributes to sustainability.
Store-Bought Campfire Tripod:
- Prices for store-bought tripods vary widely based on brand, material, and features. While some basic models may be competitively priced, higher-end versions can be quite expensive.
- The initial higher cost might be justified by durability and specialized features.
- When considering long-term value, store-bought tripods may offer better cost efficiency through durability and less frequent replacements. The initial investment could be offset by years of reliable use.
- Some high-end models come with features that, while increasing cost, enhance the cooking experience significantly. These features might not be easily replicated in a DIY model without substantial skill and effort.
Customization and Flexibility
DIY Campfire Tripod:
- One of the biggest advantages of a DIY tripod is the ability to customize its size, height, and features to meet your exact needs.
- You have the freedom to add unique modifications, such as additional hooks for utensils or adjustable legs for uneven terrain.
- The DIY route allows for the integration of specific features tailored to unique cooking styles or requirements. For example, incorporating adjustable levels for the chain or multiple hanging points can cater to complex cooking tasks.
- Creativity is another aspect where DIY shines. You can design your tripod to reflect personal style or to fit specific cooking scenarios, such as adding a grilling feature or a mechanism for rotating the cookware over the fire.
Store-Bought Campfire Tripod:
- Store-bought models offer limited customization. What you see is generally what you get, although some models come with adjustable heights or collapsible designs for easier transport.
- The range of available designs means you might find one that suits your needs without the need for modifications.
- Some store-bought tripods now come with modular designs, allowing for a degree of customization through the addition of accessories or attachments. These might include interchangeable tops for different cooking methods or adjustable feet for stability on uneven ground.
- Flexibility in store-bought models is increasingly addressed through innovative designs that cater to diverse cooking needs, from simple pot hanging to more elaborate setups for grilling or smoking.
Durability and Reliability
DIY Campfire Tripod:
- The durability of a DIY tripod largely depends on the materials used and the builder’s skill level. High-quality materials and careful construction can result in a sturdy and reliable tripod.
- There’s a satisfaction in using something built with your own hands, though consistency in quality can be a challenge for less experienced builders.
- A well-constructed DIY tripod using premium materials can rival commercial products in terms of longevity. The key lies in selecting materials that withstand high temperatures and environmental wear.
- The reliability of a DIY tripod may also depend on periodic maintenance and adjustments based on usage. Enthusiasts who enjoy regular tinkering can ensure their tripod remains in top condition.
Store-Bought Campfire Tripod:
- Commercial tripods are typically designed for durability, made from materials tested for strength and resistance to heat and rust.
- They come with manufacturer warranties, offering peace of mind and protection against defects.
- The consistent manufacturing process of store-bought tripods means they are tested for a range of conditions, ensuring a predictable level of durability. This standardization helps in providing a uniform quality that DIY projects might not always match.
- Advanced coatings and treatments applied to commercial tripods for rust and heat resistance are often the result of extensive research and development, contributing to their longevity and performance under different environmental conditions.
Ease of Use and Transportation
DIY Campfire Tripod:
- DIY tripods can be designed to disassemble or fold for easy transportation, but this requires careful planning and additional work.
- The weight and bulkiness depend on the chosen materials and design.
- For those with specific transportation needs, a DIY tripod can be designed to dismantle into a compact form that fits into specialized camping gear or spaces. This bespoke approach allows for creative solutions that address personal preferences or constraints.
- The functionality of a DIY tripod, including ease of assembly and disassembly, can be tailored to the user’s skill level and requirements. However, achieving a balance between lightweight design and stability requires careful planning and experimentation.
Store-Bought Campfire Tripod:
- Many store-bought tripods are designed with portability in mind, featuring collapsible legs and lightweight materials.
- They often come with carrying bags or cases, making them convenient to transport and store.
- Ease of use is a significant advantage of store-bought tripods, with many models featuring intuitive setup and takedown mechanisms. This user-friendly design is especially beneficial for those who prefer to minimize fuss and maximize their time enjoying the outdoors.
- Innovations in materials and design have led to the development of ultra-lightweight tripods that do not sacrifice strength for portability. These advancements make store-bought options appealing to backpackers and those with limited packing space.
The choice between a DIY and a store-bought campfire tripod boils down to personal preferences, needs, and priorities. If you value customization, enjoy DIY projects, and are looking to save money, building your own tripod might be the way to go. On the other hand, if you prioritize durability, convenience, and ease of use, investing in a store-bought model could be more beneficial.
Conclusion
Building a campfire tripod offers a unique opportunity to create a customized cooking solution that perfectly fits individual outdoor needs and preferences. This DIY approach not only allows for a hands-on crafting experience but also results in a cost-effective and versatile piece of camping equipment. The benefits of such a project extend beyond savings, fostering a deeper connection with nature and enhancing the overall camping experience through the satisfaction of using self-made gear.
For more ways to cook outdoors, check out our perfect fire pit grill project!

