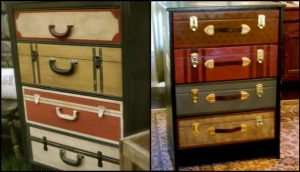
Here’s an excellent project for improving your wardrobe! Though there are similar items you can find in stores, why buy them when you can just make them yourself? This project is unique and personal, and it will save you money in the long run. Plus, it’s a great way to learn new skills.
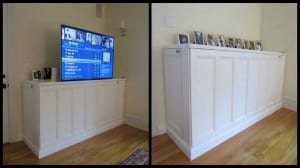
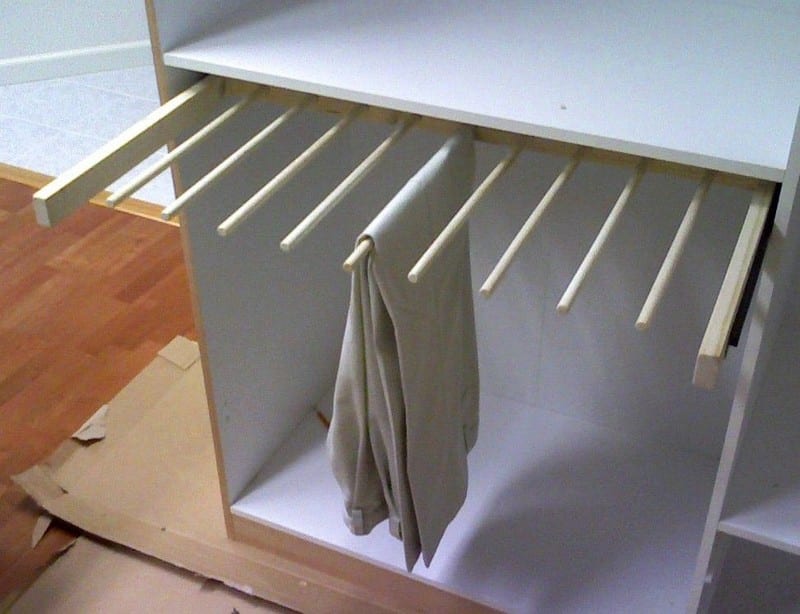
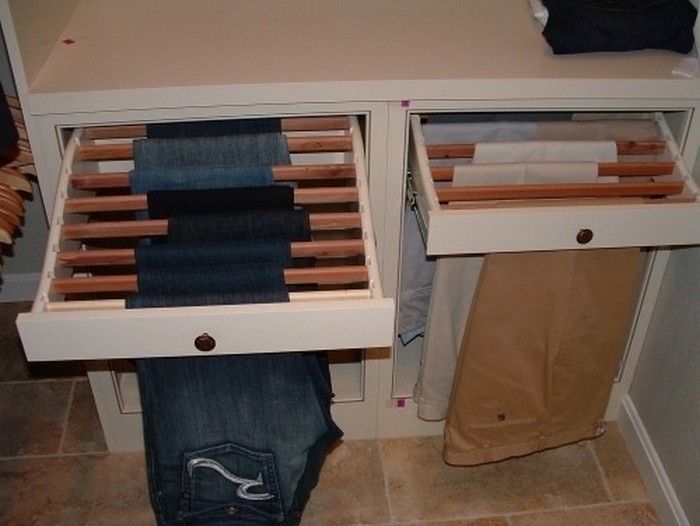
Creative DIY sliding pants rack, by doing it yourself, you can have a more organized place for pants without having to buy a whole new cabinet.
This DIY sliding pants rack is also great for its ease of access feature, where you can simply pull and slide a pair of pants without having to move the others.
Contents
Building a Sliding Pants Rack
Materials
- 1 – 1″ x 2″ x 8′ piece of wood
- 3 – 1/2″ x 48″ wooden dowel
- 1 – set of drawer sliders
- Finishing Nails
- Wood Screws
- Wood Glue
Tools
- Drill with 1/2″ Drill Bit
- Miter Saw
- Tape Measure
- Hammer
Steps
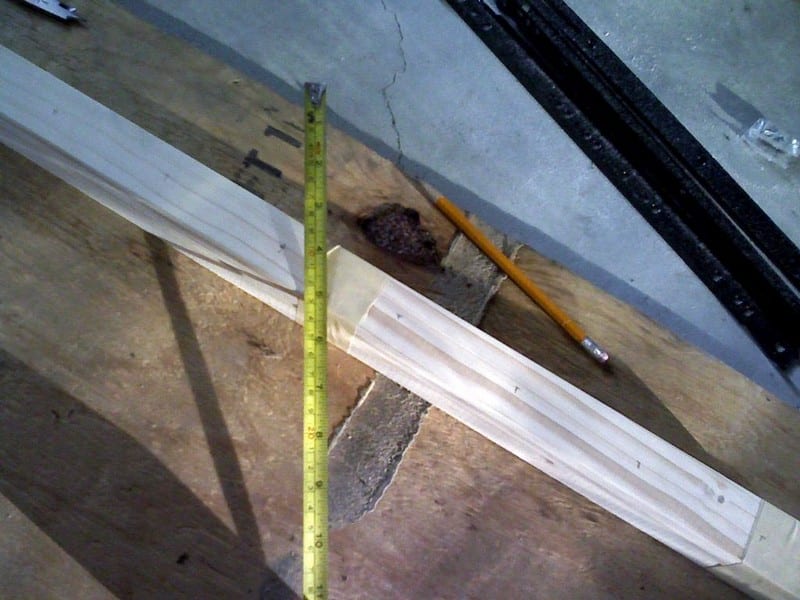
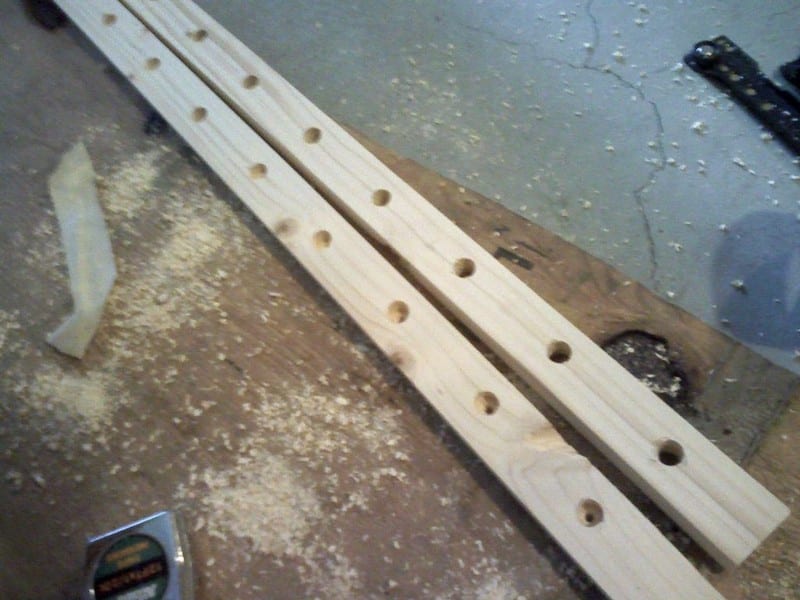
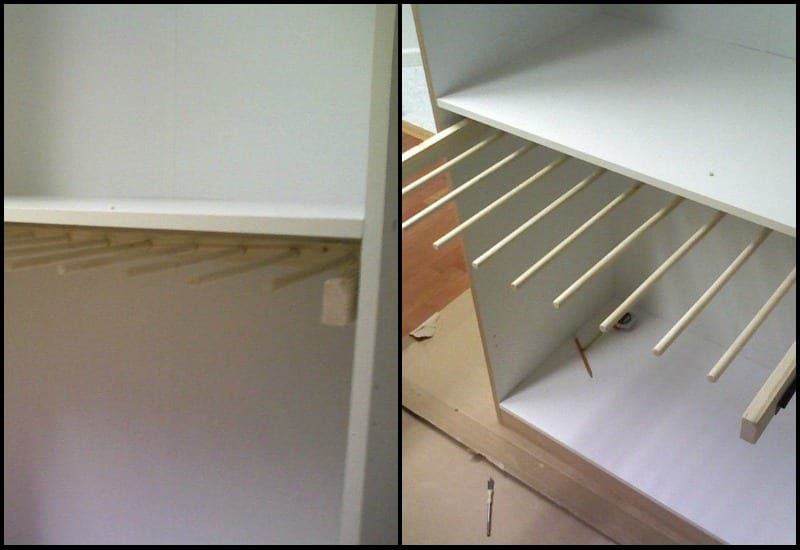
I started off by measuring the space that I was to mount this sliding pants rack. It ended up being 31″ x 19″. The sliders occupy roughly 1″ of space, so my needed to be ~ 30″ x 18″ or so.
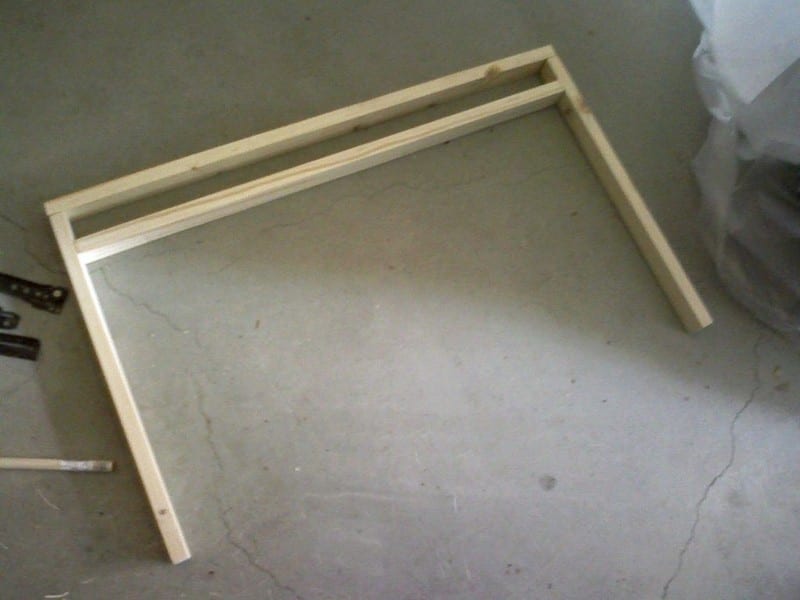
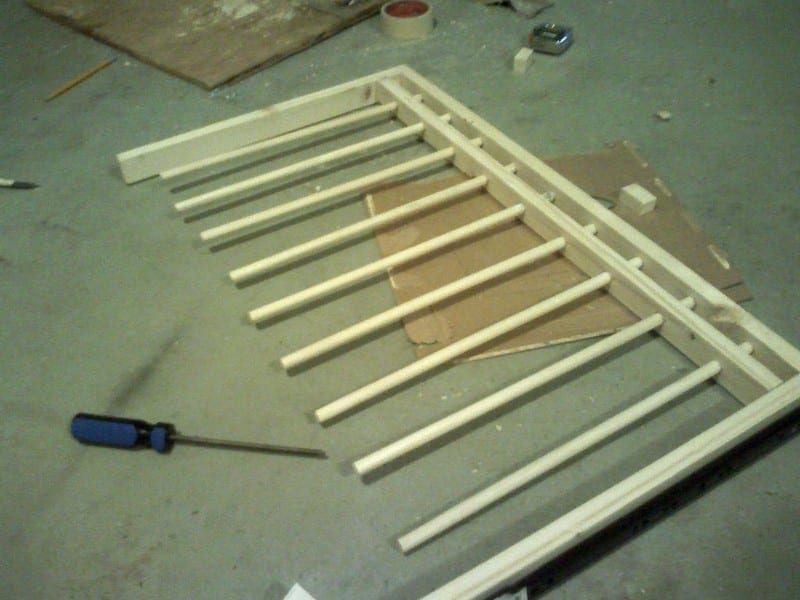
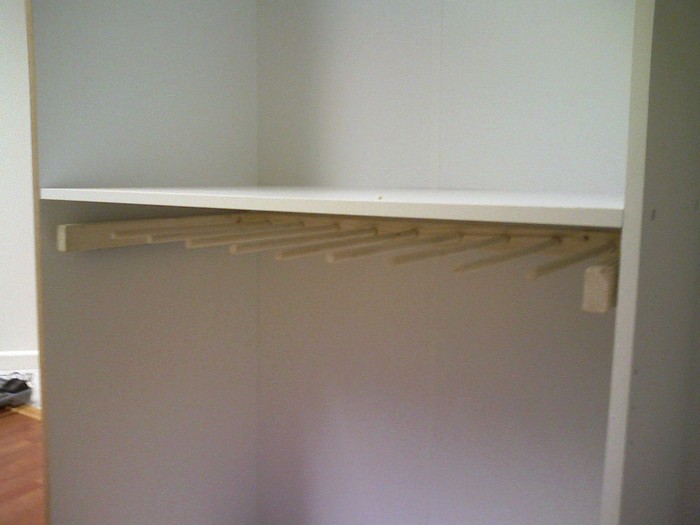
The frame needed to be able to hold its shape and not flex, and it needed something a bit more substantial than one single hole to hold the dowels. I decided on something like this:
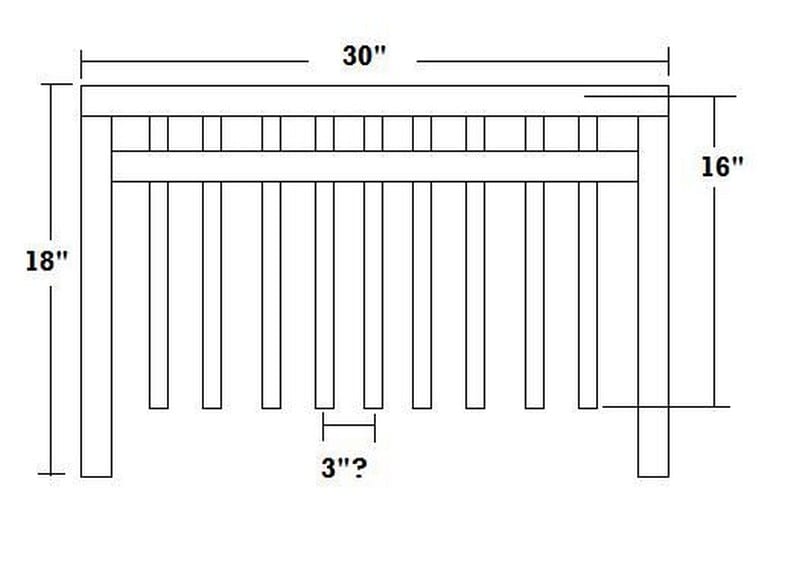
Measure and commence cutting. Dowels were cut into thirds, getting nine 16″ rods.
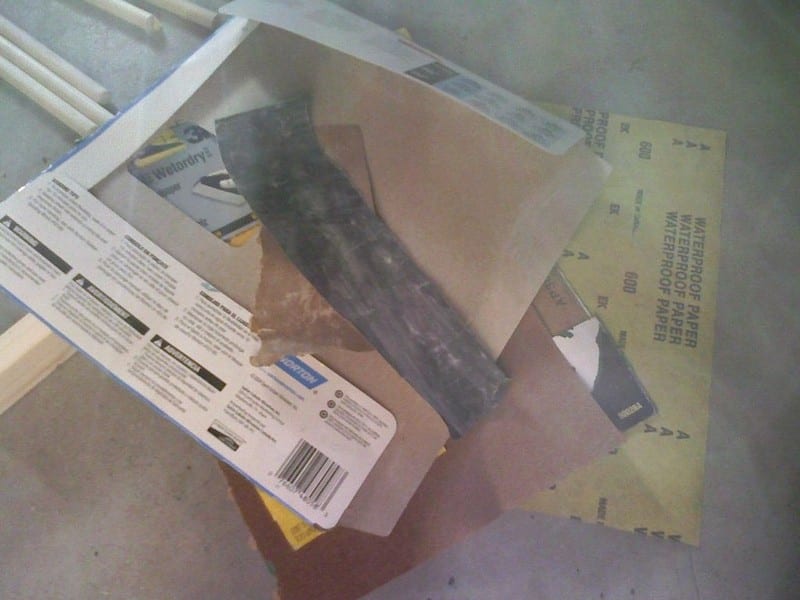
Since I don’t want wooden splinters ripping into my pants and such, the next step was to sand everything.
I started off with a rougher 220 grit, then 600, and finished off with 800.
Now comes the fun part. The dowels are 1/2″. The drill bit is also 1/2″. Can you guess?
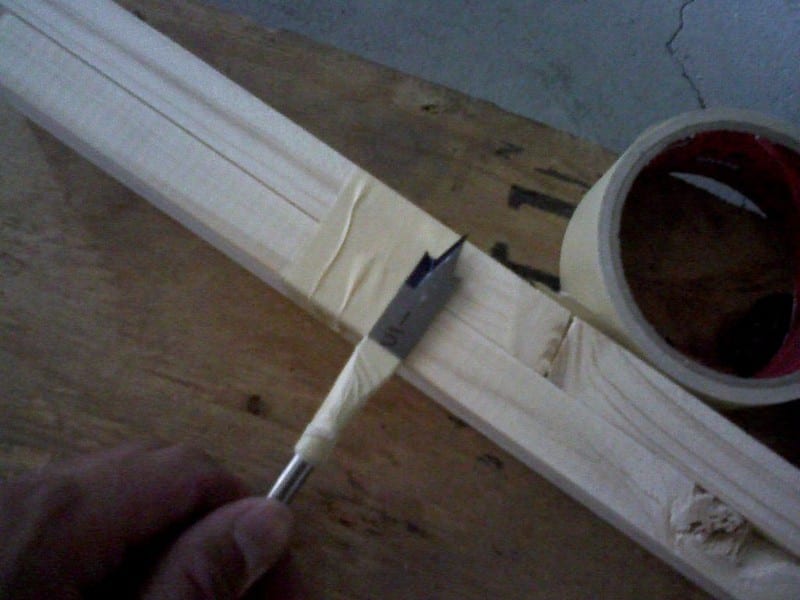
I only had one clamp, so I ended up taping the two pieces of wood together and making the top piece. Be sure you leave equal amounts of space on each side.
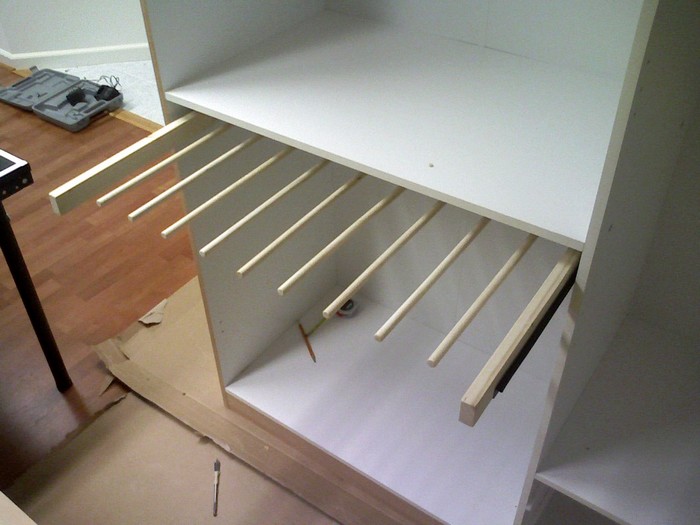
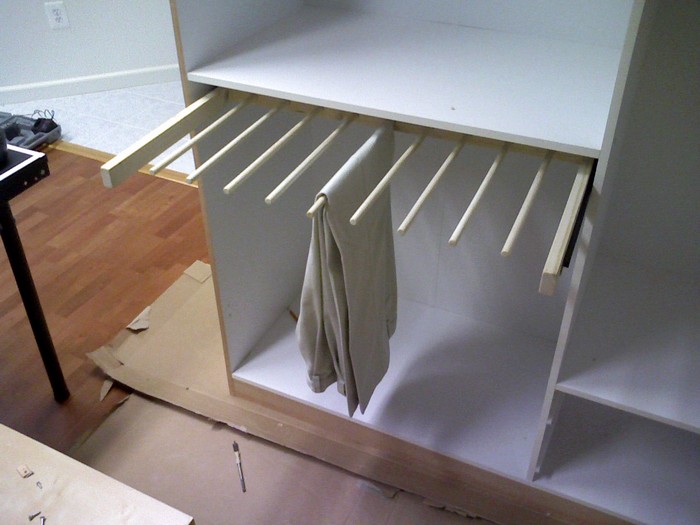
Put the sliding pants rack together. I assembled the frame first by tacking it in with finishing nails, then drilled pilot holes and put in a screw per side. After some adjustment, I glued the dowels in with some Elmer’s on steroids.
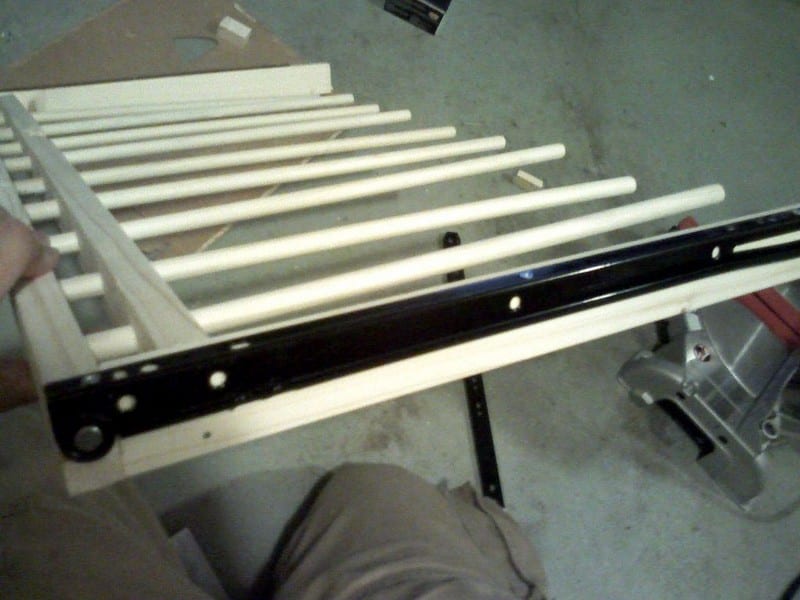
The obvious step, if it’s going to be on rails, they probably need to be attached. I used the supplied hardware to attach them to the frame.
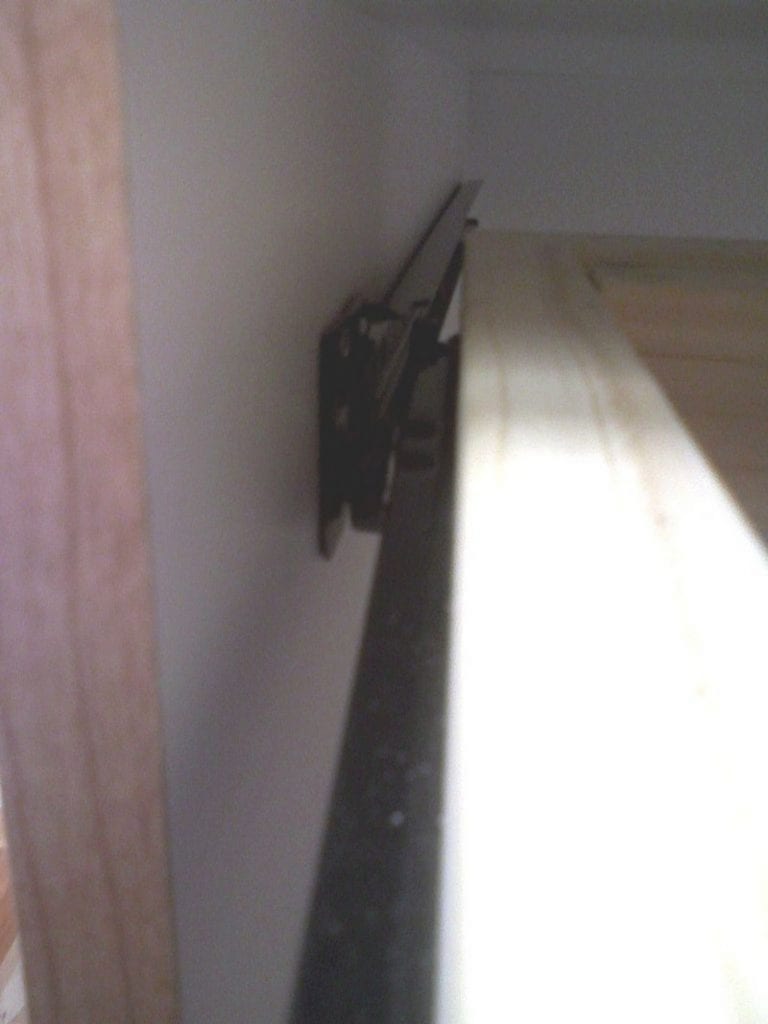
Measure how far you want the rail down, mark, and make tiny pilot holes. I used the tip of the 1/2″ bit and twisted it around some to get them started. Hold the rail in place, and attach it to the wardrobe with the supplied screws.
Unfortunately, I must have messed up my measurements somewhere, because my drawer was about 1/4″ too narrow and the sliders kept popping off. I ended up using a washer under each screw to remedy the problem. Remember kids, measure twice!
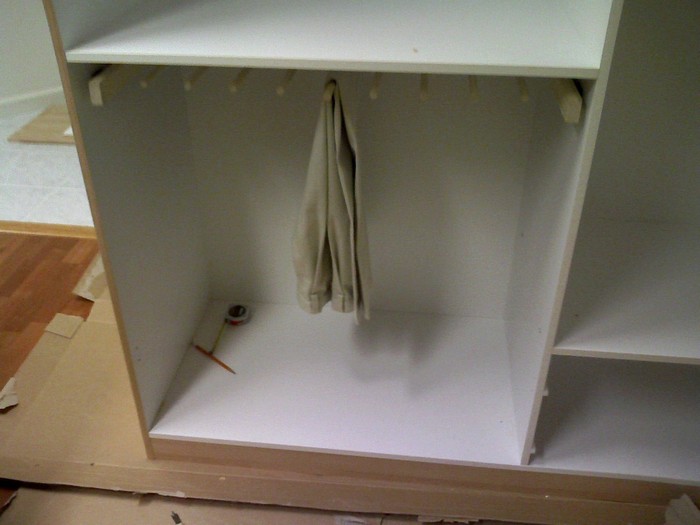
Now that that’s all taken care of, put the sliding pants rack in! If all went well, It should work. If not…. have fun tweaking it until it does 😛
The rack doesn’t come out completely, but more than enough. If you wanted it to come out further, you could get a set of full extension sliders that roll on ball bearings and such, but I opted not to since they cost more than twice as much.

Although more dowel rods could have been added to this rack, we think this design is perfect for its features. What do you think? Can this be further improved?
Thanks to phantazn for this great project.
We think this is the best sliding pants rack designed. Do you? 🙂
Click on any image to start the lightbox display. Use your Esc key to close the lightbox. ![]()
Customization Ideas for the Sliding Pants Rack
Customizing your DIY sliding pants rack can transform a simple storage solution into a statement piece that reflects your personal style and fits perfectly within your home. Whether you’re looking to add a splash of color, integrate the rack into unconventional spaces, or simply make it more functional for your needs, there are numerous ways to personalize your sliding pants rack. Here are some creative customization ideas to get you started:
Paint and Finish
The most straightforward approach to customizing your sliding pants rack is by selecting a paint or finish that aligns with your interior design. The impact of a well-chosen paint color or finish on your rack cannot be overstated. Opt for a glossy black or vibrant color to inject a modern vibe into your space, or achieve a rustic look with a distressed wood finish.
When choosing your paint, prioritize non-toxic, eco-friendly options. These paints contribute to a healthier living environment and lessen your carbon footprint. A carefully selected finish not only protects your sliding pants rack but also elevates its appearance, making it a perfect fit for your personal space.
Decorative Elements
Enhancing your sliding pants rack with decorative elements can significantly boost its aesthetic appeal. Elegant handles attached to the sliders can provide both beauty and improved functionality. Alternatively, decorative brackets for wall mounting can add a touch of sophistication and visual interest to the room.
For a personalized flair, consider stenciling intricate designs or patterns onto the wood before applying the final finish. These artistic touches not only beautify your sliding pants rack but also infuse it with character and style, making it a focal point in your room.
Adjustable Dowel Positions
Incorporating adjustable dowel positions into your sliding pants rack introduces an exceptional level of flexibility and customization. This feature allows you to tailor the spacing between the dowels to accommodate various types of pants or fabric thicknesses. Whether you’re storing bulky denim jeans or delicate silk trousers, adjustable dowel positions ensure each item has its ideal spot.
Achieve this adaptability by drilling additional holes along the frame and utilizing removable dowel supports. This modification not only enhances the functionality of your sliding pants rack but also maximizes its utility and adaptability to your changing wardrobe needs.
Lighting
Incorporating lighting into your sliding pants rack elevates its functionality while adding an aesthetic dimension to your storage solution. By affixing LED strip lights along the top or sides of the rack, you illuminate your selection of pants, making it easier to find what you’re looking for, especially in dimly lit environments like closets or bedrooms in the early morning or late evening.
This illumination not only enhances visibility but also contributes to the ambiance of the space, transforming your sliding pants rack into a visually appealing display. For an added layer of convenience and energy efficiency, consider motion-activated lights. These lights turn on automatically as you approach, providing light exactly when and where you need it, and turn off after a period of inactivity, conserving energy.
Integrating lighting into your sliding pants rack combines practicality with a touch of luxury, making your closet or bedroom both more functional and more inviting. It also makes it easy to go through your garments.
Space-Saving Modifications
Tailoring your sliding pants rack to fit compact spaces can significantly impact those dealing with limited room. For individuals looking to maximize their storage in such conditions, designing a slimmer version of the sliding pants rack is an ideal solution. This adaptation ensures that the rack fits snugly into narrower spaces without sacrificing functionality.
Alternatively, creating a vertical sliding pants rack takes advantage of vertical space, expanding upwards rather than outwards and is perfect for those with more height in their closets or rooms. Another innovative space-saving modification is the integration of a folding mechanism. This feature allows the sliding pants rack to be easily tucked away when not in use, freeing up valuable floor or closet space.
Each of these space-saving modifications enhances the utility of the sliding pants rack, making it a versatile storage solution for even the most space-challenged environments. By focusing on slim designs, vertical orientation, or foldability, you can ensure that your sliding pants rack not only meets your organizational needs but also fits seamlessly into your available space.
Incorporating Multiple Materials
Diversifying the materials used in your sliding pants rack can significantly enhance its visual appeal and functionality. By experimenting with different materials, you can introduce unique textures and contrasts that elevate the overall design.
For instance, substituting wooden dowels with metal pipes can transform the aesthetic of your sliding pants rack, giving it a robust, industrial look that can stand out in a modern home setting. The metallic sheen of the pipes contrasts beautifully with the warmth of a wooden frame, creating an eye-catching piece.
Alternatively, integrating acrylic rods in place of traditional wooden dowels can impart a sleek, contemporary vibe to your sliding pants rack. The clear, minimalist design of acrylic rods adds a touch of modern elegance, making your rack not only a practical storage solution but also a stylish decor element.
This combination of materials can be tailored to match the existing decor of your space, whether you’re aiming for an industrial edge or a modern, minimalist aesthetic. Mixing materials like wood, metal, and acrylic allows for endless creativity in designing a sliding pants rack that is both functional and visually appealing.
Theme Integration
Customizing your sliding pants rack to reflect specific themes or interests is a creative way to infuse personality and uniqueness into your space. Tailoring the design to match a chosen theme ensures that your sliding pants rack is not merely a functional item but also a reflection of your personal style and passions.
For a nautical-themed rack, incorporating elements like ropes instead of traditional dowels and adding brass accents can evoke the sense of being at sea, making it a perfect addition to coastal-inspired interiors. This approach not only serves a practical purpose but also becomes a conversation starter and a distinctive feature of your home decor.
For those with a penchant for vintage aesthetics, crafting a sliding pants rack with antique knobs and distressed wood can create a sense of timelessness and charm. The use of aged materials and classic design elements can turn the rack into a nostalgic piece that complements your vintage or shabby chic decor.
Whether you’re drawn to the rugged appeal of industrial materials, the clean lines of modern design, or the warmth of vintage elements, integrating themes into your sliding pants rack design can transform it into a personalized statement piece that enhances both the functionality and aesthetic of your living space.
Troubleshooting Common Issues
When embarking on the journey of creating your own sliding pants rack, encountering a few hiccups along the way is not uncommon. However, with the right knowledge and tools at your disposal, these issues can be swiftly addressed, ensuring your DIY project reaches its full potential.
Below, we outline some common problems that may arise with your sliding pants rack and provide practical solutions to overcome them, keeping your project on track towards success.
Sliders Not Functioning Smoothly
- Issue: The sliding mechanism is stiff or uncooperative, making it difficult to access your pants smoothly.
- Solution: First, check if the sliders are properly aligned and mounted. Misalignment can cause friction and resistance. If alignment is correct, apply a silicone-based lubricant to the sliders. This helps reduce friction and ensures smooth operation. Avoid oil-based lubricants, as they can attract dust and debris, worsening the problem over time.
Dowels Coming Loose
- Issue: The dowels on your sliding pants rack may begin to wobble or come loose, compromising the stability of the rack.
- Solution: If dowels are coming loose, first remove them and clean out the holes. Apply a stronger adhesive, such as epoxy or wood glue, and reinsert the dowels. Allow adequate time for the adhesive to cure before use. For a more permanent fix, consider using dowel screws that can be screwed into both the dowel and the frame, ensuring a secure fit.
Wood Splitting
- Issue: The wood frame or dowels may show signs of splitting, which can weaken the structure of your sliding pants rack.
- Solution: Prevent wood splitting by pre-drilling holes, especially near the ends of the wood, before inserting screws or nails. If splitting occurs, apply wood glue within the split and clamp it tightly until the glue dries. For larger splits, you may need to replace the affected wood section entirely to maintain structural integrity.
Rack Not Holding Weight
- Issue: The sliding pants rack may sag or fail to hold the weight of the pants, indicating a lack of support.
- Solution: Reinforce the structure by adding more dowels or using thicker, stronger materials for both the frame and dowels. Ensure that the wall mounting brackets (if used) are securely fastened into wall studs or use appropriate wall anchors. For extra support, consider adding a middle support bracket or rail to distribute the weight evenly.
Difficulty in Installation
- Issue: Installing the sliding pants rack can be challenging, particularly when it comes to securing it in place or ensuring it is level.
- Solution: Use a level to ensure your rack is perfectly horizontal before securing it to the wall or closet. Mark your drill holes carefully, double-checking measurements to ensure accuracy. If the rack is being mounted to a drywall, make sure to use drywall anchors that can support the weight. For closets, attaching the rack directly into the studs will provide maximum support.
Difficulty Sliding Pants On and Off
- Issue: You find it challenging to slide pants on and off the dowels without causing disruption to neighboring items.
- Solution: This issue often stems from dowels being too close together or the dowels having rough surfaces. Consider spacing the dowels further apart to provide more room for maneuvering. If the dowels’ surface is the problem, sand them down with a fine-grit sandpaper until they are smooth, and finish with a wax or polish to facilitate easier sliding.
Moisture Damage or Warping
- Issue: The wood used in your sliding pants rack is susceptible to moisture damage or warping, especially if located in a damp area of your home.
- Solution: To protect against moisture damage, ensure all wood surfaces are properly sealed with a waterproof sealant. If warping occurs, it might be necessary to replace the affected parts with new, sealed wood. To prevent future warping, consider using woods known for their resistance to moisture, such as cedar or teak.
Screws or Hardware Becoming Loose
- Issue: Over time, the screws or mounting hardware securing your sliding pants rack to the wall or within the closet might loosen, causing instability.
- Solution: Check all screws and hardware periodically for tightness. If any screws begin to loosen, remove them, apply a thread-locking compound, and re-tighten. For screws that no longer hold due to stripped holes, use larger screws or toggle bolts for a more secure fit.
Rack Becomes Noisy
- Issue: The sliding mechanism may start to produce noise, making it unpleasant to use.
- Solution: Noise often indicates either a lack of lubrication or debris caught in the sliders. Clean the slider tracks with a soft cloth to remove dust and debris. Apply a dry lubricant specifically designed for sliding tracks to minimize noise without attracting more dirt.
Limited Capacity
- Issue: The sliding pants rack does not accommodate as many pairs of pants as needed, limiting its usefulness.
- Solution: To increase capacity without compromising the design, add additional levels to your rack if space allows. Alternatively, optimize the existing space by using slimmer dowels, allowing more rows to be added. Ensure each pair of pants is hung in a way that minimizes bulkiness at the dowel points.
Conclusion
Building a sliding pants rack requires creativity, patience, and attention to detail, resulting in a highly functional and personalized storage solution. Overcoming common issues through troubleshooting ensures durability and maximizes efficiency, making it a rewarding DIY project. Ultimately, this custom piece not only organizes your wardrobe but also adds a unique touch to your home’s decor.
For more ways to organize your garments, check out our tie rack hanger guide!