Last Updated on July 31, 2024 by teamobn
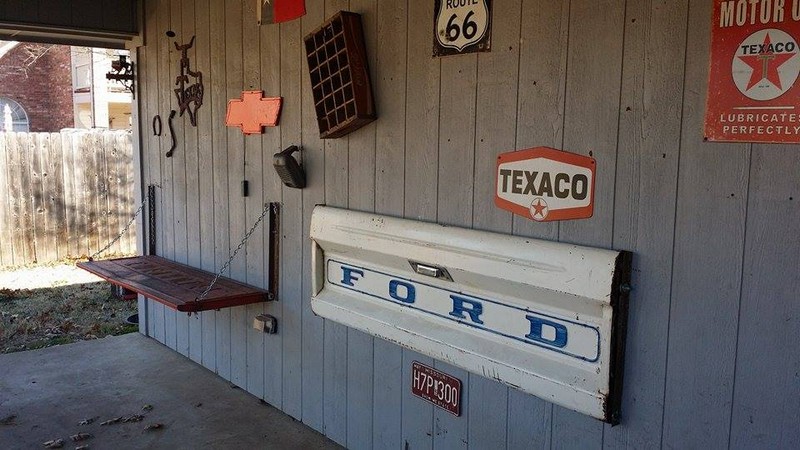
What do you think of a wall bench? Well, having just purchased a home, my wife and I decided the entire house belonged to her except for the garage and back porch and the yard. She may have made a mistake!
For many, vintage gas stations hold a particularly wistful charm. Maybe we miss those old service bays equipped with all the tools necessary to do everything from oil changes to brake replacements. Or maybe it’s just the look of a long-gone time that still holds some significance in our lives.
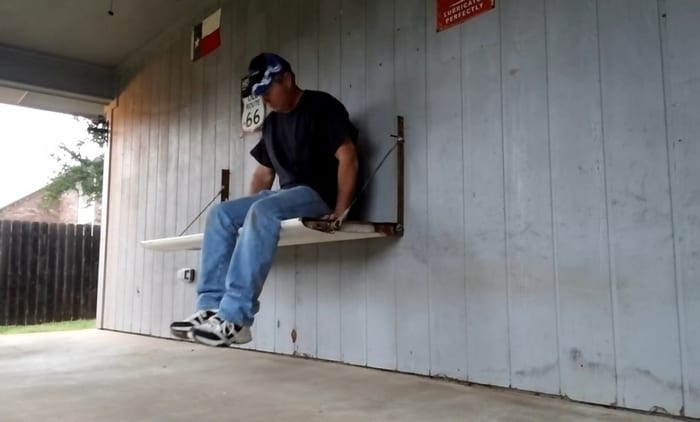
A friend gave me this old Ford tailgate after I told him I was decorating my back porch in vintage gas station/ feed store style. I decided to make a working wall bench out of it while also using it for decoration.
Click on any image to start the lightbox display. Use your Esc key to close the lightbox.![]()

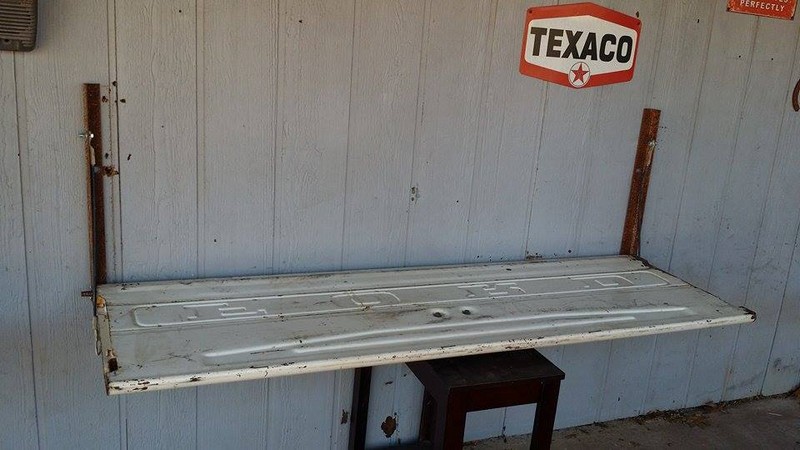

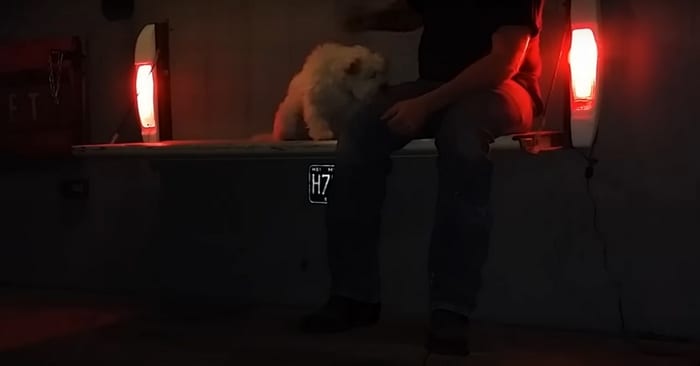
This is how I did my tailgate wall bench!
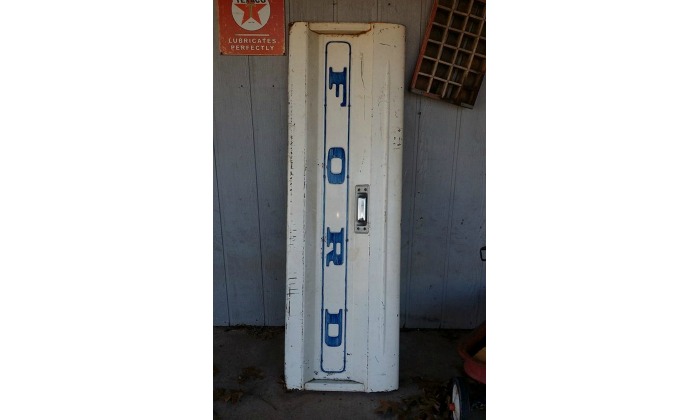
I started with one old rusty tailgate…
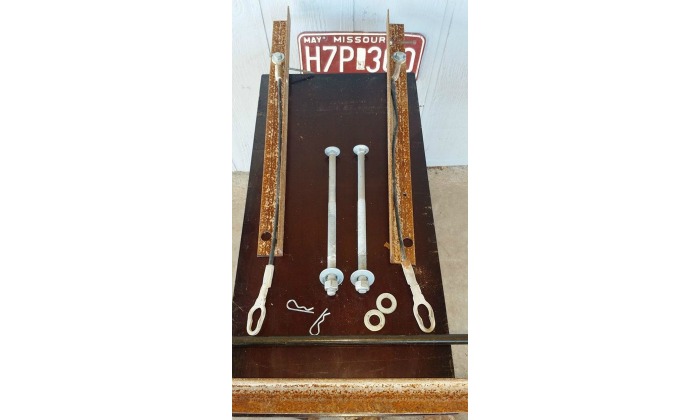
All the parts needed to mount it to the wall:
- 2- 2 1/2″ X 8″ stove bolts
- 2- 20″ X 1 1/2″ angle iron
- 1- 6′ X 1 1/2″ angle iron
- 1- 6′ X 1/8″ pipe or 1/2″ rebar
- 2- medium snap rings
- 4- 1/2″ flat washers
- 1- 1 1/2″ X 1/4-20 Allen head bolt
Contents [show]
Steps in Building My Tailgate Wall Bench
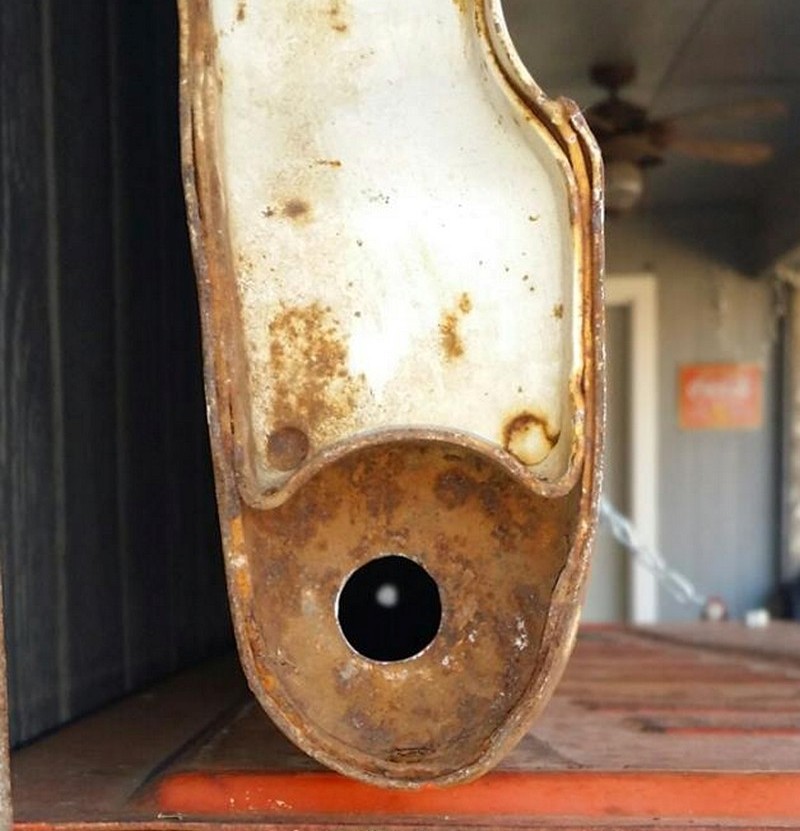
Use a 5/8″ drill bit to drill a hole in the centre of the pivot on each end of the tailgate.
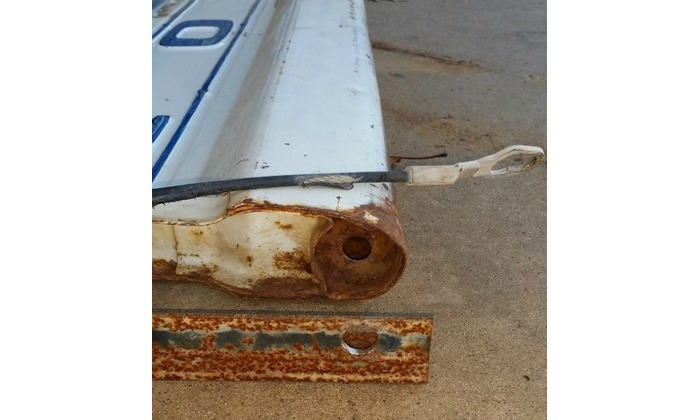
Lay angle iron flush with the side of tailgate and mark and drill 5/8″ holes in the angle like so.
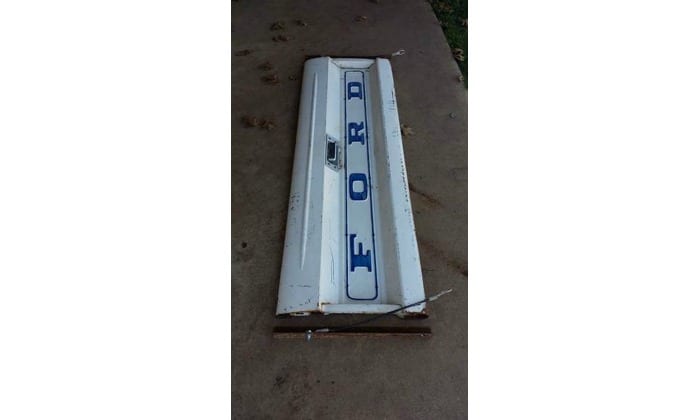
Once both ends are drilled, lay the tailgate and angles out flat on the table or floor like so as to make assembly easy.
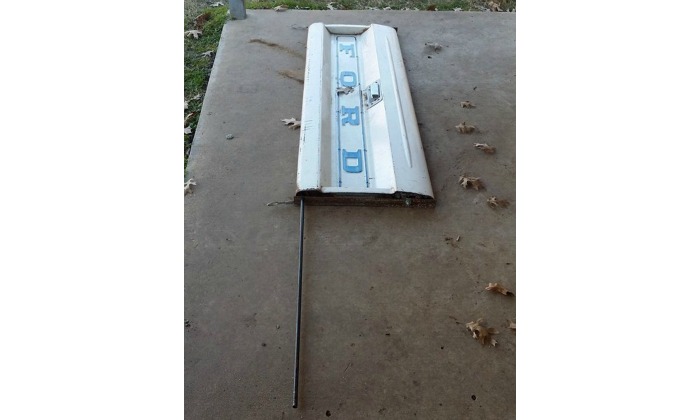
Slide the 1/8″ pipe through all three pieces like so.
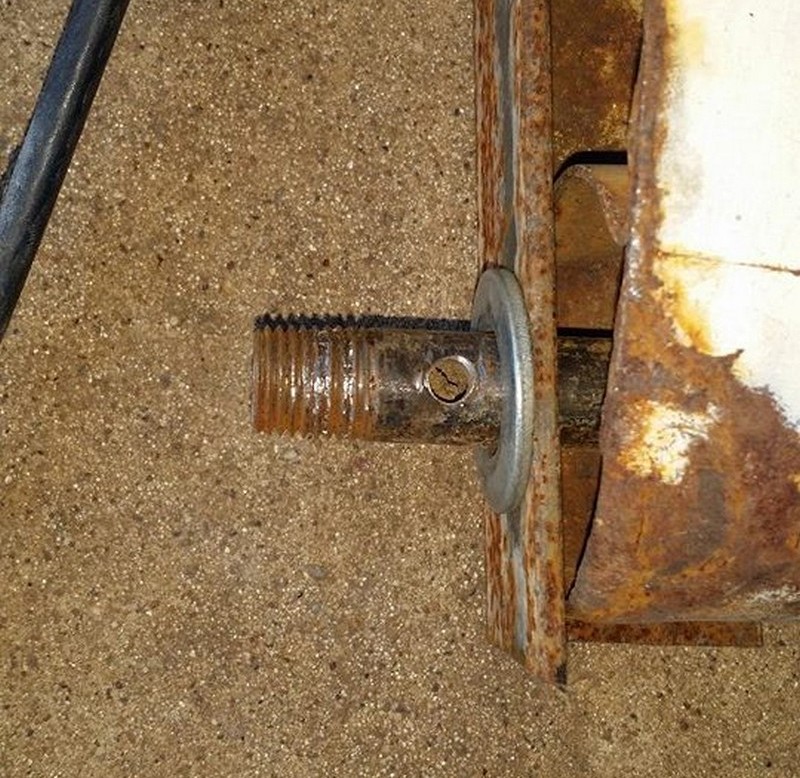
Place a flat washer on one end of the pipe and drill a hole through your pipe with a 1/8″ drill bit.
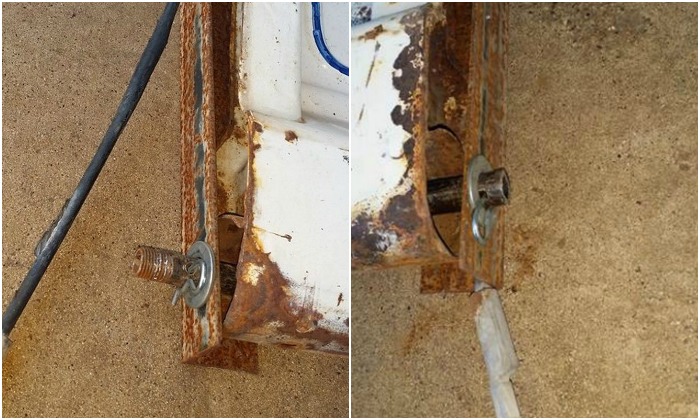
Install a cotter pin to lock the pipe in place. Do the exact same thing on the other side with an angle tight against the tailgate. Drill as close as possible to the washer for a tight fit.

I found a small table to be the perfect height for my tailgate wall bench and used it to help with installation. I levelled the tailgate at the right height and positioned the angle pieces on the wall. I actually used a couple of wood screws to hold them in place while I assembled my wall bench.
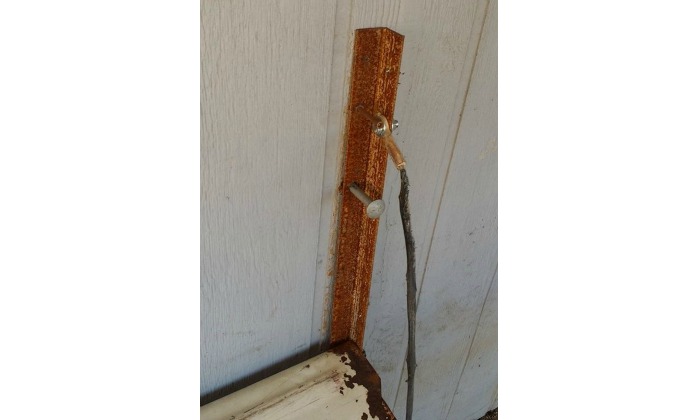
I then measured down 6 inches and drilled through the angle and all the way through the wall (after checking the wall for electrical of course!) Then I installed the 8″ stove bolts.
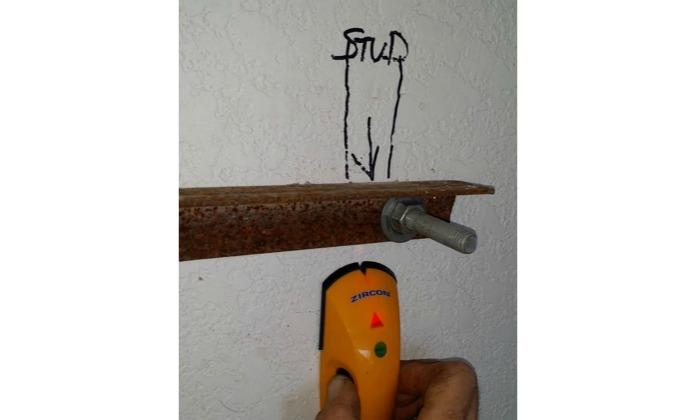
I then went to the other side of the wall and marked the long piece of angle iron according to the bolts I had just pushed through the wall. then I drilled it out and mounted it on the 2 bolts and tightened it to the wall. here is where the studs were placed on each end of the brace which was ideal.
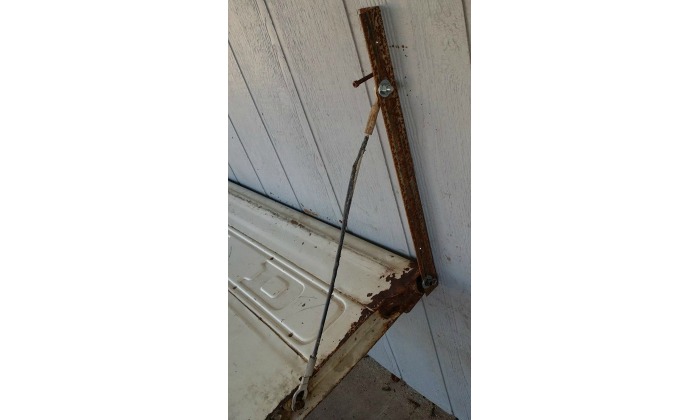
Back outside, I attached the cables from the angle iron to the tailgate on both ends.
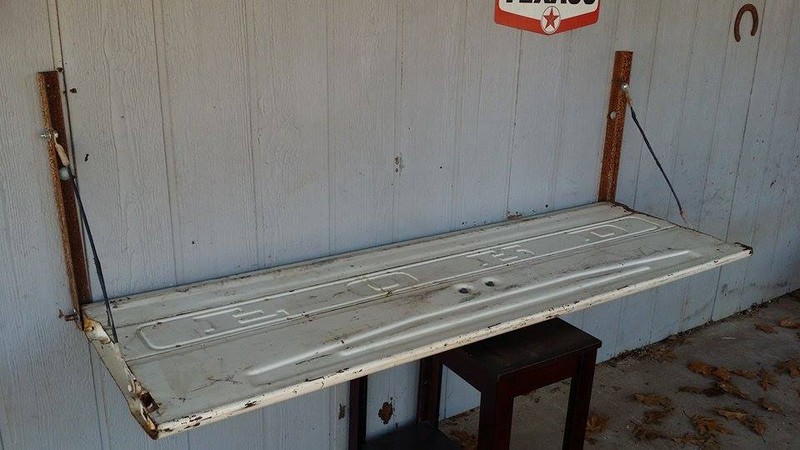
I then removed the table. The tailgate hanging is complete.

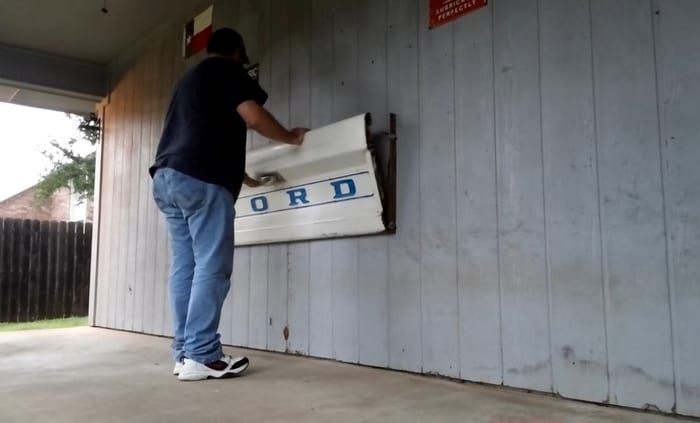
I then closed the tailgate with the Allen bolt in between the angle iron and the truck latch pin. I marked the spot on the angle then tapped 1/4-20 threads into the angle iron and installed the Allen bolt there.
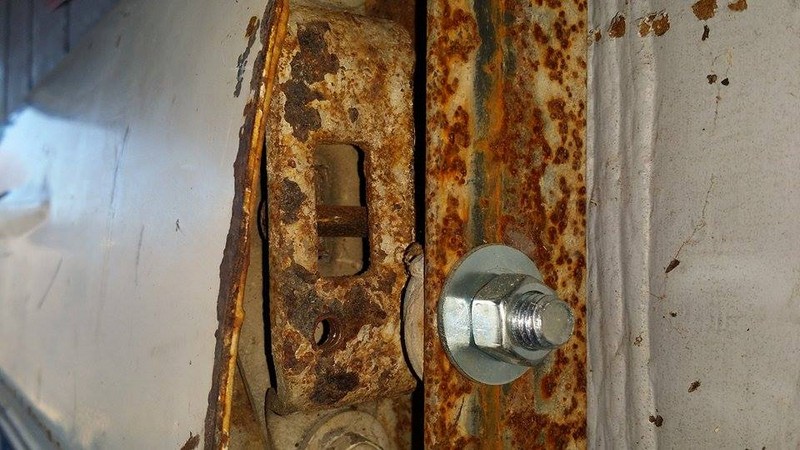
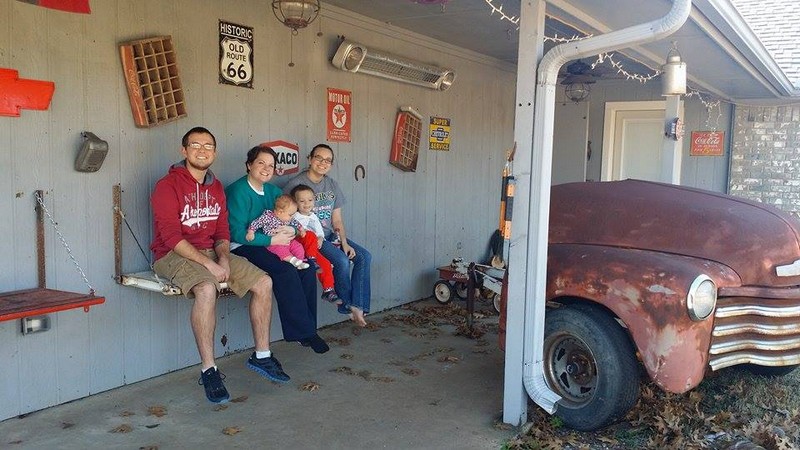
Finished Bench…

The tailgate now latches against the wall using the original tailgate handle.

My family and I enjoy sitting out here now and firing up the old bbq grill (that old 51 Chevy truck clip is another project. It is a bbq grill) I hope you enjoy your tailgate bench just as much as we do ours. Now go find a tailgate before they’re all gone!
Here’s a quick video showing all the steps.
I’ve got lots of other projects over on my Youtube Channel DRMD421. Stop in and have a look sometime!
Tailgate Wall Bench Design Variations
A tailgate wall bench can transform any outdoor space into a unique and charming seating area. Whether you’re aiming to capture the nostalgia of vintage vehicles or looking for a modern twist on this classic DIY project, there are numerous design variations to choose from.
Here, we explore different styles that can suit any preference or outdoor décor theme, ensuring your tailgate wall bench becomes a standout feature.
Classic Vintage Style
For those who cherish the allure of old-school charm, a classic vintage tailgate wall bench is a perfect choice. Selecting a tailgate from a well-known vintage truck model, such as a Chevrolet or Ford from the 1950s or 1960s, can instantly evoke a sense of nostalgia. To enhance the vintage feel, consider using distressed metal finishes or preserving the original paint and logos to maintain authenticity. This style suits traditional gardens or homes with rustic décor.
Modern and Sleek
If your aesthetic is more contemporary, consider a modern design for your tailgate wall bench. Opt for a tailgate with a minimalist design and a monochromatic color scheme. You can add a sleek finish by sanding down the tailgate to a smooth texture and applying a high-gloss paint. Integrating metal accents or even incorporating elements like glass or industrial-grade plastics can elevate the look, making it a perfect fit for modern landscaping or minimalist outdoor spaces.
Functional Add-ons
Enhancing your tailgate wall bench with functional features can increase both its utility and appeal. For a more versatile design, add built-in storage under the seat or integrate foldable cup holders to improve convenience. LED lighting is another practical addition that can provide ambiance and functionality, making your tailgate wall bench not only a place to sit but also a feature element that lights up your outdoor space during evenings.
Each of these design variations allows you to personalize your tailgate wall bench to fit your taste and the functionality of your outdoor area. Whether you choose a retro, modern, or highly functional design, your tailgate wall bench is sure to be a conversation starter at any outdoor gathering.
Installation Tips and Common Mistakes for Tailgate Wall Benches
Installing a tailgate wall bench can be an exciting project that adds unique charm and functionality to your outdoor space. However, it requires careful planning and execution to ensure stability and longevity. Here are detailed installation tips and common mistakes to avoid when setting up your tailgate wall bench, ensuring a successful project from start to finish.
Pre-Installation Planning
Choose the Right Location: Before you begin, select a location that not only fits the bench but also complements your outdoor area. Ensure there’s enough space for people to sit comfortably without obstructing pathways. Consider exposure to elements; a shady spot can prevent the metal from heating up in the sun.
Gather All Materials and Tools: Make sure you have all necessary materials and tools before starting. This includes the tailgate, mounting hardware, and any additional decorative or functional elements. Having everything at hand will streamline the process and prevent delays.
Installation Process
Secure the Mounting Hardware Properly: One of the most crucial steps is to securely attach the mounting hardware to the wall. Use sturdy bolts and make sure the wall can bear the weight of the tailgate wall bench. Anchoring into studs or using appropriate wall anchors for your wall type (brick, concrete, or drywall) is essential for stability.
Level and Align the Bench: As you mount the tailgate, use a level to ensure it is perfectly horizontal. An uneven tailgate wall bench not only looks off but can be uncomfortable to sit on. Additionally, improper alignment could lead to premature wear and stress on the materials.
Double-Check All Connections: After mounting, double-check all bolts and connections to ensure they are tight and secure. This step prevents wobbling and potential falls, ensuring that your tailgate wall bench is safe to use.
Common Mistakes to Avoid
Ignoring Wall Suitability: One common mistake is failing to consider the suitability of the wall for supporting a bench. Not all walls are created equal; some may require specific anchors or additional reinforcement to support the weight of a tailgate wall bench.
Inadequate Measurement: Before drilling any holes, measure the space and the hardware multiple times. Inaccurate measurements can lead to holes being drilled in the wrong places, which not only weakens the installation but can also damage your wall and tailgate.
Overlooking Weather Resistance: If your tailgate wall bench is to be installed outdoors, make sure all materials used are suitable for outdoor use. This includes using rust-resistant hardware and weatherproof finishes to protect against the elements.
Rushing the Installation: Rushing through the installation can lead to mistakes. Take your time to carefully follow each step, ensuring every part is correctly assembled and secured.
By following these installation tips and avoiding common mistakes, you can ensure that your tailgate wall bench is not only a stylish addition to your outdoor space but also a durable and safe seating option. Remember, the key to a successful DIY project lies in careful planning, attention to detail, and patience throughout the process. With these guidelines, you’ll be well on your way to enjoying your new tailgate wall bench for many seasons to come.
Conclusion
Building a tailgate wall bench requires attention to detail and careful planning to ensure both aesthetic appeal and structural integrity. Once completed, this unique piece not only enhances your outdoor living space but also serves as a functional and conversation-starting feature. Enjoy the satisfaction of a DIY project well done as you relax on your new tailgate wall bench.
If you have any questions, just use the comment box and I’ll happily respond!

