Last Updated on March 19, 2024 by teamobn
Hatching chicken eggs opens up a fascinating world of poultry care, where choosing between a broody hen and an egg incubator becomes pivotal. A broody hen, with her innate inclination to incubate eggs, not only nurtures her clutch but also potentially encourages fellow hens to contribute to the collective nest, creating a unique, communal hatching environment.
With a DIY styrofoam egg incubator, you’ll keep those precious eggs snug as a bug in a rug. Plus, taking control of the hatching process means you’ll never have a lackluster omelet again. Get ready to be the ultimate egg master and embrace your inner homestead.
Not only will you save a ton of cash, but you’ll also have the power to customize it to fit your every need. From chickens to quails and beyond, this versatile styrofoam incubator is the ultimate DIY solution for all your egg-hatching dreams.
However, when the warmth of a broody hen isn’t an option, the path leads us to the technological embrace of an egg incubator. These modern marvels are available in myriad sizes and designs and demand thorough exploration to find the perfect match for your hatching aspirations.
The true beauty of an incubator lies in its ability to guarantee success in hatching, irrespective of the season. And for those mindful of their finances, the prospect of constructing a personal egg incubator at home presents an enticing challenge. This venture not only offers the thrill of hands-on creation but also enriches the hatching experience with a touch of personal accomplishment and joy derived from watching life unfold from the very eggs you’ve tended to.
Contents
Building a DIY Egg Incubator
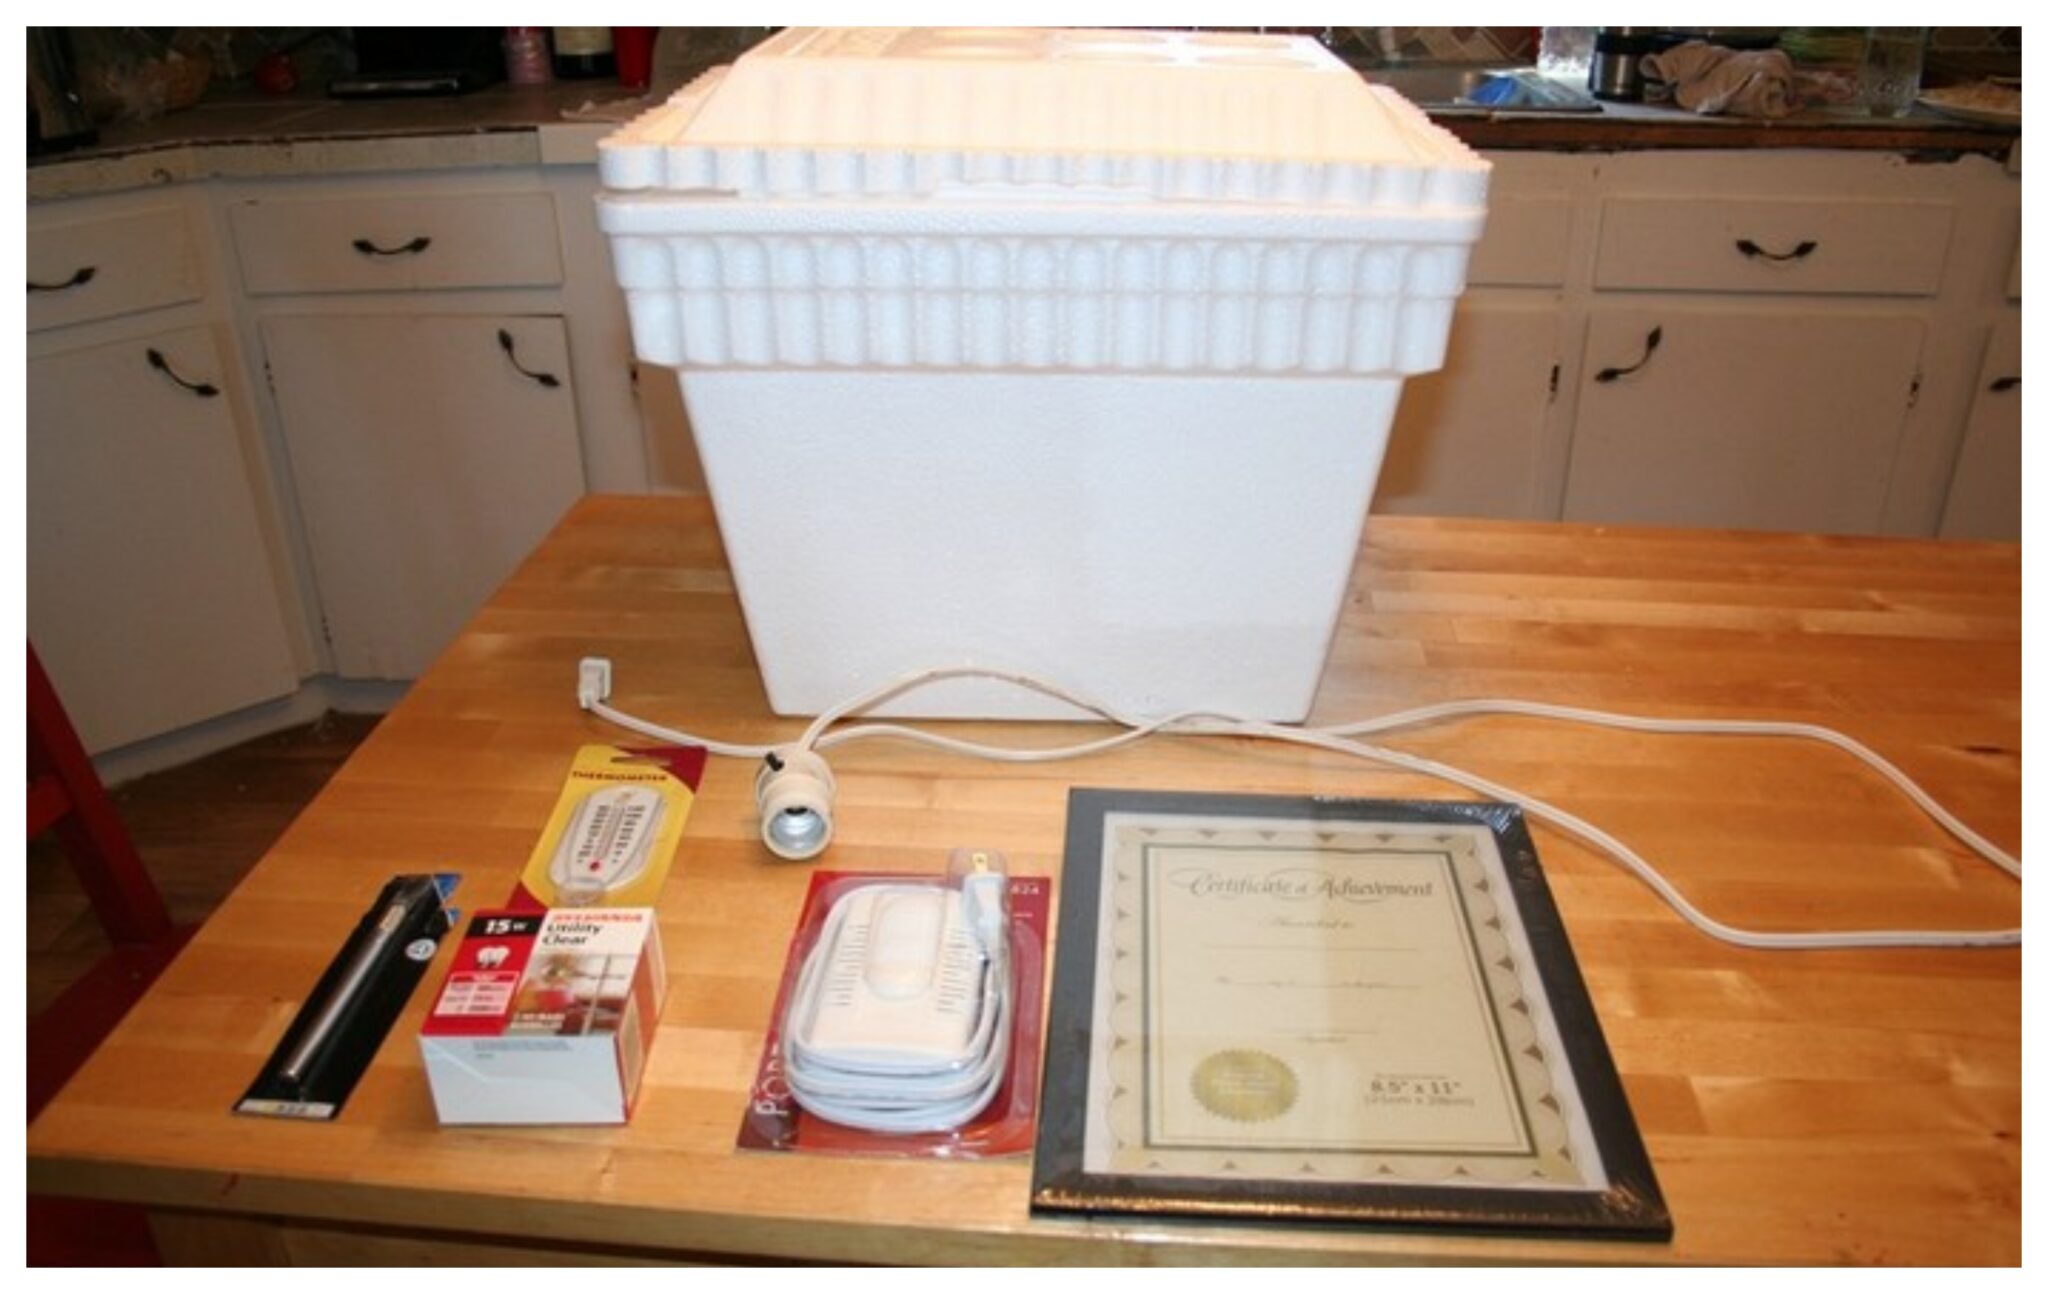
Mixing in some DIY magic and using recycled materials, you can whip up a styrofoam egg incubator that’s both budget-friendly and extremely effective. Say goodbye to shelling out big bucks for pricey egg incubators and hello to a budget-friendly solution that will make your wallet happy. All it takes is a little know-how and less than $100 in supplies to get started on your very own egg incubator project!
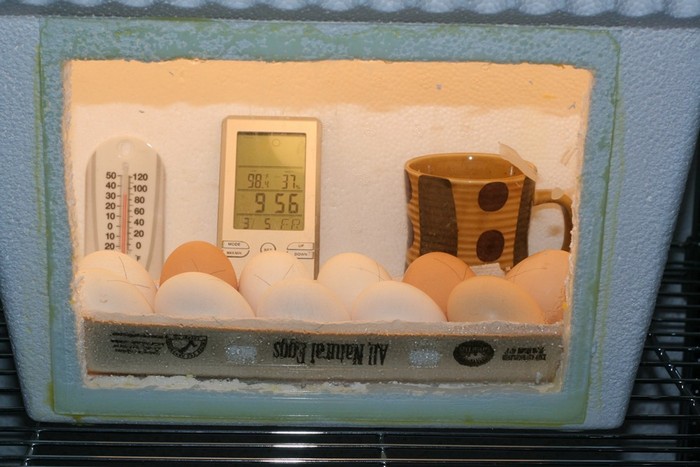
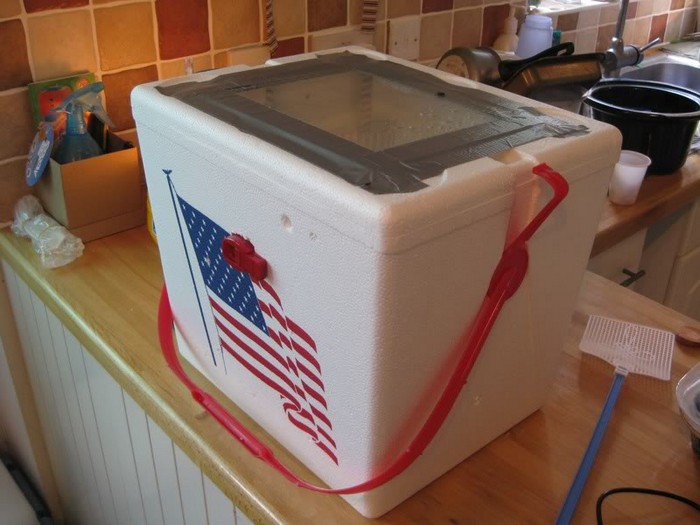
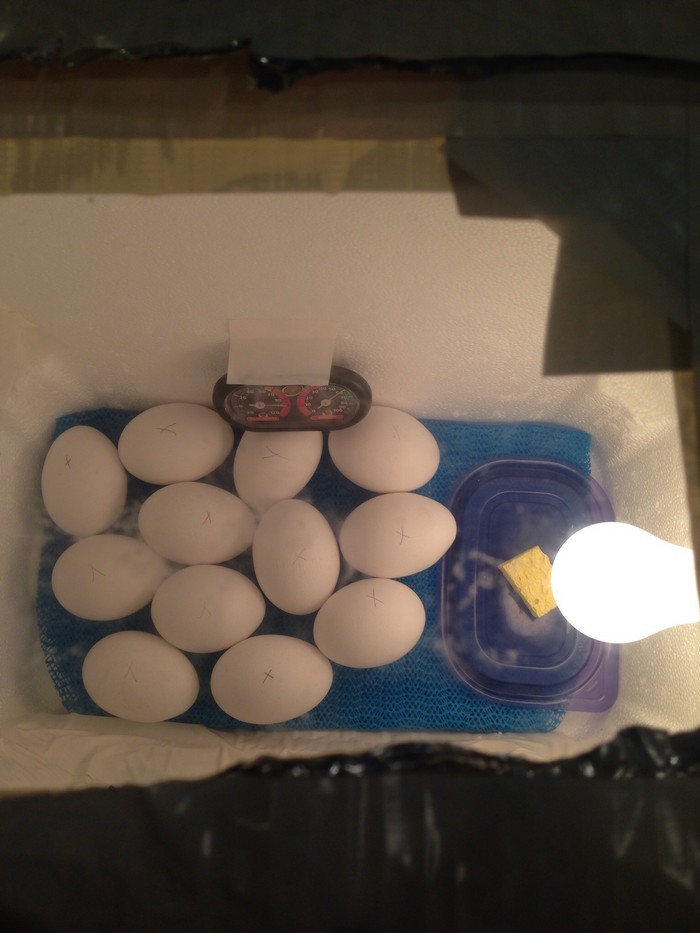
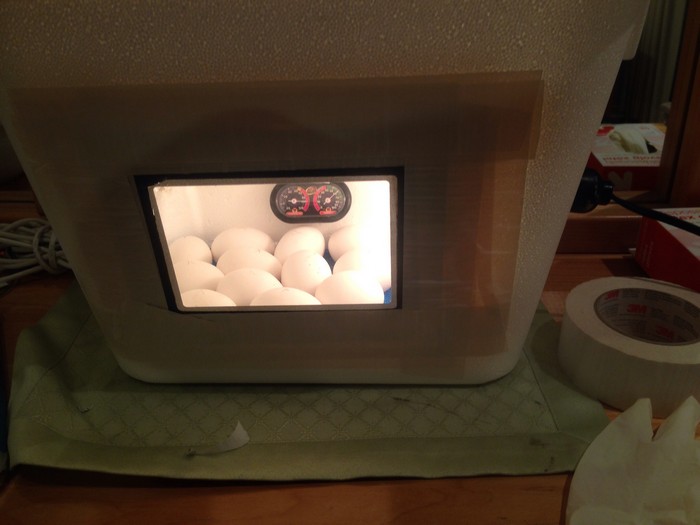
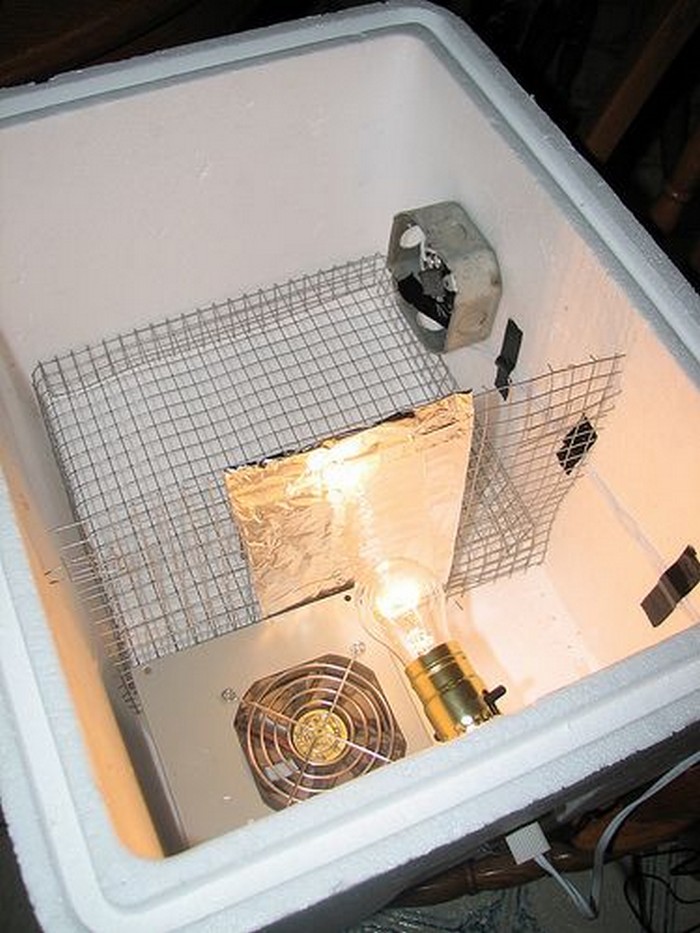
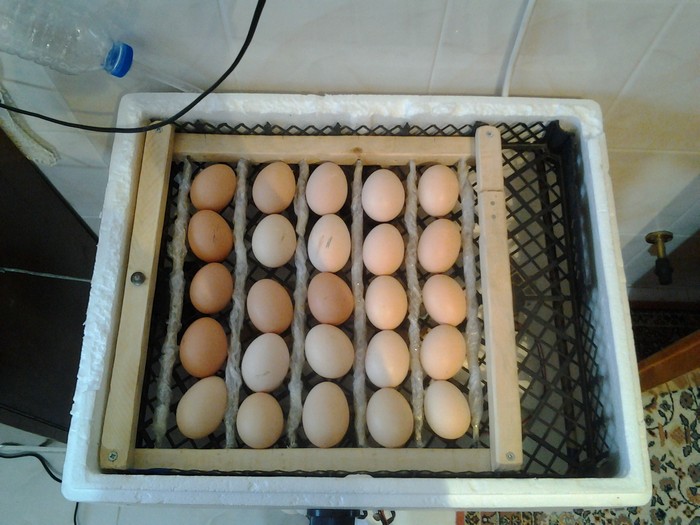
This incubator will provide ample space to accommodate approximately twenty-four eggs comfortably. To get started, locate a styrofoam cooler measuring at least 16 inches in length, 12 inches in width, and 12 inches in height. Ensure the cooler has a snugly fitting lid and create a small ventilation hole by drilling. Line the cooler’s interior with a layer of chicken wire or hardware cloth.
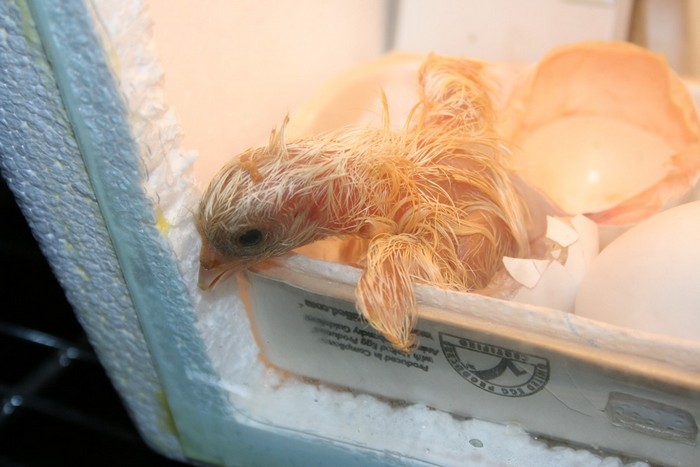
Ready to experience the wonder of birth and the joy of successful incubation?
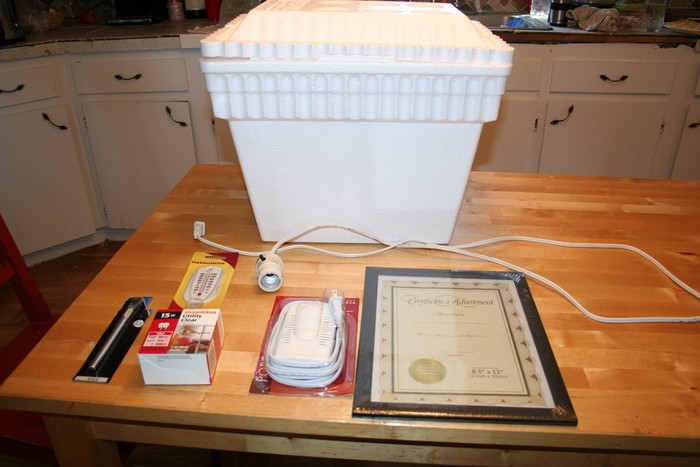
Materials
- 1 Styrofoam Cooler with Lid
- 1 Light Socket with Cord
- 1 Dimmer Switch (for table lamps)
- 8×11 Glass or Plexiglass
- Thermometer/Hygrometer
- Tape
- Wood Glue
- 40-watt Light Bulb
- Small Plastic Fan
- Small Bowl of Water
Tools
- Utility Knife
- Pencil Marker
Steps
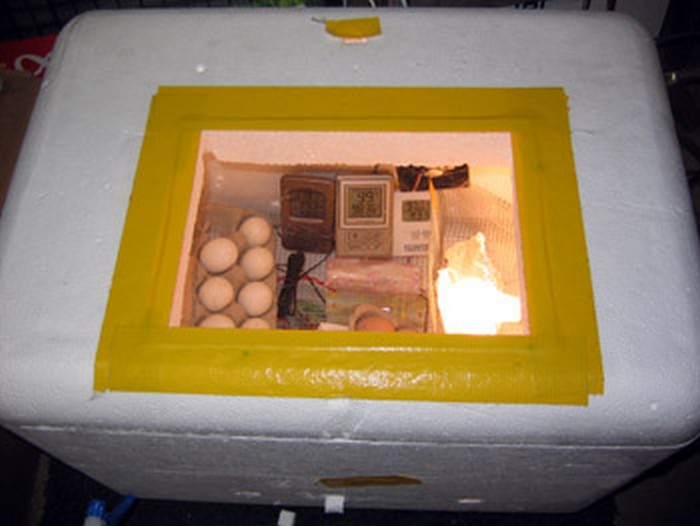
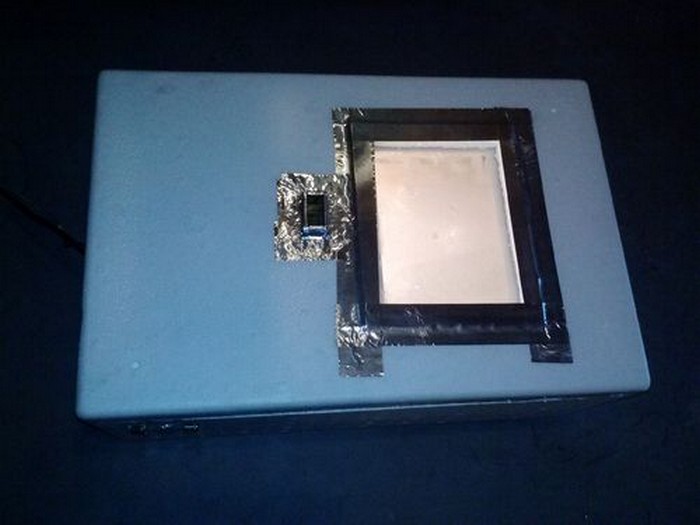
Step 1: Mark and Cut the Lid
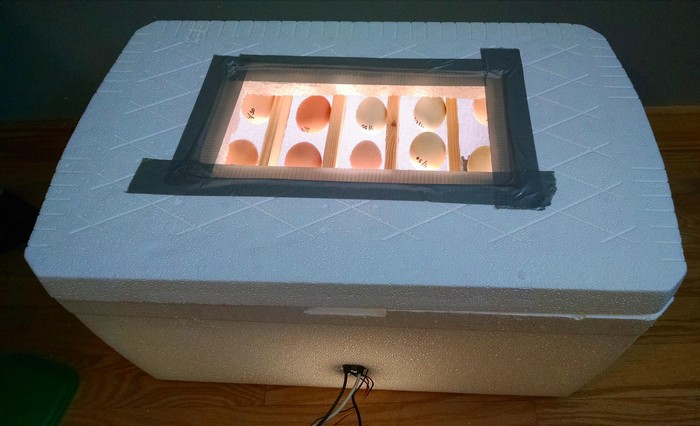
- Using the pencil marker, outline the area on the cooler lid where you’ll attach the glass or plexiglass. Then, carefully cut out this marked portion with a utility knife to create a viewing window.
Step 2: Install the Glass or Plexiglass
- Apply wood glue around the opening you cut and securely attach the glass or plexiglass. This will serve as the observation window for monitoring the eggs.
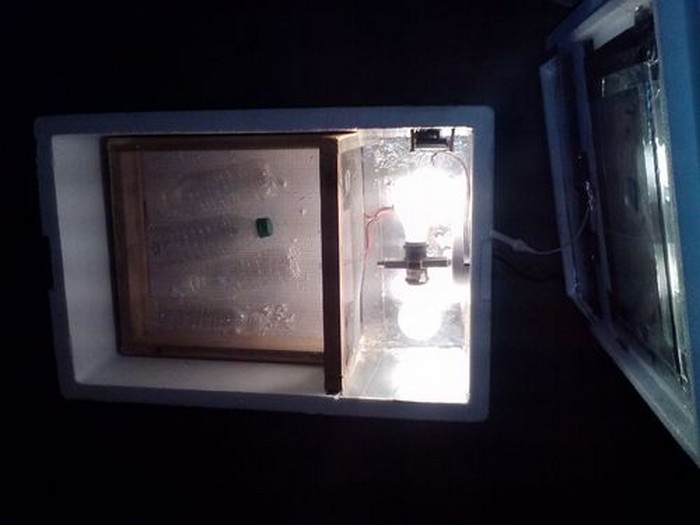
Step 3: Insert the Light Socket and Bulb
- Inside the cooler, position the light socket near the centre and attach a 40-watt light bulb. This will provide the necessary heat for incubation. Connect the cord to the dimmer switch and affix the switch to the exterior of the cooler for easy temperature control.
Step 4: Add a Small Fan
- Install a small plastic fan inside the incubator to ensure an even distribution of heat and humidity. It helps create a stable environment for the developing eggs.
Step 5: Place a Bowl of Water
- Set a small bowl of water inside the incubator to maintain the required humidity levels for egg incubation. Monitor the humidity using the thermometer/hygrometer.
Step 6: Monitor and Adjust
- Make sure they’re well-distributed and secure! Now, pop that lid on and let’s get our monitoring game on. Keep an eye on that thermometer/hygrometer and adjust that dimmer switch like a pro to maintain those optimal incubation conditions.
With these six simple steps, enjoy an inexpensive egg incubator with a controlled environment that ensures your hatching success. Enjoy the fascinating journey of nurturing and hatching your own baby chicks!
Thanks to The Empowered Mom for sharing invaluable ideas on how to build a budget-friendly egg incubator.
Click on any image to start the lightbox display. Use your Esc key to close the lightbox. ![]()
Troubleshooting Common Incubator Problems
Hatching eggs using an egg incubator presents a fascinating adventure into the cycle of life. It’s a process filled with anticipation and joy as you watch life unfold from the start. Of course, egg cultivation presents a wide range of issues. Navigating these challenges successfully can turn an initial foray into an incubation into an enriching experience.
Below are the most common problems in building an egg incubator and how to fix them.
Maintaining Optimal Humidity
- Problem: One of the most frequent issues egg incubator users face is maintaining the proper humidity level. Low humidity could result in more rigid shells, making chicks stuck within the egg. If it is too high, you risk mold growth or drowning the developing chicks.
- Solution: You want a working and accurate hygrometer to tell you the humidity level of your egg incubator. This tool is indispensable in your incubation toolkit, offering precise readings that guide you in adjusting moisture levels within your egg incubator. If the humidity is consistently off the mark, consider placing a small bowl of water inside to increase it or slightly opening the ventilation holes to decrease it.
Even Heat Distribution
- Problem: Achieving an even distribution of heat inside the egg incubator is crucial. Hot or cold spots can lead to uneven development rates or even fatal outcomes for the embryos.
- Solution: Regularly rotate the eggs and check the temperature in various sections of the egg incubator with a trustworthy thermometer. Adjusting the position of the heat source or incorporating a small fan can help circulate the air, promoting a stable temperature throughout.
Egg Turning Troubles
- Problem: Eggs need regular turning to prevent the embryo from sticking to the shell and to ensure proper development. Forgetfulness or inconsistency in this task can jeopardize the hatching process.
- Solution: Use a non-toxic marker to mark the eggs you have turned. A simple X or O lets you know if an egg has been turned. For those with a hectic schedule, investing in an automatic egg turner could be a game-changer, automating the process and reducing the risk of human error.
Power Outages
- Problem: Unexpected power outages threaten the incubation process, potentially leaving the eggs without the necessary warmth for development.
- Solution: Prepare for possible power interruptions by having backup power solutions, like battery packs or generators, ready to go. Additionally, wrapping the incubator in blankets or towels can help retain heat for a short period, giving you some leeway to restore power or find alternative heating methods.
Handling Non-Hatching Eggs
- Problem: Not all eggs will hatch, which can be disheartening. Identifying and removing these eggs is crucial to prevent contamination of the incubator environment.
- Solution: Candling the eggs at specific intervals throughout the incubation process allows you to monitor their development. Non-viable eggs or those not showing signs of growth after a certain period should be carefully removed to maintain a healthy environment for the rest.
Incorrect Temperature Settings
- Problem: Setting the correct temperature is critical for embryo development. An incubator that’s too warm can accelerate development unnaturally, while too cool an environment can halt it. These temperature discrepancies can lead to unsuccessful hatchings or chicks with health issues.
- Solution: A calibrated, high-quality thermometer monitors the incubator’s internal temperature. Regular calibration ensures accuracy. Aim for a steady temperature around 99.5°F (37.5°C) for forced-air incubators. Minor adjustments might be necessary to maintain this optimal range, so check the temperature frequently, especially after any adjustments.
Poor Egg Handling Before Incubation
- Problem: The condition of eggs before they enter the incubator can significantly affect their viability. Mishandling can damage the eggs internally without visible signs, leading to poor outcomes.
- Solution: Handle eggs with care before incubation. Collect them at least two to three times a day, store them at a cool, stable temperature, and gently turn them daily if they’re not immediately placed in the incubator. This pre-incubation care can greatly enhance their chances of developing properly.
High Egg Mortality During Late Incubation
- Problem: Observing a high egg mortality rate in the later stages of incubation can be particularly frustrating. Various factors, including genetic issues, improper incubator humidity, or infectious diseases can cause this.
- Solution: Ensure your incubator’s humidity is slightly increased during the final days of incubation to help chicks break through the shell more easily. Investigating the source of any infectious diseases and addressing them through cleanliness and egg selection is also vital. Consider sourcing eggs from a different, healthier stock if genetic issues are suspected.
Inconsistent Ventilation
- Problem: Adequate ventilation is crucial for exchanging gases and removing excess moisture from the incubator. Insufficient ventilation can lead to poor air quality and affect embryo development.
- Solution: Check your incubator’s vents to ensure they’re clear and unobstructed. Adjust ventilation according to the manufacturer’s instructions, considering that the need for fresh air increases as the embryos develop. Periodic checks will help maintain the right balance between humidity and fresh air inside the incubator.
Difficulty in Calibrating Instruments
- Problem: Relying on uncalibrated thermometers and hygrometers can lead to inaccurate readings, misleading you into adjusting the incubator settings incorrectly.
- Solution: Regularly calibrate your measuring instruments against known standards. For thermometers, the ice water and boiling water methods provide reliable references for calibration. Hygrometers can be calibrated using the salt test method. Ensuring your instruments are accurate is crucial for maintaining the proper environment inside your egg incubator.
By addressing these common issues with patience and attentiveness, you can enhance your success rates and enjoy the magical experience of hatching eggs with your egg incubator. Remember, each challenge is an opportunity to learn and improve, bringing you closer to becoming an adept incubator.
DIY Hatching Made Easy
There you have it! You’ve learned the secrets to affordable egg incubation. With just a styrofoam cooler, some other basic materials, and a dash of creativity, you can embark on an exciting journey of hatching your chicks.
Create a budget-friendly incubator equipped with temperature control, humidity regulation, and a viewing window to witness the magic of life unfolding.
Whether you’re a novice poultry enthusiast or a seasoned farmer, this DIY project promises to make your hatching aspirations come true. Hatch your way to success with these six straightforward steps!
For more projects to improve your egg production, check out our guide on the best 10 chicken feeder ideas.