Last Updated on July 24, 2024 by teamobn
If you are running out of storage space or want to organize your scrap timber pile, this simple and inexpensive project might be the answer to your problem!
It’s called the P.A.L.L.E.T. or the Pallet And Loose Lumber Enclosure Tower. A pallet and lumber enclosure tower is a type of storage unit that is often used in warehouses and other storage facilities. These units are designed to store pallets and loose lumber in a safe and secure manner.
The units are typically made from repurposed pallets or other durable materials, and they may include features such as lockable doors and adjustable shelves. Pallet and lumber enclosure towers can be used to store a variety of items, and they are an excellent way to keep your storage area organized.
This clever loose lumber enclosure for scrap timber will not cost you a fortune. In this case, it’s made from free recycled pallets. You can also use salvaged timber to keep the cost low. Although the finish might look rough, this storage does the job pretty well. And when the time comes that you have the budget to build better storage for your scrap timber, you can easily take it apart and reuse it for a new project!
Click on any image to start the lightbox display. Use your Esc key to close the lightbox.


Contents
Building a Loose Lumber Enclosure
Materials
- Two and a Half Medium-Sized Pallets
- 1-3/4″ Wood Screws
- Wood Glue (Optional)
Tools
- Pencil
- Tape Measure
- Reciprocating Saw
- Jigsaw or Handsaw
- Power Drill w/ Bits
Instructions
Step 01:
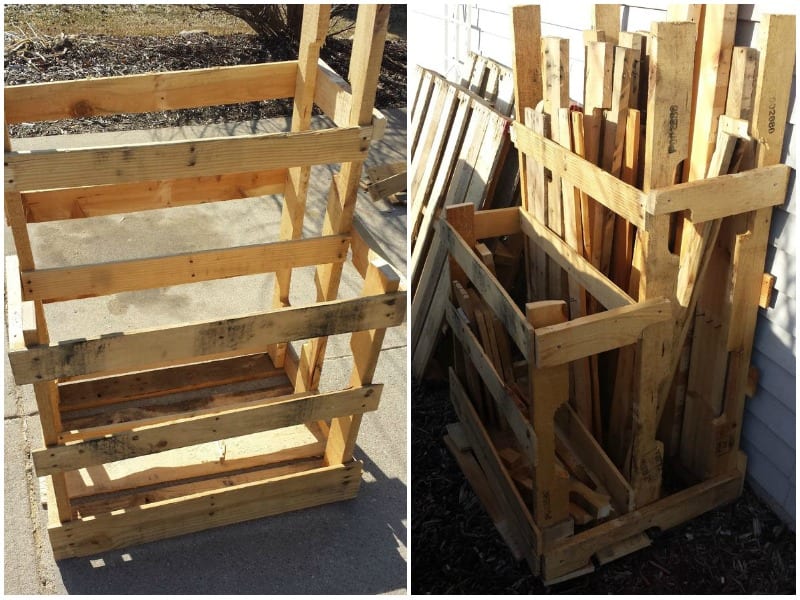
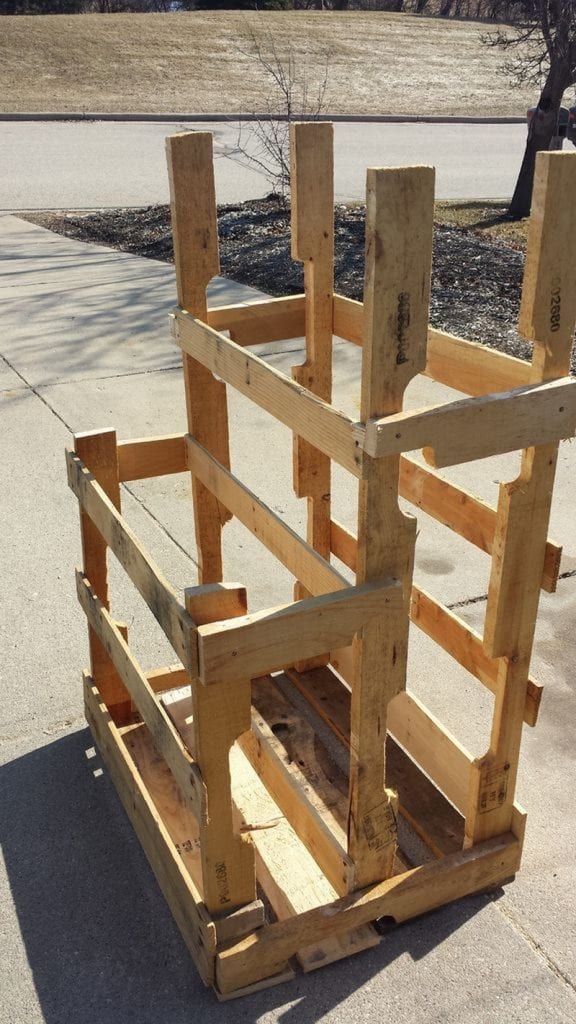
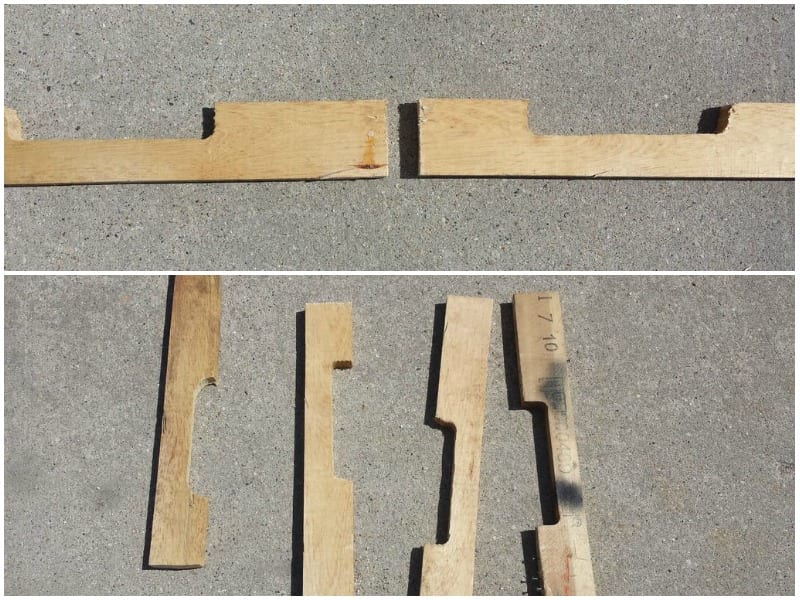
To start we will be cutting the bottom planks and inner beams off of two similar-sized pallets, this will be done with a reciprocating saw. Once that is done, cut one plank off of what will be the top of the P.A.L.L.E.T.


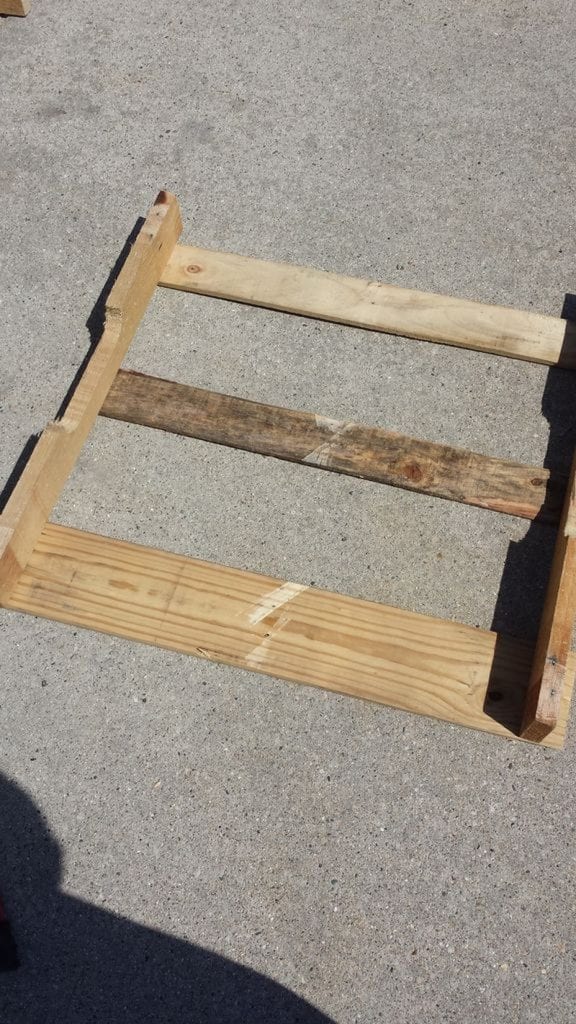
Next, we will remove the bottom planks from another pallet and cut them in half. Note that we will only be using one of these halves. We will then use these pieces to create the front and back walls of our enclosure tower.
Step 02:
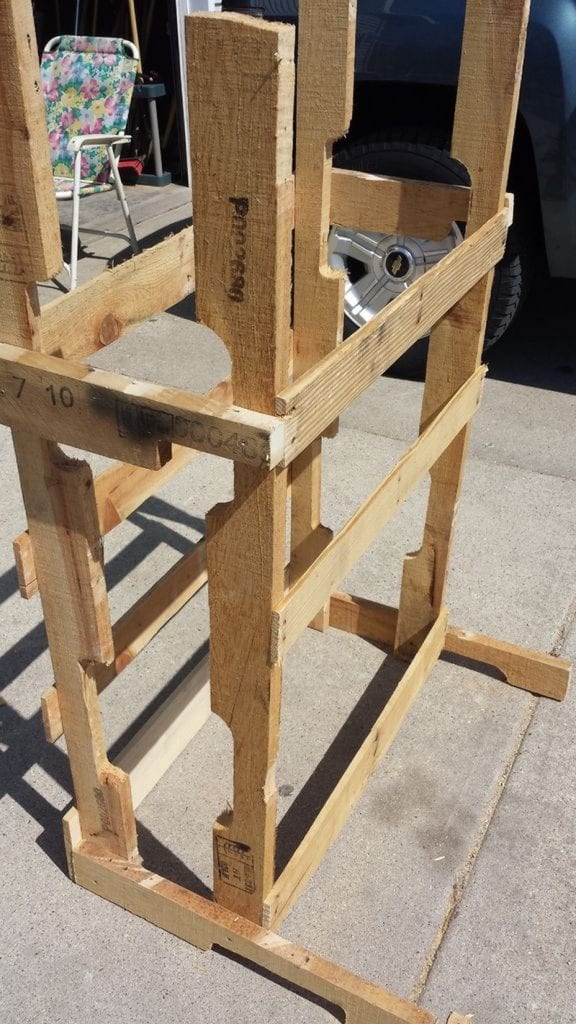
Our next step is to cut the sides which will secure our gutted pallets to one another. Remember the middle inner beam we cut from the first two pallets? We will be using this to make the sides of the enclosure tower.
I cut each beam into two pieces, making four final pieces. You can make them as long or short as needed, but I found that 14 inches was a good length. This gave me enough material to work with without making the pieces too unwieldy.
Step 03:
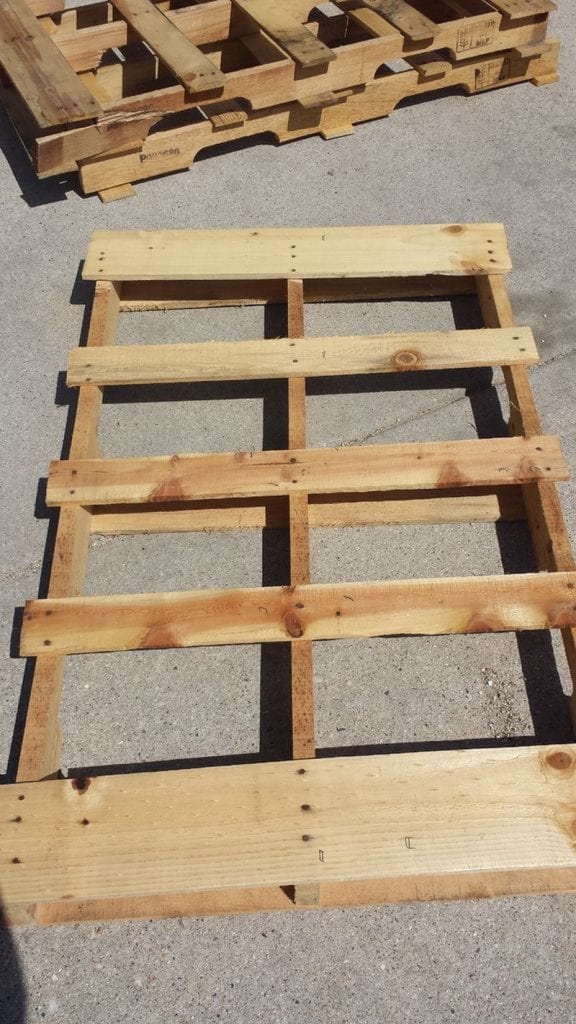
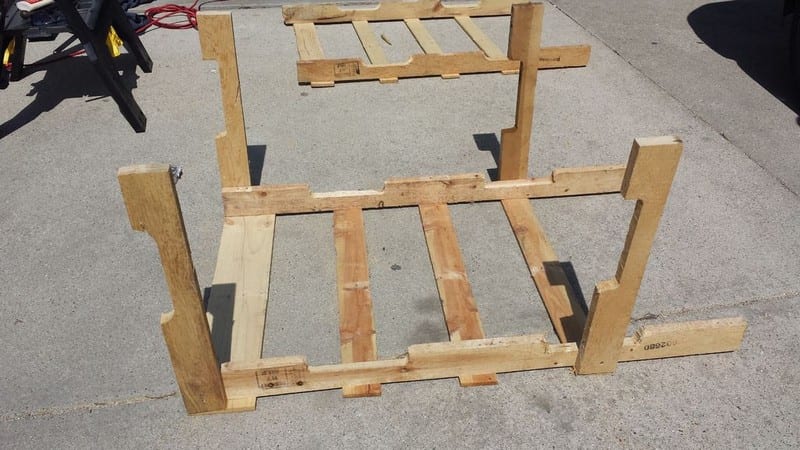
When constructing an enclosure tower it is easiest to lay one pallet on the ground and attach the sides there. Matching the sides with the planks of pallet wood for added stability and a somewhat cleaner look will produce the best results.
You can use only one screw per end to attach the plank to the wall. This way, the wood won’t move when it’s flush against the planks. You can add wood glue or extra screws for more stability.


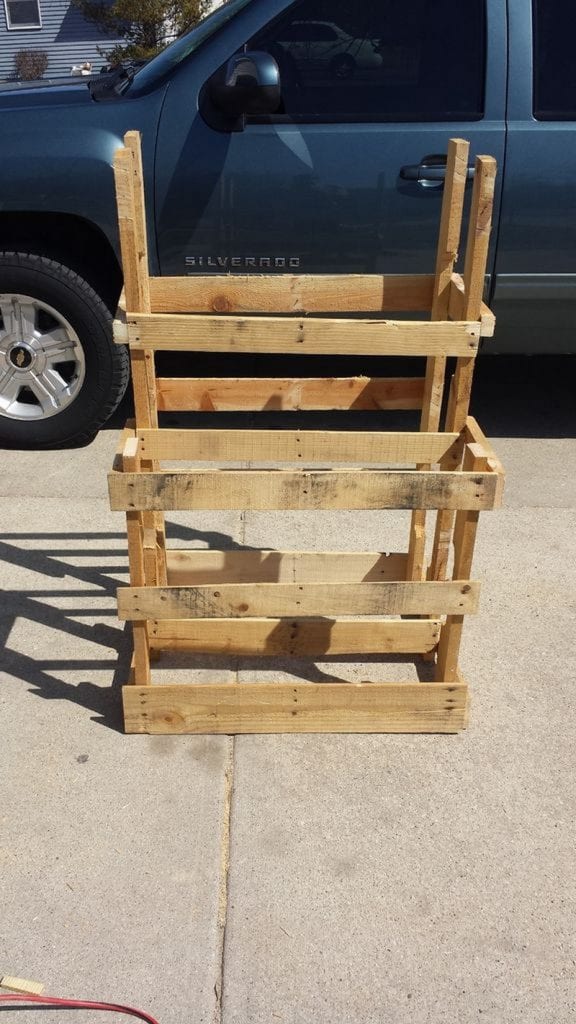
Step 04:
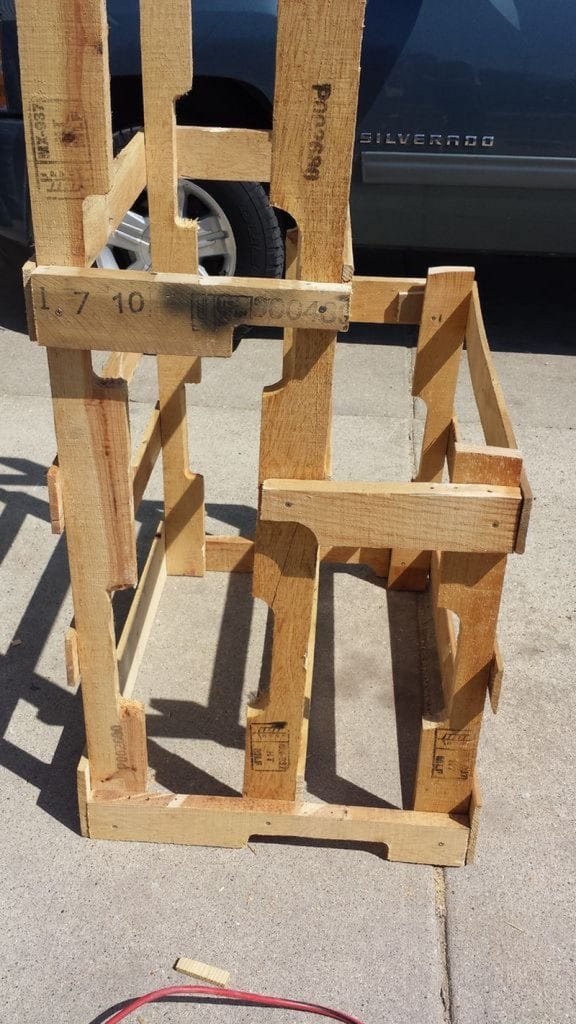
To finish up, trim the excess sides of the front planks so they would be flush with the side pieces. Also, add a more sturdy bottom by screwing extra boards to the bottom of the PALLET. This will help to ensure that your PALLET will be able to withstand more weight and last longer.


You can keep it outside, under a roof. And it will hold several pallets worth of wood through a couple of seasons and will not show any signs of weakening.
Of course, you can always use this as an inspiration for building your own, better version of the PALLET! Could you use one in your workshop?
Thanks to AmateurHour for this great tutorial!
Safety Considerations and Tips
When undertaking a project like the P.A.L.L.E.T. (Pallet and Loose Lumber Enclosure Tower), prioritizing safety is crucial. Building a loose lumber enclosure involves tools and materials that can pose risks if not handled correctly. Below are essential safety considerations and tips to ensure your project proceeds smoothly and safely.
Proper Tool Handling
Ensure you’re familiar with the tools required for building the loose lumber enclosure, such as saws, drills, and measuring tapes. Always follow the manufacturer’s instructions for each tool. Before use, check tools for any damage or wear that could cause malfunctions. Use sharp blades in saws to prevent binding and ensure cleaner cuts.
Protective Gear
Always wear appropriate safety gear while working on your lumber enclosure project. This includes safety goggles to protect your eyes from flying debris, sturdy gloves to safeguard your hands from splinters and cuts, and ear protection if you’re using loud power tools.
Workspace Safety
Keep your workspace clean and well-organized. Ensure all cords are managed to prevent tripping hazards. Work in a well-lit area to clearly see your work and avoid mistakes that could lead to injuries. Keep children and pets away from the work area to avoid accidents.
Material Handling
When handling lumber and pallets, check for nails, screws, or splinters that could cause injuries. Lift heavy materials using proper form—bend at the knees and keep your back straight to avoid strain. If possible, get assistance to move heavy or bulky items.
Fire Safety
Be aware of fire hazards. Keep flammable materials away from power tools and other heat sources. Have a fire extinguisher readily accessible in your workspace in case of emergency.
Assembly Precautions
During assembly, ensure all parts of your loose lumber enclosure are securely fastened to prevent structural failure. Regularly check joints and connections and reinforce them if necessary. Avoid overloading the enclosure to maintain its integrity and longevity.
By adhering to these safety tips, you can build a secure and effective loose lumber enclosure while minimizing the risk of accidents and injuries. Always approach your DIY projects with caution and respect for the tools and materials you’re working with.
Weatherproofing for Outdoor Storage
Building a P.A.L.L.E.T. (Pallet and Loose Lumber Enclosure Tower) provides a practical solution for organizing and storing materials like loose lumber. However, if you plan to place this storage unit outdoors, it’s essential to weatherproof it to ensure it withstands various environmental conditions. This guide will walk you through the steps to effectively protect your lumber enclosure from the elements, enhancing its durability and functionality.
Choosing the Right Materials
The first step in weatherproofing your loose lumber enclosure is to select materials that are naturally resistant to weather conditions. While pallets are a cost-effective option, ensure they are treated or suitable for outdoor use. Cedar, redwood, and treated pine are excellent choices for their natural resistance to rot and pests. If using recycled pallets, look for those marked with “HT” (heat-treated), which indicates they are free of harmful chemicals and better suited for outdoor use.
Sealing and Staining
To protect the loose lumber enclosure wood from moisture, sun damage, and decay, apply a wood sealant or stain. Choose a product specifically designed for outdoor use that includes UV protection and waterproofing properties. Apply a generous coat of sealant using a paintbrush or sprayer, making sure to cover all surfaces, edges, and joints. For enhanced protection and aesthetics, consider applying an exterior stain before sealing. Stains can enrich the wood’s natural color and provide an additional layer of moisture resistance.
Reinforcing Joints and Connections
Weather can stress the structural integrity of your loose lumber enclosure. Reinforce all joints and connections with weather-resistant screws and hardware. Consider using corner braces or additional framing supports to enhance stability against strong winds or heavy loads. Apply a silicone or polyurethane caulk around joints and seams to prevent water ingress, which can lead to wood rot and weakening of the structure.
Roofing and Coverage
If your enclosure is exposed to direct rainfall, consider adding a sloped roof or canopy. This can be made from the same material as the enclosure or from a waterproof tarp or metal sheeting. Ensure the roof has adequate overhangs to direct water away from the structure. This not only helps in keeping the stored items dry but also reduces the water exposure to the wooden parts of the loose lumber enclosure.
Elevated Base
To prevent water from pooling at the loose lumber enclosure base, which can cause the wood to rot, elevate your enclosure off the ground using concrete blocks, pavers, or treated wood beams. This elevation allows air to circulate underneath the structure, keeping it dry and reducing the risk of moisture-related damage.
Regular Maintenance
Maintain your weatherproofing efforts by inspecting the enclosure regularly, especially before and after severe weather conditions. Look for signs of wear, such as peeling sealant, loose hardware, or water damage. Promptly address these issues to maintain the integrity and effectiveness of the weatherproofing. Clean the wood periodically to remove dirt and debris, which can trap moisture and promote decay.
Ventilation
Preventing the accumulation of moisture inside your enclosure depends on proper ventilation, which also helps to avoid mildew and mold. Install vents or provide architectural spaces to let enough air flow. If you are keeping products susceptible to humidity or dampness, this is very crucial.
Following these guidelines will help you properly weatherproof your loose lumber enclosure, therefore guaranteeing its dependability for many years of use. Frequent maintenance and careful attention will help your materials remain well-protected against the stresses of external environment.
Conclusion
Constructing a loose lumber enclosure such as the P.A.L.L.E.T guarantees effective and orderly storage for several materials. The lifetime and use of the enclosure will be improved by careful design and the choice of sturdy, weather-resistant materials. Years to come will see your lumber storage solution remain strong and dependable with regular maintenance and cautious building.