Last Updated on June 29, 2023 by teamobn
Light bulbs come in a variety of shapes, sizes, and wattages. The type of light bulb you need depends on the fixture and the desired light output. Incandescent bulbs are the most common type of light bulb, but they are being phased out due to their inefficiency.
Whether you’re looking to save money or simply decrease your carbon footprint, any effort to reduce energy consumption can be quite simple. With a few small adjustments – and some creativity – you can be a positive influence on the environment while minimizing the strain on your wallet.
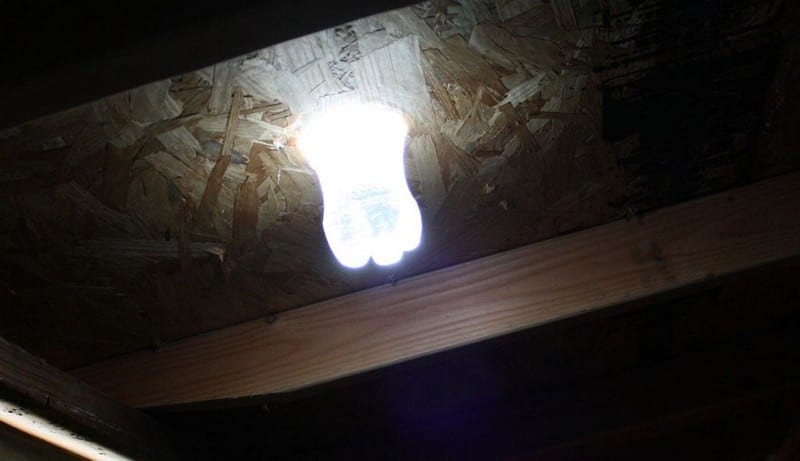
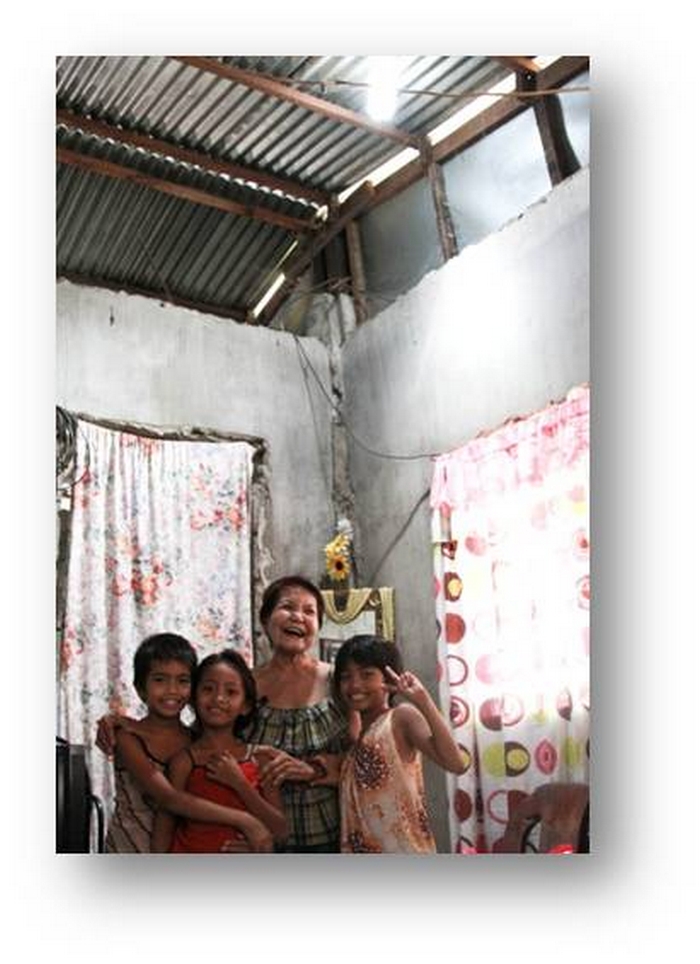
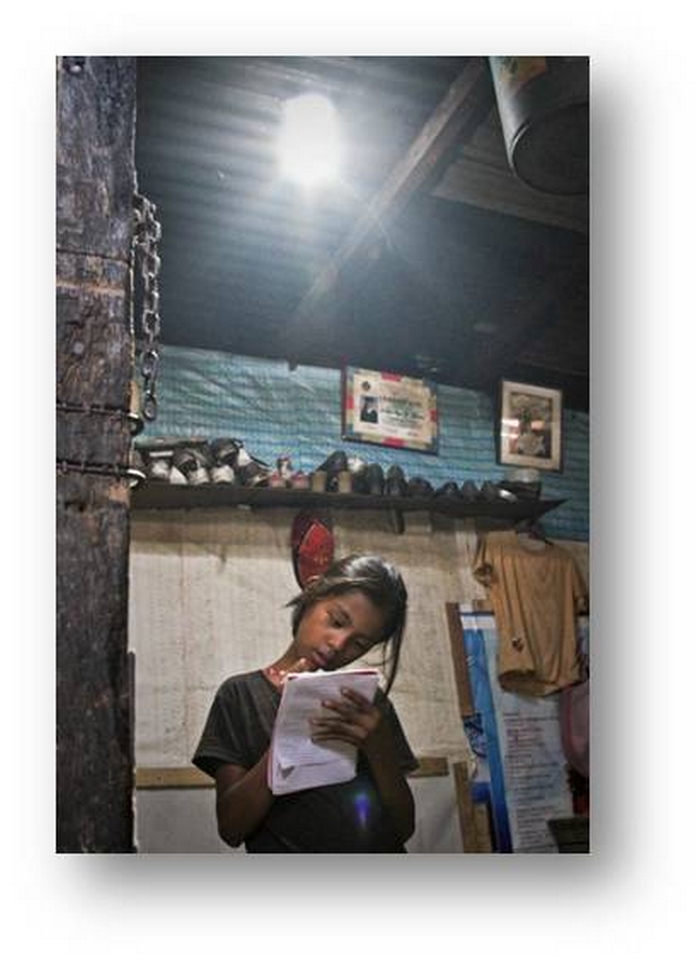
This innovative DIY idea has given light to many third-world countries, but even in the first world, free indoor lighting is good for the pocket. This low-cost solution is easy to implement and can make a big difference in areas that lack reliable electricity.
This green and sustainable concept is very easy to implement, and can provide approximately 55 watts of light! All you need is a clear plastic soda bottle, water, and bleach. This solution doesn’t require expensive solar equipment, making it a great option for those looking to reduce their carbon footprint.
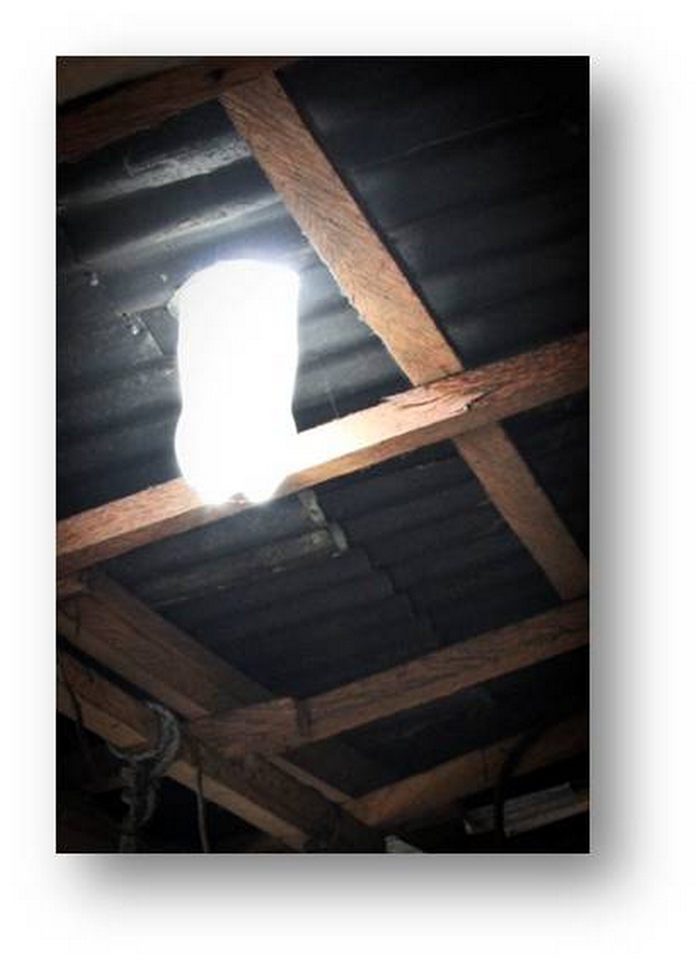
This solar lighting idea is a great way to get light in outdoor sheds or buildings that are not connected to the grid. Additionally, it can be used to light up frequently used rooms in your home during the daytime. This is a great way to save on energy costs, as well as provide a backup lighting option in case of a power outage.
This clever solution not only lowers your electricity bill but also decreases your carbon footprint and helps lessen the amount of garbage in the environment. By investing in solar water bulbs, you are not only saving yourself money in the long run but also doing your part to help the planet.
Have you got a spot where you can install one of these?
Click on any image to start the lightbox display. Use your Esc key to close the lightbox. ?

You’ll need these materials:
- Working Board
- Plastic Soda Bottles
- 2 Circular Patterns – larger circle with a diameter of the soda bottle, 3mm difference for the smaller circle
- 26 Gauge 10 x 10” Galvanized Metal Sheet
- Cement
- Rivets
- Sand Paper
- Bleach
- Water
- Covering for the Plastic Cap Bottle
And these tools:
- Pencil/Marker
- Cordless Drill
- Glue Gun with Sika Sealant
- Riveter
- Hammer
- Chisel
- Curve Metal Sheet Cutter
How to make your own solar water bulb?
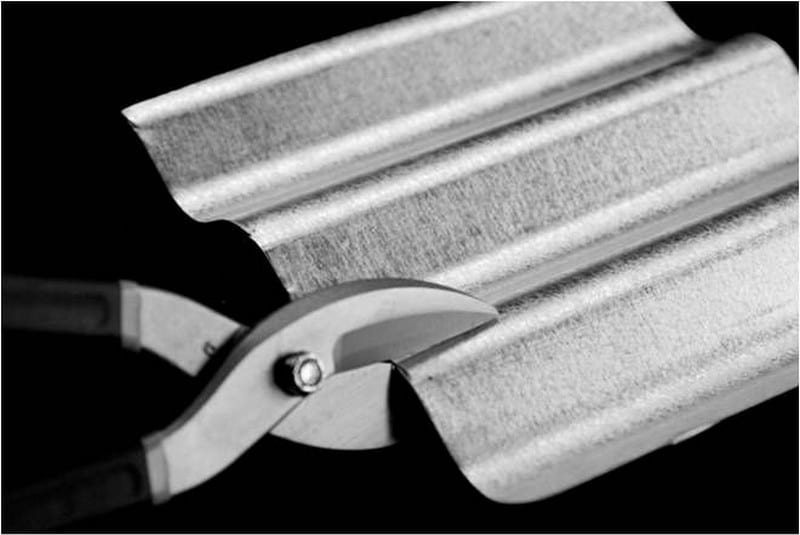
Cut a 9×10 inch piece of GI sheet, either corrugated or flat. If you’re using a corrugated sheet, make sure to cut along the ridges to avoid leaving sharp edges.
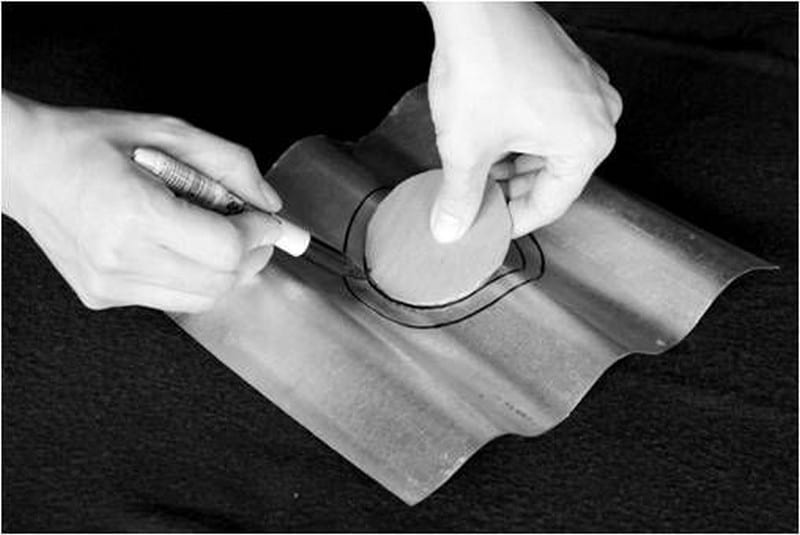
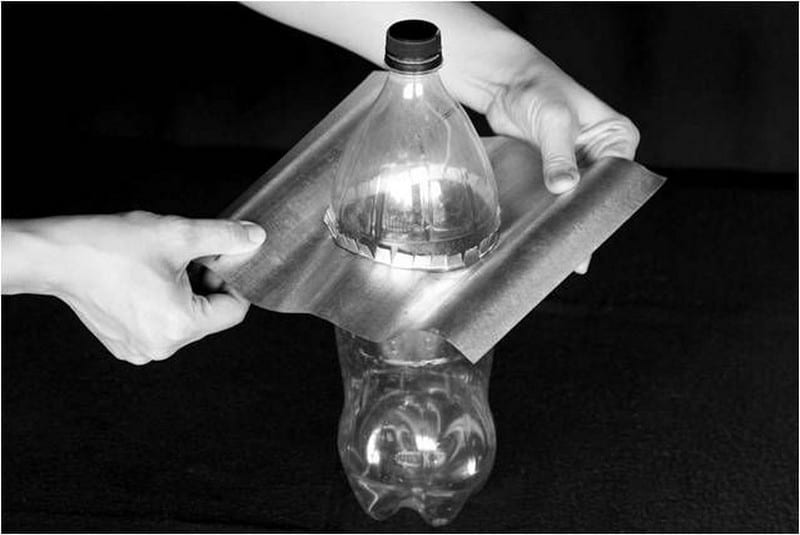
At the centre of the GI sheet, draw 2 circles.
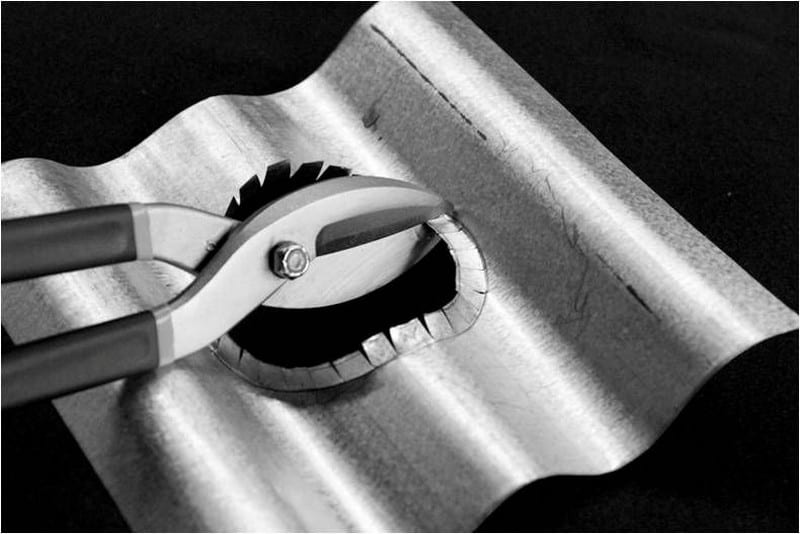
Cut the inner circle.

Cut the 1 cm difference radially, making strips and bend upwards, perpendicular to the GI sheet.
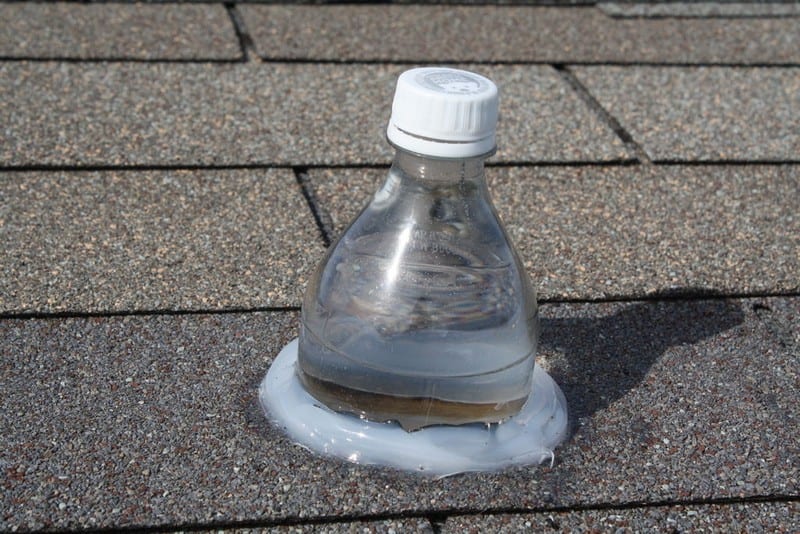
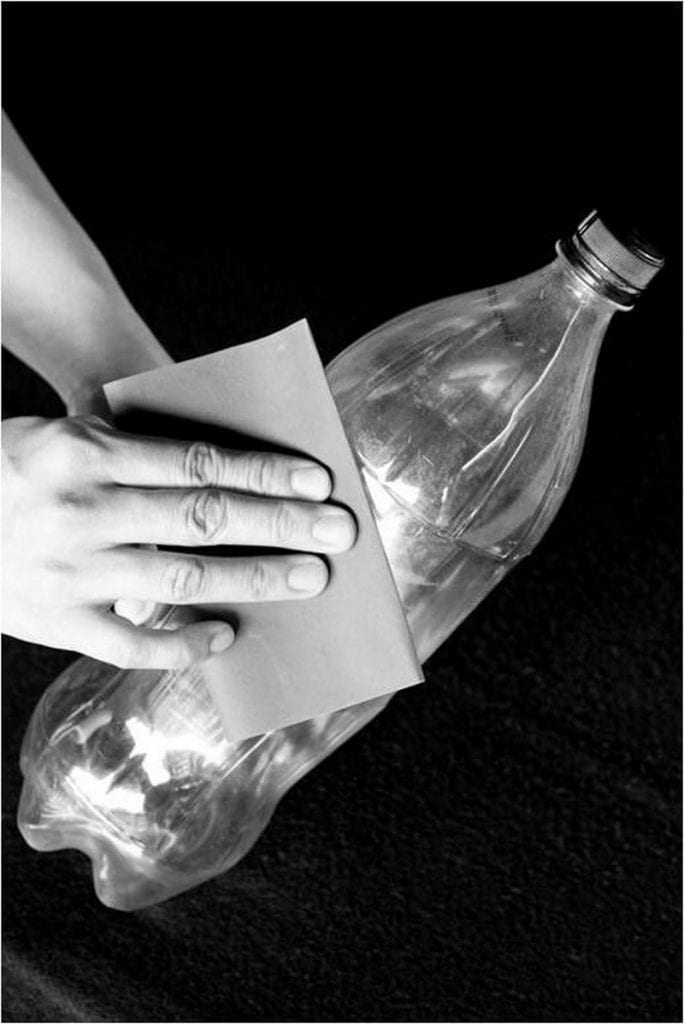
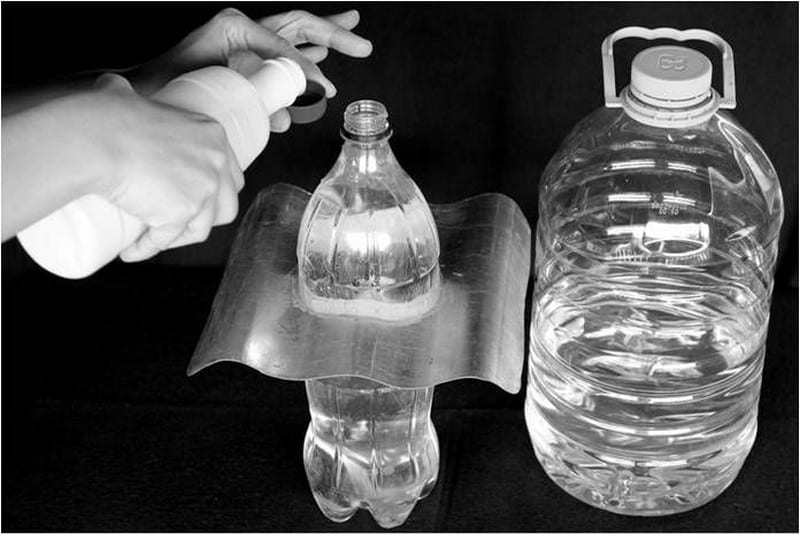
Using sandpaper, scratch the surface around the upper third portion of the soda bottle where the GI sheet will be placed, to allow the rubber sealant to stick better.
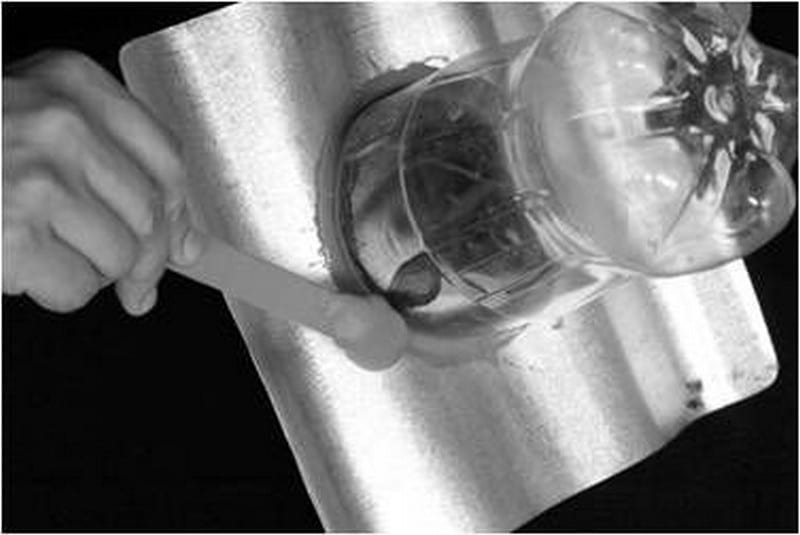
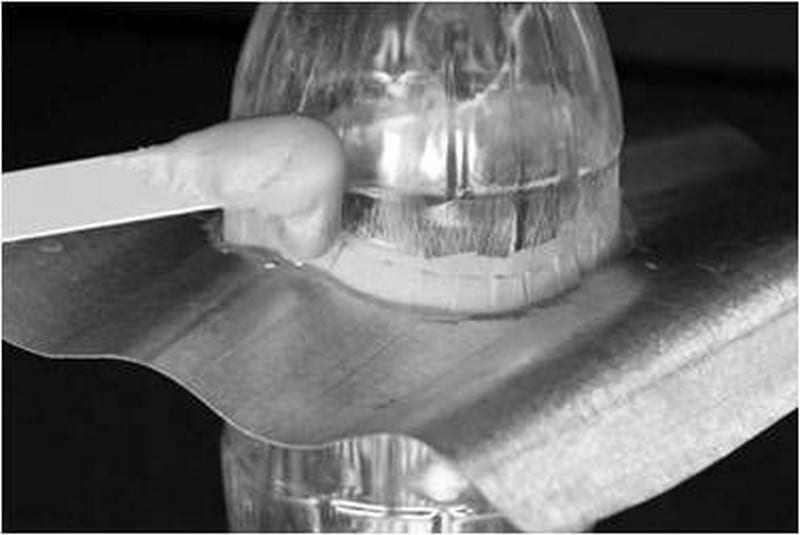
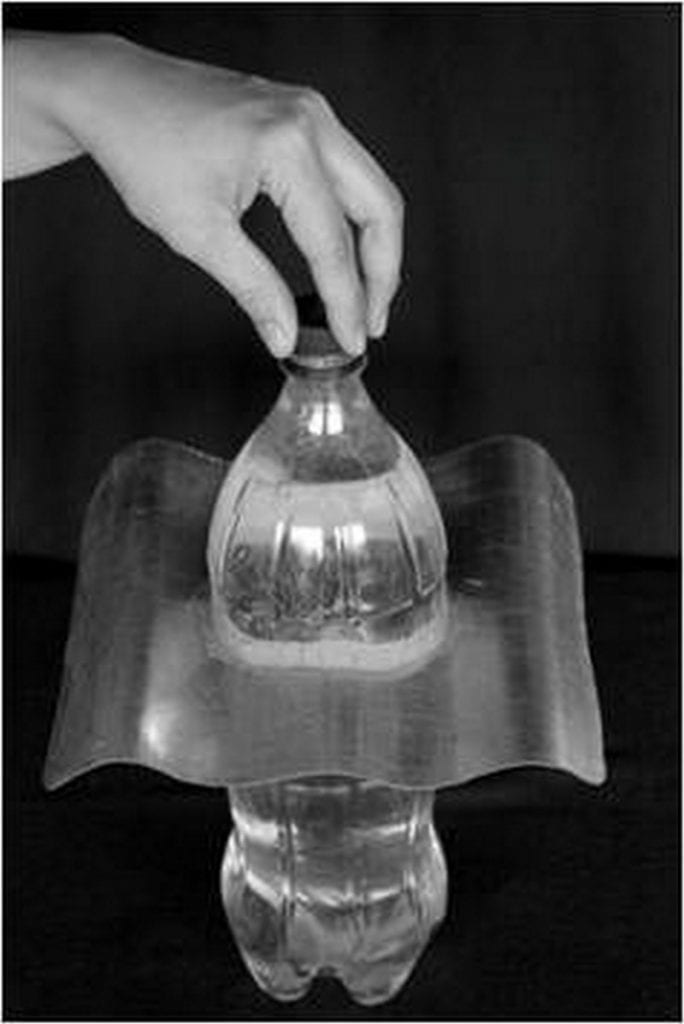
Insert the bottle into the GI sheet until the upper third. Apply rubber sealant on the strips above and around the area below. Wait to dry.
Apply rubber sealant above and below the sheet.
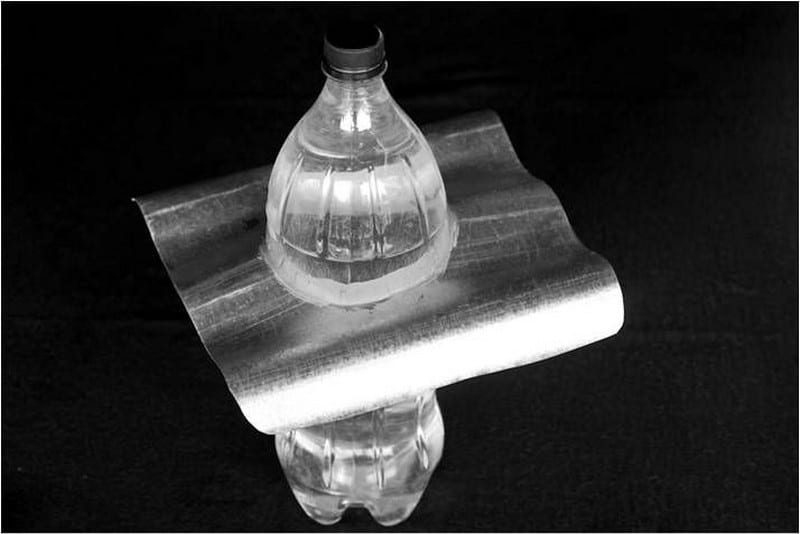
Fill the soda bottle with filtered water and ~10 mL (2 capfuls) of bleach. Cover with its original cap.
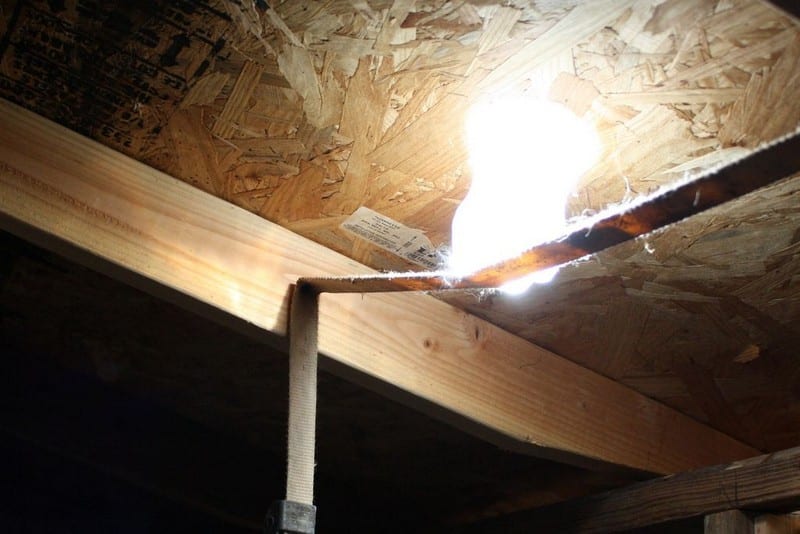
The solar bottle bulb is now ready for installation!


Perfect lighting for your workshop or garden tool shed during the day! This solar water bulb should give you great light for looking for your tools. Where else could you use this cheap and free lighting?
Thanks to Isang Litrong Liwanag and Modern Day Redneck for this great project.