Last Updated on March 9, 2017 by teamobn
In our earlier post we covered the basics of building a natural swimming pond (NSP). If you didn’t catch the post, you can find it here. As promised, today is all about getting your hands dirty. So let’s move the chooks and the yurt – well maybe not the yurt – and get started…

Layout
Don’t get your hands on the shovel yet! Before we start digging we need our plan. Flexibility of design is one of the great benefits of natural ponds. You can choose a conventional shape such as rectangular but keep in mind that there are no square corners in nature. The more random the shape, the more natural looking the end result!
The very first thing to consider is the depth you want. The deeper you go, the larger the surface area due to the sloping sides of your pond. Keep the following ration in mind:
For every metre of depth the sides need to extend three metres. So if you want a ‘swimming lane’ 2 metres wide x 1.2 metre deep, you will need to allow for a total width of 9.2 metres. This will give you a nice, easy slope resembling a natural pond. If you don’t have that much space, don’t despair. Over the next few posts we’ll show you some great ways to get around this.
Once you have this decision made, a simple design aid is to join a couple of garden hoses together and use them to mark out the shape. Adjust it until it’s what you want and then use marker paint for a more ‘permanent’ result.
How will you excavate? It is definitely possible to excavate by hand, but do you really need the pain? An eight tonne, rubber tracked excavator will make short work of the job. If you don’t have sufficient access for a machine that size, there are mini-excavators that can fit through a 900mm gate! They’ll take a lot longer to excavate because they will use smaller buckets, but they will still be many times faster than digging by hand. Expect to pay between $80 and $110 per hour for your excavator.
If you know what you are doing, consider hiring a self-operate excavator for the weekend. They are usually available at discounted weekend rates – often two days for the cost of one. All the larger hire firms have them available.
Start digging!


Installing additional features
After we’ve reached the desired depth, we can then install additional features. First on the list are the steps. These are needed because getting in and out of the pond can be difficult because of the sloping sides. Next in the list is the regeneration zone. This is the shallow part of the pond where the plants and natural stones are placed. This area needs a barrier to prevent the plants from migrating into the pond. ‘Natural’ doesn’t have to include avoiding floating plants while swimming!
What about circulation? Now is the time to lay your pipes. It’s also the time to be putting in the foundations for your deck.

Compacting and sealing the soil
 The soil needs to be compacted before sealing takes place to prevent leaks. This is boring and tedious work, but it’s a task worth spending time and effort on, knowing that your natural swimming pond will withstand the test of time.
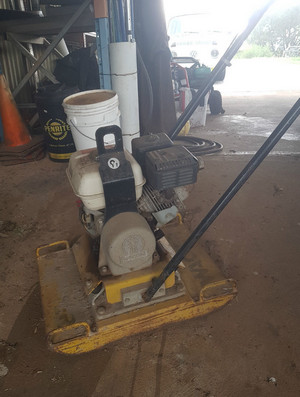
To make the job easy, you can employ a plate soil compactor like the one shown to the left. If you don’t happen to have one sitting around in the shed, once again, they are available from all builder hire outlets. Ask for a ‘whacker packer’ if they look confused.
Now that the soil is well compacted, it’s time to seal it. In doing this most builders choose bentonite clay as it is the cheapest and most effective sealing material.
A very inexpensive alternative is a polymer sealer. These high tech products have the ability to seal even highly porous soils including those with high gravel and soil content.
Add the finishing touches
After the seal has dried, we can then add the gravel to the bottom of the natural pool, place the natural rocks on the regeneration zone, and plant the submerged vegetation and bog plants in the rocks. Finally we add water, and there you have it, a piece of paradise right in your back yard!
Are you thinking of building your own natural swimming pond? What area of construction you think you think is challenging? Do you have other questions about natural swimming pool construction?

We’re here to provide you with the help you need. So let’s start the discussion over in our projects community.