Window screens allow fresh air into your home while keeping insects and debris out. They help maintain comfort and improve indoor air quality. Over time, damage from weather, pets, or accidents can weaken them. Prompt window screen repair restores their function and prevents the need for costly replacements.
Contents [show]
What Is a Window Screen?
A window screen is a framed mesh barrier that fits into the window opening. The screen is typically made of fiberglass or metal wire mesh that is stretched tightly across a wood or metal frame. Its primary purpose is to block insects, debris, and unwanted particles from entering your home while still allowing air and light to pass through. The design of a window screen is both simple and ingenious, combining practicality with ease of maintenance, and its functionality has been enhanced by modern materials that resist corrosion and wear.
In today’s homes, fiberglass mesh is commonly used because it is lightweight, cost-effective, and resistant to rust. Aluminum mesh is another popular choice, especially for areas that experience heavy use or for households with pets, as it offers superior durability. The mesh is held in place by a flexible rubber cord known as a spline, which is pressed into a groove along the frame to secure the screen and keep it taut. This construction allows for easy replacement and repair, making window screens a favorite among DIY enthusiasts.
Step-by-Step Guide to Repairing a Window Screen
Before beginning any repair work, it is important to assess the extent of the damage. Small holes or minor tears may only require a simple patch while larger rips or multiple tears might necessitate a full replacement of the screen mesh. The steps below outline the process of re-screening your window, a procedure that not only repairs the damage but also renews the overall appearance and functionality of the screen.
Tools and Materials Needed
Gather all the necessary tools and materials before starting your repair project. You will need a new piece of screen mesh that is slightly larger than the window opening, as this extra material will allow for proper fitting and trimming. A new spline is required to secure the mesh in the frame; it is essential to get the correct diameter so that it fits snugly. In addition, a spline roller tool is used to press the spline into the groove, ensuring the mesh is firmly held in place.
Other tools include a flat-head screwdriver or a dedicated spline removal tool to remove the old spline, a utility knife or heavy-duty scissors to cut the new mesh, and a measuring tape to verify dimensions. For wooden frames that rely on staples or nails, a staple gun or small tacks may be needed. Having all these tools at hand will streamline the repair process and help you avoid interruptions during the project.
Removing the Damaged Screen
Start by carefully removing the screen frame from the window. Most screens are designed to be removable, often secured by small tabs or clips that allow the frame to be lifted out without much effort. Take your time during this step to prevent additional damage; a gentle hand will help avoid bending the frame or further stressing any already weakened areas.
Place the frame on a flat, stable surface so that you can work on it comfortably. This initial step lays the groundwork for a successful repair by allowing you to work with a steady frame and clear view of the damage.
Removing the Old Mesh and Spline
With the frame secured on your work surface, it is time to remove the old screen mesh. If your frame is wooden and secured with staples or nails, carefully remove these fasteners using a staple remover or a flat-head screwdriver. For frames that use a spline to hold the mesh, use your screwdriver to pry up the edge of the spline from the groove.
Once an end is loosened, gently pull the spline out along the entire perimeter of the frame. After the spline is removed, peel out the damaged mesh from the frame. In some cases, the old spline may still be in good condition and can be reused, but often it is advisable to replace it with a new one to ensure a secure fit for the new mesh.
Measuring and Cutting the New Mesh
Accurate measurements are key to a successful screen repair. Use a measuring tape to determine the inner width and height of the frame, and mark these dimensions on your new screen mesh. It is recommended to cut the mesh leaving an extra 1 to 2 inches on all sides; this extra material allows you to work with a generous overlap that ensures the mesh can be drawn tight during installation.
Place the mesh over the frame, ensuring it is centered and that there is an equal amount of material extending beyond the frame on every side. Once properly positioned, use a sharp utility knife or heavy-duty scissors to cut the mesh to size. The key is to ensure that the mesh is large enough to cover the entire frame without any gaps, yet not so large that it becomes difficult to manage during the installation process.

Installing the New Mesh
The next step is to secure the new mesh into the frame. Begin by aligning the mesh so that it overlaps evenly on all sides of the frame. Hold the mesh in place with one hand or secure it temporarily with masking tape if needed. Using the spline roller tool, press the spline into the groove along one side of the frame, thereby trapping the mesh between the spline and the frame.
Work slowly and methodically to ensure that the mesh is drawn tight as you move along the entire perimeter. The mesh should be firm and flat without any wrinkles or loose spots. If you are working with a wooden frame that uses staples instead of a spline, stretch the mesh tightly over the frame and then staple it into place, taking care to keep the screen smooth and even. Patience and precision during this stage will result in a durable repair that restores the screen to its original functionality.
Trimming Excess Mesh
Once the new mesh is secured, you will notice an extra border of material extending beyond the frame. Use a utility knife to carefully trim away the excess mesh along the edges. It is important to cut as close to the spline or staple line as possible without damaging the newly installed screen. Trim evenly around the entire frame to achieve a neat, professional look. This finishing touch not only improves the aesthetic appeal of the screen but also prevents any loose material from flapping in the wind or collecting dirt.
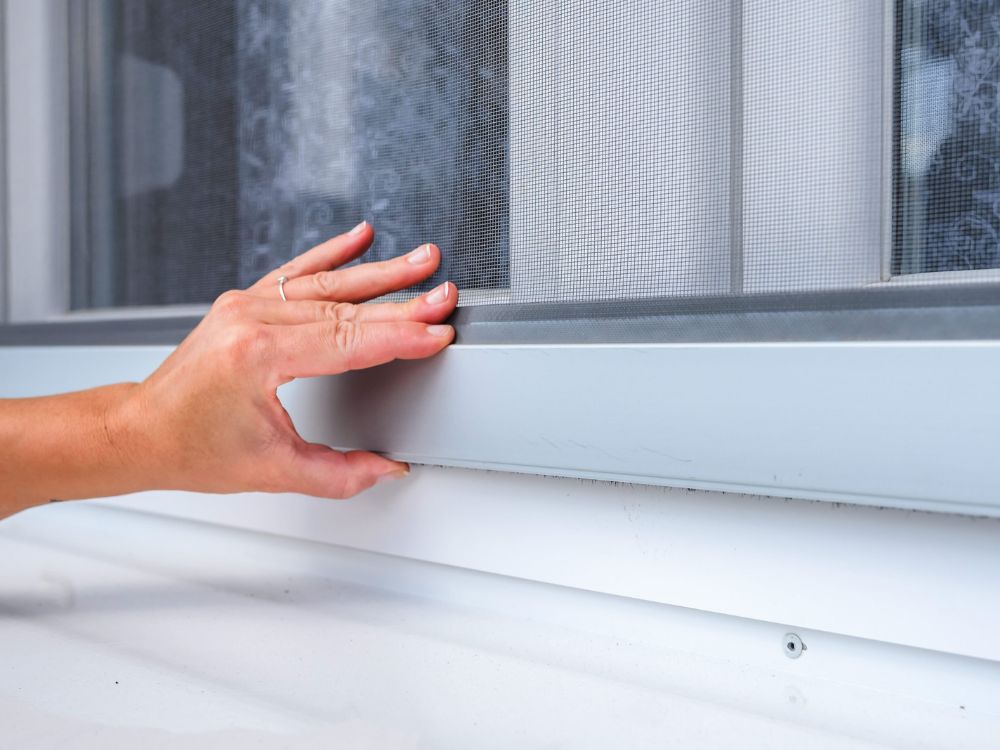
Reattaching the Screen
With the new mesh in place and trimmed, your final task is to reattach the screen to the window. Carefully align the repaired frame with the window opening, making sure it fits snugly in the channel or against the window’s holding clips. Gently press the frame back into position until it is secure.
Test the installation by gently tugging on the screen to ensure that it is firmly attached and that the mesh remains tight. This step completes the repair process and restores your window screen to full functionality, ready to once again keep insects out while letting fresh air in.
DIY Tips for Enhancing Durability and Functionality
Window screen repair not only restores your screens but also gives you a chance to make them last longer. A few simple maintenance tips and material upgrades can prevent future damage and extend the life of your screens. Here’s how to keep your window screens in top condition after completing a window screen repair.
Choose High-Quality Mesh Materials
The type of mesh you use during a window screen repair makes a big difference. Standard fiberglass mesh is affordable and works well in most situations. However, if you have pets or small children, opt for a heavier-duty, pet-resistant screen. These are more durable and less likely to tear. If your windows face direct sunlight for most of the day, solar screen fabric can help reduce heat and UV rays. While solar mesh may limit airflow slightly, it adds an extra layer of protection to your home and reduces wear on the screen over time.
Replace Worn-Out Spline
The spline plays a crucial role in holding the screen mesh securely in place. Over time, it can become brittle and lose its elasticity, which weakens the hold. When you perform a window screen repair, inspect the spline carefully.
If it shows signs of wear, replace it with a new one to ensure the mesh stays tight. Keeping spare spline and mesh materials on hand allows you to handle minor window screen repairs quickly, without waiting for a trip to the store.
Clean and Maintain Regularly
Regular cleaning can help you avoid unnecessary window screen repair in the future. Dust, pollen, and debris often accumulate on the mesh, gradually weakening it. Remove the screens once or twice a year and clean them with mild soap, water, and a soft brush.
Rinse them thoroughly and let them dry completely before reinstalling. If removing the screens isn’t convenient, you can use a vacuum cleaner with a soft brush attachment to keep them free from dust and cobwebs. Clean screens not only last longer but also improve airflow and maintain a clear view.
Protect Screens During Harsh Weather
If you live in an area prone to harsh weather, consider removing and storing your window screens during winter or heavy storms. Freezing temperatures, strong winds, and hail can damage the mesh and frames. Store the screens in a dry, flat position or upright in a way that prevents bending. Cover them to keep out dust and debris. Taking these precautions can help you avoid unnecessary window screen repair caused by seasonal damage.
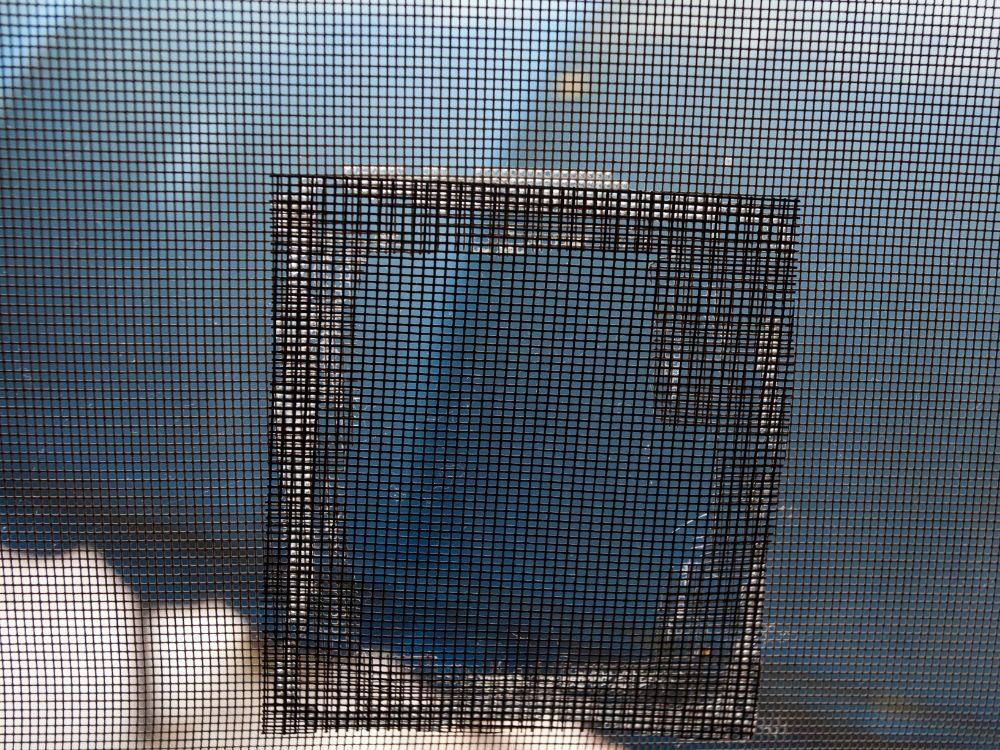
Address Minor Issues Immediately
Small holes and tears can lead to bigger problems if not fixed promptly. Regularly inspect your screens for loose mesh or sagging areas. If you spot minor damage, use a screen repair patch or apply a drop of waterproof adhesive to seal it right away. These small fixes can prevent the need for a full window screen repair later on. Staying proactive with regular inspections and minor repairs ensures your screens stay in good condition and ready to do their job.
By following these tips, you can extend the lifespan of your screens and reduce how often you’ll need a window screen repair. Regular care and the right materials make a noticeable difference in maintaining both the look and function of your window screens.
Finding Professional Window Screen Repair Near Me
Most window screen repairs can be managed with basic DIY skills and tools. However, there are times when hiring a professional makes more sense. Large or complex repairs, damaged frames, or specialty screens often require advanced tools and expertise. In these cases, professional help ensures a more reliable and durable fix.
Benefits of Hiring a Professional
Professional window screen repair services are ideal for screens located in hard-to-reach areas or frames that need reinforcement. Technicians can replace torn mesh, repair or replace damaged frames, and make sure the screen fits properly. They also assess the overall condition of the screen and frame, identifying any additional maintenance needs that might go unnoticed during a DIY repair. Many services offer warranties, providing peace of mind that the work will last.
How to Find a Local Expert
If you decide that professional help is the right option, searching for window screen repair near me is the fastest way to find local services. Many hardware stores, window specialists, and handymen offer screen repairs, either on-site or at their shops. A search for window screen repair near me will also bring up customer reviews and ratings, helping you choose a reputable provider.
While professional repair costs are generally higher than doing it yourself, the convenience, quality workmanship, and warranty options often make it a worthwhile investment—especially for complicated or time-sensitive projects.
Additional Considerations and Troubleshooting
Window screen repair is a straightforward task, but a few extra precautions and troubleshooting tips can make the process safer and more successful. Whether you’re working on a simple patch or a full rescreening, taking your time and focusing on the details will lead to better, longer-lasting results.
Prioritize Safety During Repairs
Before starting any window screen repair, make sure your workspace is safe and organized. Work in a well-lit area with a stable surface to support the screen frame. If you’re using sharp tools like utility knives or scissors, always cut away from your body to reduce the risk of injury. For windows located in high places, consider having someone assist you, especially if you need a ladder. These basic safety steps ensure the repair process is smooth and injury-free.
Common Issues and How to Fix Them
During window screen repair, you may encounter issues like uneven mesh tension or trouble fitting the spline correctly into the groove. If the screen mesh isn’t tight enough, remove the spline and reapply it using a spline roller tool. Work gradually, one section at a time, to avoid wrinkles or slack. In older window frames, the spline groove may be worn or damaged. Reinforcing the groove or replacing the frame may be necessary for a secure, lasting repair.
Test the Screen Installation
Once you finish your window screen repair, test the screen before reinstalling it in the window. Gently tap along the frame edges to make sure the spline is fully seated in the groove. If you find a loose spot, use the roller tool to press the spline in more firmly. Taking a few extra minutes to double-check the installation helps ensure the screen remains taut and secure.
When to Consider Professional Help
If you’re dealing with complicated repairs or damaged frames and prefer expert assistance, searching for “window screen repair near me” can help you find local professionals. Professional repair services can handle complex issues and ensure a precise fit, especially for large or specialty window screens. If DIY repairs aren’t giving you the results you need, turning to a professional is a practical alternative.
By following these additional tips and troubleshooting strategies, your window screen repair projects will have a cleaner finish and provide lasting results.
Conclusion
Window screen repair is a practical and cost-effective project that homeowners can tackle with a bit of preparation and care. By understanding the components of a window screen and following a detailed, step-by-step guide, you can restore the protective function of your screens while keeping your home ventilated and insect-free. With the right materials and a focus on quality, your DIY repair can match the results of professional services, providing satisfaction and long-term benefits.